
Chest Physiotherapy Treatment
What is a Chest physiotherapy treatment?
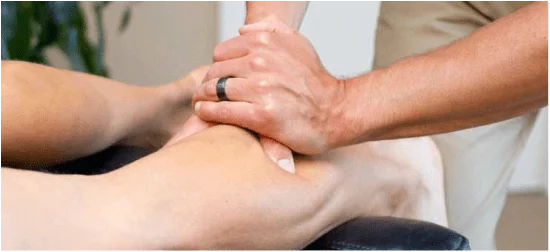
Chest physiotherapy may be a broad term utilized in research that includes physiotherapy treatment techniques that address the removal of secretion and improve airway clearance thereby helping to boost respiratory efficiency. Chest physiotherapy is the term for a bunch of treatments designed to eliminate secretions, thus helping to decrease the work of breathing, promote the expansion of the lungs, and stop the lungs from collapsing.
It is different from bronchial hygiene therapy (BHT) therein BHT incorporates chest physiotherapy together with breathing exercises and manual hyperventilation in an intubated patient. Bronchial hygiene involves the employment of noninvasive airway clearance techniques designed to assist mobilize and take away secretions and improve gas exchange.
Chest physiotherapy is the important adjuvant treatment of most respiratory illnesses from chronic respiratory diseases ( COPD, bronchiectasis, cystic fibrosis), neuromuscular diseases (muscular dystrophy, brain disorder, neural structure injury), and through peri-operative care mainly in upper abdominal surgeries. Chest physiotherapy will be a valuable component of comprehensive respiratory care but provided that is used when indicated.
Aims of Chest Physiotherapy treatment
The purpose of chest physiotherapy is:
- To assist in the removal of retained or profuse airway secretions.
- To maximize lung compliance and prevent it from collapsing.
- To decrease the work of breathing.
- To increase the ventilation-perfusion ratio/ improve gas exchange.
- The Physiological Mechanism of Airway Clearance
- Normal Clearance
A normal clearance requires an open airway, a functional mucociliary escalator, and an efficient cough. Airways normally are kept open by structural support mechanisms and kept clear by the correct function of their ciliated mucosa. the traditional human bronchial tree is lined by a skinny (5 micrometers) layer of mucus which is moved over the airway surface by the mucociliary escalator. The ciliated epithelium which lines the airways is accountable for the continual flow of mucus over the airway surface to the upper tract. The mucus is moved via a coordinated movement of ciliary motion toward the trachea and larynx, where excess secretions are often swallowed or expectorated.
An effective cough could be a must for normal airway clearance.
Cough is one of the foremost important protective reflexes. By ridding the larger airways of excessive mucus and foreign matter, the cough assists the traditional mucociliary clearance and helps ensure airway patency. There are four distinct phases to a traditional cough: irritation, inspiration, compression, and expulsion.
Abnormal Clearance
The flow of air through the tracheobronchial tree and its interaction with the mucus lining is complex thanks to the branching geometry of the airways, collapsible airway walls, constantly changing rate of airflow, and ranging viscoelastic properties of mucus. This physiology of flow in the liquid line airway is termed a two-phase gas-liquid flow. In the case of endobronchial diseases, the mucus layer may extend up to 5 mm in thickness and ciliary clearance becomes ineffective. Two-phase flow now becomes a crucial mechanism of clearance, and at a specific combination of airflow, mucus viscosity, and thickness there’s an awfully strong gas-liquid interaction that first exacerbates the pressure decrease and then detaches liquid from the airway wall. this leads to the narrowing of the lumen of the tube which causes a far greater resistance, so it affects airway clearance.
One of the mechanisms by which cough affects sputum clearance in endobronchial diseases is 2 phases of gas-liquid flow: the transfer of momentum and energy from the high-speed flow of air to the mucus that lines the bronchi. The high transmural pressure produced during cough results in dynamic compression of the airway inhibiting mucociliary clearances. Thus, the forced expiratory technique (FET) was introduced to unravel this problem.
Classification
There are many physiotherapy treatments includes including chest physiotherapy. Chest physiotherapy techniques may be classified as conventional, modern, or instrumental techniques supported by evolving research.
Conventional Techniques
Traditional physiotherapy has another name which is conventional chest physiotherapy. it had been advocated first in 1915. It further includes manual handling techniques which help in improving mucociliary clearance. Postural drainage together with percussion and vibration ( PDPV) was previously widely named Chest Physiotherapy. Later, coughing exercises and compelled expiratory techniques (huffing) were incorporated into it. PDPV with huffing has shown an efficient outcome. It will be self-administered or performed with the help of another person (a physiotherapist, parent, or caregiver). PDPV works better if applied with bronchodilator therapy.
Indication of Conventional techniques
- Postural drainage positioning
- Inability or reluctance of the patient to vary body position. (eg, mechanical ventilation, neuromuscular disease, drug-induced paralysis).
- Poor oxygenation related to the position (eg, unilateral lung disease).
- Potential for or presence of atelectasis.
- Presence of artificial airway.
- PDPV
- Difficulty in clearing the secretions with marked increased sputum production greater than 25-30 mL/day (adult).
- Presence of atelectasis which is caused by or suspected of being caused by mucus plugging.
- Diagnosis of diseases like fibrocystic disease of the pancreas, bronchiectasis, or cavitating lung disease
- Presence of foreign body within the airway.
- Patient with copious sputum or with central consolidation.
Contraindications of Conventional Techniques
Positioning
All positions are contraindicated for:
- Intracranial pressure (ICP) > 20 millimeters of mercury
- head and neck injury until stabilized (Absolute)
- Active hemorrhage with hemodynamic instability (Absolute)
- Recent spinal surgery like laminectomy or acute spinal injury
- Acute spinal injury or active hemoptysis
- Empyema
- Bronchopleural fistula
- Pulmonary edema related to congestive heart disease
- Large pleural effusions
- Pulmonary embolism
- Rib fracture, with or without flail chest
- Surgical wound or healing tissue
- Trendelenburg position is contraindicated for
- Intracranial pressure (ICP) > 20 pressure unit
- Patients in whom increased intracranial pressure is to be avoided like neurosurgery, aneurysms, eye surgery
- Uncontrolled hypertension
- Distended abdomen
- Oesophageal surgery
- Recent gross hemoptysis associated with recent lung carcinoma treated surgically or with irradiation.
- The uncontrolled airway is in danger of aspiration (tube feeding or recent meal)
- Reverse Trendelenburg is contraindicated within the presence of hypotension or vasoactive medication.
- External Manipulation of the Thorax
In addition to the contraindications previously listed
- Subcutaneous emphysema.
- Recent epidural spinal infusion or regional anesthesia.
- Recent skin grafts, or flaps, on the thorax.
- Burns, open wounds, and skin infections of the thorax are present.
- Suspected T.B.
- Lung contusion.
- Bronchospasm.
- Osteomyelitis of the ribs.
- Osteoporosis.
- Coagulopathy.
- Complaint of chest-wall pain.
- Complications
- Hypoxemia
- Bronchospasm
- Increased Intracranial Pressure
- Acute Hypotension during Procedure
- Pulmonary Hemorrhage
- Pain or Injury to Muscles, Ribs, or Spine
- Vomiting and Aspiration
- Bronchospasm
- Dysrhythmias
- Frequency
- Positioning
- Ventilated and critically ill patients: chest physiotherapy should be given as necessary with the aim of once each hour or every other hour as per the patient’s tolerance level, round the clock. In less acute patients the position of the patient should be changed every 2 hours as the patient can tolerate it.
PDPV
In critical care patients, including those patients who are on mechanical ventilation, PDT should be performed every 4 to every 6 hours as indicated. PDT orders should be re-evaluated at least every 48 hours supported by assessments from individual treatments.
Acute care patient orders should be re-evaluated supported by patient response to therapy a minimum of every 72 hours or with a change of patient status.
Exercise for the chest includes the subsequent techniques:
- Active Cycle Breathing Technique(ACBT)
- Breathing exercise
- Mobilization exercise
What is a The Active Cycle of Breathing Techniques (ACBT)?
The Active Cycle of Breathing Techniques (ACBT) is an energetic breathing technique performed by a patient who might be accustomed mobilize and clear excess pulmonary secretions and generally improve lung function. it’s a versatile method of treatment that may be utilized in conjunction with positioning and adapted to be used with most patients. Each component is often used individually or as a part of the ACBT cycle reckoning the patient’s problem. Once ACBT has been taught, the patient will be encouraged to use it independently without the supervision of a physiotherapist. This exercise doesn’t require the employment of any special equipment.
It’s used to:
Loosen and clear secretions from the lungs. This helps reduce the chance of chest infections.
Improve ventilation within the lungs.
Improve the effectiveness of a cough.
ACBT consists of three main phases:
- Breathing Control
- Deep Breathing Exercises or Thoracic Expansion Exercises
- Huffing or Forced Expiratory Technique (FET)
The technique may be modified in keeping with the condition of the patient. Additionally, a manual technique (MT) or positive pressure will be added if and when indicated, to form a more complex cycle to assist in improving the removal of secretions in the lungs. this might include percussion or expiratory vibrations.
A randomized control trial showed positive effects of active cyclic breathing technique together with routine chest physiotherapy on arterial oxygenation, heart rate, and pain perception following arteria Bypass Surgery (CABG).
Breathing Control
Breathing control is employed to relax the airways and relieve the symptoms of wheezing and tightness which normally occur after coughing or breathlessness. it’s the resting period between the more active parts of the technique. Encouraging the patient to shut their eyes while performing breathing control also can be beneficial in helping to market relaxation. it’s vital to use breathing control in between the more active exercises of ACBT because it allows for the relaxation of the airways.
Breathing Control can even help when one is experiencing shortness of breath, fear, signs of bronchospasm, anxiety, or is in a very panic. The length of your time spent performing breathing control may vary looking on how breathless the patient feels.
When using this method with a patient as a part of the ACBT, the patient is also instructed to usually take 6 breaths.
Instructions to patient:
Breathe in and out gently through your nose if you’ll. If you can not, breathe through your mouth instead(the patient breathes in step at his own rate).
If you expire through your mouth, it is best to use breathing control with ‘pursed lips breathing.
Try to relinquish any tension in your body with each breath out and keep your shoulders relaxed.
Gradually attempt to make the breaths slower.
Try closing your eyes to assist you to target your breathing and relaxation.
Breathing control should continue until the person feels able to achieve the opposite stages within the cycle.
Thoracic Expansion Exercises (Deep breathing exercises)
Deep breathing/thoracic expansion exercises are deep breathing exercises that target inspiration and help to loosen secretions in the lungs. Inspiration is active and frequently combined with a three-second, end-inspiratory hold before a passive, relaxed, and unforced expiration.
Instructions to patient:
- Try to keep your chest and shoulders relaxed.
- Take a protracted, slow, and deep breath in, through your nose if you’ll be able to.
- At the tip of the breath in, hold the air in your lungs for 2-3 seconds before exhalation (this is understood as an inspiratory hold).
Breathe out gently and relaxed, sort of a sigh. Don’t force the air out.
Repeat 3 – 5 times. If the patient feels light-headed then it’s important that they revert back to the breathing control phase of the cycle.
To facilitate maximal inspiration, and proprioceptive feedback, the therapist, or patient, placing their hands on the thoracic cage, may be beneficial. This has been related to increased chest wall movement and improved ventilation.
Breath-hold is added to a deep breath to make amends for asynchronous ventilation which can be present in some respiratory conditions because of sputum retention and/or atelectasis.
Huffing or Forced Expiratory Technique

This is a stratagem wont to move secretions, mobilized by deep breathing/thoracic expansion exercises, downstream towards the mouth. A huff is exhaling through an open mouth and throat rather than coughing. Huffing helps move sputum from the tiny airways to the larger airways, from where they’re removed by coughing as coughing alone cannot remove sputum from small airways. When initially taught, the patient is instructed to require a medium breath in and to exhale with mild to moderate force and extended expiratory flow, with the glottis open. The length of the huff and force of contraction of the muscles during expiration should be altered to optimize the clearance of secretions by maximizing airflow.
There are two sorts of huff:
- Medium Volume Huff
- High Volume Huff.
Medium Volume Huff
This helps to maneuver secretions that are lower down in your airways.
Take a normal-sized breath in so a lively, long breath out until your lungs feel quite empty. Imagine you’re trying to steam up a mirror.
High Volume Huff
This helps to maneuver secretions in your upper airways.
Take a deep breath, open your mouth, and huff quickly.
Only perform 1 or 2 huffs at a time, as huffing repetitively can make you feel tightness in your chest.
Listen for any sounds of crackles once you huff, If you are able to hear these sounds, you have to cough and clear secretions; try to spit them out into a tissue or a sputum bowl. attempt to avoid excessive coughing as this could reduce how effective the technique is and make it excessively tiring.
Repeat the entire cycle for about 10 minutes or until the chest feels clearer.
Small long huffs move sputum from low down into the chest whereas big short huffs move sputum from above into the chest, so use this huff when it feels able to set out, but not before; huffs work via dynamic compression.
Coughing
Coughing should be incorporated if huffing alone doesn’t clear your sputum. However, if it does clear your sputum, then you will not cough.
It is important to avoid long bouts of coughing as these may be very tiring and should cause you to feel breathless, or make your throat or chest sore or tight. you ought to only cough if the sputum may be cleared easily, if not, return to the start of the cycle.
Indications of Coughing
- Post surgical /pain (rib fracture/ICC).
- Chronic increased sputum production eg in bronchitis, and pancreatic fibrosis.
- An acute increase in sputum production.
- Poor expansion.
- Sputum Retention.
- SOBAR/SOBRE.
- Cystic Fibrosis.
- Bronchiectasis.
- Atelectasis.
- Respiratory muscle weakness.
- Mechanical ventilation.
- Asthma.
- Increased breathing rate/effort.
- Audible rattling in airways.
- Palpable secretions.
Precaution
It is important to constantly assess for any symptoms of dizziness or increased shortness of breath throughout the ACBT procedure. If a patient feels dizzy during deep breathing, decrease the number of deep breaths taken during each cycle and return to breathing control to cut back dizziness.
- Inadequate pain control where needed.
- Bronchospasm.
- Acute, unstable head, neck, or spinal surgery.
- Contraindications
- Patients not spontaneously breathing.
- Unconscious patient.
- Patients who are unable to follow instructions.
- Agitated or confused.
- Positioning
- ACBT will be performed in sitting or in a very postural drainage position. Initially, you’ll start in an exceedingly sitting position until you’re comfortable and assured to do different ones. According to studies, much evidence supports that this technique is much more effective in sitting or gravity-assisted positions. Although, the most effective position for you to try to to the ACBT in will rely on your medical condition and the way well it works for you. When sitting, maintain an honest breathing pattern with relaxed shoulders and neck, and back supported as this promotes the function of the diaphragm and reduces stress on the musculoskeletal. Whatever position you employ confirms you’re comfortable, well-supported, and relaxed.
The ACBT could also be performed with or without an assistant providing vibration, percussion, and shaking. Self-percussion/compression could also be included by the patient.
It has been shown that the horizontal, side-lying position is as effective because the head-down tipped position and preferred by individuals.
Duration and Frequency
Duration for ACBT should be for about 10 minutes and ideally until your chest feels far from sputum.
You may do ACBT on just one occasion or twice each day once you are well. after you have more sputum, you will have to lie more often. after you are unwell or have more sputum, you’ll do shorter and/ or more frequent sessions.
Possible side effects
- Bronchospasm with hyper-reactive airways.
- Reduced oxygen saturations/ shortness of breath.
- Cardiac arrhythmias.
- Atelectasis.
- Fatigue.
Breathing exercise:
Benefits of Breathing Exercises
- Deep breathing can help to restore the function of the diaphragm muscle and increase lung capacity. The goal is to create the flexibility to breathe deeply during any activity, not just while at rest.
- Deep breathing exercises can even lessen feelings of hysteria and stress, which are common for somebody who experienced severe symptoms or was admitted to a hospital. Sleep quality might also improve with these breathing exercises.
- Anyone can like deep breathing techniques, but they play an especially important role in the COVID-19 recovery process. The exercises will be started reception during self-isolation and simply incorporated into your daily routine.
Precautions
Do not begin exercises, and phone your doctor, if:
- You have a fever
- Do you have any shortness of breath or difficulty breathing while resting
- Do you have any hurting or palpitations (“fluttering” of the guts within the chest)
- You have new swelling in your legs
- STOP exercise immediately if you develop any of the subsequent symptoms:
- Dizziness
- Shortness of breath over normal
- Chest pain
- Cool, clammy skin
- Excessive fatigue
- Irregular heartbeat
- Any symptoms you think about an emergency
A. Diaphragmatic breathing:
Diaphragmatic breathing may be a kind of breathing exercise that helps strengthen your diaphragm, a vital muscle that helps you breathe because it represents 80% of your breathing. This breathing exercise is additionally sometimes called belly breathing or ventilation.
When the diaphragm is functioning effectively in its role because the primary muscle of inspiration, ventilation is efficient, and also the oxygen consumption of the muscles of ventilation is low during relaxed (tidal) breathing. When a patient relies substantially on the accessory muscles of inspiration, the mechanical work of breathing (oxygen consumption ) increases, and therefore the efficiency of ventilation decreases.
Controlled breathing techniques, which emphasize diaphragmatic breathing are designed to enhance the efficiency of ventilation, decrease the work of breathing, increase the excursion of the diaphragm, and improve gas exchange and oxygenation. Also breathing from the diaphragm generate intra-abdominal pressure for the control of posture and you’ll accomplish slow respiration.
Aims of diaphragmatic breathing
- To mobilize secretions and teach breathing control.
- To teach effective coughing and take away secretions.
- To teach relaxation.
- To teach postural awareness.
- To mobilize the thorax and pectoral arch.
Physiological Effect
- It improves your core muscle stability.
- It slows your rate of breathing in order that it expends less energy.
- It helps you relax, lowering the harmful effects of the strain hormone cortisol on your body.
- Increased efficiency of venous return
- Improve respiratory capacity.
- It helps lower your pressure
- It helps you deal with the symptoms of post-traumatic stress disorder (PTSD).
- It increases your body’s capacity to tolerate intense exercise.
- It lowers the chances of injuring or wearing out your muscles.
Supine position
Lie on your back on a mat or in bed with your knees bent. you’ll use a pillow under your head and your knees for support if that’s softer.
Place one hand on your upper chest and also the other on your belly, slightly below your skeletal structure.
Breathe slowly through your nose, letting the air reach deeply, toward your lower belly. The hand which is placed on your chest should remain unmoved, while the other hand which is on your belly should move along with your belly.
Tighten your abdominal muscles and allow the muscles to fall inward while you exhale through pursed lips. The hand which is placed on your belly should move downwards to its original position.
You can also practice this sitting in a chair, together with your knees bent and your shoulders, head, and neck relaxed. Practice for five to 10 minutes, several times on a daily basis if possible.
Sitting position
Sit up straight in an exceeding chair and lengthen the space between your navel and sternum.
Keep your shoulders relaxed.
Keep the pelvis in a neutral position (Sit on your sitting bones).
Place your hands on both sides of your lower ribs.
Breathe in slowly through your nose. As you inhale you can feel your ribs moving outwards and upwards. During inhalation, it generated expansion of the trunk in three directions front, sides, and back.
Breathe out from your nose. As you exhale you can feel your lower ribs moving inwards.
Precautions
Never allow a patient to force expiration. Expiration should be relaxed or lightly controlled. Forced expiration only increases turbulence within the airways, resulting in bronchospasm and increased airway restriction.
Do not allow a patient to require a highly prolonged expiration. This causes the patient to gasp with the following inspiration. This results in the patient’s breathing pattern to becomes irregular and insufficient.
Do not allow the patient to start inspiration with the help of accessory muscles and the upper chest.
Allow the patient to perform deep breathing for under three or four inspirations and expirations at a time to avoid hyperventilation.
Indication
- Post-operative pain
- Airway obstruction (COPD, asthma)
- Atelectasis
- Restriction of breathing thanks to musculoskeletal abnormality or obesity
- Central systema nervosum deficit
- Neurological patient with muscle weakness.
- A surgical procedure like thoracic or abdominal surgeries.
B. Segmental breathing(Costal expansion exercise):
Performed on a segment of the lung, or a piece of the chest wall that needs increased ventilation or movement. it’s questionable whether a patient is often taught to expand localized areas of the lung while keeping other areas quiet.
Hypoventilation does occur in certain areas of the lungs thanks to pain and muscle guarding after surgery, atelectasis, and pneumonia.
Therefore, it’ll be important to stress the expansion of problem areas of the lungs and chest wall under certain conditions.
Indications of Segmental breathing exercise:
- Post thoracotomy
- Trauma to the chest wall
- Pneumonia
- Post-mastectomy scar
- Post chest radiation-fibrosis
Advantages of Segmental breathing:
- Prevent accumulation of pleural fluid
- Prevent accumulation of secretions
- Decrease paradoxical breathing
- Decrease panic
- Improve chest mobility
Lateral costal expansion:
This is sometimes called lateral basal expansion and should be done unilaterally or bilaterally. the patient could also be sitting or in a very hook lying position.
Place your hands along the lateral aspect of the lower ribs to repair the patient’s attention to the areas where movement is to occur.
Ask the patient to breathe out, and place firm downward pressure on the ribs with the palms of your hands.
Just before inspiration, apply a fast downward and inward stretch to the chest. this places a fast stretch on the external intercostals to facilitate their contraction. these muscles help in moving the ribs in outward and upward directions during the procedure of inspiration.
Apply light manual resistance to the lower ribs to extend sensory awareness because the patient breathes in deeply and therefore the chest expands and ribs flare. then, because the patient breathes out, assist by gently squeezing the skeletal structure in downward and inward directions.
Ask the patient to expand his/her lower ribs against your hand as he or she breathes in. apply gentle manual pressure to the lower rib area to improve sensory awareness because the patient breathes in and also the chest expands and ribs flare.
Then, again, because the patient breathes out, assist by gently squeezing the skeletal structure in downward and inward directions.
Then teach the patient to perform this procedure independently. he or she may place the hand (s) over the ribs to use resistance by employing a belt.
Posterior basal expansion:
Deep breathing emphasizing posterior basal expansion is important for the postsurgical patient who is confined to bed in an exceedingly semi-reclining position for an extended period of your time because secretions often accumulate within the posterior segments of the lower lobes.
The patient should be in a sitting position and leaning forward on a pillow, with hips in a slightly bending position.
Place your hands over the posterior aspect of the lower ribs.
Follow the identical procedure as described above.
This type of segmental breathing exercise is important for the post-surgical patient who is on the bed in a semi-upright position for a longer period of time. secretions often accumulate within the posterior segments of the lower lobes.
Right middle lobe or lingula expansion:
The patient is sitting.
Place your hands on either the correct or the left side of the patient’s chest, slightly below the axilla.
Follow the identical procedure as described for lateral basal expansion.
Apical expansion:
The patient is in a sitting position.
Apply mild pressure usually unilaterally below the clavicle with the help of fingertips.
This pattern is acceptable in an apical pneumothorax after a lobectomy.
C. Pursed lip breathing exercise:
Pursed-lip breathing could be a simple technique that consists of inhaling through the nose and exhaling through the mouth with pursed lips. A patient is instructed to inhale through the nose for several seconds with the mouth closed then exhale slowly over 4 to six seconds through lips held during a whistling or kissing position. this could be finished or without abdominal contraction
Effects of pursed lip breathing exercise:
- Pursed-lips breathing is a good technique to Improve gas exchange (both oxygen and carbon dioxide)
- Slow the speed of expiration
- Increase the amount of expired air
- Limit dynamic hyperinflation during times of increased ventilatory demand, including daily activities and exercise
- Decrease the rate of respiration and minute ventilation
- Improve tidal volume, and decrease the work of breathing
- Relieve dyspnea and increase exercise tolerance
- Pursed-lip breathing may be a technique that permits the control of oxygenation and ventilation.
The technique requires an individual to inspire through the nose and exhale through the mouth at a slow controlled flow. The expiratory phase of respiration goes to prolong when put next to the inspiration-to-expiration ratio in normal breathing. this system creates back pressure producing a little amount of positive end-expiratory pressure (PEEP).
The positive pressure generated opposes the forces increased on the airways from the flow of exhalation. As a result, pursed-lip breathing helps assist breathing by opening of the airways during exhalation and increasing the excretion of volatile acids within the sort of carbonic acid gas preventing or relieving hypercapnia. Through purse-lip breathing, people can relieve shortness of breath, decrease the work of breathing, and improve gas exchange. They also learn a way to control their breathing as well as increase their relaxation.
For the effectiveness of Pursed-lip breathing (PLB), the individual must be able to perform the technique accurately. The technique requires proper coordination to take care of prolonged exhalation.
As for the therapeutic effects, they’re short-lived. The technique is proscribed to three to five breaths since prolonging the duration of the technique causes fatigue of the respiratory muscles and significantly less than normal levels of CO2 in a healthy individual potentially that result in a reduction of perfusion pressure within the brain that results in syncope. Without the correct use of purse-lip breathing, a person could exacerbate air trapping and CO2 retention
How to do it?
The patient should assume a snug position because the therapist describes and demonstrates the technique for PLB and explains its expected benefits.
The therapist asks the patient to put his or her hand on the mid-abdominal muscle and slowly inhale through the nose.
The patient is then asked to let the air passes gently through the pursed lips while keeping in mind to avoid excessive use of the abdominal muscles.
Giving the patient a verbal cue, like “imagine you wish to create the flame flicker on a candle that’s being held at arm’s length from you,” will enhance the patient’s understanding and performance.
The patient is directed to prevent exhaling when an abdominal contraction is detected.
When ready to perform PLB without cues, the patient substitutes their own hand for the therapist’s hand.
D. Glossophalangeal breathing exercise:
Glossopharyngeal breathing (GBP), is also known as frog breathing. it’s a trick movement that was first described by Dail (1951) when patients with poliomyelitis were observed to be gulping air into their lungs. it absolutely was this gulping action that gave the technique the name ‘frog breathing’.
Effects of Glossophalangeal breathing exercise:
Patients with a reduced diagnostic assay thanks to respiratory muscle paralysis.
Paralyzed patients keen on a mechanical ventilator could also be ready to use GPB continuously, aside from during sleep, to substitute the mechanical ventilation.
The most common use of GPB is in patients who are ready to breathe spontaneously but whose power to cough and clear secretions is insufficient.
The technique may enable these patients to shout to draw in attention and it’s going to help to take care of or improve lung and chest wall compliance.
Patients with high-level quadriplegia are often instructed in glossopharyngeal breathing (GPB), during which the patient swallows air into the lungs so as to extend the diagnostic assay.
GPB is employed to enhance cough effectiveness, provide internal mobilization of the chest wall, and improve quality of life by allowing periods of a ventilator or spinal nerve stimulator independence and simpler phonation.
GPB shows that capacity may be increased from 60% to 81 you look after its predicted value when using GPB.
The use of GPB has been shown to be sufficient to take care of blood gases within the normal range
How to do it?
The mouth opens the oral pharynx stuffed with air
The mouth closes air is trapped within the oral pharynx
The mouth remains closed and forces the air back to the open glottis and then into the lungs
Glottis closed and the air is trapped within the lungs
GPB should be practiced slowly initially and so gradually sped up until the movement flows. A leak of air may occur through the nose and, until it’s prevented by the mouth, a nose dip could also be required. GPB is learned easily by some patients, but others need time and patience to accumulate this skill and must be motivated to practice frequently during the training period.
The next stage is to require a maximum breath in and, while holding this breath, to feature several glossopharyngeal gulps, to enhance the content. When correct, the patient will feel his chest filling with air, and therefore the physiotherapist can test the ‘GPB vital capacity’ by putting a mouthpiece attached to the expiratory limb of a Wright’s respirometer within the patient’s mouth before he exhales. The respirometer is accustomed measure the quantity per gulp; the patient would require less effort and reach his maximum capacity more quickly if he develops a much bigger volume per gulp.
Indication Of Glossophalangeal breathing exercise:
GPB was noticed as a trick movement that can be seen in patients who are suffering from poliomyelitis. GPB is an efficient maneuver to reinforce tidal volume in any patient who is unable to voluntarily alter tidal breathing.
Dail & Affeldt (1955) gave a training of GPB to 100 patients who are suffering from poliomyelitis. They noticed that 69 patients used this technique to help normal breathing and 31 used this technique to help speech and coughing. 42 patients noticed that GPB allowed them to reduce the timing of respiratory support (mechanical ventilation, NIPPV). GPB may be helpful in increasing the effectiveness of cough in patients who are suffering from tetraplegia or neuromuscular disorders, or impaired tracheobronchial clearance
Contraindication of Glossophalangeal breathing exercise:
GPB is not allowed in patients with a tracheostomy when the cuff is inflated.
GPB must be contraindicated in patients who are suffering from airflow obstruction or pulmonary disease because there are chances of air trapping.
GPB mustn’t be attempted in patients with neuromuscular disorders affecting swallowing and in patients with a progressive disorder, intermittent positive pressure breathing (IPPB) could also be more appropriate than GPB.
Mobilization exercises:
Mobilizing the thorax and pectoral arch Exercises involving the thorax and shoulder are useful in mobilizing the lower part of the thorax and encouraging basal expansion to prevent atelectasis and improve coughing.
Some exercises for chest mobilization are as follows:
- Shoulder shrug exercise
- Shoulder roll exercise
- Trunk rotation exercise
- Chest stretch or pectoral stretch
- Forward arm raise exercise
- Sidearm raise exercise
- Step ups exercise
- Cycling


6 Comments