CO-ORDINATION EXERCISE
-A coordination exercise is an important exercise to improve your function and do activities with ease. We are performing day-to-day activities such as typing, writing, etc where coordination is required. Coordination exercise also helps to improve sports performances.
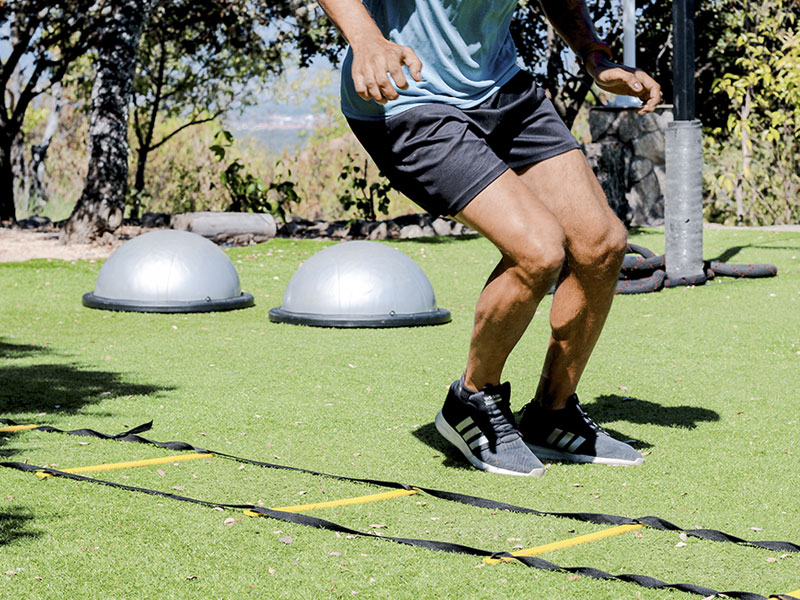
Definition of coordination
-The definition of coordination is the ability to perform movement by using right muscle at the right time with proper intensity to achieve proper action.
-Most body movements require the coordination that results in activation of motor units of multiple muscles with simultaneous inhibition of all other muscles in order to carry out a desired activity.
-The cerebellum is the primary center in the brain for making postural adjustments in order to maintain balance and the ability to execute smooth accurate motor response.
For coordinated movements to occurs all the below systems are involved
- Cerebellum
- Vestibule system
- Motor system
- Deep sensations
- Vision
- Flexibility and ROM
coordination movement is dependent on
- Volition:- is the ability to initiate, maintain an activity.
- Perception:- in tact preconception and interpretation 0f stimuli happen in the brain which integrate motor impulses and the sensory feedback. When preconception is affected it is compensated with visual and vestibule feedback.
- Engram:- A postulated physical or biochemical change in neural tissue that represents a memory in which Thousands of repetitions are required to begin to form an engram and millions of repetitions are necessary to perform a movement.
- Dexterity:-Skillful use of the fingers during the line motor task.
- Agility:-The ability to Rapidly and smoothly initiate ,stop or modify movement while maintain postural control.
- Visual-motor coordination:-Refer to the ability to integrate both visual and motor abilities with the environmental context to accomplish a goal.
Balance
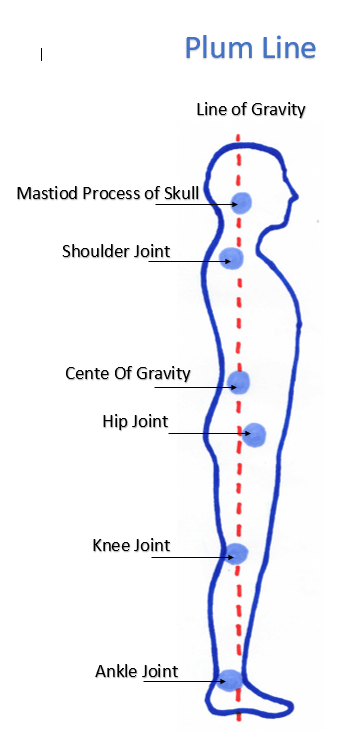
-The dynamic process by which the body’s position is maintained in equilibrium.
-Equilibrium means the body is either at rest (static equilibrium) or in steady-state motion (dynamic equilibrium).
-The body’s center of mass or center of gravity is maintained over its base of support.
Center of gravity
-It is an imaginary balancing point where the body weight can be assumed to be concentrated and equally distributed.
-Ant.2nd sacral vertebra.
Line of gravity
-The vertical line passing through the COG called line of gravity.
Base of support
-The boundaries of the contact area between the body & its support surface.
Receptors related to balance and coordination
position of sense
-a variety of muscular sense by which position is perceived.awareness of static position.
Kinesthesia ( kinesthetic sense )
-sensory receptors receive signals from muscle,tendons,and joints
-relates to awareness of joint motion
-EXAMPLE:-to know arm is moving
proprioception
-it is the sense of self-movement, force, and body position.
-function of join receptors ( sensory receptors and mechanoreceptors)
-delivers input concerning.
- joint position
- movement
- direction
- speed
Mechanoreceptors system
-regulates adaptive changes to joint movement and body position.
There are 4 type of mechanoreceptors
TYPE 1:-(RUFFINI MECHANORECEPTORS)
-respond slowly to static joint position
TYPE 2:-(PACINIAN MECHANORECEPTORS)
-adapt quickly to changes in joint position
-detact ligament tension
-detact velocity of motion
TYPE 3
-active at extremes of joint motion(motion that produce joint injury)
TYPE 4:-(FREE NERVE ENDING)
-transmit information regarding pain and inflammation
Mechanism of neuromuscular coordination
The motor pathway:- The action of each muscle group is determined by the affarent impulses which reach it by the motor pathways.
The cerebral cortex:- Voluntary movement is initiated in response to sensory stimulus. An initiation center exists in the brainstem which alerts the cerebral cortex which then is responsible for planning the pattern of movement . this plan is based on memories of patterns used on previous occasions.
The cerebellum :- The cerebellum is a receiving station of information which reaches ti by the affarent pathways conveying impulses of kinaesthetic sensation from the periphery and from other parts of the brain.
Kinaesthetic sensation :-The affarent impulses of kinaesthetic sensation arise from proprioceptors situated in muscles, tendons and joint and they record contraction or stretching of muscle and the knowledge o movement and position of limbs.
Types of Coordination
Motor coordination to complete a task a collaboration of three skills:
1) Fine Motor Skills
-Fine motor skills are Require for coordination of small muscles in movement with the eyes,wrists, hands, fingers, feet and toes.
-Examples: include picking up objects between the thumb and finger,writing, drawing, buttoning a shirt, blowing bubbles
2) Gross Motor Skills
-Gross motor skills are require for whole body movement and which involve the large (core ,trunk and extremities)muscles of the body to perform everyday activities.
Examples: include walking, running,throwing, catching, kicking, as well as riding a bike or a scooter and swimming.
3)Hand-eye Skills
-The ability of the visual system to coordinate the way that one’s hands and sight work together to be able to do things that require speed and accuracy.
Examples : include catching a ball,sewing,computer mouse,use wooden blocks, archery, sporting performance, music reading, computer gaming, copy-typing, and even tea-making.
Incoordination
-Interference with the function of any one of the factors which contribute to the production of a coordination movement will result in jerky , a rhythmic movement which is said to be incoordination.
Four main types of incoordination based on the location of lesion causing it.
1.Incoordination associated with weakness or flaccidity of a particular muscle group.
-Lesion of LMN prevents appropriate impulses from reaching the muscles or the condition of the muscles modifies their normal reaction to these impulses.
2.Incoordination associated with spasticity of the muscles.
-lesion affecting the motor area of the cerebral cortex other UMN.
3.Incoordination resulting from cerebellar lesions.
-Generally known as cerebellar ataxia where movement is irregular and swaying with a marked intention tremor.
4.Incoordination resulting from loss of kinaesthetic sensation.
-sensory ataxia or in case of tabes dorsalis here the patient is completely unaware of the position of the body in space or of the position of joints.
-hypotonic muscles and sensation of fatigue present.
Causes of Coordination Impairments
-coordination impairment is known as ataxia. There are a number of Diseases and injuries that damage or destroy cerebellum, spinal cord and peripharal nervous system can lead to ataxia. They range from chronic conditions to sudden onset.
These include
- Traumatic brain injury
- Alcoholism
- Infection
- Neuropathies
- Spinal cord injuries
- Multiple Sclerosis (MS)
- Parkinson’s
- Stroke
- Transient Ischaemic Attack (TIA)
- Genetic ataxias eg – Friedreich’s ataxia and Wilson’s disease
- Cerebral Palsy
- Brain Tumors
- Toxins can also cause ataxia.
These include
- Alcohol (most common)
- Seizure medications
- Chemotherapy drugs
- Lithium
- Cocaine and heroin
- Sedatives
- Mercury, lead, and other heavy metals
- Toluene and other types of solvents
Examples of Coordination Tests in the Upper Limb
In the following tests, Therapist looking for signs of Intention tremors and Dysmetria.
Dysmetria
-Dysmetria specifically refers to an impaired ability to properly scale movement distance.
Dysmetria can appear in a few forms
1)hypermetria:- when you overreach or overstep
2)hypometria:-when you underreach or understep
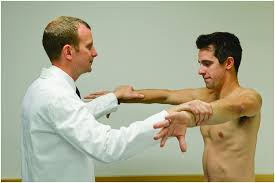
1)Finger-to-nose test
The shoulder is abducted to 90o with the elbow extended, the patient is asked to touch your nose with tip of your index finger.Finger to therapist finger:- the patient and the therapist stand opposite to each other, the therapist index finger is held in front of the patient, the patient is asked to touch the tip of the index finger to the therapist index finger. therapist ask you to do this at alternative speeds or with eyes closed.
TEST POSITIVE:-When patient is unable to perform a task.
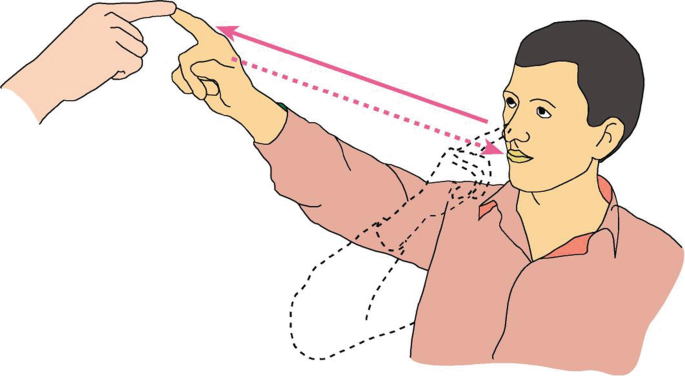
1)Finger-to-nose test – The shoulder is abducted to 90o with the elbow extended, the patient is asked to touch your nose with tip of your index finger.Finger to therapist finger:- the patient and the therapist stand opposite to each other, the therapist index finger is held in front of the patient, the patient is asked to touch the tip of the index finger to the therapist index finger. therapist ask you to do this at alternative speeds or with eyes closed.
TEST POSITIVE:-When patient is unable to perform a task.
2)Finger-to-finger test
The patient is asked to touch the tips of the fingers of one hand toward the mid line and approximate the opposite fingertip in which both shoulders are abducted to bring both the elbow extended.
TEST POSITIVE:-When patient is unable to do the test.
3)Nose-to-doctor’s finger test
The patient alternately touch the tip of the nose to the tip of the therapist’s finger with the index finger.
TEST POSITIVE:-When patient is unable to perform a task.
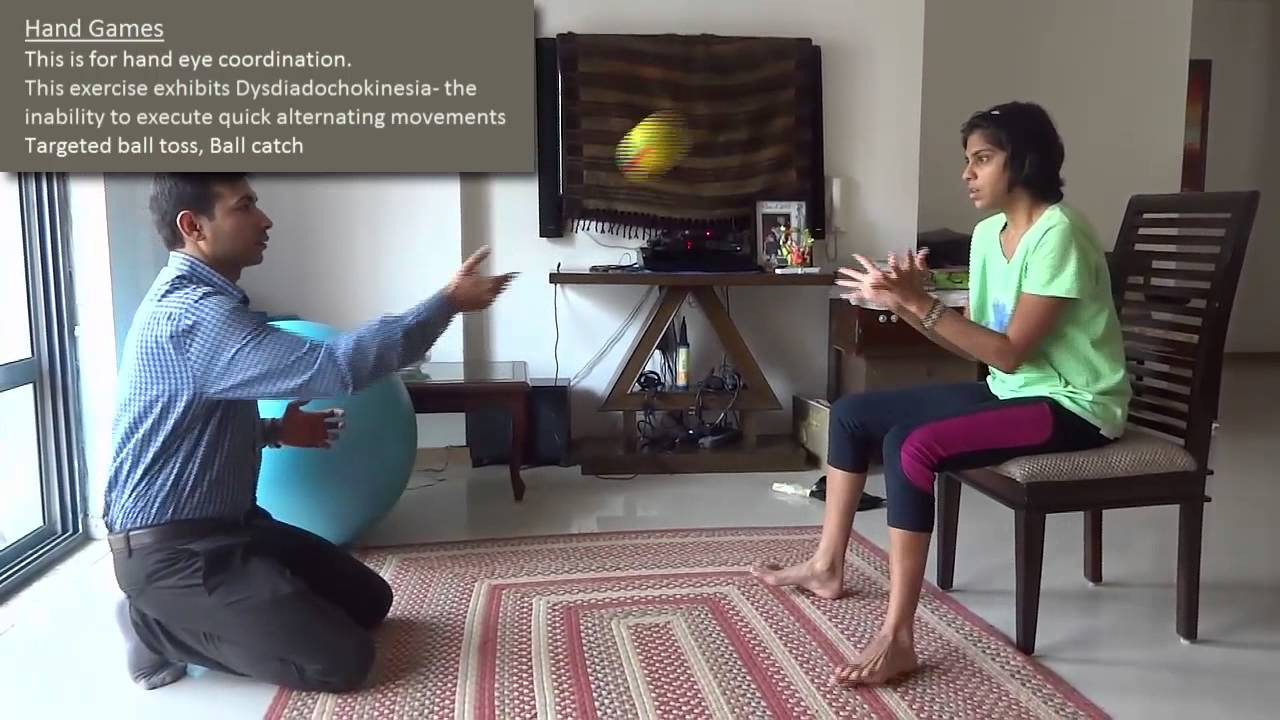
4)dysdiadokokinesia
Inability to perform rapited alternating movements.
The patient asked to do fast alternating movement e.g. forearm supination and pronation in which asking the patient to tap the palm of one hand with the fingers of the other, then rapidly turn over the fingers and tap the palm with the back of them, repeatedly.
TEST POSITIVE:-When patient is unable to perform a task.
5)Rebound phenomena
The patient attempt to move a limb his elbow against resistance When the resistance is suddenly removed, patient’s forearm move upward and it may hit his face or shoulder.
6)Buttoning and unbuttoning test
Examples of Coordination Tests in the Lower Limb
1)Tandem walking
Ask the patient to walking along a straight line with one foot immediately in front of the other foot Walking along a straight line. Foot close to foot.
TEST POSITIVE:- there is deviation of gait in patient with dysfunction in neurological conditions.
2)Rom-berg test
Ask the patient to stand with heels together and close your eyes during the test.
TEST POSITIVE:-when you have a loss of balance or Swaying while eyes are open or closed.
3)Foot tapping test
The Patient sits on a chair with adjustable height so that both foot rest on the floor. ask the patient to tap toes up and down repeatedly on the floor as fast and as possible for 10 sec. The test is performed on both sides separately. The therapist counts the number of taps for each side.
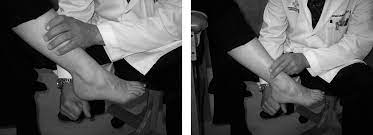
4)heel-shin test
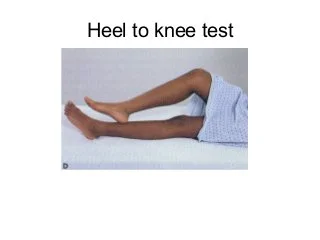
-the patient is in supine lying position .Ask the patient to runs the sole of one foot up and down on the shin of the opposite leg.
if patient having a cerebellar disease, then the test is performed poorly and intention tremor may become present.
5)toe-finger test
The toe-finger test is as same as of the finger-nose test performed in the examination of coordination of the upper limb.
The patient touches the therapist’s finger with his big toe. the test is positive when there will be an intention tremor.
General Principles of Coordination Exercises
- Continue repetition of a few motor activities
- Use of sensory cues (tactile, visual, proprioceptive) to increase motor performance
- Increase of speed of the activity over time
- Activities are broken down into components that are simple enough to be performed correctly.
- Assistance is provided when ever necessary.
- The patient should have a short rest after two or three repetitions, to avoid fatigue.
- High repetition of precise performance must be performed for the engram to form.
- When ever a new movement is trained, various inputs are given, like instruction(auditory), sensory stimulation(touch) ,or positions in which the patient can view the movement (visual stimulation) to enhance motor performance.
Progression exercise
1) Speed of exercise:- when patient perform quick movement which require less control than slow movement.
2) Range of exercise:-wide range of movement in which large joint are used.
3) Complexity of exercise :-exercise should be starting with very simple motion and gradually advance to more complicated ones.
There are many interventions that can be utilised to improve coordination, such as:-
- Tai Chi
- Pilates
- Yoga
- Otago Exercise Program and use of Balance Boards
- Neuromuscular coordination exercises
- Proprioceptive Neuromuscular Facilitation
- Neurophysiological Basis of Developmental Techniques
- Sensory Integrative Therapy
1) Tai Chi
-Tai chi is a Chinese movement practice that help to cure a number of health problems. It can have significant benefits and also focuses on muscle control, stability, balance, and flexibility. The movements are also very gentle.
Warmup
-This warmup will help improve balance and strengthen your leg muscles.
-Stand with your both legs wider than hip-distance apart, with a slight bend in your knees. Slowly you are shifting your weight from left to right leg. -Your arms should be resting at your side; your hands can be on your hips.
-Slowly and with control, shift your weight onto right leg, supporting about 70 percent of your weight on that leg. Then transfer weight to the left leg.
-Repeat at least 3 times.
Torso twists
-For this exercise, put your both hands on your hips to help you feel how much you are turning . you don’t want to be turning from the hips. Rather, you want to turn from the torso.
-Take a deep breath and feel your spine grow longer. As you exhale, gently twist just your torso. Your hips will naturally move with your torso a little, but this is a twist for your spine. Your knees should stay above your ankles.
-They should stay equally bent. This increases your core stability.
-Let your breath guide how fast you move here. Twist at least five times to both sides.
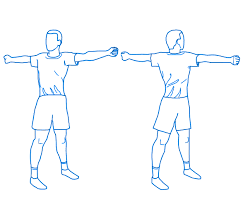
Energy to the sky (a variation on Holding Up the Sky)
-This exercise will help with core stability. It also strengthens and stretches the back.
-Standing in the same starting position as the warmup, step your left foot to hip-distance apart , with your hands resting at your sides.lifting your hands together in front of your face, palms facing down, your fingertips pointing in toward each other, and your arms as straight as you can get them.
-Look at your hands and continue to do so as you breathe in gently and begin to push your arms straight out in front of you, then up, until they are above your head.
-As you exhale, bring your arms back to your sides.
-Repeat at least 5 times.
Drawing the bow
-This exercise can stimulate the heart and circulation and also helps to build strength in the arms, shoulders, chest, and legs.
-Step out with your left foot, slightly wider than shoulder-width apart. Look to the left with your head and torso, like the gentle twist from before.
-Make your hands into loose fists, and breath as you lift arms to chest height out to your left. Your left arm will, of course, reach a bit farther than your right, since you are turned.
-As you breath out, pull your right elbow back, lift your left thumb and forefinger to pointing up, and bend your knees, do squatting .
-Look beyond the backward “L” you are creating with your left hand. breath here, and breath out as you release your hands down, straighten your legs, and back to normal position.
-Repeat on the other side.
-Repeat this at least 3 times on each side.
Penetrating heaven and earth
-It stimulates and stretches the front side of the body.
-After Drawing the Bow, step your right foot back in. Your feet should be hip-distance apart. Rest your hands to sides.
-As you breath, lift both hands, palms up, fingertips pointing in toward each other, to chest height. When you get there, relax and breath out briefly.
-As you breath, send your left-hand palm up, above your head. Send your right-hand palm down, back to your pelvis.
-As you breath out, pull them back to meet, keeping them in the mid line of your body. As you inhale, switch the movement, your right hand rising and your left hand lowering.
-Repeat this movement at least 8 times.
2)Pilates
Mat Pilates has several principles including control, centring, precision and breathing, and with the exercises, and a range of benefits can be gained:
- Improved balance and posture
- Greater core strength/stability
- Improved coordination
- Reduced lower back pain
- Improved flexibility
- Greater kinaesthetic awareness
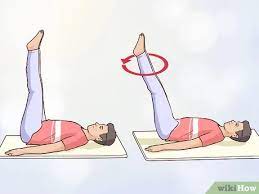
The Corkscrew
-The purpose of this exercise is to promote mobilisation of the hips and spine and also beneficial for the development of whole-body balance in a supine position. To perform this exercise correctly and it’s important that you try not to rotate the spine, instead allow the hips to lead the movement. prepare the cores throughout and avoid straining the neck area. this exercise involves 3-5 repetitions.
-This exercise is not appropriate for those who have osteoporosis. In progression, the hips can be kept on the mat with just the legs circling.
The Saw
-Flexibility in the hips, spine and shoulder regions can increase with this exercise. It also require to develop scapular and pelvic stability. To ensure you get the most out of this movement, begin by sitting tall with a neutral spine and pelvis with the legs stretched out to the front. The pelvis should remain fixed throughout and ensure that coccyx remains in contact with the floor. Perform 3-5 reps on each side.
-This exercise provides an alternative to spine twists and it can be modified with the use of a block for those with a tight lower back or hamstring.
The Scissors
-developing pelvic and spinal stability, increasing the flexibility of the hamstrings and hip flexor, and promoting whole body awareness, balance and control.
-Begin with a supine position with the legs and place the arms by the side, palms facing down. With the legs lifted upwards, support the hips with your both hands. breath out as you split the legs in a scissor motion and reach on the second breath. It is best to avoid letting the leg move too far or drop in front of the face. Both legs should move through the same ROM. A foam roller can be placed under the hips for support.
The Bicycle
-This exercise serves to mobilise the hips and knees. It also aids the development of pelvic and spinal stability. It can be modified by lying on your side for those that find it too difficult. While performing this movement, avoid loading weight directly into the neck and ensure that the torso and shoulders remained fixed and the abdominals should be active throughout.
-Perform the exercise 5-10 times on each side.
Swimming
-This exercise is mobilise the hip and shoulder joints and promote upper and lower body coordination on reciprocal sides. With a straight spine, adopt a prone position keeping the legs abducted to hip-distance apart. While this movement is performed, the legs should be kept long and together, without bending the knees. With every count, squeeze the gluteals and switch sides. repeat three to six reps on each side.
-this exercise can be performed lying prone lifting one leg or one arm at a time. The speed of the movement can also be increased to add a progression.
3)Frenkel’s Exercises
–Frenkel Exercises are a series of movement of increasing difficulty performed by ataxic patient to facilitate the restoration of coordination. Frenkel’s exercises are used to bring back the rhythmic, smooth and coordinated movements.
-Frenkel Exercises aimed at establishing voluntary control of movement by the use of any part of the sensory mechanism which remained intact,notably sight,sound and touch, to compensate for the loss of kinaesthetic sensation. the process of learning this alternative method of control is similar to that required to learn any new exercise , the essentials being :
- Concentration or attention
- Precision
- Repetition
General Instructions for frenkel exercises
- Exercises can be performed by the patient with the limbs are in supported or unsupported position, unilaterally or bilaterally.
- They should be practiced with commands given by the therapist in an event,slow voice and the exercise should be done to counting.
- exercise should be performed within normal ROM to avoid overstretching of muscle and a specified target can be used to determine range.
- The first simple exercise should be performed before progressing to more difficult patterns.
- Four basic positions are used during exercise:- lying, sitting, standing and walking.
- Exercises are designed for coordination not intended for strengthening.
- It is important that the area is well lighted and that patients are positioned so every movement easily watch by patient.
- Perform each exercise not more than four times.Take rest between each exercise to avoid fatigue.
- The exercises progress from postures of greatest stability to postures of greatest challenge.
- If voluntary control of patient is improves, the exercises progress to stopping and starting on command, increasing the range and performing the same exercises with eyes closed.
- Concentration and repetition are the keys to improve balance and coordination.
Frenkel exercises for lower limb
Exercises for the legs in lying
-(side lying) Flexion and extention of one leg by the heel sliding down a straight line on the table.
-Abduction and adduction of hip with knee bent and heel on the table.
-Abduction and adduction of leg with knee and hip extended by sliding the whole leg on the table.
-Flexion and extention of hip and knee with heel off the table.
-Flexion and extention of both the legs together with the heel sliding on the table.
-Flexion one leg while extending the other.
-Flexion and extention one leg while taking the other leg into abduction and adduction.
-Heel of one leg to opposite leg (shin of tibia from knee to toe).
-Move Heel of one limb to opposite leg in downward direction(knee, sliding down crest of tibia to ankle).
-The patient may also be told to place the heel of one leg on various points of the opposite leg under the guidance of the therapist and also do reach out with toe of one leg and after repeat on the other leg.
Exercises for the legs in Sitting
-alternate leg is stretched to slide the heel to a position indicated by a mark point on the floor.
-patient in stride sitting posture and asked to stand and then sit.
-Sit to stand with knees together.
-In Sitting do hip abduction and adduction.
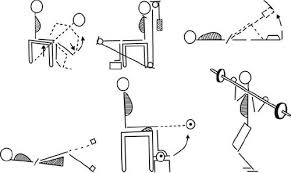
Exercises for the legs in Standing
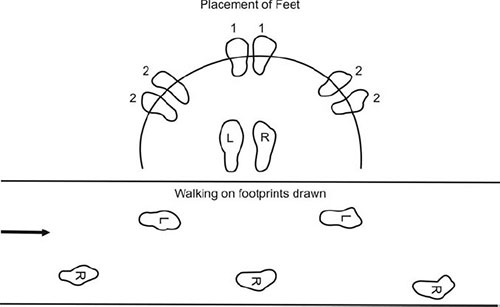
-patient in stride standing weight is transferred from one leg to other leg .
-Place one foot forward and backward on a straight line and repeat on the other leg.
-Walk along a winding strip.
-Patient do Walk between two parallel lines.
-Patient do walk in sideways by placing feet on the marked point.
-Walk and turn around.
-Walk and change direction to avoid obstacles.
Frenkel exercises for upper limb
-Same exercises can be devised for the upper limb where in the patient may be directed to place the hand on the different points marked on the table or wall board to improve coordination of all the movements in the upper limb.
-patient sit in front of a table and place a number of objects on the table and then touches each object with the one hand and then with the other hand.
-The patient flexes one shoulder to 90 degree with elbow and wrist extended. The patient then takes his or her index finger and touches the tip of his or her nose. This exercise is then repeated with the other hand.
-The patient taps bilateral hands on bilateral thighs while alternating palmer and dorsal aspect as fast as possible. some additional activities such as building with toy bricks or drawing on a black board, buttoning, combing, writing, typing are some of the activities that also improves the coordination.
4)Strengthening exercise
-Muscle weakness is common in Dysdiadochokinesia and makes movement more difficult. Muscle strength also decreases with age. Exercises to help increase strength in the lower limbs and upper limb, especially the shoulders and hips, are a good way to help improve or maintain balance and muscle strength. Exercises to strengthen the core muscles can also be helpful.
5) Balance training
-patients can also try moving their arms and legs in a coordinated manner, while sitting or standing position in which patient try to taps alternating heel and toe on the floor. At that time, it is perform by tightening the belly muscles and paying attention to posture, this exercise helps strengthen your core muscles.
Static balance control
-Maintaining sitting
-half-kneeling
-tall kneeling
-standing postures on a firm surface
-tandem,single leg stance
-squat position
-working on soft surfaces(e.g.-foam,sand,grass)
-narrowing the BOS ,moving the arms, or closing the eyes
Perturbation
-perturbations to balance can be either internal or external .
-the COG follows the moving body parts.
-learning adaptation: characterized by a significant reduction in the reactive response.
Romberg exercise
-This exercise follows the same steps as the Romberg test. Patient Stand with a chair in front of his or her and a wall behind them with foot together. Keep eyes open for 10 seconds while they catch their balance, and then close them for 30 seconds or until begin to lose their balance. if one lose his or her balance then asked to Stand with a chair in front of them and a wall behind.In the progression of exercise make sure patient is able to stand without support with eyes close.
Unilateral stance exercise
-Asked to patient Stand on one leg for up to 30 seconds, and then put it on the floor.This exercise is done on the other leg. This can be done over and over, and as therapist notice patient’s balance improvement. In the progression of exercise patient can begin to perform on various surface and movements to train posture and balance strategies.
Dynamic balance exercise using moveable surfaces
1)Balance board exercise

Starting position
Board: Any type
-Start with your feet hip-distance apart and find your balance on the board.
-Keep your spine neutral and your posture upright.
-Shift your weight as needed in the center area so the edges of the board don’t touch the floor.
-Hold it for at least 30 seconds.
-Make it easier: If needed, use the wall for support.
-Make it harder: With your spine straight, stretch your both arms straight above your head, palms facing in and put it down.
Front-to-back
Board: Wobble board
-Begin in starting position.
-Slowly tilt the board forward until it touches the floor.
-Slowly tilt it backward until it touches the floor on the other side.
-Tilt back and forward slowly for 30 seconds.
-Make it easier: Use the wall or a railing for maintain your balance.
-Make it harder: Stretch your both arms straight out from your sides.
Side-to-side
Board: Wobble or rocker board
Begin in starting position.
-Slowly tilt the board from left to right.
-Tilt from side to side for 30 seconds.
-Make it easier: Use a railing for extra support.
-Make it harder: Stretch your both arms straight out from your sides.
Round the clock
Board: Wobble board
Begin in starting position.
-roll the board around 360 degrees clockwise.
-Pause for a second, and then roll around counterclockwise.
-Keep rolling for another 30 seconds or so.
-Make it easier: Use the wall keep your balance.
-Make it harder: Stretch your both arms straight above your head with your palms facing each other.
2) SWISS BALL

Swiss Ball Sitting weight shifting
-Begin this Balance Ball exercise sitting up tall on a Swiss Ball with your feet together on the floor. Slowly and gentelly move ball forward and backward without lifting your leg . keeping your back straight.As same as patients can move the Swiss ball in side to side direction at that time they also maintain their balance.Perform 2 – 3 sets of 10 repetitions on each side.
Swiss Ball sitting leg lifts
-Begin this Swiss Ball exercise sitting up tall on a physio Ball with your feet together and Slowly lift one leg slightly off the ground, keeping your back straight and the Ball still. Then down your leg and repeat on the other side. Perform 2 – 3 sets of 10 repetitions on each side provided the exercise is pain free.
Swiss Ball Squats
-In this exercise standing with your feet shoulder width apart, your feet facing forwards and a Ball positioned between a wall and patient’s lower back . Slowly perform a squat, keeping your back straight. Your knees should be aline with middle toes and should not move backward to your toes. Perform 2 – 3 sets of 10 repetitions.
Swiss Ball Prone Single Leg Lifts
-Begin the exercise lying over a Swiss Ball as.Slowly lift one leg, keeping the Swiss Ball still and your knees straight. Then slowly lower your leg and repeat on the other side. Perform 2 – 3 sets of 10 repetitions on each side.
Stability Ball Hamstring Curl
-Stability Ball Exercises – Hamstring Rollout
-Benefits: Strengthen your hamstrings and glutes with engaging your core.
-Lie with your back flat on the flat surface with the back of your calves on top of a balance ball and your legs straight.
-prepare your core and squeeze your glutes to raise your hips off of the floor so that your body forms a straight line from shoulders to heels. This is the starting position.
-Drag your heels to roll the ball as close to your butt as possible(until your knees form 90-degree angles).
-Pause, then slowly straighten your legs as you roll your feet away from your glutes, returning to the starting position.
Stability Ball Deadbug
-Stability Ball Exercises – Dead bug
-Benefits:-It is a full-body workout with coordination between arm and leg movements. keeping your spine straight while your arms and legs do their own thing. Lie with your back flat on the floor with your arms extended straight up, your legs bent at 90 degrees, and holding a balance ball between your knees and your hands. This is your starting position.
-Keeping the ball in place with your left hand and right knee, prepare your core and slowly lower your left leg and right arm to within six inches of the floor (both should remain in line with your body). Only go as low as you can with your low back pressing in to the floor.
-Reverse the move to return to the starting position, and repeat on the other side.
-Continue alternating sides, performing equal reps on each side.
Stability Ball V-Pass
-Stability Ball Exercises – V-Up
-Benefits: Challenge your whole body with works your core as you pass the ball between your hands and feet, and you have to involve your inner thighs and arms to keep the ball from falling to the floor.
-Lie with your back flat on the floor with your legs extended straight on the floor, holding a physio ball overhead with both hands. prepare your core to reduced any arch in your lower back. This is the starting position.
-Squeeze your abs to lift your arms and legs to place the ball between your calves, creating a “V” shape position.
-Return to the starting position, but this time with the ball between your legs.
-Repeat the movement, passing the ball back and forth between your hands and legs.
Stability Ball “I-Y-T” Shoulder Raise
-Exercise Ball Workouts – IYT Raise
-Benefits: it is the exercise for training your shoulder stabilizers and mid-back muscles with this difficult exercise.
-In prone lying on a Swiss ball with your stomach on a stability ball and your legs extended out straight behind you, digging your toes into the floor for support. prepare your core so that your body forms a straight line from head to heels.
-Let your arms hang straight toward the floor, holding your hands in fists with your thumbs up. Squeeze your shoulder blades down and away from your ears. This is the starting position.
-Leading with your thumbs, raise your arms straight up and close to your ears, keeping your shoulders pressed down. This is the “I” formation.
-Lower your arms down toward the floor, then lift your arms up again, but this time diagonally, making a “Y” formation.
-Lower your arms down toward the floor, then lift your arms straight out to your side to form a “T” with your palms facing the floor.
-The cycle of “I-Y-T” is one set.
-Make this exercise harder by holding a weight (dumbbell) in each hand.
Stability Ball Rollout
-Exercise Ball Workouts – Stability Ball Rollout
-Benefits: it is the exercise for tests your core strength and stability.
-Place your hands on a Swiss ball and kneel with your knees hip-width apart and your toes on the floor for stability.
-Keeping your back flat and core braced, and without moving your knees, slowly roll forward so the ball comes to your forearms, until your body forms a straight line from your head to your knees.
-Pause, then roll back to the starting position.
7) Neuromuscular exercise
-The neuromuscular exercise program is aimed at enhance sensorimotor control and attain functional joint stabilisation by addressing the quality of motion in all 3 planes.
-Facilitation and improvement of muscle activity to increase motor control are the key to many of the techniques used in neurological rehabilitation.
-Exercises performed in closed kinetic chains in lying, sitting and standing positions to help in improving the sensorimotor control, and obtaining a low distributed articular surface pressure by muscular co activation.
8)Proprioceptive neuromuscular facilitation
Tapping
-Tapping is the technique in which use of a light force applied by therapist over a tendon or muscle belly to facilitate a voluntary control”.
-Tapping is used to evaluate reflex activity with a normal response being a rapid muscle contraction. Rood recommended three to five taps over the muscle belly to be facilitated.
Brushing
-Fast brushing, using a battery-operated brush on the skin overlying the muscle, is a therapeutic technique which facilitate movement responses improve static holding postural extensors.
-This is the technique in which therapist applied deep-pressure to the skin, firmly – so it does not scratch, itch or tickle.
-By rubbing the brush over the skin, the pressure input targets touch receptors and helps a central nervous system.
Cryotherapy-Brief
-Ice can be used to facilitate a muscle response in which uses a combination of coolness and pain sensation to produce the desired movement.
Passive Stretching
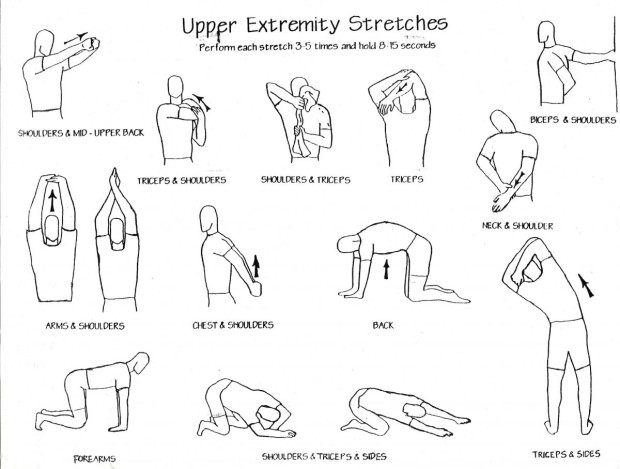
-Stretch may be applied in a lots of ways during neurological rehabilitation to achieve different effects. The types of stretching used include;
- Fast / Quick
- Prolonged
- Maintained
-The fast/quick stretch applied for facilitates a muscle contraction which can produces a relatively short-lived contraction of the agonist’s muscle and short-lived inhibition of the antagonist muscle. It produce its effect via stimulation of the muscle spindle primary endings which results in reflex facilitation of the muscle via the monosynaptic reflex arc.
Joint Compression
-Joint awareness may be inhanced by joint compression which will lead to improving motor control. proprioceptors in joints and muscles are involved with the recognition of joint position and motion which are stimulated by joint compression. Joint compression can have both exhibitory and inhibitory effects.
-Joint Compression of the joint surfaces facilitates posture extensors which are needed to stabilise the body which can be applied slowly to inhibit muscle control or in fast manner to facilitate muscle control. The application may be manually and or by using weight bearing postures.
Joint compression can be achieved in two ways:
1)Light Compression: Normal body weight being applied through the long axis of the bone which is thought to inhibit muscle spasticity.
2)Heavy Compression: Compression is more than that applied by body weight which is thought to facilitate co-contraction at the joint undergoing compression.
Vibration
Muscle Vibration
-Muscle vibration has been used to reduce muscle tone and spasticity in patient with neurological conditions. Vibrations of the muscle are anticipate to increase corticospinal excitability and also inhibitory neuronal activity in the antagonistic muscle.
-Muscle Vibration is basically applied directly to the chosen muscle or tendon and may be applied in two ways; High and Low Frequency.
Whole Body Vibration
-Whole body vibration is a relatively new modality which involves the use of vibration through standing on a vibrating platform and has been utilized to improve balance and gait.
Vestibular Stimulation
-The vestibular stimulation technique is very powerful tool for self-soothing and focusing attention and a proprioceptive unique sensory system with multi-sensory function.Galvanic vestibular stimulation is the process in which sending specific electric messages to a nerve in the ear that maintains balance.
-Total body inhibition can be achieved by slow rocking movement, slow forward-backward motion, slow horizontal motion, slow vertical movement and slow linear motion.
-Total body exhibition can be achieved by rolling and rocking pattern on elbows, extended elbows and crawling.
-Spinning produce tonal responses and causes a strong facilitation of movement through the overflow of impulses to higher centres.
-Facilitation of back extensors is another effect of vestibular stimulation if it is used by a rapid way forward-backward or angular acceleration of the head and body while the patient in prone position.
-Inverted position is commonly used now to increase to in certain extensors, while it may be used to achieve a total body inhibition.
Proprioception Neuromuscular Facilitation (PNF)
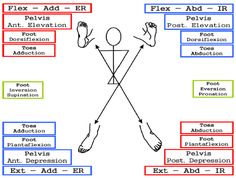
-Proprioceptive Neuromuscular Facilitation is a set of stretching techniques are used to enhance both active and passive ROM and flexibility in order to improve motor control and aid rehabilitation. PNF is considered an optimal stretching method which helps to restore four theoretical mechanisms were autogenic inhibition, reciprocal inhibition, stress relaxation, and the gate control theory by focusing on the developing sequence of movement and learning more volitional movement.
-PNF focuses on mass movement patterns that are diagonal and resemble functional movement of The whole body .
-PNF is exercise based on the principles of functional human anatomy and neurophysiology.
Primarily, PNF treatment techniques focus on three things:
-Improve the motor learning of the agonist through repeated contractions of movement and rhythmic initiation.
-Reverse the motor patterns of the antagonist muscles.
-Two techniques are use for isometric contraction( slow reversal and rhythmic stabilisation).
-learning to relax muscles helps to increase ROM and reduce spasticity.
-The patterns of movement associated with PNF are composed of multi joint, multi planar, diagonal, and rotational movements of the limbs, back & neck. There are two pairs of foundational movements for the upper extremities; UE D1 flexion & extension, UE D2 flexion & extension. There are two pairs of foundational movements for the lower extremities; LE D1 flexion & extension, LE D2 flexion & extension. Various PNF stretching techniques are there like Hold Relax, Contract Relax, and Contract Relax Antagonist Contract.
Contract Relax
patient moves the body part passively into the agonist pattern.patient is instructed to push by contracting the antagonist isotonically against the resistance.when ROM is limited by muscle tightness.
Hold Relax
begins with isometric contraction of the antagonist against resistance,followed by concentric contraction of the agonist muscle.
9)Sensory integrative therapy
-Sensory integration therapy is a therapy in which use of all senses together – that is, touch, smell, taste, sight and hearing. This therapy enhance repetitive behavior.
-This therapy may include using equipment such as swings, trampolines, and slides and it also uses therapies such as deep pressure, brushing, weighted vests, and swinging. It is able to calm an anxious child.
-Different colours can be introduced to child through new toys and clothes.
-Headphones help children to immersed in calming sounds, which can help conflict an auditory processing disorder. Natural sounds, such as the wind, thunder, rain, bird songs and waves, can be played to experienced in real life.
-Child can freely play with mud, dough, sand, water or bubbles which help to improve tactile processing. Kneading bread dough is a fun and challenging activity.
-Aromatherapy for olfactory sensitivity is often successful in which children can be given a small bottle of essential oil ,like mask scents that are unpleasant to them.
-Taste games with fruit and foods because children often like to guess the flavour of the foods. Encouraging children to prepare food is a way to introduce new flavours and textures. Playing games with food on a plate may encourage sampling.
-Children with proprioception problem challenges are beneficial for them.such as heavy work activities, which include lifting heavy weights such as full grocery bags; moving and stacking books or chairs; pushing grocery trolleys; or digging and raking in the garden.
-jumping on the Indoor or outdoor trampolines, swings, ride-on toys and seesaws are all helpful for reduce vestibuler disorder.

2 Comments