
Taping Technique: A Way of Physiotherapy Treatment
What is a Taping Technique?
- The Term ‘ Therapeutic ‘ as relating to the healing of a disease or having a good effect on the body or mind.Taping technique
- that utilize an adhesive tape as a component of management of patients with musculoskeletal condition.
- The Taping are used for soft tissue injury and joint support and protection and controlling pain, swelling in the acute as well as chronic stage also.
- Tape provides support to injured Muscle, Ligament, Weak Joint And other Structural Body Parts, Avoid Further Damage During Day To Day Activity.
- Taping Also Fascilitate Muscle Activity By Providing Fascilitatory Taping And Helps in Reducing Muscle Strain and rehabilitation.
- Taping Inhibitory Technique Used to reduce Muscle Activity to avoid injury, Reduce pain, swelling , spasm of that particular Muscle.
- Tape is strong, supportive and Lightweight and temporary Support. it adjust to the body part and elastic property of tape allow movement with support as compared to other.
Taping technique benefits
- To Protect from further injury in day to day activity by proving support to ligaments,Muscle, Tendon and joint.
- To Limit Unwanted Joint Movement.
- To allow healing Process By Proving Support And Reduce Activity.
- Reduce Pain, Spasm And Swelling By Breaking the Pain – spasm- Swelling Cycle.
- To Protect and Support the injured structure in a functional position during the exercise , Strengthening and proprioceptive programme.
- Tape Can work even after it is removed.this carry over effect occurs because receptots in the skin, Joints and soft tissue remain activated. this will improve movement, body awareness, balance and flexibility of the affected part.
- To Correct Deformity By Reducing activity And Fascilitate Opposite Directional Movement.
Goals Of Taping:
- Prophylactic: In order to Prevent injuries from happening.
- Rehabilitative: to the treatment of injured musculoskeletal Body Parts By Restricting Movements During Healing Process.
- Functional: to help the person/athlete maintain day to day activity/functional mobility while still recovering from the injury.
- Corrective: To Reduce Deformity By Reducing Movement And Fascilitating Opposite Directional Movement.
How To Select Tape (Criteria For Selection Of Various Tape )?
Selection of Tape is varies according to patient’s diagnosis,acceptance,side effects and other associated treatment option.
Patient’s / Athlete’s Acceptance:
If The patient feel that the tape application is uncomfortable, irritable or restricting ADL’s , Require reconsider the application.
If the athlete feels that taping is uncomfortable or decrease performance , it wont’s work ( Try alternate methods or Treatment Option ).
Sport of Athlete’s or Patient’s Profession:
- A Taping Technique is Effective for one patient may not be as effective to other patient’s or athlete’s.
- A taping technique that is effective for one particular sport may not be suitable for another sport/professional activity, The Physical and Functional activity of Various sport and Profession are various.
- Requirement, Equipment, Environment and rules of the Profession/Sport also play a role in the selection.
Personal Preferences:
- Personal Experience: Which Technique have worked best for you in The Past?
- Handling: Which kind of tape and materials are you comfortable Handling.
- Patient Clientage: what works best for the client age that you cater to?
- Patient Feedback/Follow Up: Feedback And Follow Up Session also play important role in selection and reselection of Tape.
- Judgement and Diagnosis Skill: Ultimately it is the therapist’s Judgement backed by sound knowledge and experience that is the best criteria to decide the tape and technique for a particular patient.
Tape Selection:
- Size: The Tape is selected depending on the area/Body Part to be treated. Narrower tape is usually used for small joints ( Finger & thumb ) and larger width of tape is used for large joints/area’s (ankle,spine). The size of the patient/athlete also influences the size of the tape.
- Type: Depending on the condition & requirement/functional demands of the patient.
- Quality: depends on the feasibility and also on the affordability of the patient/athlete.
Side Effects of Taping Technique:
- Skin Allergies : Some people are allergic to tape or the glue used on the tape. If the patient feels itchy or skin becomes red and inflamed,removed,remove the tape immediately as the patient may be having a skin reaction.
- Skin Chafing(irritation) : Results when a taped area rubs against skin.it often occurs on the thighs or between toes. to prevent chafing , apply a reasonable amount of skin lubricant to the body part and the tape.
- Blisters & Lacerations : Improper application or removal of tape ( ripping off tape ) can cause blisters or small skin cuts.
Contraindication of Taping:
- Open wounds
- Allergy to Taping Materials.
- Active Infection
- Hyper Sensitive Skin History Condition e.g.eczema,dematitis,psoriasis
- Irritation of area of skin to be tapping done earlier.
- Circulation compromised in area
- Sensation compromised in area.
Type of Tapes:
#Micro Pore/Paper Tape:
A latex-free, hypoallergenic paper tape that is gentle to the skin yet adheres well and leaves minimal adhesive residue upon removal. It is an economical,general purpose,breathable tape, available in white or tan. Micro Pore tape is excellent for repeated applications on sensitive skin, fragile skin and elderly patients. It is available in a dispenser pack for easy tear and convenience.
#Underwrap Tape:
Under wrap/Pre wrap is a thin foam based material used to reduce friction between the skin and the tape surfaces. It helps to protect the skin & help eliminate skin irritation, But decreases the efficiency of the tape. It is Skin friendly and hypo-allergenic, thus ideal for all sports.
#Rigid Athletic Tape ( Non-Elastic):
These
Mainly Useful in Joint Injuries, Such as sprains, or conditions that need rest, support and immobilization to facilitate healing of tissues. eg.Muscle Pull,Strain,Sprain, Ligament Laxity, Subluxation Of Weak Joint. They include regular white cloth athletic tapes and brown tapes. The white athletic tapes are commonly used for Preventive Measure purposes whereas the stronger brown tapes are designed for specific taping techniques, like joint realignment, deformity corrective measures etc.
#Elastic Tape:
The Elastic adhesive tapes have a Property of elasticity same have in muscle that permit some flexibility and movement, so that muscle can contract and relax while still being supported. The thicker version of elastic tape is suitable when strong support and compression is required for injury protection.
#Self Adhesive ( Cohesive ) tape:
This tape contains a cohesive material that sticks only to itself.It is excellent as a bandage for acute injuries e.g. ankle sprain, it provides compression to reduce swelling. since it sticks to itself and not the skin, skin reaction not usually seen.
#Kinesiological Tape:
This is a cloth tape with acrylic glue that allows for ventilation, good adhesive with minimal negative skin reactions. The elastic pattern moves with the skin and allows normal movement. It is water and sweat resistant so it can be allowed on to shower and bath.To know more about kineosio taping click here
How to Select Taping?
- Athletic / rigid taping most effective for instability or injury where the necessity of support,protection, immobilization and rest is part of treatment mainly in acute injury eg.ligament injury, muscle pull, subluxation of joint and some congenital deformity.
- Kinesiological taping most effective for pain, inflammation and muscle dysfunction where the necessity of movement /function is allowing.
How to Select Treatmemt Taping Table?
- During taping , Patient and therapist is in optimal comfortable condition, Height of table is varies according to therapist height and Body part of patient where taping is done.
- Usually 70cm to 90 cm height of table according to therapist height is preferable.Mostly supine or prone position where patient is fully supported position are helpful but it may be varies according to condition.
How to select Patient’s position?
Supine, Prone, Sitting,standing etc, depending on purpose and site of application.
- Ankle/foot/leg : project part out from end of table with supine or prone position is preferable.
- Hip/groin/trunk/shoulder: standing on floor
- knee : standing/supine with leg resting on couch.
- Elbow: seated with hand propped on roll cushion.
These are most commonly used position but other alternated position can be used based upon the technique, area of body part, patient and therapist comfort accessibility of the affected area and ergonomic considerations for the physiotherapist.
Basic Taping Terms:
- Anchors : initial strips of tape which provide the base or foundation of the technique, all other strips of tape should either start or finish on the anchors.
- Finishing/Cover tape strips : applied to hold the functional strips in place- can be placed right over top of the initial anchors.
Functional Strips:
- Check Reins : prevent a segment or joint from moving into a painful ROM by taping it to an adjacent uninjured structure to stabilize the injury yet allow for some degree of movement ( x – taping )
- Spirals : continuous strips of tape that wrap around the limbs between upper and lower anchors like stripes on a candy cane.
- Spica : continuous wrap of tape that encircles a limb/segment and secures it to a more stable/proximal body part, forming a figure of 8.
- Stirrup : a vertical ” U ” piece of tape o support eigher side of the ankle. it is a continuous strip of tape that runs down from the leg anchor, loops under the heel and back up the opposite side of the leg, ending at the other anchor.
- Reinforcing strips : superimposed strips of tape applied to restrict movement and add tensile strength to the application.
Which are Common Rule and Guidelines in Taping ?
- There are no ” rules” only guidelines.
- All type of taping have very specific step by step instructions regarding position of muscle / joint, application of tape and direction of pull.
- Taping technique utilize knowledge of biomechanics, anatomy, clinical conditions and tape for what you want to accomplish.
- then check to see if the application accomplished your goal.
Guidelines in Taping :
#Pre-taping assessment :
- Has the injury been thoroughly assessed ?
- How did the injury occurred ?
- What structures were damaged ?
- What tissues need protection and support ?
- What movement must be restricted ?
- Is the injury acute or chronic ?
- is immobilization necessary at this stage ?
- what would be the suitable technique ?
- Do you have required materials at hand ?
#How to Prepare area to be tapped ?
- wash, dry and shave/trim ( no hair) the skin in a downward direction.
- Remove oils/cosmetics for better adhesion.
- Cover broken lesions before taping.
- Check if the athlete/patient is allergic to taping.
- Apply under wrap for sensitive skin.
#Which Position is Best For Taping ?
- Have the patient/athlete and therapist in comfortable position, e.g. couch at an optimal working height, to avoid fatigue.
- Have the full attention of patient/athlete.
- Place the joint in a functional position, with minimum stress on the injured structure.
- Ensure that the ligament are in the shortened position.
#Care Taken During Application of Tape :
- Use the correct type, width and amount of tape for the application.
- Apply tape to skin which is at room temperature.
- Begin with anchors.
- Overlap successive strips by half to prevent slippage and gapping.
- Apply each strip with a particular purpose in mind.
- Apply tape smoothly and firmly.
- Flow with the shape of the limb.
- Avoid pressure points, wrinkles and creases to prevent blisters/lacerations.
- Apply strips of tape in a sequential order.
- Explain the function of the tape to patient and how it should feel.
- On completion check if the patient is comfortable.
#Post-Taping assessment Care :
Check for patient comfort, as well as signs of impaired circulation.
- Numbness
- Tingling
- Dislocation
- Loss of Pulse
- Loss of Function
#How To Remove Tape ?
” Never rip tape off Directly. “
- Remove the tape carefully by peeling it back on itself, and pushing the skin away from the tape.
- Pull the tape carefully along the axis of the limb.
- Check the skin for damage and apply lotion to restore skin moisture.
- Tape should not be left on for more than 24 hrs, unless using hypo-allegenic tape which may be left on longer.
- Leaving tape on for too long a period may lead to skin breakdown.
RIGID TAPING APPLICATION :
#PFPS Taping :
When the patella does not track properly in the trochlear groove, it can lead to patello-femoral pain and dysfunction.
A patella can track ineffectively for a number of reasons :
- VMO Muscle weakness
- Muscle imbalance
- Structural deviation etc.
Most common treatment technique for the treatment of patello-femoral ( anterior knee ) pain is patellar taping, also known as PFPS taping or McConnell taping. McConnell taping was first prescribed in 1984 by Jenny McConnell, a physiotherapist in Australia.
There are several taping techniques that address different tracking problems. The original intent of performing patellar taping was to alter the tilt and position of the patella, most commonly by shifting a laterally displaced patella more medially to correct
The PFPS taping technique can help maintain the patella in alignment. This can help reestablish normal movement, decrease pain and allow the muscles that hold the patella in place to redevelop properly.
McConnell would correct this by first applying a protective tape, then applying a piece of thick rigid tape ( usually called Leukotape ) placed adjacent to the knee, then pulling the patella into position.
while wearing the tape, most patients feels immediate pain relief and they are encouraged to exercise with the tape in place to provide the muscles with the appropriate feedback to correct the problem.
#How to apply PFPS taping ?
- Apply two strips of rigid tape from below the inferior angle of the scapula, over the shoulder ( avoiding the AC joint) to the sub pectoral region.
- Apply one to two incomplete anchors to humerus distal to the deltoid insertion, overlapping by two-thirds.
- Attach two support strips from the anterior and posterior aspects of the humeral anchors. Passing, in a superio-posterior and superio-anterior direction, attach to the posterior and anterior aspects of the thoracic anchors respectively.
- Repeat with two more support strips, overlapping the previous strips by two-thirds.
- Reapply the original thoracic and humeral anchors respectively.
- Apply two locking anchors to the thorax, to ensure the thoracic tapes do not lift during arm elevation.
#Ankle Sprain Taping :
Indication : Inversion trauma of the ankle resulting in positional fault of inferior tibio-fibular joint.
Function : Corrects the positional fault of the fibula by repositioning it back on the tibia.
Position : Ankle in neutral position (sometimes relative planter flexion). patient lying supine on plinth with hip and knee in flexion, foot resting on plinth.
Steps for tape Application :
- Aim of taping is to glide fibula posterio-laterally.
- Apply and maintain glide to the distal fibula.
- Tape starts anteriolaterally over the distal end of the fibula and lies obliquely.
- Direct the tape in a posteriosuperior direction, making sure to lay the tape over the Achilles to end anteriomedially on the tibia.
#Lumbar Spine support taping :
Indication : Lumbar spine dysfunction and pain. Avoidance of painful lumbar flexion/Postures.
Function : Maintains neutral to extended lumbar lordosis. Avoids pain provoking positions and facilitates a more Upright (Extended) posture.
Position : Patient lying prone or may be taped in sitting or standing.
Steps For Taping :
- Spine in Neutral to Slightly extended position with lumbar curvatures maintained.
- Anchor strips are applied to the top and bottom of the area to be tapped.
- An X is formed across the lumbar region from the top anchor to the bottom anchor,with the centre of the X overlying L2-3 region. Repeat this X with two more strips overlapping the previous strips by half.
- The top and bottom of the X are then re-achored.
#Scapular Repositioning Taping :
Indication : Instability, impingement, tendinitis, malposition/dyskinesis.
Function : To reposition the scapula to a neutral posture and optimize the length-tension relationship of the rhomboids, lower trapezius, serratus anterior and other scapular muscles.
Position : Scapula in retracted, depressed position.
Steps of Taping :
- Course of tape from the coracoid process anteriorly, across the lateral aspect of the acromion to a point just lateral to the T7 spinous process.
- Apply the tape with a firm pressure on the anterior aspect of shoulder, in a posterio-lateral direction.
- Complete the technique by adhering the end of the tape lateral to T-7 spinous process, compressing the medial border of the scapula in the process.
#Trapezius Inhibition taping :
Indication : Variety of neck and shoulder conditions that result in, or are exacerbated by trapezius spasm/hitching of shoulder.
Function : To bunch the upper trapezius fibres laterally, there by reducing their ability to activate, thus in turn resulting in reduced hitching.
Position : Neutral scapular posture.
Steps For taping :
- Course of tape : from mid-clavicle to a point at the level of T7, Medial to the medial border of the scapula.
- Apply the tape with a posterio-inferior force, to bunch the upper trapezius fiber, from mid-clavicular region anteriorly till the level of T7 posteriorly.
- Continue this pressure as the rest of the tape is laid down.
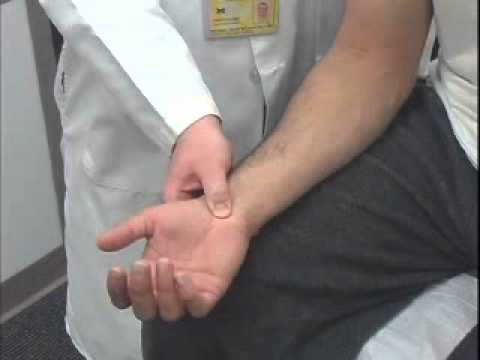
#Thumb Spica taping :
Indication : Gamekeepers thumb / UCL Sprain (MCP).(UCL-Ulnar collateral ligament)
Function : To provide support and stability to the first metacarpophalangeal joint of the hand.
Position : Wrist -slight extension & radial deviation.
Thumb-neutral/resting position.
Steps of Taping :
- Apply an anchor strip of adhesive tape around the wrist. Start at the ulnar condyle, cross the dorsal aspect of the distal forearm and encircle the wrist.
- Apply the first support strip for the first metacarpophalangeal joint. starting at the ulnar condyle,cross the dorsum of the hand, cover the lateral joint line, encircle the thumb, procced across the palmer aspect of the hand and finish at the ulnar condyle.
- Apply two more support strips overlapping the previous strips by one third. To help hold this procedure in place, apply a final anchor strip around the wrist.
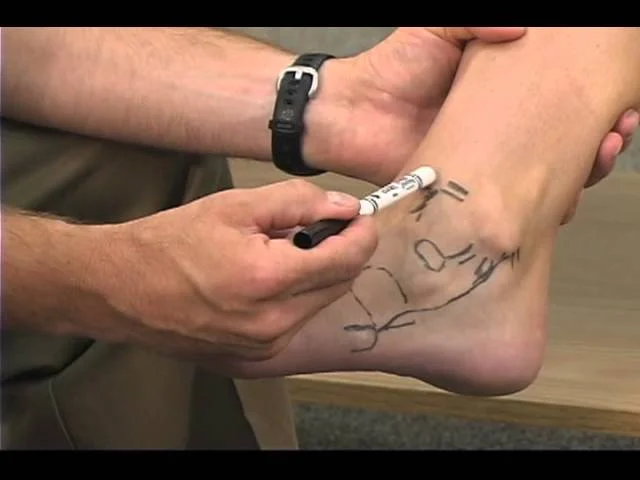
#Heel pain taping :
Indication : Heel pain, chronic planter fascitis, retro calcaneal bursitis.when a mobilization with movement (MWM) of the Calcaneum has restored pain free function.
Function : Alters the position of Calcaneum in relation to talus, thus correcting a positional fault/altering the line of stress.
Position : Ankle in neutral position. patient lying supine on plinth, with the ankle & foot projected out.
Steps of Taping :
- Calcaneum taped into internal rotation.
- The initial strip of tape is adhered around the back of the heel on the lateral aspect.
- The therapist glides the calcaneum into internal rotation.
- The tape is applied obliquely and medially over the Calcaneum, ending on the dorsum of foot (lateral aspect).
- A second tape is placed over the first for reinforcement.
#Patello-femoral Fat pad syndrome taping :
Indication : Patello-femoral Fat pad syndrome also called Hoffa’s syndrome.
Objective : To unload the fat pad.
The increase space-reduce impingement of the fat pad.
Position : Knee in slight flexion(20-30degree), resting on a couch/pillow.
Steps for taping :
- Apply one tape over superior border of patella, push down to tilt inferior patella upwards.
- Apply next tape from tibial tuberosity laterally up to superior tape. As pull up scoop soft tissue medially.
- Apply next strip of tape from tibial tuberosity medially up to superior tape. As pull up scoop soft tissue medially.
- Knee will now look puffy when in extension.
#Posture Taping :
Indication : Upper Cross Syndrome.
Muscle imbalance.
Postural dysfunction etc.
Objective : Postural correction etc.
Position : Scapular setting ( Retraction and Depression )
Steps for taping :
Step – 1 :
Ask patient to extend their thoracic spine.
Place protective tape from T1 to T7 followed by rigid tape -para-spinal.
Step-2 :
Ask patient to retract and depress their scapula(scapular setting)
Apply protective tape followed by rigid tape from middle of the scapula spine to T12 diagonally towards spine.
#ACL Taping :
Indication : To stabilize the tibia on the femur and support the anterior cruciate ligament.
- Objective :
- To help stabilize the anterior cruciate ligament.
- To prevent excessive anterior translation of femur on tibia.
- To limit medial/lateral rotation of femur or tibia.
- To relieve stress at the attachment of the patellar tendon on the tibial tubercle.
- To relieve stress at the attachment of the patellar tendon on the tibial tubercle.
Position : The knee is flexed & leg in neutral position.
Steps of Taping :
- Apply two anchors to the lower third of the thigh and one anchor distal to the tibial tubercle.
- Apply the first functional strip starting on the anterolateral aspect of the distal anchor, pass with full tension anteriorly across the tibial tubercle and diagonally upwards to the proximal anchor on the medial side.
- Apply a second strip on the opposite side with the same tension.
- Apply two more strips medially and laterally over the initial strips, superimposed on the inferior tails, and fanning out and overlapping by one half, to attach to the proximal anchor.
- Lock these six strips in place with covering anchors.
#Multi-directional Instability taping :
Indication : Multi-directional shoulder instability.
Function : Taping stabilizes the head of humerus in the glenoid cavity.
Position : Patient sitting on chair or stool, forearm supported on table at 45degree of abduction.
Steps of Taping :
First Step : 1st piece of tape is anchored at middle deltoid and pulled superiorly to attach to the acromion.
Second step : 2nd tape begins anteriorly on the deltoid and passes diagonally to anchor at the spine of the scapula.
Third step : 3rd tape begins over the posterior deltoid and is anchored on upper trapezius.
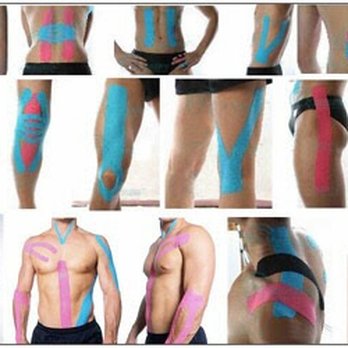
KINESIOLOGICAL TAPING :
- It is a time tested therapeutic taping method which makes use of a uniquely designed elastic tape that enhances muscular, joint and circulatory function.
- The kinesiological tape is a cotton based cloth tape with acrylic glue that allows for ventilation, good adhesion with minimal negative skin reactions.
- This highly specific tape has been used worldwide, in many settings, from chiropractic offices to athletic training rooms, physiotherapy clinic and athletic fields.
It can be applied 24hrs a day, for 3-5 days.
Fundamental Basic :
- Kinesiological taping is based on the science of kinesiology, with a belief that the body’s muscles are responsible for movements of and in the body as well as being in control of other elements, such as circulation of the blood and body temperature.
- As result of this, when muscles fail or are impaired, other parts of the body are necessarily effected, thus putting thier function at risk.
- The principle of kinesiology is to treat the muscles to help the body heal itself naturally.
Unique qualities of the tape :
- Kinesiological tape is 100% cotton, hypoallergenic, latex free, non-restrictive elastic adhesive tape designed to have the same amount of stretch as human skin.
- This tape mimics skin – it is the approximate thickness of the epidermis, and when properly applied, the body will not perceive its weight.
- There is no latex, and the adhesive is 100% acrylic. It is activated by body heat and will become more adherent, the longer it is worn.
- In the manufacturing process, the adhesive is applied to the fibres of the tape in a wave-like pattern to mimic the qualities of fingerprints on the fingerprint. This wave pattern lifts the epidermis and also allows for moisture to escape.
Skin Preparation :
- Skin preparation is important to the application process, since the tape works via the skin.
- The skin should be clean and free of any oil/comsmetics.
- Hair may also need to be clipped or shaved since the application works by skin to tape contact.
Basic Of Application :
- The Practitioner has to be thorough with anatomy in order to practise Kinesiological taping.
- The practitioner must “unlearn” traditional tape application methods, as the techniques used to apply Kinesiological tape are different from traditional tapes. The tape has a paper backing which can be torn, folded back, and removed in different ways, depending on the desired application.
- The tape can be worn for three to five days, and be worn during athletic events as seen in the recent Olympics. The tape comes in several sizes; the most commonly used size is the 2inch width.
- The tape itself can stretch (only longitudinally) approximately 40-60% of its resting length. The tension may be altered when applying to the skin, depending on the desired effect and the technique being used.
How to Apply Kinesiological tape ?
- Measure and cut the tape into the size and shape required.
- Round off the corners at the end of the tape to prevent it from lifting/peeling.
- Remove the paper backing and apply.
- Rub- to activate the adhesive.
#Anchors :
Never stretch ends of the tape and leave between 2 & 3 cm of tape at each end that will remain un-stretched, serving as the anchors.
#Pre-stretch :
- Before the kinesiological tape is applied to the injured area, guide and place the soft tissues into a naturally stretched position :
- This allows for wrinkling or recoil, so the kinesiological tape will create convolutions on the skin, which aid in normal blood and lymphatic flow.
- Applying in a stretched position also allows full range of motion for the patient.
#Mechanism of Action:
Potential skin lifting effects of kinesiological tape :
- Creates convolutions.
- Sub-dermal vacuum.
- Tissue decompression.
- Promoting fluid flow.
Recoil effect: when tape is applied at or below 50% of available tension, the tape will recoil or pull back toward the anchor, thus potentially shortening or lengthening the tissues.
Conditions, it can be used for ? : AC joint dysfunction, bicipital tendinitis, tennis elbow, carpal tunnel syndrome, de Quervain’s Syndrome, Ankle sprain etc.
#Preventive / Curative Efects:
- The taping technique can be preventative by supporting ligament, muscles and stabilizing soft tissues or rehabilitative to allow athletes to continue training and completing as injuries heal.
- The tape may be used with differing degrees of stretch depending on the desired effect of the taping e.g. preventive, supportive or curative.
#Main Key Benefits (USP) :
- Kinesiological tape is water-resistant and may be utilized even when swimming, showering or with hydrotherapy.
- Kinesiological tape is among the very few therapeutic tape, that ” doesn’t restrict mobility”
#Functions :
The tape has five major functions :
- Skin : Relieve pain or pressure and improve proprioception.
- Circulatory/Lymph : Remove congestion of lymphatic fluid. Promote natural fluid flow between the layers of tissue.
- Fascia : Return homeostasis to the fascial matrix.
- Muscle : Restore or promote normal muscle function.
- Joint : Improve joint bio-mechanics and alignment.
#Precautions/Contraindications :
- People currently under cancer treatment
- Pins/needles/numbness under tape.
- Skin irritation, open wounds, Infection, Cellulites.
- Fragile or sensitive skin(Mainly Old age people and small child)
- Never blow dry the tape- it will burn you ( if taped on the neck in particular)
#Kinesiological Tape and skin :
- The skin is the largest organ of the body and is filled with many different receptors that feed information to our brain.
- It is through sensory receptors that we are able to take information from our environments, process it and have smooth co-ordinated movements.
- Kinesiological taping is one of the clinical interventions that can be used to stimulate our sensory system.
#Kinesiological Tape tensioning :
- Suitable tape tension during its application is assigned by the therapist, depending on the purpose of the therapy.
- In kinesiological taping techniques various degress of tension are used, which are marked descriptively and by means of their maximum extension percentages.
LESS IS BETTER PRINCIPLE :
During tape tensioning the principle of ” less is better” is respected and the greater the tension of the tape is, the longer the anchors should be, to break the tension and reduce the risk of skin irritation.
KINESIOLOGICAL TAPE TENSIONING :
| The Degree of tension | Designation in % | Effect / function |
| None | 0 | Anchors |
| Very Light | 15 | Inhibition of the myofascia |
| Light | 25 | Facilitates the Myofascia |
| Moderate | 50 | Corrective techniques |
| Severe | 75 | Tendon,Ligament based technique. |
| Full | 100 | Positional corrections and ligament |
| Paper off tension | 10 | Lymph |
Easy way to think about how you will be taping :
M – Move ( 10-25%)
R – Repair ( 25-50%)
A – Adapt ( 50%)
#The Cuts :
The Kinesiological tape can be cut in different shapes/patterns based on :

- Location of the treatment area.
- Muscle Shape.
- The desired effect.
” I ” shape Cuts :

- Most effective following acute injuries.
- The tension concentrated within therapeutic zone directly over the target tissue.
- Utilized more to inhibit of facilitate or as corrective taping.
” Y ” Shape Cuts :

- Most effective following chronic injuries.
- The tension scattered alongside the two strips/tails over target tissue and between those strips.
- Utilized more to surround muscle belly than to directly cover it.
- Can be used to inhibit or facilitate or as corrective taping.
” X ” Shape taping :

- Works on a small space – Rhomboids, Elbow injury, Fascia.
- The tension focused directly over the target tissue and scattered alongside the branches at each end.
- Utilized often for 2 joint muscles with max tension on muscle belly.
- When a muscle’s origin & insertion might change depending upon the movement pattern of the joint.
” Fan ” Shape taping :

- The tension scattered over the target tissue alongside many branches.
- Utilized for lymphatic correction.
- Paper-off tension.
- Cut with 4-6 tails, depending on surface area.
” Web ” Shape taping :

- Used as a modified “fan”.
- Utilized for lymphatic correction, eodema or space technique.
- 10-20% stretch.
- Cut with 4-6 folds, depending on the surface area.
- Place the joint in as much of stretched position (at least mid joint position).
” Donut ” Shape taping :

- The center cut-out of donut hole is placed directly over the area to be treated.
- It is primarily used for oedema/pain in a focal or spot specific area or to increase space in a particular region.
- It is sometimes used when the application requires passing a finger/toe through the tape.
KINESIOLOGICAL TAPING TECHNIQUE :
#Basic Technique :
- Therapeutic Muscular technique.
- Therapeutic Ligamentous technique.
#Corrective technique :
- Therapeutic lymphatic drainage technique.
- Therapeutic space technique.
- Therapeutic Positional correction.
- Therapeutic Musculo-fascial technique.
- Therapeutic Functional technique.
#Therapeutic Muscular technique :
Indications : Hyper tonus/hypotonus.
Pain/myalgia.
Impaired function.
Objective : Activate the muscle.
Relax/Inhibit the muscle.
There are two basic application directions for treatment of muscles.
#Therapeutic Ligamentous technique :
Indications : Tendon and Ligament injuries.
Objective : Support
Pain relief.
Improve resilience.
This technique is used to create increased stimulation over a ligament or tendon to stimulate the mechano-receptors.
Rule Of Thumb : ” Maximum stretching of the tape, pre-taping” (except anchors)
e.g. MCL taping : ” I ” strip is fully stretched in the middle, and then applied with each end being anchored with no stretch.
#CORRECTIVE TECHNIQUE :
- There are 5 corrective technique that serve specific purpose/function in the treatment of various injuries/ailments. These corrective technique can be integrated along with the basic techniques for best results.
- The application methods may overlap a bit and look similar, but should be determined based on the patient’s condition and the best method to treat an area.
- Proper application will blend several elements of the kinesiological taping method, with each element having a specific function.
#Therapeutic Lymphatic drainage technique :
- This technique assists the removal of edema by directing or ” channeling”the fluid proximally.
- Directional pull of the tape guides the exudate to less congested areas, through superficial lymphatic pathways.
- The tape application, via a “fan” strip, is used to lift the skin superficially.
Application :
- In lymphoedema Kinesiological tape is usually applied using the fan cut technique.
- This involves cutting the tape into 4,5 or sometimes 6 strips with a base.
- The base is applied without tension towards the lymph node to whichthe lymphatic drainage is being directed.
- With the affected area in a slightly stretched position, the fans are directed distally, with minimal stretch(0-15%, paper-off tension).( If a DVT is suspected, taping the extremity would be contraindicated)
#Therapeutic Musculofascial technique :
- Application of Kinesiological tape in the musculofascial method involves using light to moderate tension(25-50%)
- Generally, for fascia correction a “Y” strip of Kinesiological tape is used.
- The base is applied with no tension, then by applying light tension the tape is gently stretched in the direction fascia correction is desired.
- The practitioner “oscillates” or “vibrates” the tape during application.
- This corrective technique is used to gather fascial tissue in order to position it in a desired position and alignment.
- It can hold or assist the fascia from unwinding.
#Therapeutic Positional Correction :
- The purpose of this technique is to reposition or return structures to their normal position, by positioning of the structure to stimulate a sensation which results in the body’s adaptation to the stimulus.
- Moderate to severe tension is applied to the tape (50-70%).
- Functional support can be maintained without losing active range of motion.
- This technique can be used to either place the tissue in the desired position, or provide a blocking action to limit joint movement.
- The method uses either an “i” strip with tension in the middle, or a “Y” strip with the taped areas under the tails to be pulled towards the base.
#Therapeutic space correction :
- This technique requires applying the Kinesiological tape directly over an area of pain, inflammation or swelling.
- The tape decreases pressure by the lifting of the skin directly over treatment area.
- The ” I ” strip ” Y ” strip, web, or “Donut” hole can accomplish this technique.
( Space correction creates the effect of elevation and returning over the target tissue. The resulting area experiences reduced pressure, receptor’s irritation, thereby reducing pain. In addition, it improves blood circulation and accelerates the removal of inflammation pleural. This technique is characterized by acting with high speed.)
#Therapeutic functional taping :
- This is used to create a sensory stimulation (via tape) to either assist or limit a motion.
- Put the joint in the desired assisted position first, then using a ” I ” strip apply the tape with moderate to severe tension.
- Rule of Thumb : Tension on during undesired motion and off during desired motion.
Example 1 – Limiting wrist flexion ( Radial tunnel syndrome)
- Measure & cut an ” I ” strip with two donut holes at one end of tape.
- place the middle & ring fingers through the holes.
- place the wrist in extension.
- Apply the distal anchor with no tension.
- Apply 40% to 50% tension in the middle making a bridge & apply the proximal anchor.
- Move the wrist towards flexion while rubbing on the tape.
Example-2 : Limiting planter flexion.
- Measure & cut an I strip with two donut holes at one end of tape.
- place the 2nd & 3rd toe through the holes to apply tape on the volar surface.
- Place the ankle in dorsiflexion.
- Apply the distal anchor with no tension.
- Apply 40% to 50% tension in the middle making a bridge & apply the proximal anchor.
- Move the ankle towards planter flexion while rubbing on the tape.
KINESIOLOGICAL TAPING APPLICATION :
#Deltoid Application :
Deltoid muscle : composed of anterior, middle and posterior fibers.
Objective : inhibition/activation
Clinical application : shoulder injuries; post injury weakness, rotator cuff injury etc.
Procedure :
- Measure and cut ” Y “.
- 2 strips : Anterior & posterior.
- Adhere anchor of Y strip at deltoid tuberosity, and activate the glue.
Posterior strip :
Position : place the arm in horizontal adduction, i.e, across the chest.
Follow the posterior deltoid, apply the posterior strip and activate the glue.
Anterior strip :
Position : shoulder in extension & internal rotation.
Follow the anterior deltoid, apply the anterior strip, and activate the glue.
#Upper trapezius application :
Objective : Inhibition- insertion to origin(I-O)
Clinical implications : trapezius spasm ( most common ), postural problems, chronic neck pain etc.
Procedure-
- Measure & cut ” I” strip.
- Adhere the anchor just below the acromion process & activate the glue.
- Position : shoulder depression & neck opposite side lateral flexion.
- Follow the course of the upper trapezius muscle and apply the tape up to the origin ( cervical region ).
- Activate the glue.
#Lower Back application :
Objective : inhibition/support
Clinical implications : lumbago, nonspecific low back pain, paraspinal muscle spasm.
Procedure :
- Measure and cut two ” I ” strips.
- Position : patient standing, or high sitting.
- Patient bends forwards from the waist.
- Apply two vertical strips with anchors on either side of the side of the top of the buttock cleft (PSIS) and apply upwards on either side of the spine till mid thoracic region.
- You can also supply a horizontal strip across the most painful area with a 50% stretch ( for stability/support)
#Quadriceps application :
Objective : activation, Facilitation.
Clinical implications : Post-injury weakness/wasting, Patella tracking dysfunction, preparation for sport.
Procedure :
- Measure and cut a modified ” Y ” strip.
- Position : Patient in side lying, with affected leg up.
- Adhere the anchor at the origin of quadriceps.
- Gradually extend hip and flex the knee, placing the quadriceps in a stretched position.
- Apply the tape distally up to just before the knee joint. Apply the two tails around the patella.Activate the adhesive.
#Plantarfascitis application :
Objective : support/inhibition
Clinical implications : planter fascitis, heel pain, Pes planus.
Procedure : Measure and cut a ” I ” or ” fan ” strip.
Position : patient relaxed, supine lying. Foot in dorsi flexion.Adhere the anchor at the base of heel. Apply the tape towards the toes with no/minimal stretch.
Add-on arch support :
Measure and cut ” I ” strip. Anchor this strip at the outside (dorsum) top edge of the foot. Apply the tape from outside to inside to support the arch, pulling up a little at the end (medially). Lay down the end with no tension on the top of the foot.
#Tennis Elbow Taping :
Objective :
- Inhibition/Activation of the extensor muscles.
- Unloading the common extensor origin.
Clinical Application :
- Tennis Elbow
- Overload of the common extensor muscles.
- Prepararation for sport.
Steps for tape application :
- Measure and cut a Y strip of tape.
- Adhere the anchor of the Y strip just distal to the wrist.
- Position : elobow extension, forearm pronation & wrist flexion, placing the extensor muscles in full stretch.
- Apply both tails of the Y strip apart along the muscle till just proximal to the common extensor origin.
- Anchor both ends of the Y strip with no stretch.
Add-on correction technique :
- Apply a fascia technique a little below the common extensor origin ( Y strip).
- Apply the base of the short Y strip just below the common extensor origin on the dorsal aspect.
- Apply the 2 tails across the pain full area via fascia technique.
- Anchor the ends with no stretch.
- Activate the adhesive.
#De’quiveran’s Tenosynovitis (DQ):
Objective : Inhibit/support
Rest/unload.
Clinical implications :
- Dequiveran’s Disease
- RSI
- Preparation for sport.
Application :
- Measure and cut a “I” strip.
- Position : Wrist in ulnar deviation and slight flexion.
- Thumb in flexion and adduction.
- Anchor the long “i” strip over the tip of the thumb and apply the tape along the dorsum of the thumb, continuing along the lateral aspect of the forearm to the course of the muscles.
Add-on correction technique :
Fascia technique : (short Y strip)
Anchor the base of “Y” tape at the volar aspect (radial side) of the wrist.
Apply one tail around the wrist and another tail over the lower forearm.
Anchor the ends with no stretch.
#Taping for Trigger points :
- Apply 3-4 strip of tape across the trigger point in an overlapping manner.
- For acute trigger points : no stretch.
- For Chronic trigger points : 30-50% stretch.
- Anchor the ends of tape with no stretch.
#Rhomboids Application :
Objective : Activation/support.
Clinical Implications :
- Inter-scapular pain.
- Scapular dyskinesis.
- Shoulder movement impairment.
Steps for taping :
- Measure and cut an “X” strip of tape.
- Position : shoulder horizontally adducted across the front of the body, thumb reaching toward opposite hip (fully stretched position).
- Apply the center portion of the tape directly over the muscle belly(sp T2-T5 to medial border of scapula) with mild stretch.
- One at a time, apply the tails around the boundaries of the muscle with no stretch.
- Rub, to activate the adhesive.
#Biceps Application :
Objective : Activation/Inhibition.
Clinical implication :
- Bicipital Tendinitis
- Biceps Muscle Strain
- Overuse Injury/Spasm
- Preparation for sport.
Steps for taping :
- Measure & cut a “Y” strip.
- Position : Biceps in full stretch (shoulder in External rotation and extension; elbow extension, forearm supination)
- Apply the the base of the “Y” strip at the radial head with no tension.
- Apply each tail with paper off tension surrounding the biceps muscle.
- Anchor the ends at the coracoid process with no stretch.
- Medial tail : apply with shoulder in neutral position.
- Lateral tail : apply with shoulder in lateral rotation.
Add-on for Bicipital tendinitis :
- Measure and cut a short “Y” strip.
- Position : Patient’s shoulder in extension and external rotation.
- Apply the base without tension medial to the Bicipital groove.
- Apply the tails with 25% tension in the transverse direction directing the fascia laterally.
- Anchor the ends with no stretch.
#Hamstrings Taping Application :
Hamstrings Muscle Group : composed of biceps femoris, semi-tendinosis & semimembranosis.
Objective : Activation/Inhibition.
Clinical implications :
- Overuse injuries.
- Hamstring strain.
- Preparation for sport(Running).
#Steps of Taping :
- Measure and cut a “Y” strip.
- Apply the anchor of the Y strip just below the ischial tuberosity.
- Position : Hamstrings in a stretched position.
- For the hamstrings, this means having the knee extended and hip flexed.
This can be done by having the patient lay on the plinth face down with the affected leg off the table and the foot on the floor with the leg as straight as the patient can tolerate.
Alternate Position : Lying on your back using a belt/strap to pull the leg up).
- Apply the 2 tails of the Kinesiological tape-
- Medial tail covering the medial hamstrings & ending over the medial joint line of the knee.
- Lateral tail covering the lateral hamstrings & ending over the head of fibula.
- Rub to activate the adhesive.
Add-on correction technique :
Strain :
- Measure and cut a short “i” strip.
- Stretch the tape up to 25-30% in the middle & apply across the most painful area, laying the ends of the tape with no stretch.
Overuse :
- Measure and cut a “Y” strip.
- Apply the “Y’ strip across the muscle belly using musculofascial technique.
#Pectoralis major Taping application :
Objective : Inhibition/Relaxation.
Clinical implication :
- Tightness.
- Overuse.
- Postural dysfunctions(muscle imbalance).
Steps for tapping :
- Measure and cut a piece of “Y” tape.
- Position : supine lying, arm out of the couch, with shoulder in extension, external rotation and abduction, placing the muscle in full stretch.
- Apply the base of “Y” strip on the lateral aspect of shoulder and spread two tails towards the chest with minimal stretch, as follows-
- 1st tail : clavicular fibers.
- 2nd tail : sternal fibers.
- Rub to activate the adhesive.
#Pectoralis minor taping :
Objective : Inhibit/Relax.
Clinical implications :
- Overuse.
- Postural dysfunctions(muscle imbalance).
- Sick scapula syndrome.
Steps of taping :
- Measure and cut a “Y” strip.
- Apply the base of the “Y” strip at the coracoid process.
- Position : Instruct patient to bring scapula/shoulder blades together(retraction & depression of scapula), thus placing the pectoralis minor in a stretched position.
- Apply the tails along the muscle up to ribs 3-5 with minimal stretch.
#Shin splint application :
Objective : inhibit/support/unload.
Clinical implications :
- Shin splint.
- Overuse injury.
- Soreness.
- RSI.
Taping Application :
- “i” Strip-therapeutic muscular technique for tibialis anterior(inhibition).
- Measure & cut a “i” strip.
- Apply the anchor on the sole of the foot medially.
- Position : knee flexion, ankle planter flexion & eversion.
- Apply the tape with minimal stretch over the dorsum of the feet, continuing on the anterior aspect of the leg along the course of the tibialis anterior muscle.
- Anchor the end of the tape just below the knee with no stretch.
“Y” Strip- Fascia technique :
- Measure & cut a small “Y” strip and apply on the shin at the area of maximum soreness/tenderness.
- Anchor the base of the “Y” strip on the medial aspect of the shin.
- Lay the tails of the “Y” strip across the shin via therapeutic musculofascial technique.
- Anchor the ends of the tails with no stretch.
#Neck Pain Taping :
Objective : support/rest.
Clinical Implications :
- Nonspecific neck pain.
- Paraspinal muscle spasm.
- Sprain.
- Postural dysfunctions.
Taping Application :
- Measure and cut 2 strips of “i” tape.
- Anchor the strips of tape at the sub-occipital region, just below the hairline.
- Position : Neck in forward flexion- muscle in stretch position.
- Apply the two “i” strips of tape along the paraspinal region up to the mind-thoracic region with minimal stretch.
Add-on correction technique :
- Measure and cut an “i” strip.
- Apply the “i” strip horizontally across the most painful region with 50% stretch.
- Anchor the ends with no stretch.
Related Other physiotherapy Technique Post :


6 Comments