47 Top Cool-Down After Exercise
Introduction
We all know how crucial it is to warm up before working out, but we seldom ever take the time to cool down afterwards. I know that once your workout is over, you have to get back to your to-do list.
Stretching for a few minutes, however, can significantly reduce pain and damage. Additionally, crucial are the proper stretches: The main objective of warming up before a workout is dynamic stretching. However, the most effective way to release muscle tension and promote the body’s healing process is to perform static stretches after working out.
From the top of your head to the soles of your feet, this cool-down stretch method uses static stretches to help you relax. One of the best ways to achieve a good stretch is to warm up your muscles with a cardio or HIIT workout.
When you stretch, it’s important to breathe. It enables the body and mind to relax and helps you to go deeper into each stretch. Typically, after working out, customers are advised to stretch while inhaling deeply and exhaling through their noses. As a result, the body finds it easier to calm the nervous system through breathing. However, if you are experiencing dyspnea following an aerobic session, feel free to breathe normally. Take a breath through your nose and release it through your mouth.
You should conduct cooldown exercises to assist you in recovering from your hard work. Stretching and cool-down exercises lessen the risk of injury, increase blood flow, and lessen the strain on your heart and other muscles.
Before continuing with the usual workouts, you’ll also lower the blood pressure, body temperature, and heart rate to their normal levels.
Doing cooldown exercises can help you recuperate from your hard labor. In addition to increasing blood flow and reducing the pressure on your heart and other muscles, stretching and cool-down exercises also reduce the chance of injury.
Before starting your regular exercise routine, you’ll also reduce your body temperature, heart rate, and blood pressure to their
After the training, take at least 10 minutes to cool down. Continue reading to learn about some of the more successful strategies. Now you can create your own healing and relaxation program by combining the exercises that you find most appealing.
What stretches and exercises make the finest cool-downs?
There is no definitive list of the best things to do to cool down after working out. Static stretches and five to ten minutes of lower-intensity exercise, however, should make up an effective cool-down routine. After running, you can start your cooldown by transitioning from running to a brisk walk or mild jog. After that, you can try static stretches.
Light cardiovascular activity keeps your blood flowing while you progressively lower your workout intensity. The focus of static stretches should be on the muscles you use when working out. For example, you should focus on your quadriceps, hamstrings, and glutes after riding. After engaging in upper-body strength training, it’s crucial to stretch your arms, shoulders, and back.
Exercises to Cool Down
Shoulders cross-body stretch
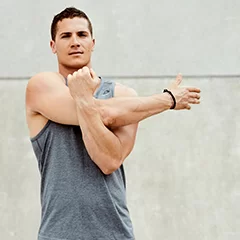
Stretching the shoulders after upper-body activities is essential since they have the greatest range of motion of any body part. You may have less tension and muscular soreness if you stretch your shoulders. They may help you relax by relieving stress and tension after working out.
How to carry out: Maintain a straight back, place your arms at your sides, and place your feet shoulder-width apart.
Lift your right arm in front of you, pointing down with your palm while keeping it parallel to the floor.
Using your left hand, hold your right arm above the elbow. Pull your right arm gently toward your left side to make the stretch more intense.
Overhead triceps stretch
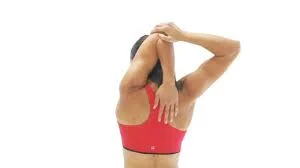
Stretching your triceps can help release and increase the flexibility of the connective tissues in your joints and upper body. Additionally, your range of motion may improve. Here’s how to perform an overhead tricep stretch.
As the name suggests, the overhead triceps stretch targets the triceps on the rear of your upper arm. It’s a great complement to any cooldown workout that follows swimming, rowing, or lifting.
To perform, stand with your shoulders back and your feet hip-width apart.
Bend your right arm until your palm rests in the center of your upper back. Lift your arms above your head and to the sides.
Apply light pressure to your right elbow with your left hand to increase the stretch in your right tricep.
Before switching sides, pause for 20 to 30 seconds.
Butterfly stretch
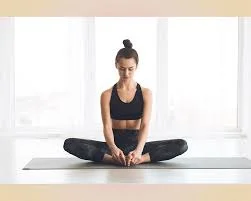
A butterfly stretch helps calm your nervous system and assists your body in readjusting after exercise. Additionally, it can help to loosen up the hip joints and lessen stiffness.3 To add a seated butterfly stretch to your cool-down routine, follow these instructions.
The groin and adductor muscles in your inner thighs are the significant areas of focus of the butterfly stretch. In addition, it helps to open up stiff hips and connect to the lower back.
How to execute: Take a seat with your knees bent and your feet flat on the ground.
Put the soles of your feet together in front of you and let your knees sag out to the sides. You should utilize your hands to preserve the feet together.
Bend toward your feet while keeping your back straight and placing your elbows on the inside of your thighs.
To extend the stretch even more, softly press down with your elbows.
Repeat two to four times after holding for 20 to 30 seconds.
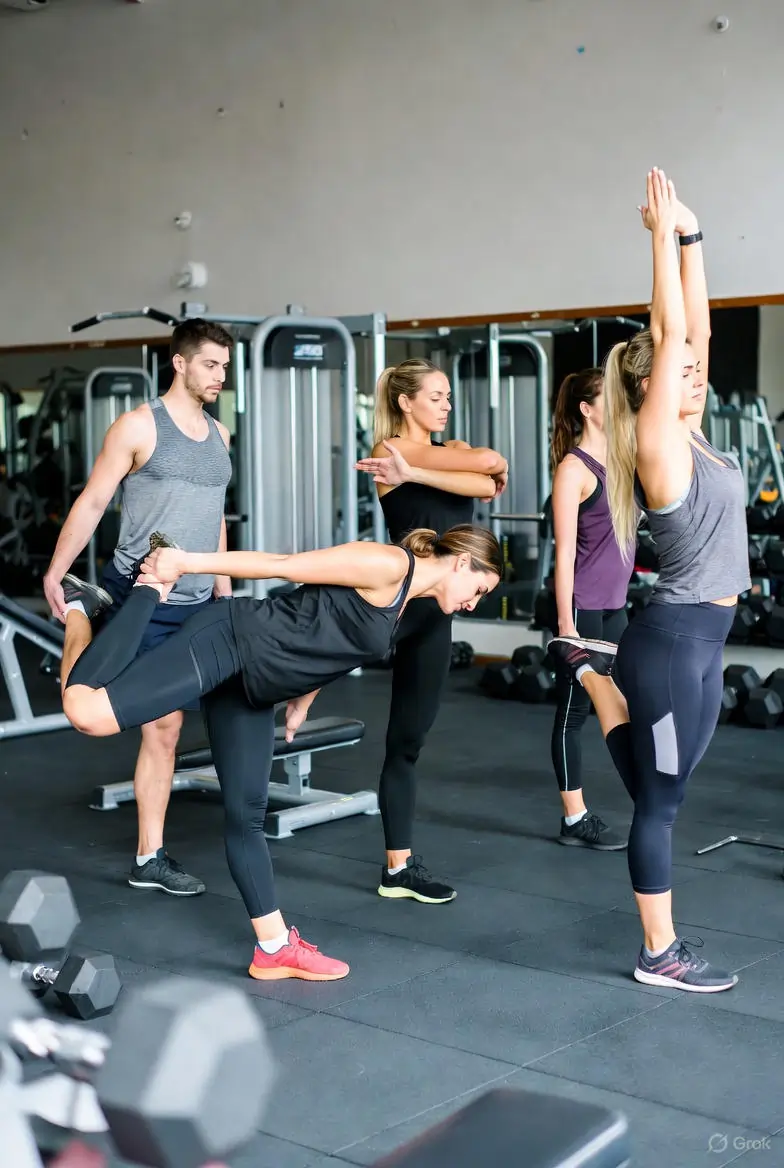
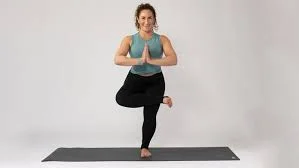
Standing quadriceps stretch
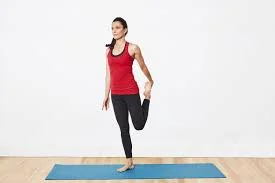
By standing and stretching your quadriceps, you can engage the muscles that run along the front of your leg. It can ease tight muscles and knee pain. It’s also a great method to cool down after a strength training session or a run.
Method: Maintain a straight posture when standing. For support, you can grip the back of a sturdy chair or counter.
Your right knee should be bent such that the heel is facing down.
Pulling the top of your foot gently will increase the stretch and bring your heel closer. Try to maintain a straight line at the knees.
After 20 to 30 seconds of holding, move to the left.
On each side, repeat two to four times.
Standing hamstring stretch
Use the standing hamstring stretch to strengthen the hamstrings in the back of your thighs. The standing hamstring stretch helps alleviate tense muscles, increase flexibility, and reduce knee pain.
Method: Stand behind a yoga block or workout step and keep your posture straight.
On the heel of the step, raise your right leg so that your toes point upward. Straighten your right knee.
Lean toward your right leg, bend at the hips, and lift your arms straight up.
Feel the strain in your right hamstring after maintaining the position for 20 to 30 seconds.
Move to the left.
On each side, repeat two to four times.
Wall calf stretch
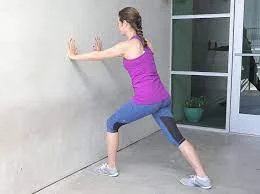
The wall calf stretch, which lengthens the muscles in the rear of the leg, may help release a tight calf. You should be able to relax and relieve stress by stretching your calves. A calf stretch can make your leg muscles feel more relaxed and free after working out. You can now incorporate a standing calf stretch into your cool-down routine.
To perform, stand with your arms by your sides, approximately an arm’s length from a wall, and your feet hip-width apart.
Place your palms shoulder-width apart, flat against the wall at shoulder and chest level.
Step back with your right leg while keeping both feet flat on the floor.
Leaning forward and bending left, you place your weight on your hands.
As you press your right heel down, feel the effort in your body.
Change sides after holding for 20 to 30 seconds.
Calf stretch with a chair

Hold the back of a chair or brace your hands on a wall while keeping one leg straight with the heel on the floor.
Slowly bend the other knee and your elbows while twisting a little forward to stretch your calf.
Then, switch to the other leg and hold for at least 30 seconds.
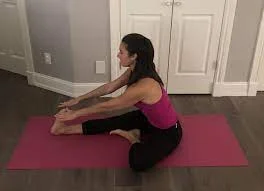
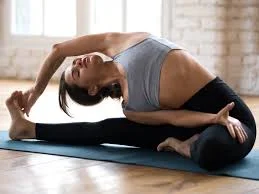
Seated single-leg forward bend
Regular yoga practice will help you maintain the flexibility of your muscles. This is a beginner-friendly pose that allows you to stretch your lower back, calves, and hamstrings while sitting in it. Perhaps it’s a better option for those with balance problems.
Put your heels on the ground and tip your toes upwards as you sit up straight.
Bend your right leg so that the knee is bowed to the side and the heel is pointing toward your groin. Your right foot can be propped up on your left thigh. Keep your left leg straight and angled slightly to the side, as though you were making the letter V.
Breathe in deeply as you raise your arms.
When you tilt your hips toward your left foot, exhale. Depending on how flexible you are, place your hands on your left ankle, toes, or shin.
Change sides after holding for 20 to 30 seconds.
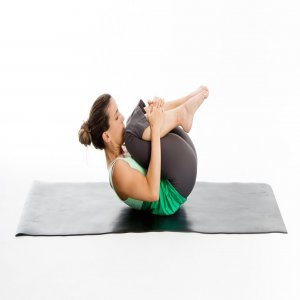
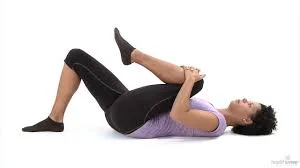
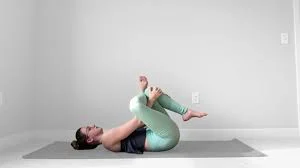
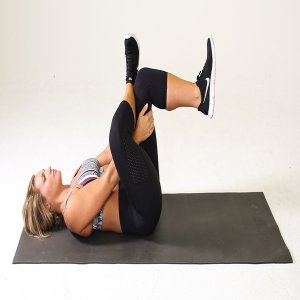
Single knee to chest stretch
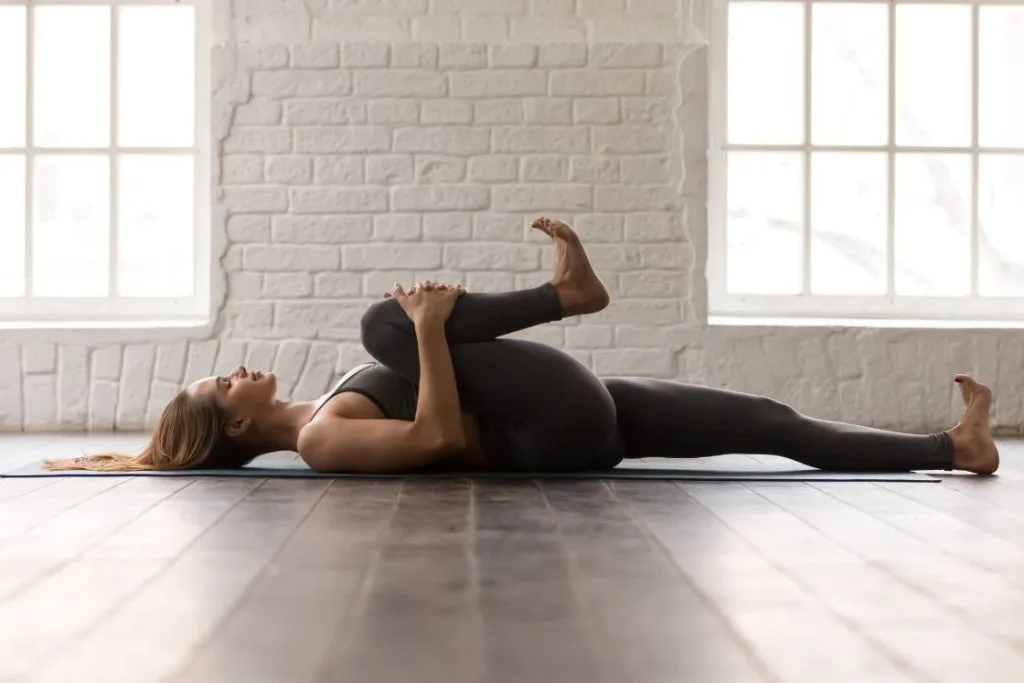
One leg can be brought to the chest to stretch the muscles in the glutes, hips, and back. It may help with low back pain as well as spinal mobility.
Lie flat on your back with your heels on the floor and your legs straight.
Bring your right knee up to your chest and bend it as close as you can. Holding the back of your right leg will help you gradually bring your right knee closer.
Hold for 20 to 30 seconds with your lower back flat against the floor and your left leg straight.
Switch sides.
Complete the individual side two to four times
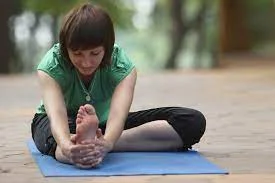
Seated Hamstring Stretches
Your hamstrings are the large muscle groups located in the rear of your thighs. Stretches for the hamstrings can help release tense hips and tendons.2 Here’s how to stand and stretch your hamstrings.
Sit down and stretch your legs to begin.
Place the sole of your right foot against the inside of your knee.
Bending forward at the waist is necessary to reach for the foot of the outstretched leg.
Step forward as much as you can.
Hold for 20 to 30 seconds.
Repeat on the other side.
Compared to a normal workout, perform these actions more slowly and carefully. Breathe deeply as you relax to promote relaxation, ease tension, and help your muscles obtain oxygen.
Brisk walking or jogging
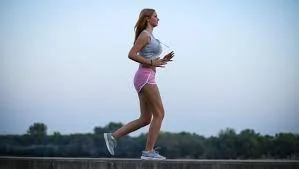
Going for a brisk stroll is one of the easiest ways to relax the body. 3 to 5 minutes of easy or brisk walking should be followed by 3 to 5 minutes of light running.
Stretch for the top body
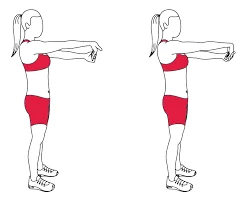
Intertwine your fingers and raise your palms, whether you’re standing or seated.
Raise and retract your hands as much as you can while keeping your back straight.
Put your left arm in front of your right and then stretch your hands up and back.
Seated toe touch
Sitting with one leg out in front of you is recommended. Bend your legs more and raise your arms.
Make a bend at your hips to twist forward.
Try using your hands to make contact with the big toes.
Sit in a toe-touch position for up to one minute.
Pose with Knees to Chest
Your left leg should be bent when you’re lying on your back.
Grasping the front of your right tibia bone with your fingers, bring your right knee close to your chest.
For up to a minute, keep your knees close to your chest.
On the other side, repeat.
Twice or three times a day on each side.
Reclining butterfly pose
Lying on your back with your feet together at the soles, kneel out to the sides.
Hold your arms close to your body or in the air.
Hold the reclining butterfly position for five minutes or more.
Child’s Pose

As you slide back to a sitting position on your heels from the tabletop position, extend your arms in front of you or beside your body.
Take a deep breath and allow your chest to descend into your thighs.
The forehead needs to be on the floor or ground.
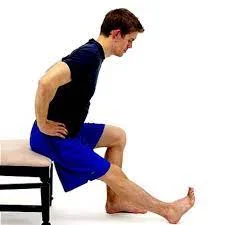
Seated quadriceps stretch
Bend your right knee while seated and move your right heel toward your buttock.
Your back, with your hands behind it.
Don’t stretch one of your knees out to the side; keep them in line with one another.
For 30 seconds, maintain seated quads stretch posture.
On the other side, repeat.
2 to 3 times on the individual side.
Ear-to-shoulder stretch
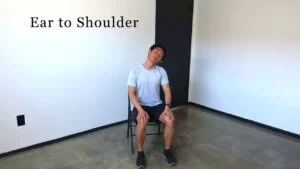
Look straight forward.
Rotate your head to tilt the ear toward your shoulder. Keep your shoulder away from your ear at all times.
Keep the stretch going for 30 seconds.
Remain calm and return to your starting position gradually.
Twice or three times during the day, repeat the ear-to-shoulder stretch while cocking your head to the other side.
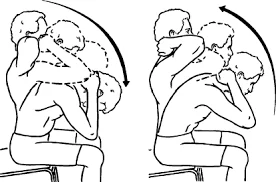
Chin-to-chest stretch

Try the chin tuck to ease tense shoulder and neck muscles:
Behind your head, place your hands gently.
Aim straight ahead.
Bring your chin to your chest.
Keep your chin to chest stretched for 30 seconds. You will feel the strain on the back of your neck.
Remain calm as you return to your starting position gradually.
Do this five times in two sets each day.
Armpit stretch
Reposition your hands on your head and extend your elbows to the side of your body. This time, let your head drop back into your hands. Tilt your chin up and look up at the ceiling with your back slightly bent. After holding for a few breaths, release. Three repetitions, two to three sets
Standing side reach
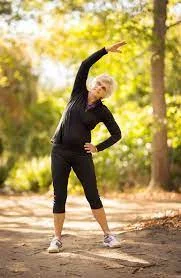
Here’s how to perform the standing side reach so you can relax your shoulders, back, and neck.
Here’s how to do the standing side reach to ease your neck, shoulders, and back.
Your posture should be wider; the easier it is to balance. Place your feet at least hip-width apart and stand erect. With the palm toward your thigh, keep your left hand by your side.
Raise your right hand high over your head and completely extend your right elbow and shoulder. Make sure your fingers are pointing up.
Keeping your right arm elevated, lean to the left. Continue to lean and let go of your left hand when you start to feel a tugging feeling on your right side.
Allow your neck to slide in as you extend.
Five to ten seconds later, stop here and then return to the beginning.
Do the same on the other side.
Continue switching between 10 and 20 repetitions. Do two to three sets of stretching exercises for a lasting release of stress.
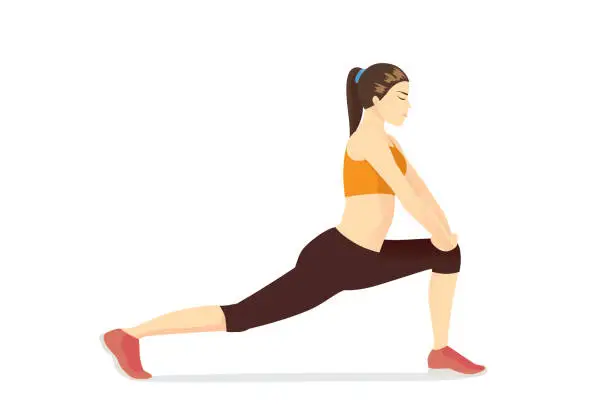
Standing lunge
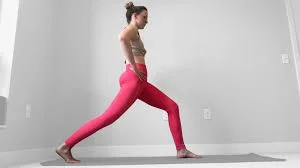
Step your right foot forward while keeping your left leg straight, while standing with your feet as wide as your hips. As you rise to your back feet, bend your right knee so that it is over your ankle. Push the belly region inward toward the spine. After noticing a stretch at the front of your right hip, alter the sides. three in a day
The quadriceps, gluteus, hamstrings, calves, transverse abdominis, obliques, multifidus, and erector spinae were all worked.
Standing lunge with a side reach
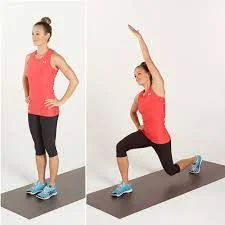
While standing, lunge forward and lift the bent leg’s opposing arm to the ceiling. Bending at the waist, extend your arm to the side of the bent leg. A standing lunge with a side reach lengthens the entire side of the body, from the straight leg behind you to the hip flexor and side waist. Two or three times a day, change the sides after holding for ten counts.
Standing single-leg hamstring stretch
Straighten your leg and flex your right foot as you take a step forward. Tilt forward over the straight right leg and bend your left knee while twisting at the waist. The back of your leg and your calf should feel stretched. Change sides after a few counts of preservation. Twice daily
Standing figure four
Place your feet hip-width apart and stand with the right leg raised. Cross the right ankle over the left thigh and flex the left knee out to the side. Lean back as you approach a chair. There should be equilibrium here. Your right foot should be bent. If you want to make your right thigh a little wider, you can gently press your palms into it. It is also necessary to perform the exercise in Figure 4 while seated. Change sides after holding for a few breaths.Two times a day, three to five reps.
Be mindful of your feet. Since they are usually neglected when it comes to stretching, they also get a workout, especially during cardiac exercise.
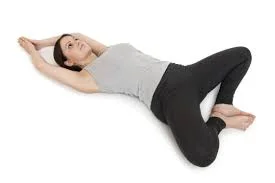
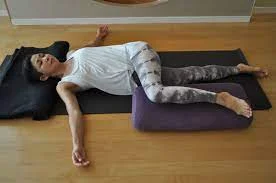
Supine figure four
The figure-four stretch can be used to lengthen your hips and buttocks. Stretching these muscles can improve their range of motion and flexibility. Resting after an exercise session can also help to stabilize your breathing and lower your heart rate. This is an exercise for a figure-four stretch.
The soles of the feet should be flat on the ground as you lie down on your back with your knees bent.
Forming a figure four, move your right ankle to your left knee with your foot’s sole towards the left.
By wrapping one arm around the outside of your bent knee and the other via the center of your figure-four, grasp your hands behind your hamstring. Maintaining your knee from turning inward, slowly pull the bent leg toward your chest using your hands.
Restart on the contrasting side after holding for 20 to 30 seconds. Two sessions in a day
Foot rock
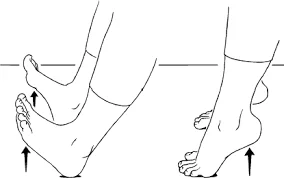
Wear it without shoes, rock onto your heels, and extend your toes while sitting upright. Rock forward on your arches and the soles of your feet after raising your heels off the ground while maintaining your toes planted. A total of ten occasions, two to three daily sessions
Toes splay
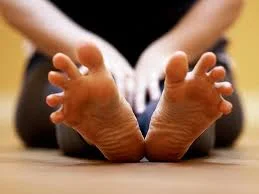
With your feet flat on the floor and your knees bent 90 degrees, sit up straight. Toes should be spread as wide as possible. Hold for 5 seconds. Release. Ten times in total. Two to three sessions per day
Wide leg forward fold
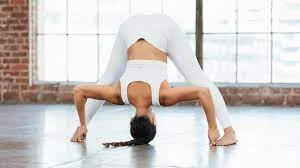
Your hip flexibility will be greatly improved by the wide-leg forward fold. It increases circulation and brings your heart rate back to a resting rhythm when you are standing because it lowers your head below your heart. How to include a wide-leg forward fold in your cool-down exercise is shown here.
Position your feet separately as you stand.
When you inhale, raise your arms straight up toward the ceiling.
As you exhale, bend at the hips and bring your hands down to the ground in the middle of your stance.
Keep your back straight and take a moment to rest your hands on your shins.
If you can, deepen the stretch by maintaining your legs straight,ght not flexing the knee, and placing your hands directly on the floor in the middle of your pose
After holding for 20 to 30 seconds, lift your head. Two sessions on alternate days
Floor scorpion
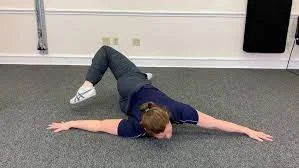
The lower back, hips, and buttocks muscles can be stretched and released with the floor scorpion exercise. It can ease tension and lessen stress. Perform the floor scorpion as follows. Likewise called vrischikasana
How to execute: Lying face down on the floor, forming a T with your arms, and extending your legs straight out along the floor are the first steps.
To keep your spine in a neutral position, softly rest your chin on the mat while looking down.
Preserve your shoulders, upper back, and chest in place by lightly pressing your palms into the ground.
By bending your right knee to a 90-degree angle, you can raise your leg.
The toes on your right foot should be touching the ground outside of your left leg as you move your right foot over your left leg. Your lower back and hips should rotate, but your upper body should stay still.
Before changing sides, maintain for one to two minutes and then revert to a T position.
5 to 10 reps, two to three sessions in a day
90/90 with folding forward
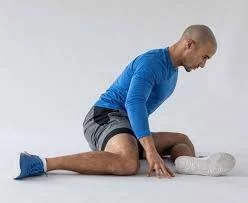
The 90/90 stretch is a fantastic approach to improve hip mobility and lessen pain from strain. After working out, do this while your muscles are still warm to help minimize lactic acid, which can lead to stiffness in the future. Achieving improved hip rotation will also help future workouts go better and lessen lower back pain. Perform a forward fold and 90/90 stretch.
How to execute: Utilize a floor seat.
The sole of your left foot should be pointing right, and your left leg should be bent 90 degrees in front of your torso.
Bend your right leg at a 90-degree angle with your hip rotating inward, placing your shin and ankle on the floor.
Hold your right knee and hip in alignment.
Once both legs are 90 degrees from each other, sit up tall to maintain a straight back.
Bend forward and extend your arms out from your head while keeping equal weight on both hips.
Repeat on the other side after holding for a minute or two.
5 to 7 reps, two sessions in a day
Downward-facing dog
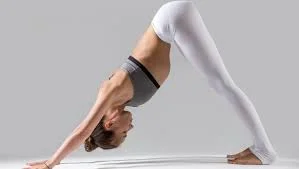
Your body and mind can be brought back into equilibrium by doing the downward dog. Additionally, because it is an inversion, your head is lower than your heart. Your body’s balance is restored, circulation is improved, and stress is eased. Here’s a demonstration of the downward dog.
Start in a tabletop position with your knees under your hips and your hands shoulder-width apart on the floor with the palms facing up.
Spread your fingers broad and fold the toes underneath.
Draw your hips up toward the ceiling by pushing up with your hands and the balls of your feet.
As you raise your knees off the floor, straighten your legs.
Deeply inhale and exhale while stretching your upper back, the backs of your legs, and the soles of your feet. Also, relax your neck and head.
For 30 to 60 seconds, hold.
Head to knee side bend
Put your left foot into your right thigh while seated and stretch your right leg.
Elevate your arms upwards and position your body such that it is side by side with the inner of your right leg.
Fold sideward by hinging at the hips and resting your hands on the ground or your body.
For up to a minute, maintain a head-to-knee side bend posture.
On the other side, repeat.
Standing forward bend
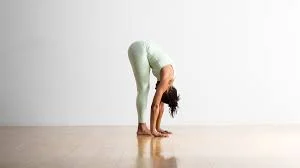
From a standing position, progressively bend forward by hinging at the hips.
Maintaining a small bend in your knees, lengthen your spine, and let your head fall heavily to the floor.
Put your hands on the floor, interlace your hands behind your back, or hold your opposing elbows in front of or behind your thighs.
For 30 seconds, maintain a standing forward bend posture.
You can adjust this stretch if your hands are too high off the floor. Instead of the floor, place your hands on a block or other solid object. You’ll continue to gain the same advantages
Pose with your legs up the wall
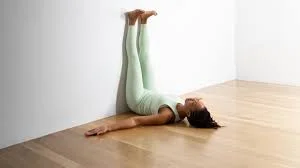
Set your right side of the body against a wall while you sit.
As you lean on your back, sway your legs upward along the wall.
Position your hips close to the wall or against it.
Put your arms at your sides, in front of you, or overhead.
For up to five minutes, maintain the legs up the wall posture.
Two to three sessions in the day
Corpse pose
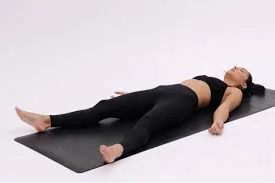
Your feet should be slightly wider than your hips and spread out to the sides while you lie on your back with your arms beside your body, with your hands facing up.
Release any tightness or stress in your body by relaxing.
As you inhale deeply, let your body sag heavily to the ground.
Maintain corpse posture for at least five minutes.
2 to 3 times a day
Supine spinal twist
Your lower back muscles can become more relaxed and limber by doing a supine spinal twist. After difficult weight-bearing tasks, this can reduce tension and relieve stress.4 Here’s how to perform a spinal twist while reclining.
Lie backward with your legs outstretched to start.
With your hands facing down, extend your arms out in a T shape perpendicular to your body.
Your left knee should be bent to a 90-degree angle, then lowered in the direction of your right. Your left knee should be facing the ground with the inner facing up.
Rotate your spine while attempting to keep your shoulders level with the ground.
Tilt your head to stare at your right fingertips as opposed to your bent knee.
Lie back and let gravity drag your knee toward the floor as you stretch.
preserve for 30 to 60 seconds, then alternate the legs
two to three times a day
Marching arm circles
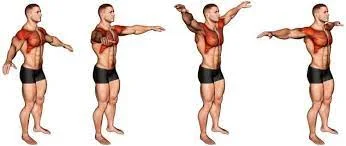
Put your feet shoulder-width apart while standing and raise your arms parallel to the ground.
Make short, controlled movements with your arms forward, then gradually enlarge the movements until you feel a stretch in your triceps.
After around 10 seconds, change the circles’ direction.
8 to 10 times, make a forward arm circle.
Eight to ten times, make a circle with your arms.
Two times a day
Body shakes

Vibrate your right arm softly, then vibrate your left arm, and finally both arms simultaneously.
Shake the left leg first, then your right leg.
Shake your hips, your head, and your entire body after that.
Give every bodily part a 15-second shake
two times a day
Cat cow
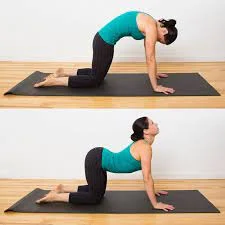
On a yoga mat, get down on your hands and knees.
Take a breath in, lower your tummy, raise your head, and look up at the sky.
Inhale, curve your spine, lower your head, and direct your attention to your belly button.
Repeat.
Bent knee cross-body stretch
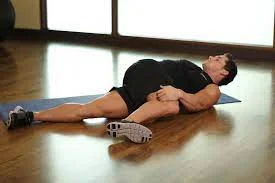
How to perform it: While twisting through your lower back, lie on your back and sway one leg over the other. For balance, extend both arms to the side. As much as you can, attempt to maintain your shoulder blades on the floor. The opposite rotation should be resisted by your upper body. 30 seconds of holding, then alternate sides.
Why it works: This exercise stretches the obliques and lower back muscles. A healthy back requires strengthening your core muscles. This exercise also stretches your sacroiliac joint and the bones in your lower back.
Abdominal Core Stretch

Lie flat on your stomach to perform. Then, with both elbows narrowly bent, push up on your elbows or all the way to the palms of the hands. Even if you might only be able to reach your elbows, that’s fine. In order to look up at the ceiling, extend your neck and head back.
Why it works: This move extends your rectus abdominis and obliques, which are core muscles. These muscles are essential for effective exercises and the well-being of your lower back.
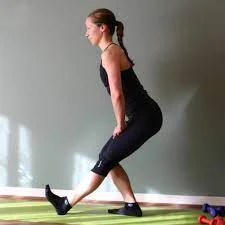
Lunging calf stretch
How to perform it: Lunge forward while keeping your back knee raised. To feel the stretch in your back calf, ease into the stretch with a light bounce. Repeat on the opposite side after holding for 30 seconds.
Why it works: The best thing about this stretch is that it works your calves, hip flexors, glutes, and hamstrings. People frequently neglect their calves when cooling down. It works wonders as a warm-up but is also excellent for stretching your lower body after a grueling HIIT workout or long run.
Seated Pigeon stretch
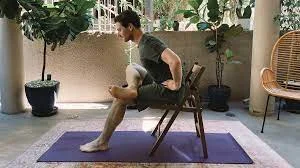
How to execute: Place your right ankle on your left knee while seated on a bench or chair. Then, gently press your right knee toward the floor. Then, switch to the other leg and hold for a further 30 seconds. This will aid in avoiding tightness in your inner thighs.
Why it works: Similar to a standing figure four stretch, the sitting pigeon is excellent for focusing on your glutes and enables you to hold the position for however long you need without needing to balance on one foot. By releasing lower back tension, it also helps to enhance hip mobility as well as posture and alignment.
Piriformis stretch
How to execute: Take a seat on the ground with your legs out in front of you. Put your right foot firmly on the ground near your left knee and cross your right leg over your left. Put your right hand behind you while rotating your upper body to the right. As you continue to twist, place your left elbow on your right knee and press outward to deepen the stretch. After holding for 30 seconds, change sides and do it again.
Why it works: Have you ever had leg and lower back pain that shot through you? You would have a sciatic nerve in it. The piriformis, a flat muscle on your butt that is situated close to the top of your hip joint, houses the sciatic nerve. Your piriformis compresses the nerve when it becomes inflamed, which causes pain. Exercising, stretching, and strengthening that muscle will help you move more freely and prevent an uncomfortable recurrence.
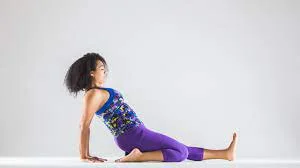
Lunge with A spinal twist
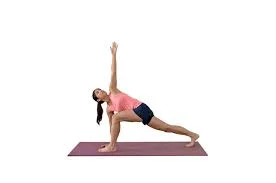
How to execute it: From a standing position, extend your left leg by taking a large stride forward with your left foot. Gradually position the left foot on the ground/mat. Turn your upper body to the left and raise your left arm toward the ceiling while placing your right hand on the floor near your left foot.
Why it works: Mobility is a key factor once more. Your thoracic or mid-back mobility can be greatly improved with this stretch, which is frequently disregarded. It is very simple to modify to fit your current level of flexibility and is excellent for stretching the hip flexors and opening them up.
This is frequently performed faster as a warm-up, so take your time and allow yourself to fully immerse yourself in each action.
Sumo squats stretch
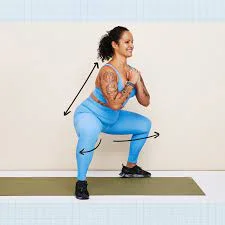
With your feet wider than your hip distance apart, stand up straight.
Deeply squat while placing your elbows slightly above your knees on the insides of your thighs.
Hold the separation of your knees for a few seconds.
Repeat.
Benefits of cool-down exercises
Similar to how a warm-up gets you ready for exercise, a cool-down aids in recovery. A cool-down has the following benefits.
- Exercise recovery is accelerated by reducing exercise intensity and easing out of a session by performing static stretches. Your heart rate, blood pressure, and breathing rate all gradually return to their pre-exercise values as you calm down. This accelerates the healing process and aids in the removal of metabolic waste that accumulates in your muscles during exercise. Additionally, it might assist you in preventing post-workout side effects, such as headaches or vertigo.
- Eases stiffness and muscle soreness: Exercise also has the unintended side effect of DOMS or delayed-onset muscle soreness. There is a different analysis of the impact of stretching on muscle soreness. Additionally, stretching after exercise should be static. However, evidence indicates that delayed-onset muscle soreness may be reduced with light cardio cooling down.
- Increases range of motion and flexibility: After exerting yourself physically during exercise, targeted static stretches assist in lengthening and relaxing your muscles. This might increase your range of motion and flexibility, making it easier for you to move around during daily activities and subsequent workouts.
- Exercises for the cool-down phase encourage relaxation, flexibility, and the beginning of the healing process.
- You can experience lightheadedness or vertigo if your blood collects in your veins; a slow cooldown maintains your blood flow.
- Your body temperature, blood pressure, and heart rate can all return to normal after cooling down.
- Lactic acid buildup can be lessened by stretching your muscles while they’re still warm. Lowering the risk of stiffness and cramping in your muscles.
- Stretching also lengthens the connective tissue surrounding your joints, boosts mobility, and enhances the range of motion.
- Simple and Easy to Do Everywhere: This stretch can be performed in almost any situation, whether standing or sitting, working at a desk, cleaning the house, or traveling by vehicle, rail, or other mode of transportation. You don’t require a lot of space or any particular equipment. This stretch can be achieved anywhere and doesn’t even require you to get on the floor, making it a terrific exercise for easing aching muscles quickly.
- Can Be Mild or Strong: The upside to the overhead side reach stretch is that you may adjust the intensity to suit your needs for any given day. If you ever experience extremely severe pain, you might try a gentler variation of this stretch. Sometimes, if you’re feeling particularly flexible, you might push yourself to extend your range of motion.
- Stretches the stiff and the core muscles: Your upper and lower back, as well as your core, will be completely stretched if you perform the overhead side reach correctly. Your obliques and latissimus dorsi should feel a significant stretch along the sides of your torso.
- Lessens tension in the neck: You’ll experience nearly instant relief of tension if you let your neck descend into the stretch. Just be careful to drop your neck gradually; rapid or jerky motions could cause an injury or an unpleasant pop at the very least.
All of these benefits work to increase your body’s general flexibility and function, which will help you feel better, perform better, and experience fewer injuries.
When to see an advanced
If you want help making changes or want to advance your training, think about hiring a personal trainer.
A fitness expert can assist you in creating a personalized cooldown plan based on your needs. If you have any ailments, worry about certain regions, or have particular targets in mind, they may change the type of exercise you undertake.
An expert can ensure you’re performing the exercises properly and offer insightful comments to remain safe while getting the most out of your workout.
Conclusion
After exercising, a cooldown regimen can assist your heart rate in returning to resting levels, promote workout recovery, reduce muscular discomfort, and lower your pulse rate.
The overhead triceps stretch, the seated forward bend, and the knee-to-chest stretch are a few examples of cool-down exercises.
The last thing you would want to do after working out is to cool down. After all, it’s challenging enough to fit in a workout. However, spending more time cooling down is essential for your post-workout recuperation. Skipping it can result in injuries and muscular tightness that can wreck your fitness ambitions.
This crucial exercise doesn’t have to take a lot of time or be difficult. Incorporate 5 to 10 minutes of lower-intensity aerobic and static stretches that concentrate on the muscles you worked throughout your workout as part of your cooldown routine.
Set aside some time after your workout to gently calm down to set yourself up for success. This allows your body to heal, balances your physical functions, and aids in easing you back into the rhythm of your everyday life.
Give yourself just enough energy to finish your cool down without going overboard. Never bounce or force your way into a position; only move to your edge.
You can switch out a portion of your workout and concentrate more on these calming, soothing activities to benefit your mind and body on days when you’re not feeling particularly active or energized.
FAQs
Is stretching a beneficial cool-down technique?
Stretching’s capacity to help your body achieve homeostasis—a crucial component of a cool-down—is one of its main advantages. Stretching also reduces heart rate, soothes the nervous system, and restores normal breathing.
What occurs if a cool-down is skipped?
Your blood pressure, muscle tone, and heart rate may all rise during exercise. If you don’t cool down, you run the risk of getting hurt again, having blood pool in your lower limbs, and putting more strain on your heart.
What workouts are effective for cooling down?
As you calm down, take deep breaths to help your muscles receive oxygen, reduce tension, and encourage relaxation.
Brisk walking or jogging. One of the easiest ways to decompress is to do this.
Stretch your upper body.
Forward bend while seated.
Knee to Chest Position.
Butterfly Pose when lying down.
Infant Pose.
Is relaxation a good way to cool down?
Additionally, relaxation helps the body cool down and relax, and physically soothes you. Excellent for post-workout when the body’s systems are high on endorphin substances.
Should yoga be a cool-down activity?
With or without yoga, the body will naturally calm down. However, yoga offers additional advantages that may help your client finish their workout. Check out these eight postures that work, then incorporate them into your go-to post-workout regimen.
Do breathing exercises help you relax?
After an intense game, to relieve tension after a fight, or even just to recharge and concentrate, breathing exercises might be helpful.
What three kinds of cool-downs are there?
You should incorporate the following three phases of a cool-down after the activity. These include easy exercises like walking, stretches that target different parts of the body, and rehydrating because it’s crucial to replenish fluids lost during activity.
What is class 8 of the cool-down exercises?
Any exercise, physical or mental, that aids in a person’s recovery and physical repair following physical activity or exercise is referred to as a cool-down in the setting of physical activity and exercise.
What are two good reasons to relax?
Similar to warming up before a workout, cooling down afterward progressively lowers your heart rate, aids in injury prevention, and stretches you out. It’s all positive! The best part is that cooling down need not be time-consuming. Your body should begin to recuperate after anywhere between four and 10 minutes.
Should an individual cool down?
Your heart rate should drop to a level that is near rest during the cool-down. Without a cool-down, stopping abruptly might cause lightheadedness, dizziness, and/or fainting. Walking after running is a wonderful example of a cool-down. Two to five minutes should be allocated for your cool-down.
What is an active cool-down exercise?
The preferred kind of exercise is a dynamic whole-body motion that uses more muscular mass, such as walking, jogging, or rowing. Low- to moderate-intensity exercise is recommended to improve blood flow, encourage the reduction of blood pooling at the extremities, and aid in lactate clearance.
What is a passive cool-down?
The list of passive cool-down techniques is not universal but contains sitting, standing, lying down, resting, stretching, foam rolling, vibration treatment, submersion in cold or hot water, and wearing compression clothing.
References:
- Try this cool-down routine you can do after every workout. (2023, June 5). TODAY.com. https://www.today.com/health/diet-fitness/cool-down-exercises-rcna24609
- Cronkleton, E. (2019, December 17). 16 Cooldown Exercises You Can Do After Any Workout. Healthline. https://www.healthline.com/health/exercise-fitness/cooldown-exercises#takeaway
- GoodRx – Error. (n.d.). https://www.goodrx.com/well-being/movement-exercise/cool-down-exercises-after-workout
- LaMarco, N. M. (2022, October 19). 14 Cool Down Stretches to Add to Your Workout Routine. Verywell Fit. https://www.verywellfit.com/cool-down-stretches-to-add-to-your-workout-routine-6748990
- Stiefvater, S. (2020, September 29). 10 Cool Down Exercises That Can Make Your Workout More Effective. PureWow. https://www.purewow.com/wellness/cool-down-exercises
- VV. & V. (2022, December 28). 12 Best Cool Down Exercises. VTW. https://www.vingo.fit/fitness-for-beginners/how-to-create-a-cooldown-routine/