39 Best Chest Exercises for Women: Get a Stronger, More Toned Chest
The Chest contains the largest muscle in the upper body. The pectoralis muscles, in your chest are reliable for moving and handling the arms. Even daily functional chores like washing your hair, propelling open a door, or getting up and down from the ground all heavily recruit your chest. While we place so much focus on lean legs and a strong core, a well-rounded training regimen incorporates chest work too.
In this article, we describe different types of exercise to strengthen chest muscles. This variety of exercise movements works every angle of the chest and engages helping muscles too. Try the training format below and you will be on your way to that ideal pushup in no time. And of course, always consult your doctor or healthcare practitioner before beginning any exercise protocol.
Introduction:
Our pectoral muscles play an important function in keeping our posture and suspending the upper body. With good posture comes generous breathing, enhanced digestion, and circulation. A toned chest adds strength to your shoulders and arms, which helps with maintaining your body for day-to-day tasks like selecting grocery bags and carrying your baby. When we perform chest exercises, we also work the surrounding muscles including the shoulders, back, and arms.
When it comes to raising weights, many people have the perception that only men are needed to target their chest. However, chest training for women has a bunch of benefits and should not be ignored. Providing every muscle group in the body attention at least once a week is important for strengthening total-body stability and symmetry.
The Chest Muscles,
The main muscle of the chest is the pectoralis major, pectoralis minor, and serratus anterior.
- Pectoralis major: This is the largest muscle of the chest, this fan-shaped muscle traverses across your chest. It is reliable for flexion, adduction, and internal rotation of the humerus (arm at the glenohumeral joint, a.k.a. the shoulder).
- Pectoralis minor: This is a Small muscle with a more triangular shape, this muscle performs many roles, such as moving the ribs and shoulder blades.
- Serratus anterior: More laterally found within the chest wall, this muscle is reliable for scapular protraction.
Why train your chest?
When it comes to wellness, your chest mostly takes a backseat to other areas that are more prone to fat accumulation (e.g., your hips, thighs, and stomach). However, breast training has the power not only to change your chest but also your whole upper body posture.
Benefits of Chest Workouts for Women:
- You’ll improve your posture: When it concentrates on posture, the back and shoulders get all the concentration. However, as one of the biggest muscles in the upper limb, the pectoralis plays an equally vital role in maintaining posture and upright stability, namely by helping the scapula (Your shoulder blade) as well as the actual shoulder joint.
- Each muscle that surrounds the scapula and shoulder will play a crucial role in stabilizing those joints; if any of them weakens, the strain at the joints will be uneven.
- Even if the pecs are robust or weak, they won’t be able to adequately perform their function if one muscle is unduly shortened or lengthened. Who is the main cause of shortening? your laptop. You simultaneously shorten your chest muscle fibers and lengthen your back muscle fibers when you slouch all day. Therefore, the more reason there is to incorporate some chest exercises for women into your workout program if you have a desk job.
- You’ll breathe easier: When you correct your posture, your chest also opens up, which makes it simpler to take long, thorough breaths. The tiny, triangular pec minor muscle, which attaches in the middle of your third, fourth, and fifth ribs, is very beneficial. The pec minor extends every time you breathe in, allowing your rib cage to enlarge.
- Breathing will be severely hampered if the pec muscles are too short because you won’t be able to open up the diaphragm. However, respiration and the capacity to increase oxygenation to all of your muscles will both be much improved if you stretch those chest fibers. A significant justification for weighted chest exercises.
- You can make your breasts perkier: Many women are hesitant to train their chests because they fear that their breasts may enlarge, however, the opposite can occur. Women’s chest exercises resemble a non-surgical form of breast augmentation. They might even assist you in achieving that elusive pull-up! The breast tissue is being pushed up and forward more, making it appear as though you have larger breasts. Moreover, strengthening your chest muscles lifts your breasts.
- You’ll make daily activities easier: Your pecs play a significant role in a variety of daily tasks outside of the gym, such as carrying a suitcase through an airport or pushing a heavy door open.
- Your pecs’ main uses are for flexing (raising), adducting (bringing back), and medially rotating (turning inward) your upper arm. The pecs are therefore involved in any movement that includes pressing, such as taking something up, holding it, or squeezing it.
- Because of this, carrying and loading grocery bags into your home can feel difficult if your pecs are weak from inactivity. If you include this chest workout for women in your exercise regimen, it will significantly simplify your day-to-day activities.
- You’ll train other muscles: as already mentioned, the pecs are large, significant muscles. But they are also important since they activate a number of the nearby muscles, including the shoulders, back, and triceps, making any chest workout a great all-over upper-body exercise.
Exercise Protocol
- Choose any 5 exercises from the listed below.
- Do each exercise for thirty seconds and try to reduce any rest in between movements.
- Once you have finished 30 seconds of all 5 exercises, rest for 1 minute.
- Repeat three more times.
Here we describe different exercises for the chest:
Bench press
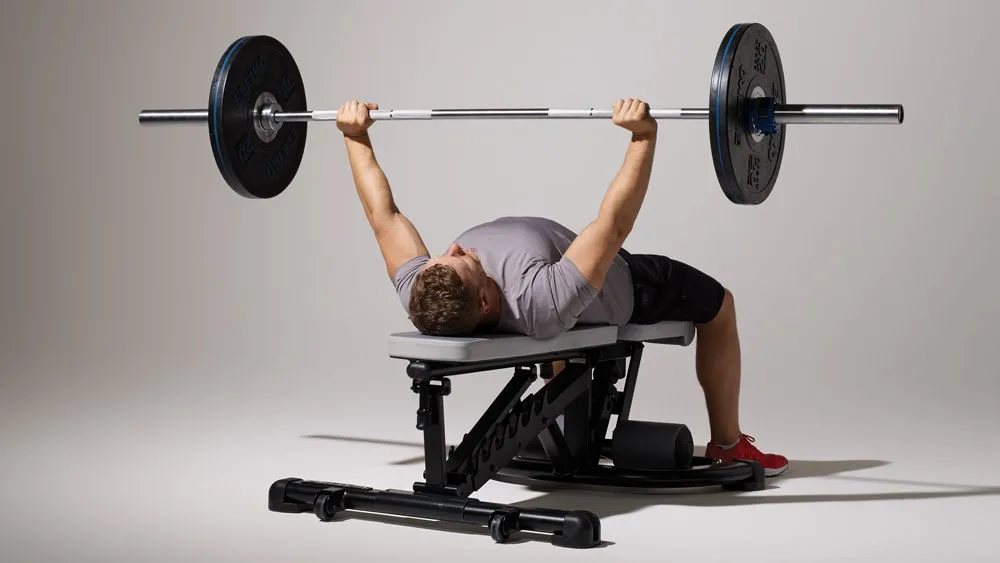
- On a flat bench, lie on your back. Grip a barbell with hands that are a little broader than your shoulders. The barbell should be directly placed across the shoulders.
- Put your feet firmly on the ground and keep your hips on the bench the entire time.
- Throughout the activity, maintain a neutral spine position and keep your core engaged. Do not let your back arch.
- take the bar or dumbbells off the rack gradually. Allowing the elbows to bend out to the side and away from the body by about 45 degrees, lower the bar to the chest, just below the nipple level.
- Your elbows should be just below the bench when you stop lowering. Push the bar back up to the starting position while squeezing your feet firmly into the ground.
- Perform five to ten repetitions, depending on the weight used.
Dumbbell Flyes

- Equipment required: set of dumbbells, flat bench
- on a flat incline bench lie on your back. Put your feet firmly on the ground on either side of the bench. Your head and back should be firmly pressed into the bench for the entire exercise.
- The 2 dumbbells can be handed to you by an assistant, or you can carefully take them up off the ground and hold 1 in each hand.
- Lift your arms so that they are stretched but not locked out above your head.
- Inhale deeply, then slowly lower the dumbbells until they are parallel to your chest. Although they won’t be shut out, your arms will be at your sides. Keep your arms from dipping below your shoulders.
- After exhaling fully, steadily press the dumbbells up in an arc.
- Do 10 to 15 repetitions. Rest. Total 3 sets.
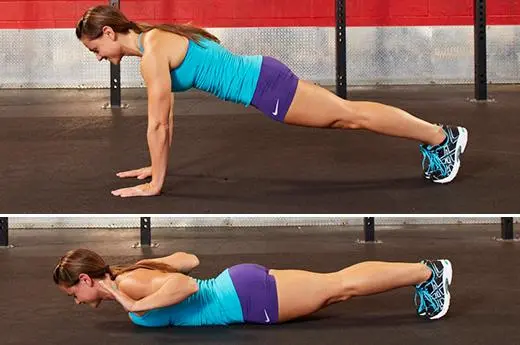
Push-up
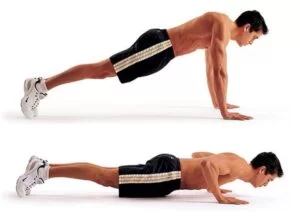
- To perform this exercise you have to get on the ground on all four limbs, positioning your hands slightly wider than your shoulders. Keep your elbows slightly flexed; don’t lock them out. Extend your legs backward so you are balanced on your hands and toes, your feet hip-width apart. Once reach this position, here is how you will do a push-up.
- Tighten your abdominals and tighten your core by pulling your tummy button toward your spine.
- Breathe in as you slowly flex your elbows and lower yourself to the floor, until your elbows are at a ninety-degree angle.
- Take a breath in, tighten your chest muscles, and push back up through your hands to go back to the starting posture.
Dumbbell bench press
- Begin by lying flat on a bench with a dumbbell in both hands.
- grab the dumbbells at chest level with your palms facing forward.
- contract your core and press the dumbbells upward until your arms are fully extended.
Isometric chest squeezes
- Your hands should be open, palms facing inward (perpendicular to your torso), and fingers pointing forward. As you tighten your chest, push your hands together. Increase the strain gradually after a modest start. While performing this contraction, keep breathing normally.
Plank shoulder taps
- Start in a plank position with your feet hip-width apart and your wrists under your shoulders.
- Return to the plank posture by placing your right hand on your left shoulder. Complete 10 repetitions.
- Once the set is finished, switch sides by touching your left shoulder with your right.
Cable crossover
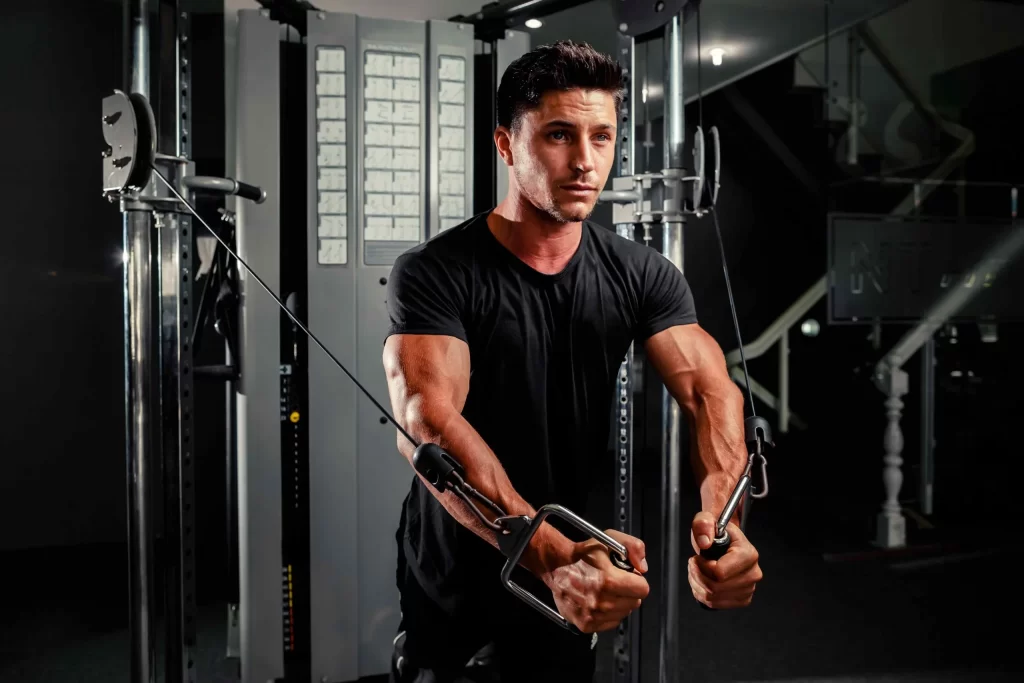
- Make sure the cables are set at chest level. Turn your back on the cable machine as you stand. With your palms facing forward, grab the handles and extend them out to the side of your body. Brace your abs and draw in. Back and down shoulder blades locked.
- Pass the hands with one hand above and one below by driving the hands forward and together in an arcing motion.
- Reverse the pattern and move through the widest range of motion possible before returning to the beginning position.
- Repeat while switching the top and bottom hands. Keep your posture steady. Avoid pushing your chin forward, slouching your shoulders, or arching or slouching your back.
Dumbbell Pullover
- Place yourself on the end of a sturdy weight bench to complete this exercise. put your feet on the ground, slightly wider than the bench. grab a dumbbell with both hands. So that you are lying on the bench, roll back. Your head, neck, and back ought to be completely supported.
- Stretch your arms toward the top, over your chest. Your elbows should be slightly flexed, and your palms should be facing one another.
- Breathe in and extend the weights back and over your head, keeping a strong back and core. Take about three to four seconds to reach a fully extended position where the weights are behind—but not below—your head.
- breath out slowly and return your arms to the initial position
Downward-Facing Dog
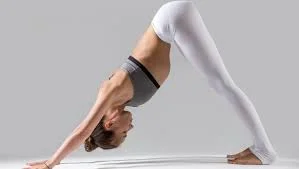
- To do this exercise you have to Come onto your hands and knees and bring your hands slightly in front of your shoulders. Extend your fingers wide, push down through your knuckles, and tuck your toes under.
- Breathe out as you raise your knees off the mat and reach your sit bones toward the top. Keep your knees slightly flexed as you lengthen your back.
- Push the back of your thighs toward the wall behind you and stretch your heels toward the mat. extend your knees without locking them.
- Squeeze the base of your index fingers into the mat. Raise your inner arms from your wrists to your shoulders. Rest your neck and keep your head between your upper arms.
- Remain here for 10 or more breaths. As you exhale, flex your knees and lower yourself into Child’s Pose.
Alternating renegade row
- To perform this, all you require is enough space to hold a plank and a set of dumbbells.
- Put the dumbbells on the base, positioned so that when you set up in a plank position, the dumbbells are roughly shoulder-distance apart and the handles of the dumbbells are parallel to one another.
- Begin on your hands and knees in a tabletop-like position, gripping the dumbbell with both hands. The position of your hands and knees should be in line with your shoulders and hips, respectively.
- Step your feet back to take on the full plank position. Your hands and the balls of your feet will support your body. Your body should be in a straight line from your heels to your head, with your core taut and engaged. Check your form. To improve your balance and support the workout, place your feet about hip distance apart.
- Take a deep breath in and slightly lean to the left so that more of your weight is being supported by your left palm. Make sure that your shoulders and hips are still perpendicular to the floor.
- Draw the dumbbell you are holding in your right hand towards your chest while flexing your elbow with your right shoulder blade squeezed against your spine. Exhale as you lift the dumbbell. Check your form at the top of the movement—your hips and shoulders should still be squared to the floor, and the dumbbell should be pulled to your right chest/shoulder.
- Returning the dumbbell to its beginning position, slowly lower it to the ground.
- Repeat the exercise while shifting your weight to your right side, this time bringing the left dumbbell to your left chest or shoulder.
- After completing the required number of repetitions, release the dumbbells and sit up to finish the exercise by bringing your knees back to the floor.
Decline push-up
- You will require a raised surface like a bench, box, or chair to do decline pushups.
- The more elevated the surface, the harder the movement will be. If you are new to decline pushups, begin with a low surface, like a curb or step. You can improve the height over time.
- Kneel with your back to the bench. Place your hands on the ground, shoulders over your wrists, and elbows at 40 degrees. Set your feet up on the bench’s top.
- Brace your core, glutes, and quadriceps. Flex your elbows and lower your chest to the ground, maintaining your back and neck straight.
- Push into the ground to return to the initial position, extending your elbows.
- Finish 2 to 4 sets of 10 to 20 repetitions.
- Quit doing this movement if you feel pain in your wrists, elbows, or shoulders.
Modified push-up
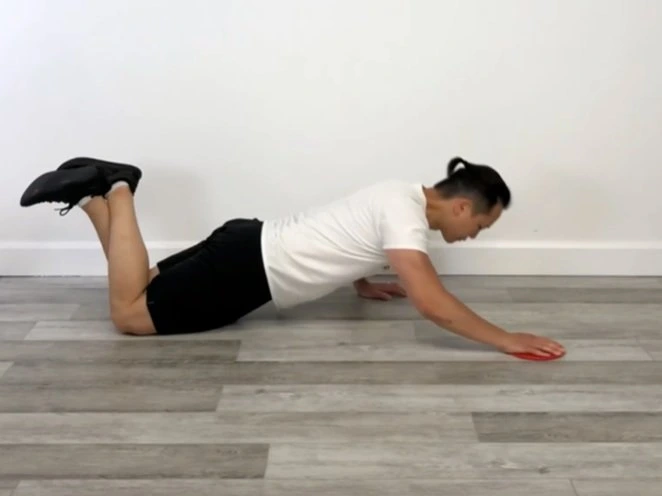
- Start in a kneeling position on a mat with hands below shoulders and knees behind hips, so the back is angled and long.
- Tuck toes under, pull abdominals, and flex elbows to lower chest toward the ground. Keep your eye in front of your fingertips so your neck stays long.
- Press the chest back up to begin position.
- Repeat for 10 to 15 repetitions.
Incline dumbbell press
- Seat on the bench and bend back. Grab a dumbbell in both hands, with hands positioned at your shoulders, and elbows flexed and angled down below your ribs. Rest your neck against the bench. Maintain a flat ground with your feet.
- Contract your core and press both dumbbells straight over your chest as you breathe out. Keep your wrists straightforward. At the top of the movement, the dumbbells should almost touch each other, and your arms should be perpendicular to the ground.
- Switch the movement and slowly lower the dumbbells to the top of your chest as you breathe in. Your elbows ought to bend with the weights at a roughly 45-degree angle to your torso. They shouldn’t point out to the sides of the room or spread out to the edges. Rather, keep your elbows pointing to the floor.
- you have to complete sets of 10 to 12 repetitions. Begin with one set and work up to two to three sets over time as you build strength. When you complete your set, safely leave the exercise by sitting up and placing the dumbbells on your knees before you stand up.
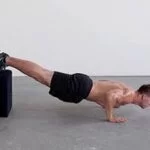
Medicine ball push-up
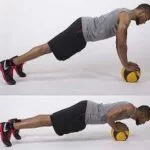
- To start this exercise Place your hands on a medicine ball on the ground with your legs straight and hip-width apart. Your toes should be bent and in contact with the base.
- Grab the medicine ball with your hands and turn your shoulders outward to engage your lats.
- Pre-tension your shoulders and hips while contracting your core. Squeeze your quadriceps and glutes.
- Lower your chest toward your hands by flexing your elbows. As you lower yourself towards the medicine ball, your shoulder blades should retract.
- Your body should be lowered until your upper arms are parallel to your back. Keep your elbows in close proximity to your ribs. Keep your position near the base of the movement.
- While holding your alignment, start the upward movement by squeezing your chest and straightening your elbows. Your shoulder blades should protract as you press to the action’s peak.
- Complete the movement by squeezing your chest and triceps.
Plank rotation
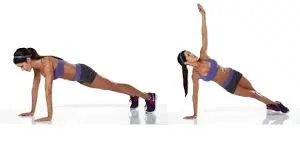
- Set yourself in plank position, hands on the floor beneath your shoulders. Straight body from head to toe. Pull your abs and glutes to maintain your body. Contact your elbow up toward the ceiling and gradually twist your upper body back, looking in the same direction. Hold for 5 seconds, return gradually, and repeat the other side to count 1 repetition.
Dumbbell floor press
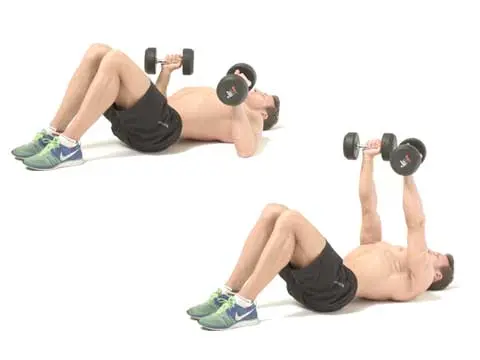
- Begin by positioning yourself on the ground underneath the barbell (eyes should be underneath). With the legs either straight or bent, be sure to put the feet, hips, and upper back on the floor, similar to that of a bench press.
- With the body actively gripping the ground, firmly press the barbell and pull the elbows down towards the trunk. Once the back of your arms touches the ground, stay tense and reverse the movement so that you’re primed to lift the weight.
- Once your elbows are fully extended, push the weight. Make sure to not over-protract (bring your shoulder blades forward) at the top when completing a repetition, as this could throw your positioning and base out of line.
- Lower your elbows back to the ground.
Incline push-up

- Bend slightly and place your hands on the wall just wider than shoulder width. Gradually and deliberately flex the elbows move in as close to the wall as conceivable, and breathe in. Slowly and deliberately push off the wall until your elbows are extended, but not locked. Breathe out as you push up.
Close grip bench press
- To complete this workout Use a flat bench station or a flat bench/power rack combo.
- Place the barbell at the right reach level on the rack (you should be able to grip/lift the bar off the rack with assistance).
- Put weight resistance on the barbell in line with your level of fitness.
- Lie flat on the bench and grasp the barbell with your hands shoulder-width apart.
- Raise the bar with assistance from the rack, arms locked, and maintain the bar straight over you.
- Breathe in and gradually bring the barbell down toward your chest, keeping your elbows close to your body for the whole exercise.
- Breathe in and push the barbell up using the triceps and locking arms at the top of the movement.
- Return the barbell to the rack upon training completion.
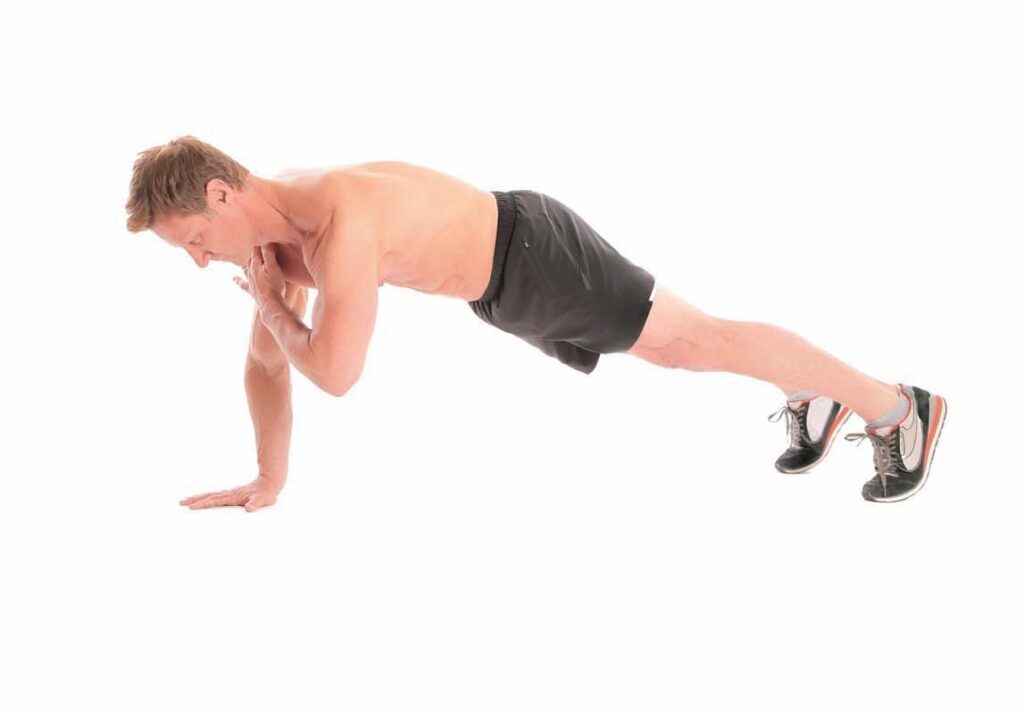
Hand release push-up
- To start this exercise you have to come into an all-four limb position with your knees and toes flexed and in contact with the ground. Your hips should be over your knees. Your shoulders should be a little wider than your hands.
- Come in the traditional plank position and all repetition should start from this position.
- To start the downward movement, lower your chest toward your hands by flexing your elbows. Your shoulder blades should retract as you lower to the floor. Your elbows should be 40 degrees away from your body, and your wrists should be under your elbows.
- Drop your body until your chest, stomach, and legs are in contact with the ground.
- Retract your shoulder blades, and raise your hands slightly off the ground.
- Bring your hands back to the base.
- While maintaining your alignment, start the upward movement by pressing your chest and pushing your hands into the base.
- Your shoulder blades should protract as you push to the top of the movement and return to the initial position.
- Complete the repetition by squeezing your chest and triceps.
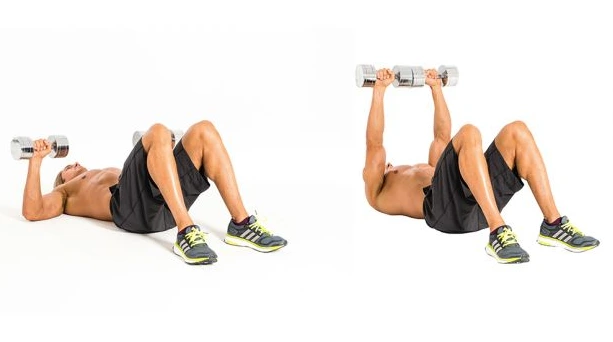
Squeeze press
- Grab the dumbbells in your hands and lie down on the bench
- Put the dumbbells together side by side and raise them over your chest
- Lower them down together and touch each other and then push the dumbbells back up.
Floor press
- Begin by positioning yourself on the ground underneath the barbell (eyes should be underneath). With the legs either straight or flexed, be sure to place the feet, hips, and upper back on the ground, similar to that of a bench press.
- With the body actively gripping the ground, firmly squeeze the barbell and pull the elbows down towards the trunk. Once the back of your arms touches the ground, stay tense and reverse the movement so that you are primed to raise the weight.
- Once your elbows are fully extended, carry the weight. When finishing a rep, be careful not to over-protract (pull your shoulder blades forward), as this could cause your placement and foundation to be off.
- Lower your elbows back to the ground.
Close-grip dumbbell press
- Use a neutral grip (palms facing in) to pick up the dumbbells off the ground. Put the dumbbells’ ends in your hip crease and take a seat on the bench.
- Laying back and keeping the weights near your chest can help you get into position. Once you are ready, take a moment to breathe deeply before pressing the dumbbells until they lockout at the top.
- While holding the other locked out at the top, slowly drop one dumbbell as far as you can safely go while maintaining control of it (the handle should be roughly level with your chest).
- Push the dumbbell back up to the starting position by tightening the chest.
One arm floor press

- Hold a dumbbell with an overhand grip and lie flat on your back. Flex knees with feet firmly planted on the ground. Fully extended free arm, planting palm flat on the ground. Extend the arm holding the dumbbell outward, bringing the elbow to a 90-degree position, triceps resting on the floor, and holding the dumbbell above your chest.
- Exhale and brace the core while pressing the weight toward the ceiling. Pause, retract back to the starting position, and switch arms.
Alternating Dumbbell Bench Press
- Hold the dumbbells off the ground by using a neutral grip (palms facing in). Sit down on the bench with the dumbbells’ ends in your hip crease.
- To come into position, lie on your back and keep the weights close to your chest. Once you are ready, inhale deeply, then press the dumbbells until they lock out at the top.
- Gradually lower one dumbbell under control as much as comfortably possible (the handle should be about level with your chest) while keeping the other locked out at the top.
- Tighten the chest and press the dumbbell back up to the initial position.
- Gradually lower the other dumbbell under control as much as comfortably possible (the handle should be about level with your chest) while keeping the other locked out at the top.
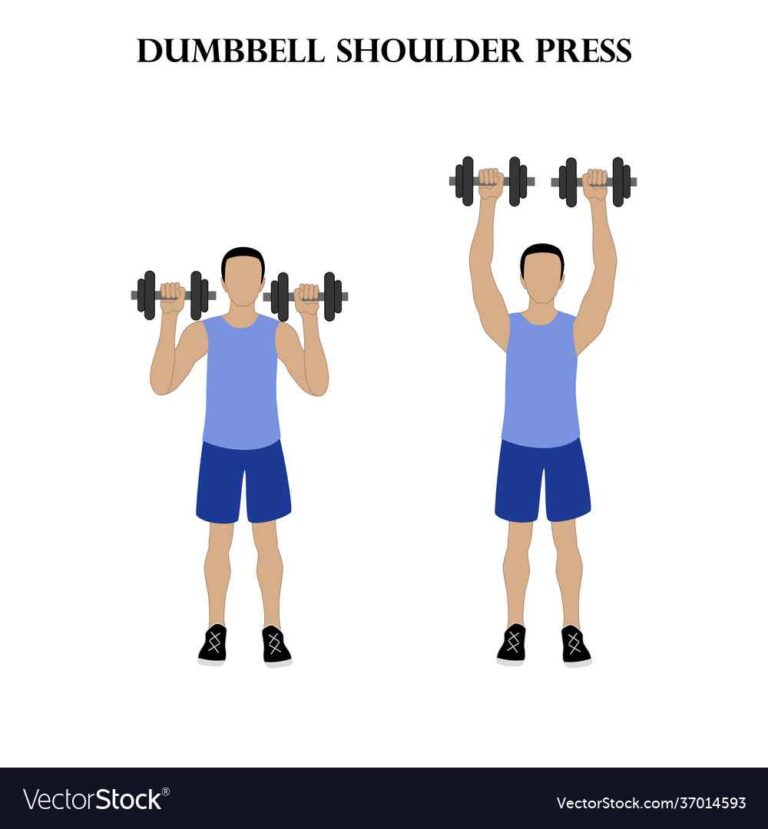
Seated Arnold Press
- Hold a dumbbell in both hands and sit on the bench
- Raise the dumbbells to shoulder level with palms facing your chest
- Push the dumbbells overhead while turning your palms to the front
- Drop the weight.
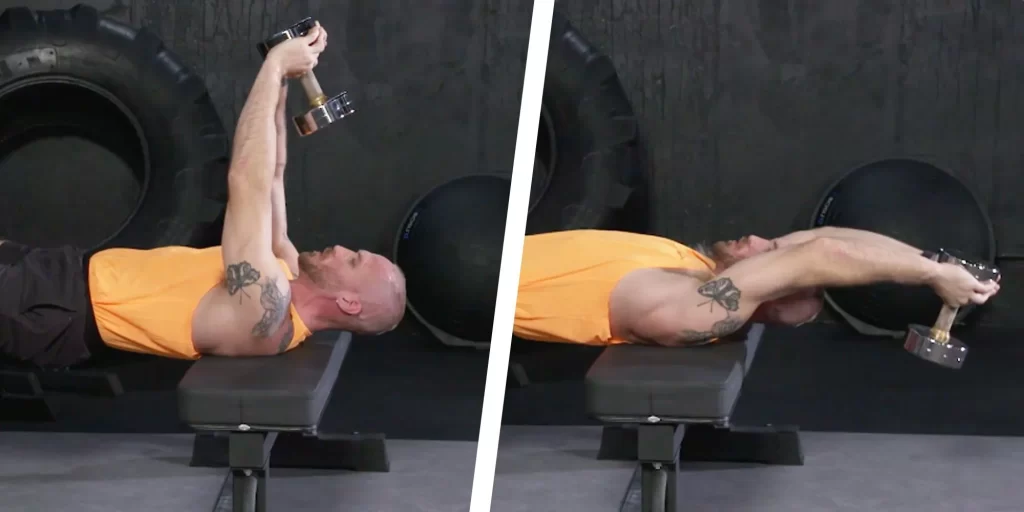
Around the worlds
- With the palms of your hands facing upwards, lie down flat on a bench while you grab the dumbbells on both sides. The position of your arms should be parallel to the ground. Slightly flex your elbows to prevent injury. This will be your starting position.
- Force the dumbbells in a semi-circle position, moving away from the initial position and going towards the head. Make sure that you perform this exercise with your arms parallel to the bottom.
- As you get back to your starting posture, breathe out.
Y Raise
- Arrange a bench at a 35–45-degree incline.
- Grab a dumbbell in both hands, face the bench, and bend forward until your torso rests against the bench and you are on the balls of your feet.
- Dumbbells should be somewhat in front of your torso when you hold them with your arms straight down.
- To begin the exercise you have to raise the dumbbells until your elbows are at the same height as your ears, thinking about sweeping them upwards towards the roof.
- Switch the movement by getting the dumbbells down, making sure to control this descent.
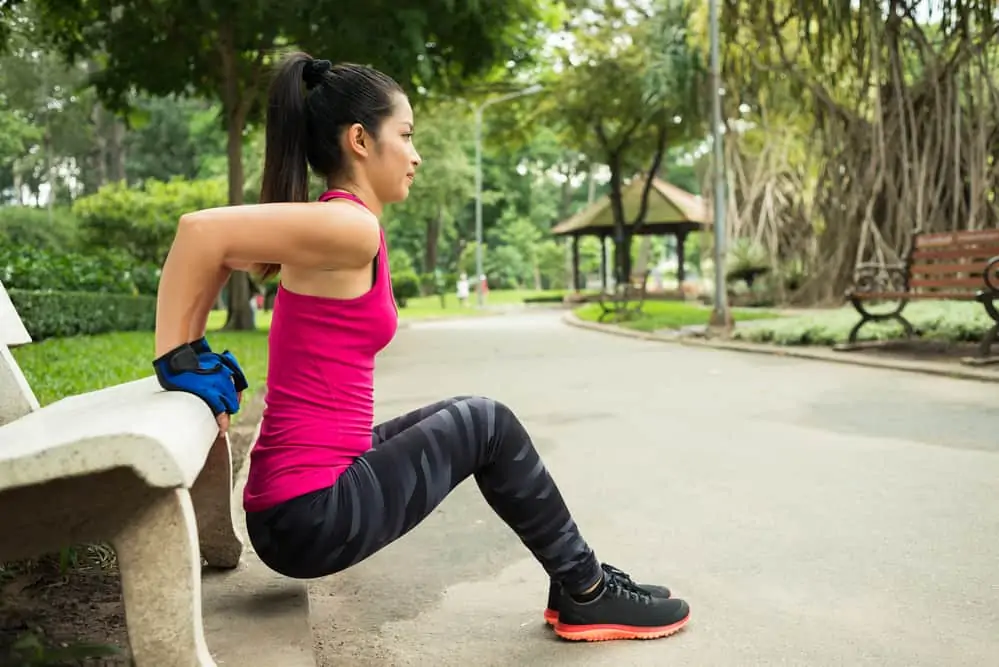
Tricep dips
- Seat on the edge of a stable chair, weight bench, or step and grab the edge next to your hips. Some tricep dip bars can also be used as pull-up bars. Your legs should be stretched, your feet should be roughly hip-width apart, and your heels should be in contact with the ground. Look straight ahead and keep your head high.
- For your behind to clear the edge of the chair, elevate your body by pressing into your palms and moving forward a small amount.
- As you stoop, bend your elbows between 50 and 90 degrees. Throughout the entire range of movement, maintain control.
- Push yourself back up gradually until your arms are almost straight, and repeat.
Staggered push-up
- Place your hands slightly wider than shoulder-width apart, one higher than the other, with your legs extended back.
- As you begin to flex your elbows, bring your chest down to the floor.
- Reverse the position of your hands, then extend your arms to push yourself back up.
- Repeat.
Stability ball chest press
- Hold your knees slightly bent and a dumbbell in each hand while lying with your upper back firmly resting on top of a stability ball.
- Your palms should be facing your feet and your arms should be directly over your shoulders as you raise the dumbbells towards the ceiling.
- Repeat the motion with your arms down at your sides.
Bench press – with bands
- To secure the barbell to heavy dumbbells on the floor, wrap resistance bands or tubes around it. On a bench, supine with your feet flat on the ground, maintain a neutral spine alignment. The shoulder blades should be locked back and down on the bench while you draw in and brace your abs. Aim to equally spread your hands on the barbell as you grasp it at a distance that is 1.5 to 2 times your shoulder width.
- Bring the bar directly over the shoulders after unracking it. Starting with the arms extended, steadily lower the bar towards the mid to lower chest while extending your arms as far as they are comfortable.
- Reverse the pattern, then take the first step.
- Repeat. Keep your stance throughout. Avoid leaning forward or arching your back. Avoid allowing your shoulders to slouch, your posture change, or your feet to elevate up. To stay balanced at all times, keep the elbows under the bar.
Dumbbell bench press with a neutral grip
- Hold a pair of dumbbells with your palms facing each other directly over your sternum while lying on your back on a bench.
- Pull your shoulder blades together and extend your chest just a little. Lift each dumbbell until the arms are fully stretched. Bring the dumbbells back to the starting position after pausing.
Wall push-ups
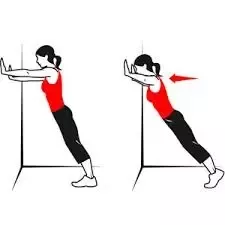
- All you need is a wall to do a wall pushup.
- Place your feet hip-width apart and maintain a minimum of arm’s length distance from the wall.
- With your fingers pointing up towards the ceiling, place both hands on the wall shoulder-width apart at roughly shoulder-level height. Bring your feet closer to the wall if you feel like you are reaching too far.
- Gradually flex your elbows and begin to lean your body against the wall until your nose almost touches it. Maintain a straight back and elbows that are bent at a 45-degree angle rather than straight out to the sides.
Lateral plank walk
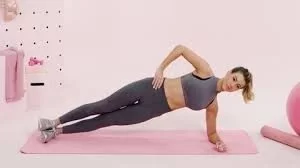
- Start by laying your body on the ground. You will be facing the ground with your back pointing towards the roof.
- Place your palms flat on the ground. To get the most stability, place your palms directly beneath your shoulders.
- Lift your body by extending at the elbows until your arms are nearing lockout (fully extended).
- Your body should form a serial line from the heels of your feet to your head. You must maintain this straight line as you complete the exercise.
- You are now in the initial position to perform these exercises.
- As you push yourself up to the top, place your arms directly beneath your shoulders. Ensure that the muscles in your core are engaged.
- Raise your left arm and extend it forth by half to a foot to the left. Step out by half to a foot with your left foot.
- Bring your right hand in towards your body as you move it. Take your left foot now and step it closer to your body. Your palms should now be aligned once more with your shoulders.
Wide pushups

- Your hands should be wider than your shoulders when you start in the plank posture.
- Your fingers should be facing forward or just a little to the outside.
- As you slowly drop your body towards the ground, bend your elbows out to the side.
- When your elbows and chest are at the same level, stop.
- Lift your body back to the beginning position by contracting your abs while pressing into your hands.
- Complete one to three sets of eight to fifteen repetitions.
Camel Pose
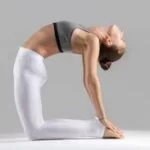
- Place your hands on your hips while kneeling on the yoga mat.
- The soles of your feet should be facing the ceiling, and your knees should be aligned with your shoulders.
- Draw your tailbone inside towards your pubis as you breathe in, as though you were being pulled from the navel.
- Until your arms are straight, arch your back and slip your palms over your feet simultaneously.
- Keep your neck in a neutral position rather than flexing or straining it.
- For a few breaths, hold this position.
- Exhale and return gradually to the starting position. As you straighten up, pull your hands back and place them on your hips.
Overhead press
- Before you head to the gym, you should be familiar with the purpose and movement pattern of any exercise that requires the use of weight.
- According to Rader, an overhead press is nothing more than a motion in which resistance is lifted over the head. You can accomplish this in several ways, for as by using: both hands at once
- a single barbell gripped in each hand with a free weight (a free weight is a weight that isn’t attached to any other equipment).
Barbell shoulder press
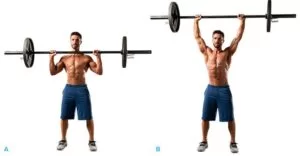
- Standing with your feet shoulder-width apart, extend your hips and knees as far as they will go without locking them. Hold the barbell with your hands shoulder-width apart and your elbows pointed forward in a front-rack posture (so that it rests on the front of your shoulders). Your starting point is here.
- As you exhale, tighten your abdominal muscles, squeeze your shoulder blades together, and press the barbell above.
- Press on until your arms are completely immobilized. Your head should feel as though it is being forced through the “window” your arms have created.
- As you inhale, contract your back muscles and slowly bring the barbell back to the front-rack position.
- To add more repetitions or to complete the exercise, repeat these steps while setting the bar back on the power rack.
Diamond push up
- To do this exercise you have to come on all four limbs and put your hands under your sternum. straighten your arms so that your trunk is lifted and forms a straight line from your head to your feet.
- Position your index fingers and thumbs so that they are connecting, making a diamond shape. By keeping your back flat and your elbows from spreading out to the sides, lower your chest towards your hands.
- Go back up to the start position after stopping just before your chest contacts the ground.
5 Variations of Chest Stretches
The following chest stretching exercises provide different ways to open up the anterior body and can be done at any time not just after training. Performed regularly, you will begin to see and feel continual progress in chest and shoulder flexibility and range of movement.
- Maintain each stretch for 30 seconds or 3-5 breath cycles. One breath in+ one breath out = 1 breath cycle.
- Avoid jumping. With each breath out, move into the stretch a little other, but only to the point of tightness or slight distress, never pain.
- Complete stretches 2-5 times.
- Get focused on pulling the shoulder blades down and back, while also smoothing your chest and heart forward to create length within the pectoral muscles.
Behind-the-back Elbow-to-elbow Grip
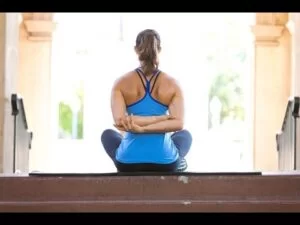
- It’s an excellent way to stretch at any time of day to perform.
- To begin, take a sitting or standing position with your shoulders back and away from your ears, and your arms at your sides.
- Widen your chest by lightly squeezing your shoulder blades together. Gripping elbows to elbows, bring the arms behind the back.
Above-the-head Chest Stretch
- Another stretching exercise that can be done standing or sitting. Play around with your hand placement to highlight your chest, shoulders, or both.
- Put your fingers together, bend your elbows, and lift your arms above your head whether you’re standing or sitting.
- Move your hands and elbows back while gently squeezing your shoulder blades together.
- Use different heights for your hands to draw attention to your shoulders and/or chest, such as a few inches above or behind your head.
Bent-arm Wall Stretch
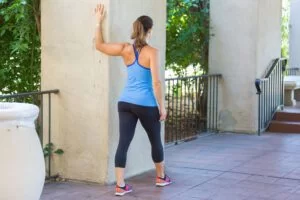
- You can stretch your chest on each side independently with this workout.
- Place your right leg in front and your left leg in the back in a split position at the end of a wall or in a doorway.
- Position the palm and inside of the left arm against the wall or doorway by raising it to shoulder height. Your arm ought to resemble a goalpost.
- To feel the stretch, gently press the chest through the opening.
- You can stretch different parts of the chest by raising or lowering the arm.
- On the opposite side, repeat.
Extended Child’s Pose on Fingertips
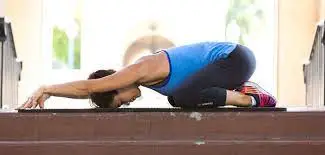
- A child’s pose is usually thought of as a resting pose in yoga, however, when the arms are extended, the pose becomes quite active in the upper body while still relieving stress in the lower back.
- Kneel on the ground. With your big toes touching while seated on your heels, spread your knees to roughly the width of your hips.
- Walk your hands out as far in front of you as you can while bending forward from the hips. Come up onto the fingertips as if you have a ball underneath your palms with your arms outstretched, palms facing down, and melt your chest towards the floor.
Side Lying Parallel Arm Chest Stretch
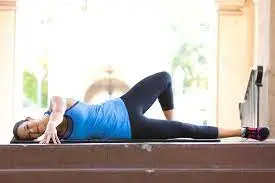
- With this exercise, you can focus specifically on the shoulders and separately work each side of the chest.
- Create the letter T while lying on your stomach, and extend both arms out to the sides.
- Pushing with your left hand, begin to roll over onto your right side. To add stability, lift the left leg, flex the knee, and plant the left foot on the ground behind you. Lay your right temple down on the surface.
- To maintain balance, keep the left hand on the ground. Lift the left hand towards the ceiling for an added stretch.
- On the opposite side, repeat.
Pro Tips For Strengthening Your Chest Muscles:
- Retract your scapula: Basically, you should visualize dragging your shoulder blades back and down. Your chest muscles must be fully activated for the specialized pushing motion needed to retract your scapula.
- Pair chest moves with lower-body pulling moves: Squats and lunges are examples of lower-body pushing exercises, while rows are examples of upper-body pulling exercises. I prefer to train using a full-body strength-based program.
- Start with a barbell. advises beginning chest presses using a bar (without any added weight! ), not dumbbells, even though this may seem illogical. You should concentrate on using a bar to create that control because it is frequently difficult to keep control with dumbbells.
- Don’t do pushups on your knees. Before getting down on your knees, “I strongly advise elevating your upper body on a bench, couch, or chair. Pushups, for example, require us to perform them on our knees, which causes us to lose all of our core functions and makes it more difficult to advance the activity. The more we can practice the same motion, even from an elevated platform, the faster we will gain stronger because pushups need a lot of core control.
- Consider tempo training. Consider adjusting your pace, or the amount of time it takes you to complete the movement’s three components, once you’ve mastered a particular chest exercise. As with rising back up to plank after a push-up, there is the concentric, or “upward,” component of the exercise. Following are the eccentric (or “lowering phase”) and isometric exercises, which are performed while holding a move in peak contraction.
How to Exercise Safely to Prevent Injuries:
- If you have a history of health problems, consult your doctor before beginning an exercise program.
- To maintain the safety and effectiveness of an exercise program, proper exercise technique is important.
- To get the best results, you might need to modify each workout based on your unique needs.
- When working out, choose a weight that will give you complete control over your body.
- When working out, pay close attention to your body and stop immediately if you feel any pain or discomfort.
- Include the appropriate warm-ups, rest, and nutrition in your training program to observe continual development and increase body strength.
- Your capacity to effectively recover from your workouts will ultimately determine your results.
- Take a 24- to 48-hour break before working out the same muscle groups again to allow your body to heal.
FAQ
Is chest exercise good for females?
Yes. The truth that women should train their chests is now completely clear. By doing this, we may clarify some myths about the subject and highlight some of the essential reasons why women should include chest exercises in their routines.
What do chest workouts do for females?
Your pecs, together with the muscles in your back and shoulders, aid in stabilizing the shoulder joint. Better Breathing: In addition to improving your posture, lengthening and strengthening your chest muscles supports deeper breathing.
Can chest exercises make breasts tighten?
since there is no muscle in the breast, you cannot theoretically increase your bust size. But you may prevent sagging by toning and strengthening the muscles in the area, particularly the pectoralis major. (Plus, you ought to be working out with weights anyhow.
How many chest workouts must a woman perform?
The majority of chest exercises should be performed for 3–4 total sets in 2-3 different combinations during chest workouts. Each session should consist of 8–12 hard work sets, where hard work means using the most weight possible for the rep range you are performing while still having one or two reps left in your body.
What is going to happen if I don’t exercise my chest?
This could result in poor posture, a tangled or bony-looking chest, and the difficulty of appropriately executing subsequent workouts. One day, attempting an exercise that requires some chest muscles that are unable to pull or in this example, push their weight, could even result in significant injury.
What chest exercise is the best?
Wide-grip Flat Bench Press: Here’s how to perform the most effective chest exercise. Lay back on a level bench with your feet firmly planted on the ground. Widen your grasp to roughly three inches from shoulder breadth. Take a breath out, then raise the bar straight up.
What are the advantages of chest exercises?
The more powerful your chest muscles become, the stronger your whole upper body can be, Not only is this secure for you, but it may also offer you a boost of confidence knowing that you are becoming stronger. As you feel your strength improves, it could make all the difference in your everyday life.
References
- Cn, C. V. P. (2023, August 4). 10 Best Chest Exercises For Women: Beginner And Advanced. Exercise With Style. https://exercisewithstyle.com/chest-exercises-for-women/
- Valdez, E. (2022). The best chest exercises for women (and men). UPPPER Gear. https://uppper.com/blogs/news/the-best-chest-exercises-for-women-and-men
- Tobin, N., & Bedosky, L. (2022, April 25). The best chest workout for women. Shape. https://www.shape.com/fitness/workouts/chest-exercises-women
- Nasm-Cpt, S. S. M. R. C. C. (2021, January 5). The 14 best chest exercises for women, according to fitness experts. Good Housekeeping. https://www.goodhousekeeping.com/health/fitness/g35098458/best-chest-workouts-for-women/
- 5 chest stretch variations. (2015, September 17). https://www.acefitness.org/resources/everyone/blog/5657/5-chest-stretch-variations/