Best Exercise for Thoracic Outlet Syndrome
Exercise for Thoracic Outlet Syndrome is an important part of the overall treatment program that helps to minimize the symptoms, by increasing the thoracic outlet space.
Introduction:
Fortunately, This syndrome can usually be prevented with the help of physiotherapy treatment and pain-relieving medicine. Rarely, surgical intervention may be needed.
Exercise can help to minimize the symptoms by increasing the thoracic outlet space. Exercise can help to stretch the compressed vessels and helps to normalize their function and gain affected muscle strength.
What is Thoracic Outlet Syndrome?
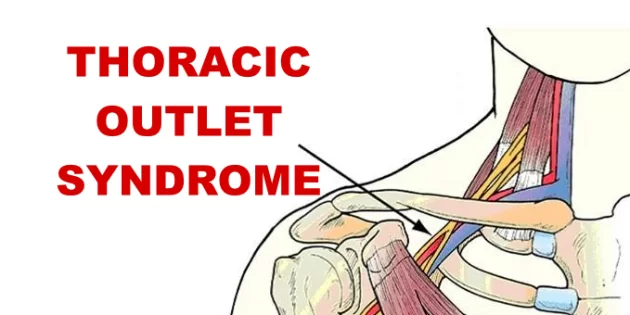
A thoracic outlet syndrome is a group of disorders that appear when the blood vessels or nerves of the thoracic outlet are compressed.
Constriction of the thoracic outlet can induce symptoms of pain, weakness, numbness/tingling, discoloration, swelling, muscle wasting, protruding veins, cold hands, and in severe cases, an aneurysm or embolism.
There have three main kinds of thoracic outlet syndrome, and symptoms may differ depending on what is most involved. The three main kinds of thoracic outlet syndrome have:
- Neurogenic thoracic outlet syndrome
- Arterial thoracic outlet syndrome
- Venous thoracic outlet syndrome
Benefits from exercise in Thoracic Outlet Syndrome:
- Help to minimize the symptoms by increasing the thoracic outlet space
- Help to stretch the compressed vessels
- Helps to normalize their function
- Gain affected muscle strength
- Maintain good posture
- Helps to decrease symptoms of numbness and tingling sensation
What is the goal of Treatment?
- Reducing symptoms
- Enhancing posture
- Back to more regular function
Before you start your exercises do this thing:
- Proper Warm-up of your muscles before starting exercise: Warm the neck and shoulder area with warm water or a heating pad set to low for about 10 to 12 minutes or until you feel normally warm. You should never feel hot, as this may induce a burn.
- Stretch gently: You can feel a force in your muscles, but not ache. If stretching evolves painful, try not to go for more stretch.
- Hold your stretches: Avoid “leaping” when you stretch.
- Pay attention to how you feel: If your hand begins to feel cold, numb, or starts to tingle, quit stretching
Exercises for Thoracic Outlet Syndrome:
- Before you start any exercise this is important to get permission from a healthcare expert first. Performing an exercise with a physical therapist can help you to guide through your diagnosis and give personalized exercise schedules based on your requirement.
- In individuals, physical therapy is usually advised for people with neurogenic thoracic outlet syndrome but may not be suitable for those who suffer from venous or arterial thoracic outlet syndrome symptoms, since operative treatment is usually needed. If conservative treatment does not help, it is best to consult with a physician.
- The prescribed exercise can help you with your rehabilitation, but should only be done, once you and a healthcare professional feel you are prepared. Your posture stabilizers, upper back, and shoulder muscles are all supposed to be strengthened by the exercise. Retraining your posture daily could assist with symptoms.
Best exercises for Thoracic Outlet Syndrome:
Isometric cervical lateral flexion
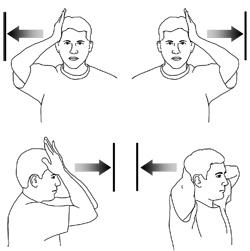
- In sitting:
- Your palm should be on the side of your face.
- Try to bring your ear down to your shoulder, but don’t let your hand move at all.
- Repeat on the other side.
- In supine:
- Lay down on your back.
- Put your hands palms up to the sides of your face.
- Try, without making any real motion with your hands, to move your ear down to your shoulder on one side, then on the other.
- Do not look around. When you try to move your ear down to your shoulder, you should be looking straight ahead.
Standing rows

- To do this exercise you need resistance. Wrap a band around a stable object. wrap the resistance band around a doorknob and close the door so it is stable.
- Hold the resistance band with both hands and stand erect.
- With elbows flexed, smoothly pull the band back until your elbows are just past the sides of your body. Instead of using your arms to pull the bands back, use your scapula (shoulder blades).
- Reposition the bands to their original position after that.
- 1-2 sets of 8–10 repetitions should be performed.
Quadruped thread the needle
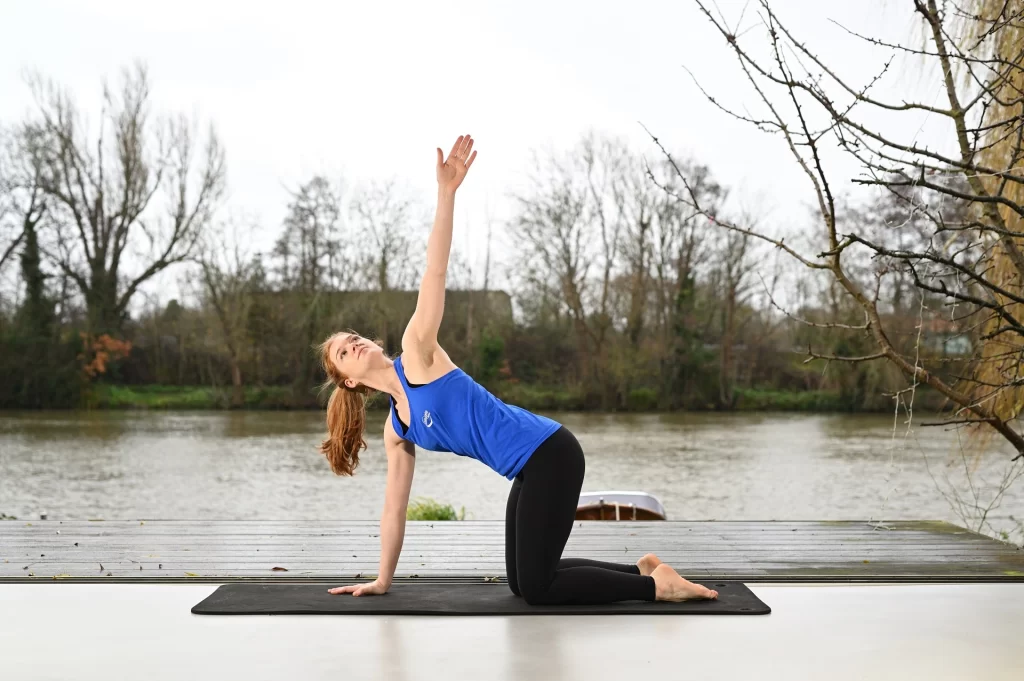
- To do this exercise you have to take a quadruped position, with your palms flat on the ground and your spine in a neutral position. keep your knees and hips are stacked and your shoulders and hands are aligned.
- Raise your left hand then slowly thread it beneath your right arm, allowing your left hand to graze the ground.
- Allow your chest and left shoulder to lower towards the floor.
- Next, slowly bring your left arm back and then reach out toward the sky, allowing your chest to rotate outward to the left.
- Then, bring your left arm back down and repeat the same steps.
- Continue this for 10–15 repetitions. Then, do this on opposite sides.
Prone snow angel
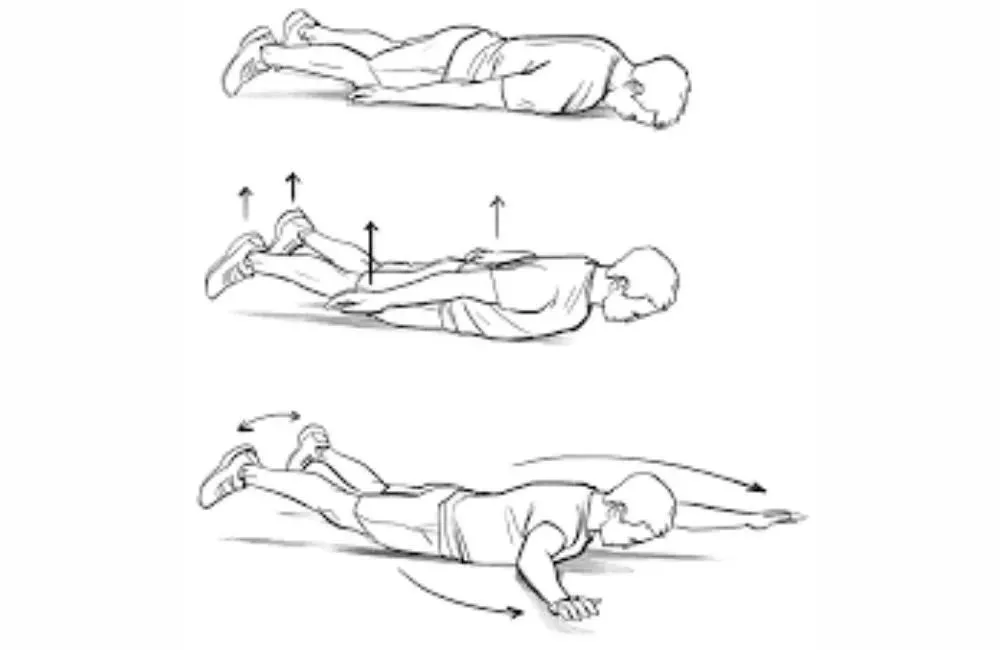
- To perform a prone snow angel you have to lie on your tummy with your forehead touching the floor, your legs extended, and your arms by your side (palms facing down). slowly, raise your arms a few inches off the floor by retracting your shoulder blades. This is the initial position.
- Next, slowly move your arms out to the sides (perpendicular to your body). If this is comfortable, continue to move your arms until they are over your head.
- Then, gently return the arms to the initial position. As you will see, the action is similar to doing snow angels.
- Perform 10–12 repetitions or as many as you feel comfortable to perform.
Resistance band pull-apart
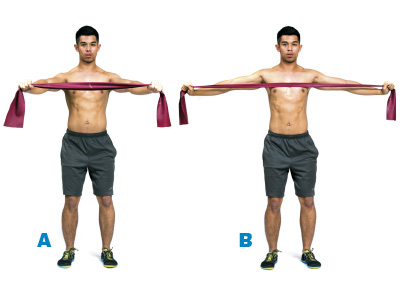
- To do this exercise you have to Stand erect with your elbows flexed 90 degrees. grab a resistance band and taut it in front of you with both hands (palms facing up). The resistance band should be parallel to the ground.
- Elbows should be bent by the sides, and slowly pull the band toward your tummy by moving your arms outward direction. pay attention to squeezing your shoulder blades together to start the movement and your spine should be neutral.
- Slowly back to the main position and do it again.
- Perform 2–3 sets of 10–12 repetitions.
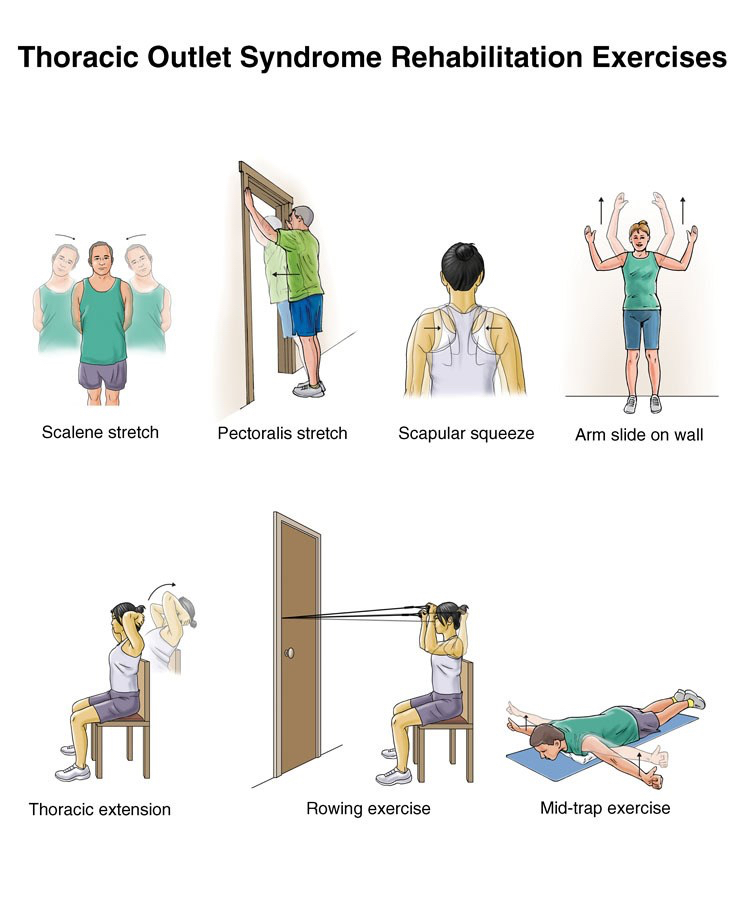
Scapular squeeze:

- You can perform this exercise in sitting or in standing also with your arms by your side contract your shoulder blades together and hold for five seconds.
- Do two sets of fifteen repetitions.
Arms slide on the wall:
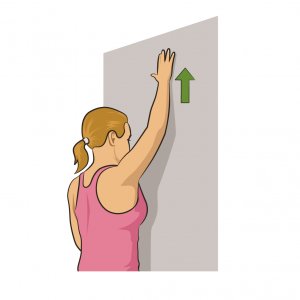
- To start the arms slides exercise you have to sit or stand with your back against a wall and your elbows and wrists against the wall.
- Gently move your arms upward as much as you can while holding your elbows and wrists against the wall.
- Finish two sets of eight to twelve.
Mid-trap exercise:
- To perform this exercise you have to lie on your tummy on a soft surface and put a folded pillow underneath your thorax. Put your arms out straight to your sides with your elbows extended and thumbs toward the sky.
- Slowly lift your arms toward the sky as you contract your shoulder blades together. Lower it slowly. try to complete two sets of 10 to 12 repetitions.
- When you are comfortable with this exercise, then hold soup cans or small weights in both hands.
Shoulder stretch
- Start this exercise with your elbows or arms low or with your arms extended by your side.
- Move on until you sense a stretch in the front portion of the chest and shoulder.
- Hold for 10 to 20 seconds. Perform this for 10 repetitions two times a day.
Upper extremity neural mobilization
- To start this exercise put your hand on a wall with your fingers pointing down.
- Keep your shoulder down and your arm as straight as possible.
- From this position, move your neck smoothly left and right.
Median nerve mobilization of fingers & head
- To do this nerve mobilization you have to stand beside a wall with your palm flat on the wall and your fingers pointing straight up elbow should be flexed.
- Side flexed your neck (ear towards opposite shoulder) and extend your elbow slowly until a gentle stretching is felt over all anterior compartments.
- Return to the starting position and repeat.
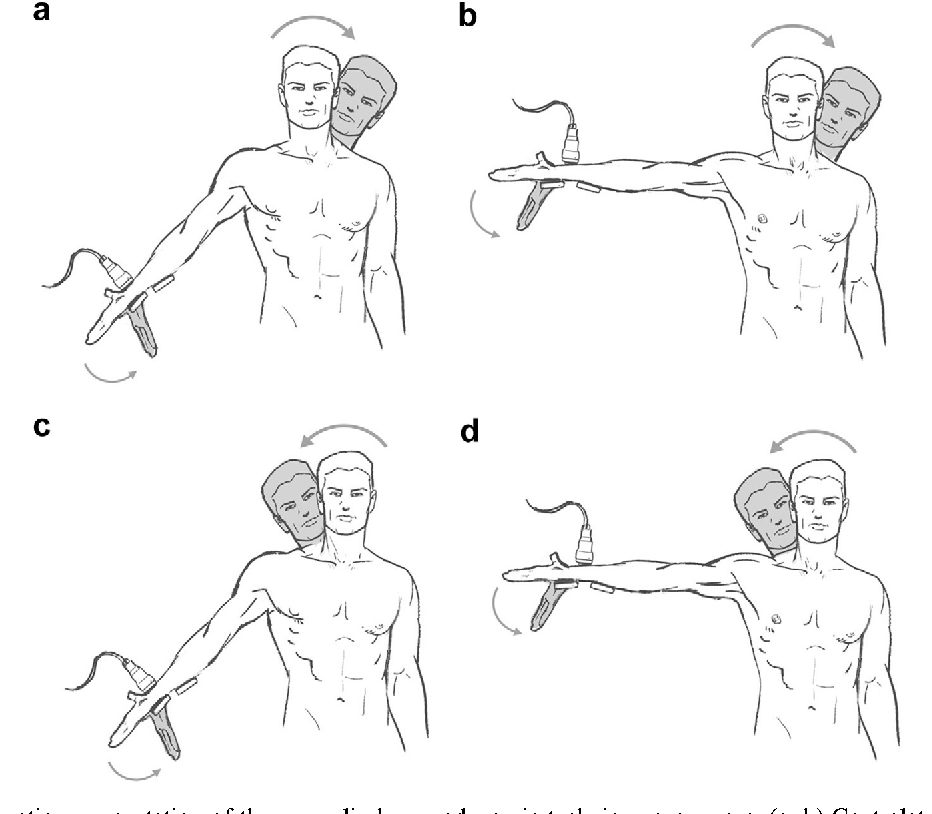
Median nerve flossing
- When performing this nerve flossing, you must be standing with the arm that you’re focusing on abducted to 90 degrees, palm facing forward, and fingers straight.
- While flexing your wrist forward and keeping your fingers straight, move the opposite ear in the direction of the opposite shoulder (side bend your head).
- Next, turn your ear towards the shoulder on the same side while extending your wrist while maintaining your fingers straight.
- These two places should be switched.
Scalene stretch
- Place your feet flat on the floor while sitting erect on a chair.
- Grab the chair’s seat with your right hand.
- Then, while keeping your head straight, tilt it to the left. Your neck’s right side ought to feel stretched. If the stretch hurts, ease it off or stop.
- Hold this for 30–60 seconds. After that, repeat this stretch on the other side.
Doorway shoulder stretch
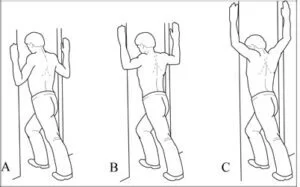
- To do pectoralis stretching you have to stand near the in-between the door opening with both hands on each side of the door frame. place hands should be slightly above shoulder height.
- Next, allow your body to forward lean so you can expand your chest. Put one foot forward and gently bend your knee for further support.
- Hold for thirty seconds.
- Note: Stop doing the stretch or modify it so you just do one arm at a time if it causes your tingling and numbness in your fingers to become worse.
Sitting back extension
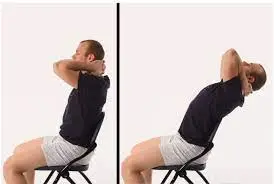
- To start this exercise you have to Sit erect in a chair with your palms on the back of your head and arms out to the side.
- Gently tilt back until you feel a stretch in your anterior body.
- Hold this for 30 seconds.
Stretching side bending
- As you raise one arm, cross it over your head.
- The palm of your hand should be on your head as you sit up straight.
- Soon as you feel a stretch on the opposite side of your neck, use your hand to gently lower your head down towards your shoulder.
- Keep the position.
- During this stretch, avoid turning or tilting your head in any direction.
Neck 3-in-1 stretch
- To do this stretch your shoulders back and down, and stand tall.
- To position your head in line with your spine, slightly tuck your chin.
- Put your ear on your shoulder by first bending your head to the side. Your hand should gently pull down and be held there for a short while.
- Next, turn slightly to the other side while lifting the chin a little. Hold for a short while.
- Finally, pull your head back while placing your tongue against the roof of your mouth. For a brief while, maintain this posture.
Neck side bending stretch
- Lay down on your back without a pillow under your head.
- As you raise one arm, place one hand above your head.
- When you feel a stretch on the side of your neck, gently pull your head down towards your shoulder with your hand.
- Keep your posture while unwinding.
- While performing this stretch, avoid turning or tilting your head either forward or backward.
Why is posture important for thoracic outlet syndrome?
Keeping the right posture can help relieve tension on nerves and vessels within the thoracic outlet. Typical signs of bad posture have rounding the shoulders and upper back and moving the head and neck forward. Over time, these postures can cause tightness and put pressure on the thoracic outlet. When done repeatedly, some movements can worsen posture, like working at a computer, playing a musical device that needs bending forward (e.g., string instruments), carrying heavy bags or a child, or other movements that bring the shoulders and neck forward. To avoid this, it is important to hold good posture and keep the thoracic outlet “open”. This can be done by maintaining the shoulders up and back, holding the neck in a neutral position, and maintaining your head up (chin parallel to the ground). It can also assist in a better posture to perform workouts that strengthen the muscles of the upper back and neck.
Exercises to avoid if you have thoracic outlet syndrome:
- You may need to restrict some activities while recovering from neurogenic thoracic outlet syndrome, even though no activities are strictly prohibited. If you have arterial or venous thoracic outlet syndrome, it is crucial to consult with a physician first.
- It is usually recommended you limit or avoid overhead activities or exercises that need lifting heavy objects(e.g., dumbbells, barbells, etc.) until you have received approval from your physical therapist or healthcare professional.
- Often, it may also be a good vision to steer clear of chest exercises (e.g., bench press) until you are further along in your recovery. The focus must be put more on strengthening the back muscles than the muscles in the front while treating thoracic outlet syndrome.
- During healing, it is important to take it gradually and avoid exaggerating it, which can worsen your condition. Hear to your body and only complete movements that feel relaxed and are not painful.
FAQ
Which things aggravates thoracic outlet syndrome?
Repetitive overhead activities, bad posture, and heavy weight lifting can exacerbate thoracic outlet syndrome.
Which muscles are affected by thoracic outlet syndrome?
The pectoralis minor is the muscle most typically affected in thoracic outlet syndrome.
How much time is taken to recover from thoracic outlet syndrome surgery?
Recovery: For at least a week or more after surgery, most patients have some level of discomfort or pain. Resumption of activities: Patients frequently resume low activity within seven to ten days.
Which nerve is affected in thoracic outlet syndrome?
The brachial plexus nerves, subclavian artery and vein, and axillary artery and vein are all pinched in Thoracic Outlet Syndrome, causing the signs and symptoms.
Is massage good for thoracic outlet syndrome?
Massage therapy may help some persons with thoracic outlet syndrome reduce their symptoms and improve the affected space. To avoid aggravating the injury more severely, it is best to consult an experienced physician.
Is thoracic outlet syndrome better treated with heat or cold?
People with neurogenic thoracic outlet syndrome may find some relief from pain and discomfort by applying heat to their neck and shoulder areas. Heat and cold therapy improve blood circulation.
If thoracic outlet syndrome is not treated, what will happen?
Thoracic outlet syndrome symptoms must be treated quickly to be effectively managed. You can feel more discomfort and pain if you don’t get treatment.
If you have venous or arterial thoracic outlet syndrome, it is important to seek medical attention as this can potentially lead to serious issues, such as blood clots.
How do you release thoracic outlet syndrome?
Physical therapy is typically the first-line treatment for thoracic outlet syndrome. Botulinum toxin injections are sometimes effective when physical therapy does not completely relieve symptoms. Surgery may be suggested if symptoms continue after physical therapy and steroid injections.