

Muscular Endurance
What is a Muscular Endurance?
Muscular endurance is the ability to continue contracting a muscle or muscle group against resistance, such as weights or body weight, over a period of time.
Increasing the activity of these muscles means they can continue to contract and work against these forces.
Greater muscular endurance allows a person to do more repetitions of exercises such as push-ups or squats.
Do you need muscular endurance?
By building muscular endurance patients will be able to perform physical tasks for a longer period of time. Whilst strength allows you to lift a force, endurance allows the patient to continue doing this over time.
How to Measure Muscular Endurance
McGrill Core Endurance Test
Purpose of the test:
To assess the muscular endurance of the stabilizing muscles of the body
PROCEDURE:
The protocol consists of four tests that measure total body strength using isometric muscle strength.
- Trunk flexor test (TFT)
- TFT is used to assess the endurance of the anterior core musculature (rectus abdominis)
- The flexural resistance test begins in a sitting position with the back against the jig, which is at an angle of 60 degrees to the floor. Both knees and hips are bent 90 degrees, arms are crossed across the chest, hands are on the opposite shoulder, and feet are stretched. First, the jig is pulled back 10 cm and the person holds the isometric position as long as possible. Failure is determined when a person’s back touches the jig.
- Record how long in seconds the client can hold his position.
- Trunk Extensor Test (TET)
- TET is used to evaluate the erector spinae and multifidis.
- The practitioner stands next to the client’s body to ensure proper alignment.
- Back extensors are tested with the upper body extending over the head of the test stand and the hips, knees, and pelvis fixed. The upper limbs are held across the chest, hands resting on opposite shoulders. The error occurs when the upper body falls below the horizontal position.
- Lateral musculature test:
- Lateral muscle tests (LBM) are used to measure the obliques, transversus abdominis, and lumbar region.
- The following protocol applies to both le! and tests of the right lateral muscles: “The lateral muscles are tested when the person is in a full lateral bridge position (le” and the right side separately). The legs are extended and the top is placed in front of the lower leg for support. Clients support themselves with one elbow and one leg as they lower their pelvis to the floor to create a straight line from head to toe. The unbound arm is held across the chest, the hand on the opposite shoulder. Failure occurs when the person loses a straight back position and/or the pelvis returns to the ground.
- If the client is unable to assume a correct position, lateral weakness is evident.
- Make sure the client remains in the correct position during the test.
Plank Hold
Purpose of the test:
Assess core muscle strength.
Necessary equipment:
Stopwatch
PROCEDURE:
- Begin with the client lying on their back on a stable, flat surface.
- Instruct the client to place the forearms on the floor with the elbows directly under the shoulder girdle.
- Next, press your toes down to touch the floor.
- When ready, have the client push off the ground with their hands and float into a plank position. • Take care of pelvic height or adjustment to both sides.
- A timed version of the plank hold test: Start the stopwatch while the client is still and motionless. Stop timing at one minute or when the client can no longer hold the position.
Static Squat Test
Purpose of the test:
Assess lower body muscle strength
Necessary equipment:
The wall
Stopwatch
PROCEDURE:
- The client stands with both feet against the wall, hips, and knees bent at a 90° angle.
- Instruct the client to lift one leg 5 cm” off the ground and hold it as long as possible.
- Time starts when the leg is pulled and ends when it touches the ground. • Record the maximum time for each leg.
Maximum Push Test
Purpose of the test:
To assess the muscle strength of the upper body.
PROCEDURE:
The protocols for the maximum pushup test and the modified pushup test are as follows:
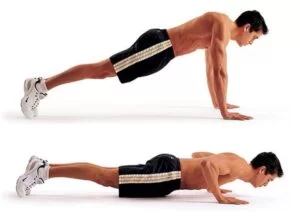
Pushup test (performed on the client’s toes)
- Lie on the mat with your hands shoulder-width apart and fully extend your arms.
- Lower the patient body until your elbows are at a 90-degree angle.
- Back to the starting position with the patient’s arms fully extended. • Do not hold the client’s legs.
- The pushing motion should be continuous without rest.
- Do as many compressions as possible.
- Record the total number of full-body push-up exercise.
Modified Pushup Test (performed on the client’s knees)
- Lie on the mat with your hands shoulder-width apart, knees bent and arms fully extended.
- Lower the patient’s upper body until your elbows are at a 90-degree angle.
- Back to the starting position with the patient’s arms fully extended.
- Do not hold the client’s legs.
- The pushing motion should be continuous without rest.
- Make as many custom seals as possible. • Record the total number of edited seals.
Benefits of muscle endurance training
- Helps maintain good and correct posture and stability for longer
- Improves aerobic capacity of muscles
- Improves the ability to perform daily functional activities such as lifting heavy objects
- Increasing athletic performance in endurance sports
Exercise For Muscular Endurance
Cardiovascular or Aerobic Exercises:
Activities like running, cycling, swimming, brisk walking, and jumping jacks improve cardiovascular health and boost overall endurance by engaging large muscle groups for an extended period.
Swimming
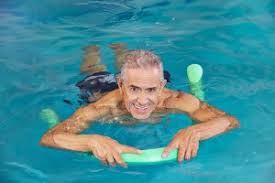
- If you are not interested in running, swimming can be a good option. Swimming is one of the best total body exercises and can lead to serious muscle endurance and an amazing physique. Swimming properly can be difficult without professional help, but here are some things to keep in mind while swimming that can help:
- Keep clean movements and avoid crying. The extra movements not only add to the body but also make it difficult to glide effectively in the water.
- “Dig” through the water with your hands. This allows for longer propellants.
- Keep your eyes down. It helps improve power dynamics and keeps the body in a good position.
- There are many more tips to improve muscle endurance for efficient swimming, but these should get you started. If you are new to swimming, start slowly and aim for a reasonable swim time. Over time, shoot for at least 30 minutes to an hour so that swimming builds muscle strength.
Running

- If you train and avoid cardio, now may be the time to explore cardio as a fitness booster. Not only does running build great cardiovascular endurance, but it also builds endurance as you work multiple muscles in your body.
- Make sure your posture is good as this maximizes benefits and minimizes the risk of injury.
- Activate your core all the time. Most people think of running as a lower-body sport, but running uses the entire body. Endurance running takes practice, but it can build serious cardio-respiratory endurance that can transition seamlessly into strength training. Don’t set pace goals that are too fast for long distances.
Plank
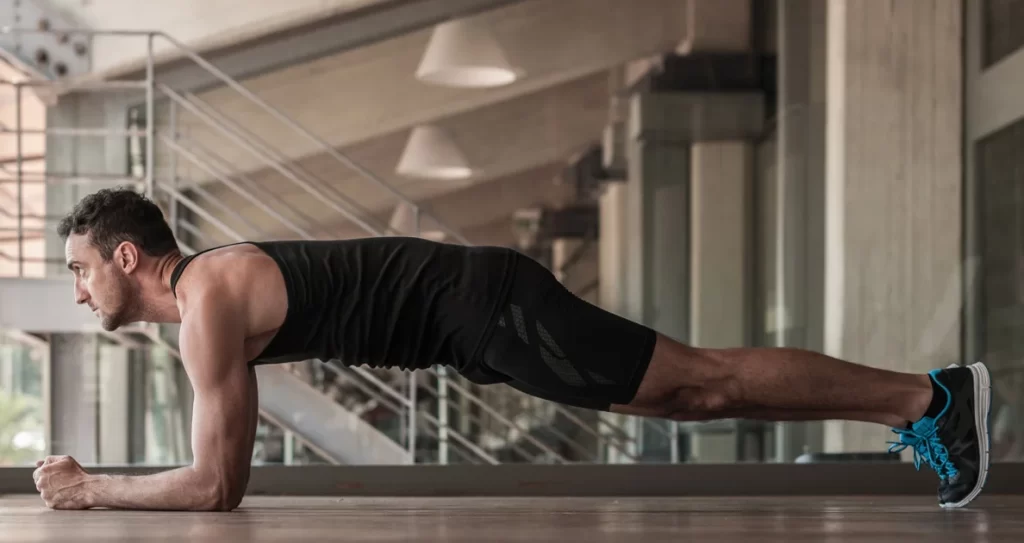
- Begin kneeling on all fours, and then place the patient forearms down on the floor. Step one leg back at a time until you’re in a straight line from the head area to the heel area, keeping the spine neutral.
- Engage the patient’s abs to support the lower back, and imagine lifting your chest away from your elbows but without a rounded spine.
- Hold for as long as the patient can (aim for intervals of 30 to 45 seconds) and then relax. That completes one rep.
- Tips: If you start to lose form (either your hips sag low or your buttocks start to lift up), then it’s a good period of time to rest before performing another rep.
Body Weight Squats
- Start by standing with your feet slightly wider than shoulder-width apart and your toes pointed straight ahead. Bend your legs and sit until your buttocks reach the level of your knees. Your thighs should be almost parallel to the floor and your knees should extend over your toes. Push yourself up, pushing through your glutes on the way up.
- Do 2-4 sets of 25 repetitions. Adjust this number of repetitions if you feel you can do more at the end of each set. Tips: To maintain good form, keep your head up, chest up, and shoulders back. Do not let your body be parallel to the ground.
- Try a variation of this traditional squat by widening the position and pointing your toes. This movement targets the inner thighs.
Basic Burpee
- Stand with the patient’s feet shoulder-width apart, hands at your sides. Bend the patient’s knees and reach forward to place your hands on the ground. Straighten your legs behind you and immediately lower your whole body to the ground, bend your elbows. Use your arms to quickly push your body back up and jump your legs back under your body. Jump straight up into the air, extending the patient’s arms above your head. Finish with slightly bent knees and go straight to the next repetition.
Push up
Step 1
Starting position: Kneel on the exercise mat or floor and bring your legs together behind you.
Step 2
Slowly bend forward to place your palms on the mat and place your hands shoulder-width apart with your fingers pointing forward or slightly inward. Slowly shift your weight forward until your shoulders are directly over your hands. Position your arms as needed to fully extend your body without bending your hips or knees.
Strengthens your body by contracting your core/abdominal muscles (“tightening”) as well as your glutes and quads and aligns your head with your spine. Place your feet together with your ankles bent back (toes pointing toward your shins).
Step 3
Bottom Phase: Slowly lower your body to the floor, keeping your body rigid and your head aligned with your spine.
Do not allow your lower back to sag or your hips to lift during this lowering phase. Keep going down until your chest or chin touches the mat/floor. Allow the elbows to flare outward during the lowering phase.
Step 4
Rise phase: Press up through your arms keeping your body rigid and your head in line with your spine. For added strength, consider pushing the floor away from you. Don’t let your lower back sag or your hips go up.
Continue pressing until the patient’s arms are fully extended at the elbows.
Step 5
An alternative position is to rotate your arms to face forward and keep your elbows close to your sides in the down phase. This shifts the focus from the pectorals to the triceps and can reduce stress on the shoulder joint.
Pushing through the heel and the outside of the palm adds compression and stability to the shoulders.
Strength Training Exercises:
Lunges
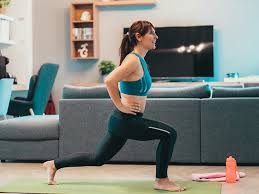
- Stand position in a split stance with your right foot about 2-3 feet in front of your left foot. Your body is straight, your shoulders are back and down, your core is closed and your hands are resting on your hips.
- Bend the patient’s knees and lower your body until your back knee is a few inches off the ground. At the bottom of the movement, your front thigh is parallel to the ground, your back knee is pointed toward the floor, and your body weight is evenly distributed between both legs.
- Push back to the starting position, keeping the patient’s weight on the heel of the front foot.
Crunches
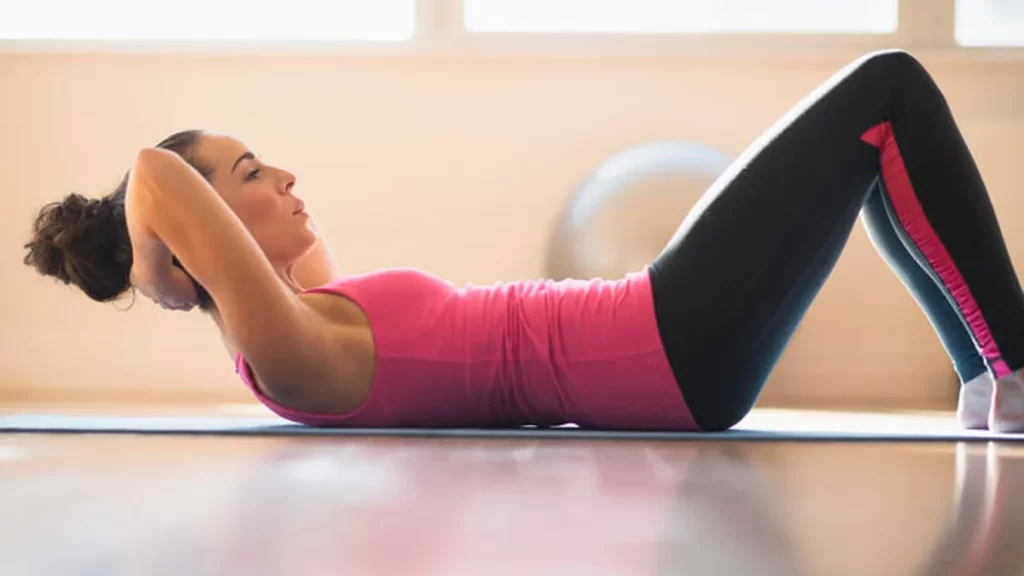
- Begin by lying on your back with your legs bent and feet on the ground. Place your hands slightly behind your head to support your neck, elbows at your sides. Brace your stomach and twist your body up, lifting your upper back and shoulders off the ground. Keep your elbows at your sides instead of swinging them around your head. Resist the urge to use momentum instead of muscle to lift your body. Leave a golf ball’s space between your chin and chest. Lower your body in a controlled motion to maximize the use of the muscles. Do 5 sets of 25 repetitions.
Abdominal crunch
- Lie on the patient’s back with your knees joint bent and feet on the floor. Place your hands lightly on the back of your head with your chin tucked in. Slowly bend your upper body toward your knees, keeping your lower back on the mat. Slowly lower the patient’s back to the starting position. Do 10-15 repetitions for one beginner set.
Pike crunch
- Another crunch example of an abdominal crunch is the pike crunch:
- Lie on the floor with your back straight, legs extended, and arms above your head. Lift your body and legs off the floor to form a pike. Place your feet straight up in the air at a right angle and reach your arms toward your feet. Slowly lower your legs and body back to the floor. Do 10-15 repetitions with one starting set.
Bench Press
- Traditional flat bench press
- Necessary equipment or objects: barbell (extra weights optional) or dumbbells, flat bench
- Lie on the patient’s back on a flat bench. Grasp the bar with the patient’s hands slightly wider than shoulder width. The band should be directly above the shoulder joint. Press the patient’s feet firmly into the floor and keep your hips on the bench throughout the movement.
- Engage the patient’s core muscles and maintain a neutral spine throughout the movement. Avoid arching your back. If patients use dumbbells or barbells, slowly raise them. Lower the bar to your chest about nipple level, allowing your elbows to bend out to the side, about 45 degrees away from your body.
- Stop counting when the patient’s elbows are under the bench. Press the patient’s feet into the floor as you push the bar back up to return to the starting position. Do 5-10 repetitions depending on the weight you are using. Complete up to 3 sets.
2. Narrow grip bench press
- Necessary equipment: barbell (additional weights optional), flat bench
- Use the steps above for a traditional bench press, but keep the bar shoulder-width apart throughout the movement.
3. Incline bench press
- Necessary equipment: two dumbbells or a barbell, an incline bench at an angle of 45-60 degrees
- Place your feet on the floor as you lean back slightly so that your back rests against the bench with a neutral spine. Start by holding dumbbells or barbells directly above your shoulders. Face your palms forward with your thumb around the handle. Press the weight to the eyes or slightly higher, elbows extended to 45 degrees. Inhale and lower the dumbbells or dumbbells slowly and with control until they touch or extend just above your chest, elbows, and wrists out to your sides. Repeat the push and do about 5 or more repetitions.
- Remember that repetitions will depend on your goals and weight. Someone using heavier weights can do fewer repetitions than someone using lighter weights.
4. Decline chest press
- Necessary equipment: bench 15 degrees and dumbbells or barbell
- Slowly lie on the bench with your legs over your head, keeping your back straight
- bench Place your feet on the stools provided. Ask a spotter to help you lift the bar off the rack or grab the dumbbells as you use them. Hold the weight directly above your shoulders with your hands slightly wider than shoulder height. Press the weight up until your arms are at a 45-degree angle overhead. Slowly lower the weight to chest height, elbows at the sides. Repeat the push and do about 5 or more repetitions. Remember that repetitions will depend on your goals and weight. Someone using heavier weights can do fewer repetitions than someone using lighter weights.
Step up:
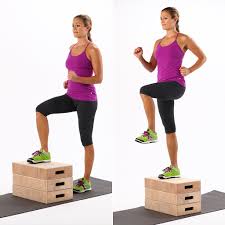
- Depending on the mobility and strength of your hips, place your feet on the box so that the knee is bent at a 90-degree angle or the hip crease is slightly below the knee. Make sure it is on a flat surface area. Do with body weight, holding the dumbbells to the patient’s chest and standing about a foot away from the box.
- Place the entire lead leg on the box with the toes pointing forward side. Push through the wire leg to stand. As you stand up, think about extending the patient’s glutes forward. With the knee extended, place one foot on a box, balance on the patient’s leg, or press the non-working leg onto a high knee. Step down slowly with the non-lead foot, reset, and repeat the position.
Walking Lunges:
- Stand with your feet about hip-width apart. Before you start, check your posture – your body should be upright and tall, core engaged, shoulders back and chin up. Look straight ahead. Take a wide step forward with your right foot—planting it about two feet forward, allowing your left heel to rise naturally as you step forward. You may want to place your hands on your hips with each step, or move your arms naturally – elbows at 90 degrees.
- Keep your core engaged and upright. Bend both knees area and lower the back knee to the floor. Stop right before it touches. Inhale during the downward (or eccentric) phase of the exercise. Press firmly through your right heel and straighten your right knee to stand up as you lift your left foot off the ground, moving your left foot forward to plant it about two feet in front of your right foot. Avoid leaning your body forward from the hips when doing this move. Exhale as you stand up (concentration phase of the exercise).
- Continue to step forward with each jump, alternating sides as you do. If you find yourself losing balance as you walk, stop with your feet together at the top of each step. Collect your balance and continue. Finish the series by bringing the back foot with the front foot on the last jump.
Wall Sits:
- Start with the patient’s back against a wall with the patient’s feet shoulder-width apart and about 2 feet away from the wall. Brace your abs and slowly slide your back down the wall until your thighs are parallel to the ground. Adjust your legs so that your knees are directly over your ankles (not over your toes). Keep your back against the wall.
- Hold the position for 20-60 seconds. normally slide up the wall to a standing position. Rest for 30 to 40 seconds and repeat the exercise three times. Increase your hold time every five seconds as you increase your power.
Calf Raises:
Double Leg Calf Raise
- Stand on an exercise or yoga exercise mat with your feet shoulder-width apart and toes pointed forward. You can do legs on the floor if you don’t have a mat. You can even try a standing desk. Some trampolines have handlebars that can also be useful during this calf-raise exercise. Keep the patient’s back straight, shoulders back and down, and abs pulled in.
- Slowly raise the patient’s heels, keeping your knees extended (but not locked). Pause as you can while standing on your toes. Lower your heels back to the ground and back to the starting position.
Triceps Dips:
- Sit on a stable chair, or weight bench, or step on the edge and grab the edge by your hips. Some pull-up bars can also be used to dip the triceps. Your toes should be pointed toward your feet, legs extended feet about hip-width apart, heels touching the ground. Look straight ahead, chin up.
- Press into your palms to lift your body and slide forward just enough to clear your back from the edge of the chair. Lower yourself until your elbows are bent 45-90 degrees. Control the activity movement through the full range of motion. Slowly push yourself back up until the patient’s arms are almost straight and repeat.
Pull-Ups or Chin-Ups:
Chin up
- Grab the bar with your palms facing you, slightly shoulder-width apart. Engage your core and leg muscles. Raise your shoulders off the floor until your chin is over the bar. Wait a minute. Lower back to the starting position. Do a total of 8-10 repetitions.
Pull up
- With your hands shoulder-width apart, hold the bar with your palms facing away from you. Shrug your shoulders. Brace your core and lift your feet off the floor. Pull the chest up towards the tank until the head peeks through it. Wait a minute. Lower yourself back to the starting position. Do a total of 8-10 repetitions.
Resistance Band Bicep Curls:
- Standing Resistance Band Bicep Curls
- Standing position in the middle of the resistance band. Hold the resistance band by the ends so that the middle part is on the floor. Step on the strap with one foot so that the strap is in the middle of the foot. Then place one foot on the resistance band with your feet shoulder-width apart. Make sure the strap doesn’t move and your feet are comfortable. You can buy resistance bands at any sporting goods store or online. If you want a lighter workout, tap the resistance band with one foot instead.
- Hold the ends of the resistance band in the patient’s hands. Stand with a straight back and look ahead while performing the exercise. Keep your arms straight down, palms facing inward. Hold the band with slight tension between your arms and legs
- Some resistance bands have handles so patients can easily hold them. Otherwise, grab and hold them as hard as you can. Bend your elbows and hold the curls 2-3 times. Raise your arms to stretch the ends of the resistance band and stretch. Use a slow, controlled motion to prevent the tapes from breaking or slipping. Bring your hands in front of your shoulders and flex your biceps for 1-2 seconds to engage the muscles.
- If you want to add more complexity to your curls, stick to dumbbells and a resistance band. You can lift both arms at the same time or alternate arms with each curl. Slowly lower your arms to complete the repetition. After counting, extend your arms again at the same controlled speed. Do not let go of the straps while lowering your arms or you may injure yourself. With your arms at your sides and the resistance band relaxed again, rest for 1 count before resuming your repetitions. Do 2-3 sets of 10-15 repetitions during the exercises. Do not lift your legs during any curl as the resistance band may break and injure you.
2. Seated Resistance Band Bicep Curls
- Place a resistance band under your feet while sitting in a chair. Use loops when making a side-less chair or bench. Slide the center of the resistance band under your feet so that they are shoulder-width apart. With the resistance band attached under your feet, sit with your back straight and look ahead. Make sure the chair or bench you use doesn’t move too much or the resistance band may slip out from under your feet.
- Hold the ends of the resistance band with your palms facing inward. Keep your arms at your sides so they hang over the seat. Firmly grasp the ends of the resistance band so that it stretches slightly as you relax. Make sure your palms are turned inward so you can bend easily.
- Bring your arms to your chest to stretch the resistance band. Avoid moving your back, shoulders, and elbows when bending. Stretch the resistance band by raising your arms to your chest and keeping your wrists straight so that your hands are in line with your hands. When you reach the top of the curl, hold it for 1-2 seconds.
- Lower your arms until they are straight after 1-2 counts. Slowly lower your arms until they are straight and the resistance bands relax. Don’t let the band pull your arm down too quickly, as this will make your workout less beneficial. At the end of the repetition, take a short break before continuing the set.
- Do 2-3 sets of 10-15 repetitions.
Bicep Curls with Lunges
- Step into the middle of the resistance band with one foot. First, choose one of your feet and stand with it in the middle of the tape. Place the tape so that it is under your toes, not in the middle of your foot. Hold the ends of the resistance band with both hands to provide some resistance when your arms are straight.
- It doesn’t matter which leg you start with, you’ll switch them later.
- You can bend both arms simultaneously, or just the arm against the leg with which you step forward.
- Take a long step forward side with one foot. Step forward with one foot so that it is about 2-3 feet (61-91 cm) in front of the resistance band. Make sure your feet point forward to maintain form. Keep your knees slightly bent and your back straight to look forward. Stepping forward position adds tension to the resistance band. If it feels too tight or hard to pull, loosen the head grip or use less resistance. Don’t step too far if you lose balance easily, as the resistance bar may return to you if you fall.
- Bend the patient’s knees so they form a 90-degree angle. Lower your body closer to the floor by bending the patient’s knees. Keep your back straight as you get closer to the ground to work your legs and hips. When the front knee forms a 90-degree angle, hold the position for 1-2 seconds.
- Do not lift your feet off the ground while kicking, as the obstacle may slip out from under your feet.
- Bend your arms toward your shoulders while maintaining a forward thrust. As you lower your body into the push-up, bend your elbows to bring your hands closer to your shoulders. Keep your palms facing in and your wrists straight to make it easier to stretch the resistance band. With the biceps flexed, hold the lunge position and curl for about 1 second. Then slowly lower your arms to complete the loop. If you want to add weight to your routine, you can use dumbbells. After 10-15 repetitions, switch which leg is behind you for a consistent workout. Do 2-3 sets of 10-15 repetitions for both legs.
Bicycle Crunches:
- Lie on the floor on a yoga mat, rug, or towel with your lower back pressed into the ground and knees bent. The feet should be on the floor and the hands behind the head.
- Engage your core muscles and pull in your stomach to stabilize your spine. Hold your head gently in your hands. Pull your shoulders back and slowly raise your knees to about a 90-degree angle, lifting your feet off the floor. Exhale and slowly do a bicycle pedal at first, lifting one knee to the armpit while extending the other leg, keeping both hips higher. Turn your body so you can touch your opposite knee with your elbow as it rises. Turn to the other side, pulling the knee to the armpit and extending the other leg until the elbow touches the opposite knee. The goal is 12-20 repetitions and three sets.
Straight leg raise exercise
Step 1: Establish Your Position
Begin this exercise by lying on your back (flat back) and extending your legs. Extend your arms and place them at your sides, then press your hands lightly into the ground.
Step 2: Exhale and rise
Starting the movement grounds the body creating tension through the core and pressing the lower back into the ground. Use this shallow ground nozzle to ensure proper placement.
Exhale and then lift your legs until you reach the point where you feel your lower back “peel” off the ground. If you reach this point before your lower back feels like it’s losing contact with the ground, stop and start the landing.
Coach’s Tip: The reason I prefer to exhale during the concentric (lifting) part is that may produce slightly better core contractions due to less inflated support in the body.
Step 3: Lower and Repeat
On the way down, inhale and check your legs on the way down, keeping the ground in contact with your lower back. At the end of the movement, keep your feet off the ground, then repeat the above three steps for the set number of repetitions.
Box Jump:
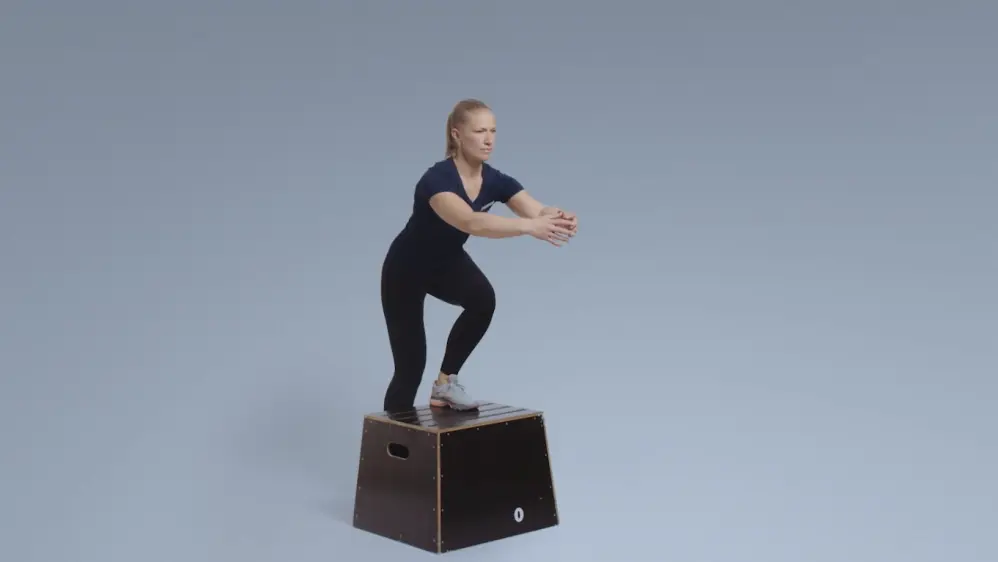
- Stand in front of a plyo box with your feet wide apart arms in front of your chest, elbows slightly bent and hands in front of your face.
- Bend your knees slightly and bring your hands down and behind your body, then press through the floor to jump into the box, bringing your hands back in front of your chest.
- Land softly on the box with both feet, knees bent at about 90 degrees, and chest up. Press your legs to extend your legs and return to standing. Drop your arms to your sides, then step back from the box one foot at a time.
Kettlebell Swings:
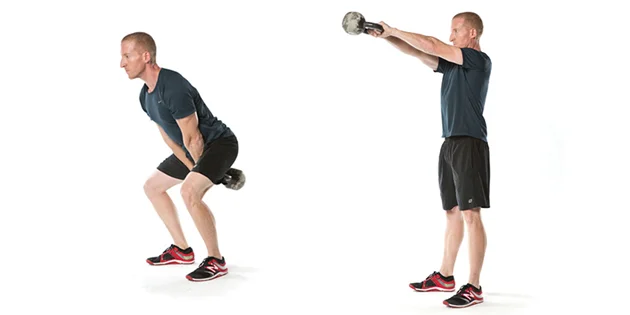
- Stand with your feet shoulder-width apart, holding two hands (palms facing you) and arms straight down. Inhale and push your hips back (exhale hips) and bend your knees slightly so the kettlebell comes between your legs. Make sure you keep your back straight and connect with your core. Exhale, contract the patient’s glute muscles, and push your hips forward to lift your body.
- Let your hand swing the two-bell until it naturally goes. Shoulder height or parallel to the ground is your goal, even if you don’t want to use arm strength to lift the kettlebell. It may take a few turns to find a rhythm and maximize lift. Inhale and lower the kettlebell between your legs, pushing your hips back and bending your knees slightly. This is 1 representative. Do 2-3 sets of 10-20 repetitions or continue for as long as you want (eg as many as you can in 5 minutes).
5 Battle Rope Exercises
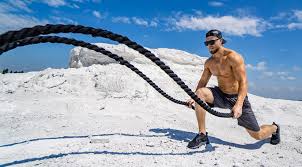
Do three to four sets of each exercise, working for 20-30 seconds and resting for 20-30 seconds between sets. As you progress, try to work up to 30-60 seconds and rest only 15-20 seconds between sets.
Single arm wave:
- Begin standing in an athletic stance with your feet about hip-width apart, holding one end battle rope in your left hand with a grip (thumb should be on top). Control and bend the patient’s wrist, and start violently moving your hand up and down. The movement must start from the shoulders, not the hands. It gives momentum and “wave” across the length of the rope. Change hands.
Double-handed wave:
- Start standing with your feet about hip-width apart, holding both ends of the battle rope (thumbs should be up). Control and bend your wrists, and start moving your arms up and down simultaneously with force. The movement must start from the shoulders, not the hands. This creates momentum and waves throughout the rope.
Alternating waves:
- Start standing with your feet about hip-width apart, holding both ends of the battle rope (thumbs should be up). Controlling and bending your wrists, begin to force your left arm up. As the left string begins to descend, repeat the movement with the right hand. Continue to alternate between the left and right sides, maintaining the rhythm. This creates momentum and waves through the rope.
Single-arm slam:
- Start standing with your feet about hip-width apart, and hold one end of the battle rope with the handle in your left hand (thumb should be on top). Raise the rope under control and then press down. Repeat this movement, kicking with as much force as possible, maintaining the foot position, and keeping both feet “glued” to the ground. Switch to the right hand and repeat the activity.
Double-arm slam:
- Start standing with your feet about hip-width apart, holding both ends of the battle rope in your hands (thumbs should be up). Lift both ends of the rope under control and then push them down simultaneously. Repeat this movement, squeezing both ropes simultaneously with as much force as possible, maintaining your foot position, and keeping both feet “glued” to the ground.
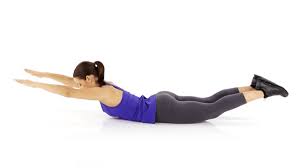
- Lie on the floor in a supine position (face down) with your legs straight and your arms extended in front of you. Keeping your head in a neutral position (avoid looking up), slowly raise your arms and legs about 6 inches off the floor or until you feel your lower back contract. Engage your glutes, core, and inter scapular muscles at the same time.
- Try to lift your navel slightly off the floor to contract your stomach. A good way to describe it is to imagine the patient is Superman flying through the air. Stay in this position for 2-3 seconds. Make sure the patient is breathing all the time. Lower the patient’s arms, legs, and stomach back to the floor. Repeat this superman exercise for 2-3 sets of 8-12 repetitions.
Shoulder Press:
- Place a barbell of the desired weight on the rack, making sure it is at shoulder height. Dip under the bar stand under the bar and slowly lift it straight up. When done correctly, the bar should rest on top of your shoulders. Grab the bar with your palms facing up – the elbows should be pointing straight ahead. Make sure your back is straight to ensure proper form. Carefully step back from the rack, keeping your back tall – then press the bar overhead. When you can no longer extend your arms, slowly bring the bar to your shoulders and repeat as many times as necessary. After the last repetition, enter the rack and again leave the bar at shoulder height. Finally, dip the bar down and walk away from the bar without the bar.
Hammer Curls:
- Stand legs straight (not stiff or locked) and knees below hips. Your arms are at your sides, a dumbbell in each hand, the weights resting next to your outer thighs. The palms are facing the thighs, the thumbs are forward and the shoulders are relaxed.
- Bend at the elbow, and raise your arms to pull the weights toward your shoulders. Your upper arms are still and your wrists are in line with your hands. Hold for 5 to 7 seconds at the top of the movement. Your thumbs are close to your shoulders and your palms are turned inward, toward the mid-line of your body. Lower the weights to back to the starting position.
Triceps Kickbacks:
- Raise a stop with your left hand.
- Stand in a split stance with the patient’s right foot forward.
- Tighten your core and lean forward, keeping your back straight and your head in line with your spine.
- Place the patient’s right hand on your right thigh.
- Bend the left arm holding the bar to a 90-degree angle, keeping the upper arm in line with the upper body. Without moving your upper body or upper arm, slowly straighten your arm, keeping your wrist rigid.
- Slowly return your arms to the starting position at a 90-degree angle. Do the desired number of repetitions.
- Repeat on the other side.
Jumping Jacks:
- Stand in a straight position with feet together, arms fully extended, arms at sides, and toes pointed forward. This sporting attitude is the first step.
- Then, in a quick movement, bend your knees slightly, jump your legs to the sides of your body, push your arms out on both sides and raise them above your head. Make sure you do all these things at the same time.
- After landing, reverse the pattern and return to the starting position with your arms at your sides and feet together. Repeat the entire process and do 10-100 repetitions for about six sets. Remember to maintain your position and avoid curling or twisting your toes outward.
Bent-Over Rows:
- Stand behind the barbell with patient feet shoulder-width apart. Bend at the hips, keeping the patient’s back straight and your knees slightly bent. Consider sitting down a little (move your tailbone behind your legs) – this will help determine your barbell position. The body should be bent forward at an angle of about 45 degrees, but no more. Grab the bar slightly wider than shoulder-width, keeping your hands in a supine position (palms facing your shins).
- Engage your glutes and core by tucking your elbows behind you and lifting the bar into your abs. Pull your elbows behind you and squeeze your shoulders, keeping your back straight. Hold for 1 second and then slowly lower the bar back to the starting position, extending your arms and barbell plates completely off the floor. Repeat this for 6-12 reps and do 3 sets.
FAQ
What is muscle endurance?
Muscle endurance refers to the ability of a muscle or group of muscles to sustain repeated contractions over an extended period without muscle fatigue.
How can I improve muscle endurance?
You can improve muscle endurance through regular aerobic exercises, strength training, high-intensity interval training (HIIT), and proper nutrition.
Are there specific exercises to target muscle endurance?
Yes, exercises like push-ups, squats, lunges, planks, and cycling are excellent for building muscle endurance.
What are the benefits of muscular endurance?
Increase your ability to tirelessly perform activities such as opening doors, lifting boxes, or chopping wood.
Reduce the risk of injury.
Helps maintain a healthy weight. Causes healthier, stronger muscles and bones.
Improve the patient’s confidence and how you feel about yourself. Gives a sense of accomplishment.
You can add new and different activities to your exercise program.
Is muscular endurance more important?
Muscular endurance can be a much more valuable fitness attribute than pure strength, especially for those who play sports that require sustained effort throughout the game. The best way to develop muscular endurance is simple: lower the intensity and increase the frequency.
Does endurance exercise build muscle?
Strength training builds existing muscles. However, new muscle fibers are not born. Millions of recreational athletes exercise in the gym, mostly with strength training, to promote their health and well-being. This form of exercise causes muscle irritation even with minimal effort.
Reference
Sissons, B. (2021, January 29). The best way to train to improve muscular endurance.https://www.medicalnewstoday.com/articles/muscular-endurance#what-it-is
Muscle Endurance Testing -. (2018, February 6).https://exercise.trekeducation.org/assessment/endurance-testing/
Mpt, T. E. P. (2023, April 7). The Top 5 Muscular Endurance Exercises. Healthline.https://www.healthline.com/health/fitness-exercise/muscular-endurance-exercises#body-weight-squats
Mpt, T. E. P. (2023, April 7). The Top 5 Muscular Endurance Exercises. Healthline.https://www.healthline.com/health/fitness-exercise/muscular-endurance-exercises#plank
How To Do Push-Ups | ACE. (n.d.). https://www.acefitness.org/resources/everyone/exercise-library/41/push-up/
Cpt, P. W. (2022, November 25). How to Do Lunges: Proper Form, Variations, and Common Mistakes.Verywell Fit. https://www.verywellfit.com/how-to-lunge-variations-modifications-and-mistakes-123132
Chertoff, J. (2023, May 24). What Muscles Do Bench Presses Work? Healthline.https://www.healthline.com/health/exercise-fitness/bench-press-muscles-worked#how-to
Nasm-Cpt, C. E. (2022, May 1). How to Do Standing Calf Raises: Proper Form, Variations, and CommonMistakes. Verywell Fit. https://www.verywellfit.com/how-to-do-calf-raises-4801090
CSCS, J. B. (2021, January 6). How to Do Leg Raises the Right Way. Men’s Health.https://www.menshealth.com/fitness/a35140310/leg-raises/
Cpt, K. D. M. R. (2023, April 12). Try the Superman Exercise to Stand Tall and Proud. Healthline.https://www.healthline.com/health/fitness/superman-exercise#benefits
Selemin, J. (2022, June 30). How to Do a Shoulder Press. WebMD. https://www.webmd.com/fitness-exercise/how-to-shoulder-press
Cpt, M. F. M. A. C. (2022, November 18). How to Do Hammer Curls: Proper Form, Variations, and Common Mistakes. Verywell Fit. https://www.verywellfit.com/how-to-hammer-curls-techniques-benefits-variations-4788329
Mpt, T. E. P. (2022, April 12). Master the Bent Over Row: Good Form and Variations. Healthline. https://www.healthline.com/health/fitness/bent-over-row#how-to-do-it
Falk, M. (2022, October 17). How to Do Box Jumps with Perfect Technique. Shape. https://www.shape.com/fitness/workouts/targeted-exercises/box-jump-exercise
Ms, E. Q. (2023, May 26). How to Do a Bicycle Crunch: Fitness Tips, Variations, and Common Mistakes. Verywell Fit. https://www.verywellfit.com/bicycle-crunch-exercise-3120058
Stobo, R. (2021, August 9). Pull-Ups vs. Chin-Ups: What’s the Best Upper-Body Workout? Greatist. https://greatist.com/fitness/pull-up-vs-chin-up#pull-up-technique
V. (2022, November 15). Step Up To The Bench And Elevate Your Leg Gains with this Underrated Exercise. Muscle & Fitness. https://www.muscleandfitness.com/workouts/leg-exercises/step-up-exercise-how-to-benefits-variations/
Theriot, D. (2021, August 25). 3 Ways to Do Bicep Curl Resistance Band Exercises – wikiHow. wikiHow. https://www.wikihow.com/Do-Bicep-Curl-Resistance-Band-Exercises
Cpt, K. D. M. R. (2022, January 28). The Benefits of Kettlebell Swings and How to Do Them Right. Healthline. https://www.healthline.com/health/fitness/benefits-of-kettle-bell-swings#how-to-do-one
Ms, E. Q. (2022, August 14). How to Do Triceps Dips: Proper Form, Variations, and Common Mistakes. Verywell Fit. https://www.verywellfit.com/the-chair-dip-triceps-exercise-3120734
Battle Ropes: What They Are, Their Benefits and Exercises You Can Do. (n.d.). Nike.com. https://www.nike.com/in/a/battle-ropes-benefits-workout
Adcox, S. (2022, July 22). How to Do Triceps Kickbacks. WebMD. https://www.webmd.com/fitness-exercise/how-to-do-triceps-kickbacks
Weishaupt, J. (2022, July 8). How to Do Jumping Jacks. WebMD. https://www.webmd.com/fitness-exercise/how-to-do-jumping-jacks

2 Comments