32 Best Advance Poses In Yoga
Introduction
Advance Poses In Yoga
Complex yoga poses that are beyond your ability to perform comfortably are known as advanced poses. It’s possible that you experience mental and/or emotional difficulties in addition to physical difficulty when performing these challenging yoga positions.
- It is incorrect to categorize yoga as an “easy” type of exercise.
- It might feel just as difficult to activate your muscles, focus, control, balance, and breathe in unison as it can to perform a set of burpees.
- There is no truth to the myth that yoga is only a kind of stretching and meditation; while these aspects are important and have many advantages, regular yoga practice also helps build muscular tone and endurance.
- According to one study, those who practiced sun salutations six days a week for 24 weeks noticed a substantial gain in their upper body strength and endurance as well as a decrease in their body fat percentage in the case of the female participants.
- Whether you practice yoga regularly or are just starting out, you might be interested in gradually increasing the intensity to challenge your body and mind even more.
- More than just a basic Chaturanga, advanced yoga positions may help you develop your body and train broader muscle groups.
- Here are a series of poses and thorough instructions for each that will challenge your body and mind at a level that will be even more intense than you’re used to.
- Whether you practice yoga regularly or are just starting out, you might be interested in gradually increasing the intensity to challenge your body and mind even more.
- More than just a basic Chaturanga, advanced yoga positions may help you develop your body and train broader muscle groups.
- A yoga instructor with thousands of on-demand yoga, Pilates, and meditation classes available on YogaToday, a subscription-based virtual fitness platform has shared a series of poses and thorough instructions for each that will challenge your body and mind even more than you’re used to (who knows, maybe you’ll be snagging a front-row mat in class soon).
32 Best Advance Poses In Yoga
Following are the advanced yoga poses to Elevate your practice and enhance your flexibility
Chin Stand
Benefits:
Opens up the chest and neck region while strengthening and extending the wrists, biceps, and upper arms.
Steps To Follow:
- Slowly bring your chin and chest down to the yoga mat from the plank position.
- Lift one leg, then the other, until they rest on your hands and chin by using your core to hug your inner thighs inward toward one another.
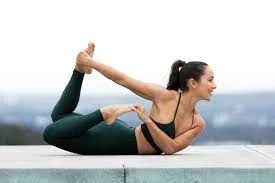
Dhanurasana (Bow Pose)
Benefits:
Strengthens the back and abdomen.
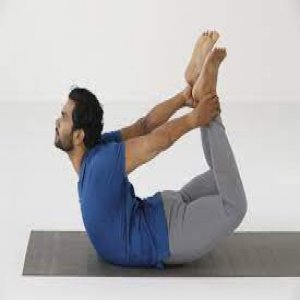
Steps To Follow:
- Laying down on your stomach.
- Grab hold of your ankles by bending your knees in.
- To raise your torso and draw up your legs, press the backs of your feet into your palms.
- Maintain your position.
Compass Pose
Benefits:
Opens the glute, chest, and hamstring muscles.
Steps To Follow:
- Attempt to get your right leg over your right shoulder while seated.
- After that, plant your right hand to help you stay grounded, and use your left hand to grab hold of your right foot.
- Press the right foot into the left hand to stretch the right leg straight behind you.
- Hug the inner thighs in toward each other.
- Broaden across the chest.
- Continue on the opposite side.
Boat Pose
Benefits:
Improves concentration and fortifies the center.
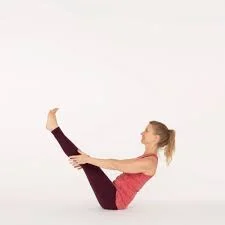
Steps To Follow:
- Put your hands close to your hips in Staff Pose to start.
- Lean back gently without letting your back contact the floor, lifting through your sternum.
- Keep your tailbone and sit bones in balance.
- If at all possible, slowly begin to straighten your legs, keeping your toes just above eye level.
- There, extend your arms forward with your palms facing inward, straighten your back, and do the same.
- Maintain your position.
Crow Pose
Benefits:
Strengthens the arms, wrists, and core; opens the hips.
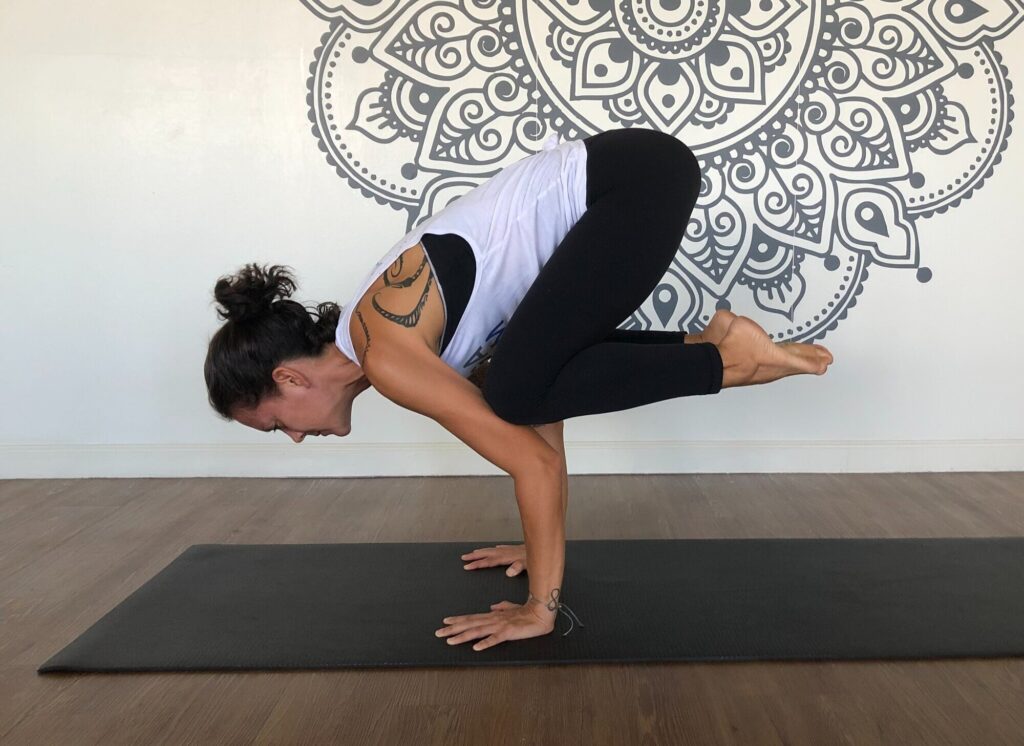
Steps To Follow:
- Walk the big toes together and try to rest your knees high on your triceps from a yoga squat or Garland posture.
- Start by rocking back and forth on your wrists.
- Once you feel steady, bend forward and embrace your inner thighs inward toward one another with your core strength.
- Bring your toes up and toward your glute muscles while activating your core.
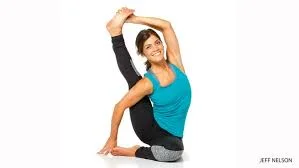
Gomukhasana (Cow Face Pose)
Benefits:
Body stretches and posture are improved.
Steps To Follow:
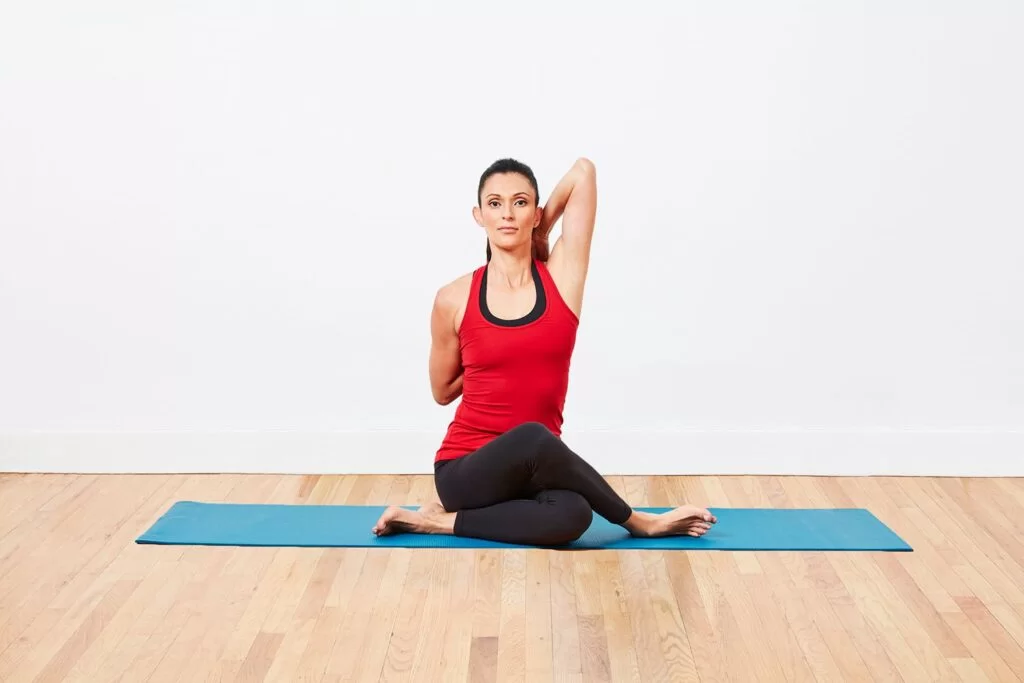
- Start in Staff Pose, then stack your knees, bring your right heel to the outside of your left hip, and cross your right leg over your left.
- Next, extend your left knee to the outside of your right hip by bending it.
- As you take a breath, extend your right arm, palms facing back and thumbs pointing downward.
- Bend the elbow and bring the arm behind your back, palm out, while you exhale.
- Your right fingers should point toward the base of your neck, and your elbow should point toward your sacrum.
- Next, raise yourself to the ceiling by extending your left arm to the side.
- Keeping your right arm in place, bend your left elbow and bring the arm to the back of your neck.
- If you can, reach out until your hands are almost in contact and clasp them together.
- On the other side, repeat.
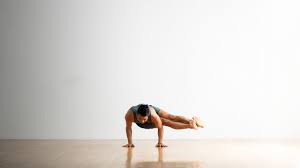
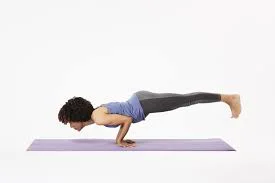
Astavakrasana (Eight-Angle Pose)
Benefits:
Whole body involvement.
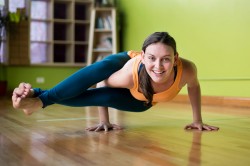
Steps To Follow:
- From head to toe, this posture lengthens and strengthens every part of the body, but it notably targets the inner thighs, back, arms, and wrists.
- Try wrapping your right leg around your right shoulder while seated.
- Put your left leg in front of your right hand after that.
- Squeeze the inner thighs closer to one another, hook the ankles, and bend forward to raise the hips.
- Continue on the opposite side.
Ardha Chandrasana (Half Moon Pose)
Benefits:
Enhances balance and fortifies core muscles.
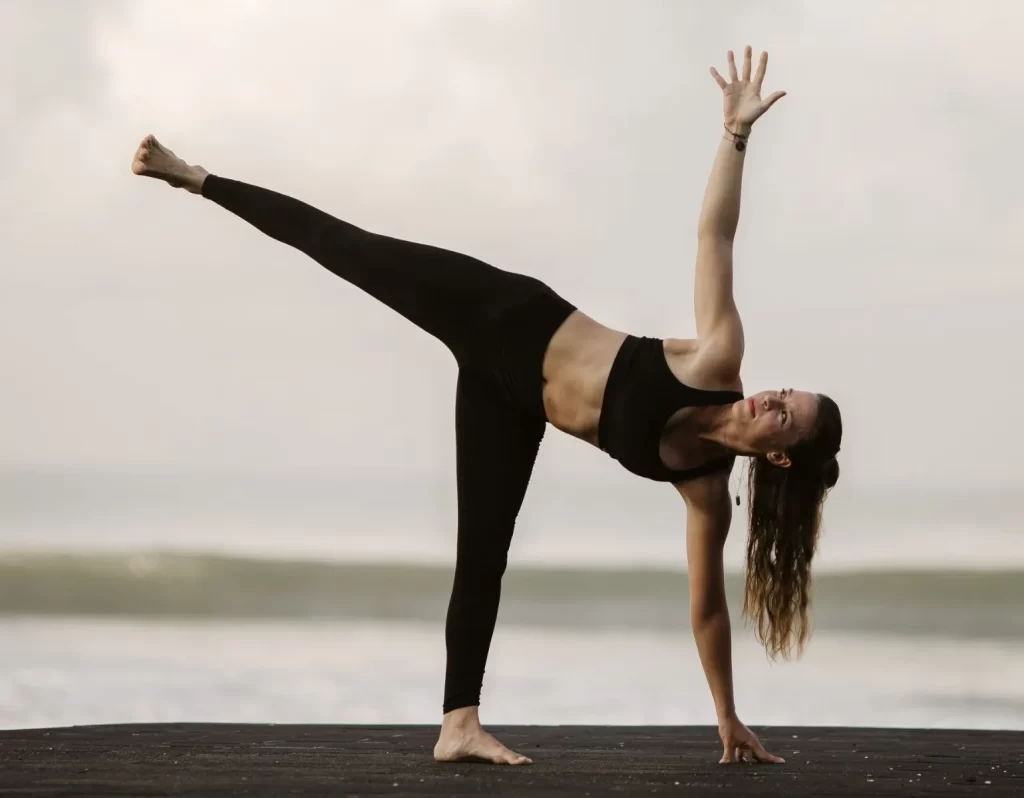
Steps To Follow:
- Step forward with your left foot to begin in the Extended Triangle.
- Raise your right hand to your hips and look down at the ground.
- Put your weight on the ball of your front foot and bend your front leg.
- Raise your rear leg so that it is parallel to the floor by extending your hand forward or placing it on the mat.
- Lift your upper hand and point it upwards.
- Maintain a small bend in your front leg and maintain eye attention to maintain your balance.
- On the other side, repeat.
Flying Crow
Benefits:
Bolsters the shoulders, wrists, arms, and upper torso.

Steps To Follow:
- Try placing your right hip on your right elbow and your right knee on your left elbow while pointing to the right with your legs together.
- Feel your toes rise off the ground as you lean forward and contract your core.
- Next, try separating your legs such that your left leg is extending up and back.
Tittibhasana
Benefits:
Helps in increasing upper arm strength.

Steps To Follow:
- Begin with your knees slightly bent in a forward fold while standing.
- Insert your right shoulder behind your right knee and pull your right hand through your legs to grab your right calf.
- Then, with your fingers pointing forward, lay your right hand on the ground behind your heel.
- On your left side, repeat. Lower your knees gradually onto the backs of your upper arms while bending your chest forward a little.
- Raise your feet off the mat and extend your legs.
Forearm Stand
Benefits:
Increases circulation while strengthening the back, shoulders, arms, and core.
Steps To Follow:
- Step your feet up to your heart from Dolphin Pose.
- Lift one leg and hop to raise the other while directing your attention between your wrists.
- After you are solid and your legs are overhead, contract your core, bend your knees, press your forearms into the ground, and start to look up and forward while expanding your chest as your feet get closer to your head.
Tulasana (Scale Pose)
Benefits:
Strengthens abs and enhances balancing abilities.
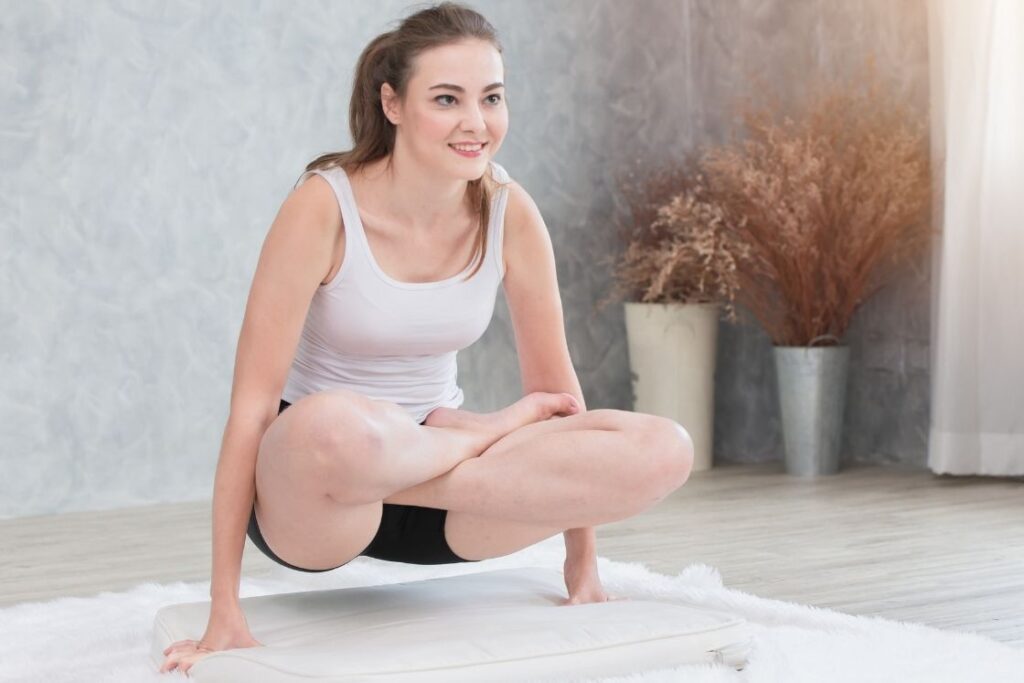
Steps To Follow:
- Start with your legs crossed in the Lotus Pose.
- Spread your fingers wide and place the palms of your hands close to your hips.
- Take a deep breath, raise your body and legs off the floor, and push your hands into the floor.
- To assist you in holding the pose, clench your thighs and tighten your core.
- Let go and drop to the ground.
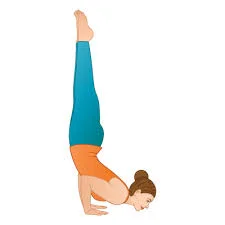
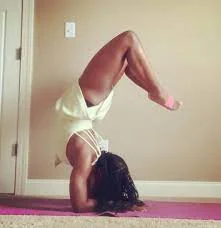
Headstand
Benefits:
Decreases tension, relaxes the mind, aids in memory, activates the lymphatic system, and tones the back and core.
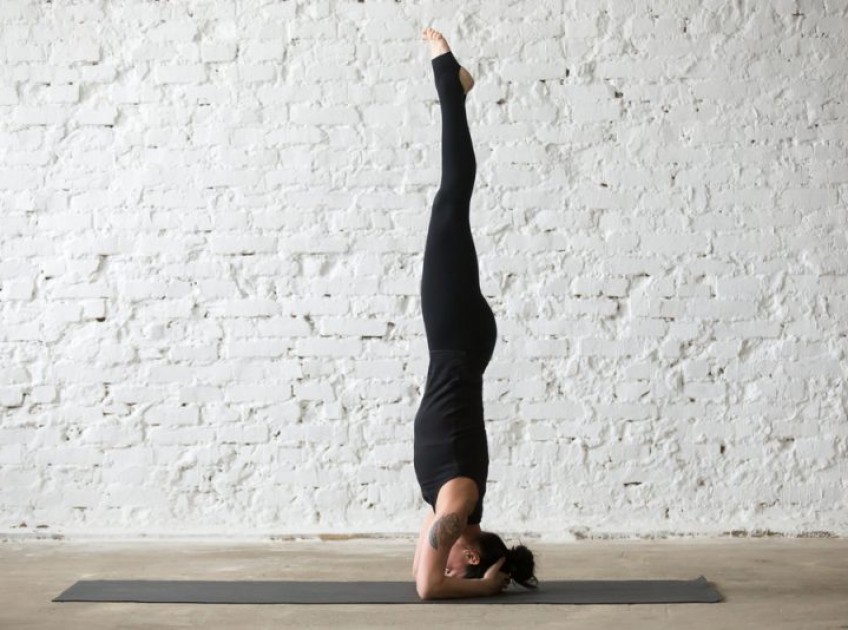
Steps To Follow:
- With the hands, form a basket and set the head’s crown down on the mat, maintaining the elbows shoulder distance apart.
- Lift your knees and move your feet in the direction of your face after pressing your forearms into the ground.
- Start with raising one foot, and then the other.
- Send knees over hips, then ankle over knees, till legs are straight after knees are tucked and feet are off the ground.
Eagle Pose
Benefits:
Improves concentration and balance.
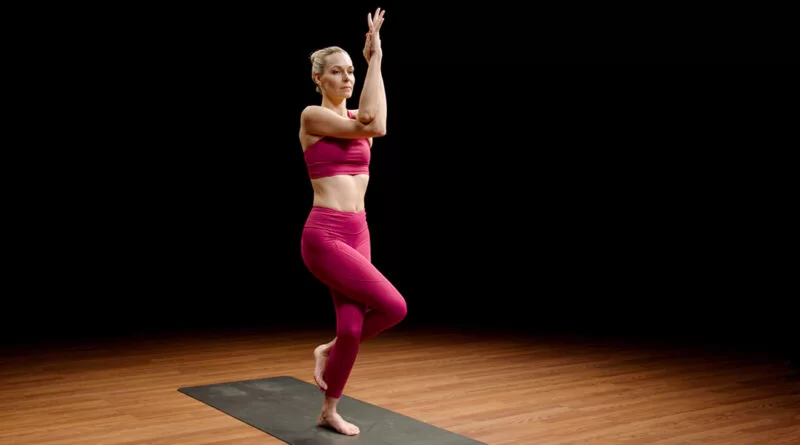
Steps To Follow:
- Start in the mountain stance, slightly apart with your feet.
- Put your hands on your hips and tuck your pelvis in.
- Wrap your left leg over your right thigh, bend both knees and raise your right foot.
- Bend your right foot over your left leg. Staying in that position, raise both arms in front of you, putting your left arm over your right and crossing your left elbow over your right upper arm.
- Raise your elbows to shoulder height, push your palms together, and slide your right hand toward your face.
- Hold, then switch to the other side.
Lizard Variation
Benefits:
The hamstrings quadriceps, and hip flexors are all stretched.

Steps To Follow:
- To the outside of your right hand, step your right leg.
- Step out to the side of the yoga mat with your right foot heeled, then start to extend your back left leg behind you and curl your toes under with the ball of your foot.
- Next, try to reach around and grab your left foot by twisting to the inside of your right leg.
- To obtain a deeper stretch, press the left foot into the hand and then bring the hand into the foot.
- You may test this out on your forearms as well.
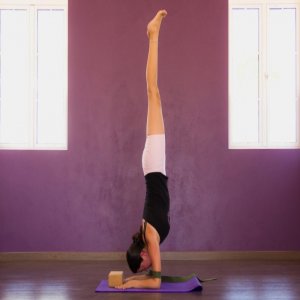
Plow Pose
Benefits:
Stretches the neck, shoulders, glutes, hamstrings, and buttocks. It also stretches the entire back of the body.
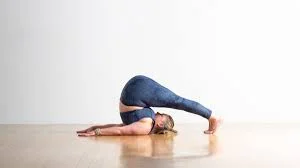
Steps To Follow:
- Begin in the Corpse Pose and then bend your legs to your chest.
- Stretch your legs straight up toward the ceiling.
- Then, with your core working hard, push your hips off the ground and roll up until your shoulders support you.
- Place hips higher than shoulders.
- Lower your legs above your head slowly until your toes touch the ground behind you.
- Plant your toes on the ground with your feet flexed.
- With your hands clasped or your palms down, let go and place your arms on the ground.
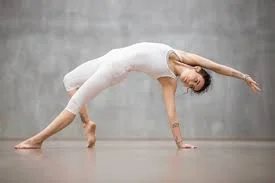
Mermaid Pose
Benefits:
Opens the upper back and stretches the quadriceps, chest, thighs, and glute muscles.
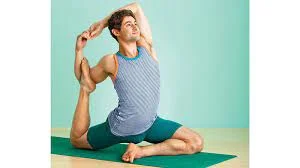
Steps To Follow:
- Raise your right leg to form a three-legged dog, then move your right heel toward your left hip point and your right knee behind your right wrist.
- Put your left foot behind you after that.
- Twist to the left from this Pigeon Posture and try to grasp the top of your left foot.
- Try to plant your left foot in the elbow’s crook, and then reach back behind you with your right hand to grasp your left hand.
Forearm Hollow Back Pose
Benefits:
Bolsters the shoulders, back, and arms.
Steps To Follow:
- Begin in the peacock stance with your legs out wide, then bend them to form a pike.
- Tie your toes and bring your heels up to your buttocks.
- Lower your head while applying strong pressure with your forearm.
- Pass your torso through your arms.
- Stretch one foot down toward the floor and the other up over your hips, then reach your buttocks back and bend your knees in the other manner.
Nataranjasana (Dancer Pose)
Benefits:
Stretches the quadriceps, chest, shoulders, and core; enhances core stability.

Steps To Follow:
- With your left hand bent at the knee, grab hold of your left foot as you shift your weight to your right foot.
- Grab the inside of your left foot after that.
- In the hand, firmly plant the top of the foot.
- Press the foot back and up to raise it up nice and high.
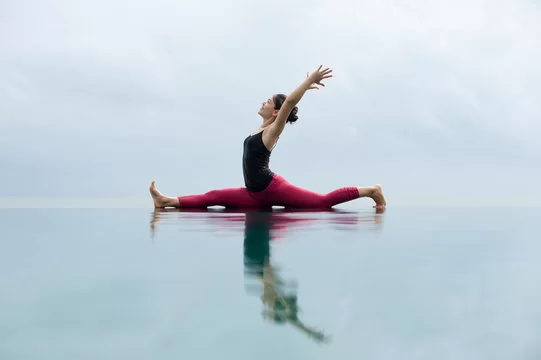
Hanumanasana (Full Front Split)
Benefits:
Stretches the hamstrings, quadriceps, and groin muscles; improves hip flexibility.
Steps To Follow:
- Raise your torso to position your fingertips precisely beneath your shoulders while in a half-monkey stance.
- Engage your quad while flexing your front foot.
- When your front sit bone touches the ground, start sliding your back knee back and your front heel forward.
- Aim to bring your naval in and keep your hips as square as you can.
Side Crow
Benefits:
lengthens the hamstrings and strengthens the glute muscles, upper body, and core.
Steps To Follow:
- Try to place the left side of the leg on the left elbow and the right hip on the right elbow while keeping your knees together and pointed to the right.
- Feel your toes rise off the ground as you lean forward and contract your core.
Lotus Pose
Benefits:
Increases circulation.
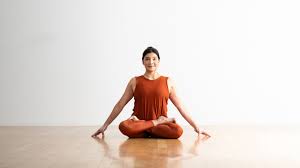
Steps To Follow:
- Sitting upright, begin in a cross-legged stance.
- Take hold of your right ankle and turn your foot so that it faces you.
- Feel for a complete external rotation in the right hip and knee as you raise the ankle as high as you can on the left hip.
- Next, to settle into the right hip, grab the left ankle and pull it across the right thigh.
- While maintaining your erect posture, let your knees to drop toward the floor.
Side Plank With Lifted Leg Variation
Benefits:
Opens up the hamstrings.
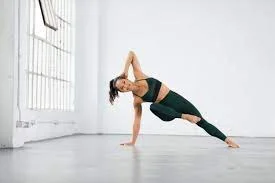
Steps To Follow:
- Raise your hips to a great height and bring your right knee into your free upper hand while maintaining the side plank position.
- Try to encircle the big toe with two fingers. After that, raise and stretch the leg to stack over the top of the right hip.
Eka Pada Rajakapotasana (One-legged King Pigeon Pose)
Benefits:
stretches the inner hips, buttocks, and thighs.

Steps To Follow:
- Begin in the one-legged Pigeon Prep Pose.
- Squeeze your inner thighs and ensure that your hips are squared.
- Reach back with an open hand to grab your foot and bring it in.
- Open toward your rear leg. To change your hold, bring your same-side arm around to the outer back of your leg.
- Seize hold of your back-leg foot’s pinky-toe edge.
- Orient yourself toward the front of the mat, making sure your elbow is pointing down.
- Reach back with the other hand if you can so that both hands are grasping the foot.
- To finish the position, raise your belly and chest and push your foot back.
Standing Hand to Big Toe
Benefits:
Opens up the hips and hamstrings while stabilizing the core.
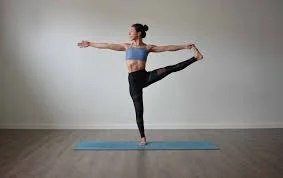
Steps To Follow:
- Shift your weight to your right foot.
- Raise the left foot off the ground and encircle the left knee with your fingers.
- From this position, try to stretch your left leg out to the side and wrap two fingers around your big toe.
- For stability, pull your inner thighs in nearer one another.
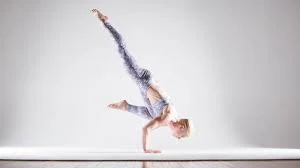
Scorpion Handstand
Benefits:
Improves balance; builds core strength.
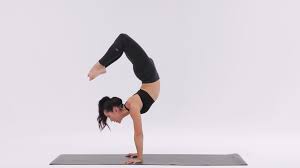
Steps To Follow:
- Begin with your legs together in a handstand.
- Leg one should be bent while the other should remain straight.
- To create a little backbend, lower your chest, raise your head, and move the bent leg’s toe in the direction of your head.
- To make the toes contact, bend the straight leg.
Standing Forward Fold to Tripod Headstand Press
Benefits:
Strengthens arms, back, and core; stretches hamstrings and back.
Steps To Follow:
- With your hands at your sides, lay your head on the floor while maintaining a wide-legged forward bend.
- Ensure that elbows are snuggled in and above the wrist.
- From there, you may either extend your legs to the side and up into a straddle using your inner thigh and core power, or you can bend both knees to your elbows.
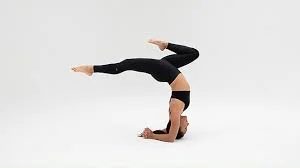
Forearm Scorpion
Benefits:
Enhances balance and strengthens the core.
Steps To Follow:
- Raise your legs into a handstand starting with your forearms firmly planted on the floor.
- Bend one leg while keeping the other straight, using the same technique as the scorpion handstand.
- To create a little backbend, lower your chest, raise your head, and move the bent leg’s toe toward your head.
- To make the toes contact, bend the straight leg.
Wild Thing Into Bow Pose
Benefits:
Opens up the chest, back, and hip flexor muscles.
Steps To Follow:
- Flip your dog from a three-legged position such that your free right foot touches the ground.
- To push all four corners of the yoga mat down, turn your foot and press it in.
- From this position, raise your hips and extend your free right hand back.
- Continue raising your hips until your upper back has enough room to allow you to send your right hand to the floor and turn your left fingertips to face your feet.
- Proceed to move the feet in closer proximity to the hands, completing the entire bow.
Twisted Floor Bow Pose
Benefits:
Builds strength in back muscles.
Steps To Follow:
- Start by extending your left arm forward in the Sphinx stance.
- Step with your right arm to the left and land on your right shoulder.
- Pull your left foot in with your left hand, use your right hand to grip your left toes, and grab the inside of your right foot with your left hand.
- To raise yourself up, kick back with your right foot and elevate your right knee.
- Elevate your chest while applying pressure to your right elbow.
One-Legged Crow Pose
Benefits:
strengthens the wrists, shoulders, and core; enhances balance.
Steps To Follow:
- In order to activate your hamstrings, begin in the crow position, point your toes, and bring your heels toward your buttocks.
- Draw in your tummy and open up your shoulder blades
- Straighten and extend your right leg at a diagonal angle up to the sky, pulling it in toward your chest and starting to shift your weight forward.
Peacock Pose
Steps To Follow:
- The peacock position is stunning, but not for everyone. Extreme arm-balancing prowess, back and core strength, and a readiness to fall flat on your face while learning are required for this one.
Benefits of advanced yoga postures
- A person who is currently in excellent health might benefit even more from these asanas.
- The body’s energy is greatly impacted by these asanas.
- Positive character changes are facilitated by the stimulation and harmonization of the chakras and the related physical, mental, emotional, and psychic aspects of the personality.
- One of my favorite yoga instructors, who trained under BKS Iyengar and Pattabhi Jois, showed me that Tadasana, or mountain position, is among the most difficult poses.
- She showed me how to perfect the stance such that every muscle, ligament, and bone in my body was strengthened and stabilized.
- I then successfully executed headstands and headstand variants using the mountain position.
- I’ve been practicing mountain pose for the past 25 years, and it still helps me see the many areas in my practice where I need to improve my strength, stability, and balance.
- In order to get a deeper alignment, basic poses like mountains also highlight other areas in my body where I need to soften and let go.
- For me, an advanced practice isn’t flaunting my strength and flexibility on Instagram or Facebook! Instead, the foundation of an advanced practice is a blend of silence, comfort, stability, and discipline.
- Your yoga practice is like a mirror reflecting back to you the entirety of who you are and all that has ever been.
- Your personality shines through as a mirror of your yoga practice to others as well.
- When someone keeps learning and shows up on their mat with the goal of cultivating these attributes I outlined before, that’s when a deeper or more advanced yoga practice is attained.
- With the correct mindset, students may progress in their practice and postures, and there are many different postures that can be mastered.
- Particularly for the postures regarded as more advanced, one should become aware of the advantages of performing them.
- As you practice and master more advanced yoga poses, their advantages will become clear to you.
- It would be best if you kept studying and practicing the postures and sequences that you find interesting.
- Discover the advantages of key postures and how to particularly hone the postures to increase strength, stability, flexibility, steadiness, and balance by finding an instructor or attending a workshop.
General precautions while doing Advanced Yoga Poses
- The limbs and joints must move into strange postures that they are not used to for these exercises.
- They might be harmed by any strain.
- It is considerably preferable to gradually encourage the body to do advanced asanas over time rather than attempting to force results quickly.
- It is not advised to use them when pregnant.
- Pay close attention to the specific asana contraindications listed as well as the asanas suggested as warm-ups.
Overview
- Remember that these poses are advanced because they call for a significant amount of strength and flexibility, both of which come from practicing yoga often over an extended period of time.
- By now, you most likely have a solid understanding of the positions that are easier for you and the ones that are harder. Steer clear of the checklist mindset, where you check off poses with the expectation of a reward (enlightenment?) at the end of the list.
- There’s basically no limit to what you can learn about the physical postures of yoga since there’s always going to be some variation or improvement.
Conclusion
You may become an expert in yoga asanas by mastering advanced yoga poses. It is crucial to master a variety of yoga poses and sequences, such as the Sun Salutation, Pawanmuktasana Series, Padmasana group of asanas, forward-bending, spinal-twisting, meditative postures, inverted, and balancing positions, before moving on to more difficult poses.
When performing these postures, be aware of all the safety measures you need to follow to prevent harm. To ensure that you perform things correctly, it is recommended that you learn them in the company of a qualified instructor.
FAQs
What is an advanced pose in yoga?
Advanced yoga postures put the practitioner’s mental fortitude and agility to the test since they force the limbs and joints to occupy strange angles and positions that are outside of their typical range of motion (ROM).
Does Chakrasana represent a complex pose?
Advantages of Chakrasana | Chakrasana Technique Since the Chakrasana Pose extends the entire front side of the body, it is regarded as a high-level posture. Before trying chakra, you should absolutely practice postures that develop flexibility in the upper back, such as the bow position (Dhanurasana), camel pose (Ustrasana), and cobra (Bhujangasana).
Is this position considered advanced?
Yoga positions classified as intermediate and advanced include halasana. Intermediate level for someone who already has control over their breathing and a supple back. Advanced level for someone who needs more practice to improve
their lower back flexibility and learn how to breathe easily.
References
- Kai, J. (2021, September 15). The Purpose And Benefits Of Advanced Yoga Postures. Sacred Seed Yoga & Ayurveda. https://sacredseedyoga.com/the-purpose-and-benefits-of-advanced-yoga-postures/
- Ryt, A. P. (2020, March 15). Advanced Yoga Pose Library. Verywell Fit. https://www.verywellfit.com/advanced-yoga-pose-library-3567056
- Sugar, J. (2023, February 22). Advanced Yoga Poses | Pictures | POPSUGAR Fitness. POPSUGAR Fitness. https://www.popsugar.com/fitness/advanced-yoga-poses-pictures-22619631
- 31 Advanced Yoga Poses to Level Up Your Practice. (2023, January 5). Byrdie. https://www.byrdie.com/advanced-yoga-poses-5200277
- N. (2022, December 11). Advanced Yoga Poses. World Yoga Forum. https://worldyogaforum.com/yoga-poses/advanced-yoga-poses/