20 Best Yoga Poses To Improve Balance
Introduction
Yoga Poses To Improve Balance
Engaging in yoga postures such as mountain position, chair pose, and lunges “builds body awareness, strengthens all body parts that require balance.” Those two are essential for enhancing balance.
- Whether you’re falling from a mat posture or just falling in everyday life, having a fast response time will help you avoid injuries.
- Your body should be able to move quickly so that, for example, you can react quickly enough to save a kid from danger or stop oneself mid-fall.
- At every age and activity level, the motor fitness components of balance, agility, speed, coordination, and power are essential for both good daily living and sports performance, even though falling can undoubtedly have more serious repercussions later in life.
- It’s not only in tree pose in yoga that having strong balance is important.
- Daily motions like walking or leaping across puddles without falling naturally need you to use your balance skills.
- However, you may do yoga for balance, which can help with your general mobility, to develop those skills.
- Your body resists gravity whether you’re on the mat or not.
- “Our balance is essentially resisting the earth’s gravitational pull,” explains Liza Colpa, a yoga instructor on the online platform YogaToday.
- “We get up by using our strength.” You are naturally skilled at balance, but as you get older, your abilities tend to deteriorate, she says.
- It’s beneficial to refine them in your exercise regimen because of this.
- The key to better balance is to strengthen
- According to her, this includes your lower abdominals, back muscles, inner thighs, quads, glutes, and pelvic floor muscles.
- By gradually strengthening these areas daily, our body learns to compute and know exactly which muscles need to work consciously or subconsciously in order to perfect the art of flying against gravity.
- You may do this in yoga.
- According to Colpa, doing yoga “enforces that body knowledge and helps you with coordination.”
- “It also facilitates rapid reflexes and bodily reactions, enabling you to quickly adjust and catch yourself when you feel yourself falling.”
- Yoga is an excellent method to educate your muscles to be stable since many of the postures demand balance, or just your body’s strength, to keep oneself up.
- It’s important to remember that falling is normal.
- Colpa advises against fighting against falling as doing so would prevent your body from learning.
- She suggests practicing Drishti, which involves holding oneself still while staring at a focus point in front of you.
- “Remembering to breathe is crucial for novice yogis.
- Most importantly, she advises having fun and not taking things too seriously.
- And with that, continue reading to learn more about yoga poses that promote balance.
What is your yoga practice for balance?
- Reliability is more crucial than you would think.
- It is necessary for all of our movements in order to stay upright and move quickly.
- Start moving better right now by learning how to use yoga to enhance your balance!
Why is balance important?
- In essence, being able to balance involves maintaining enough physical stability to be safe and prevent accidents, both when moving and when you’re stationary.
- To move with comfort and control is to have a good balance.
- The advantages of balance training extend beyond sports training to everyday situations where you must reach for objects or walk on uneven terrain.
- Balance issues can occasionally be physical, particularly following a period of inactivity.
- However, if your training isn’t well-balanced, you might experience balance problems even if you’re active!
- In certain situations, a little exercise will help you regain your balance since your muscles need to be reminded of how to maintain your balance. Yoga is a great tool for that!
- Other times, when you’re preoccupied or under stress, your mind plays a part in making you lose your equilibrium.
- Yoga may provide you with immediate feedback on how you’re feeling; for example, if you find yourself unable to maintain a posture, it’s probably not going well.
- And there’s another area that yoga may assist with; it helps you become less stressed and more focused.
What does balance have to do with flexibility?
- Your inner ear’s unique mechanism allows you to sense whether you’re upright, tilted, or upside down naturally.
- In addition to that, the deep stabilizer system a network of muscles that runs deep into your body and stabilizes every joint is also essential to balance.
- Not only can you exercise these muscles to get stronger, but your large muscles are also very important for balance.
- Your range of motion is restricted when your large muscles, such as your hamstrings, quadriceps, or glutes, are too tight.
- That could have an impact on your gait, decreasing your stability.
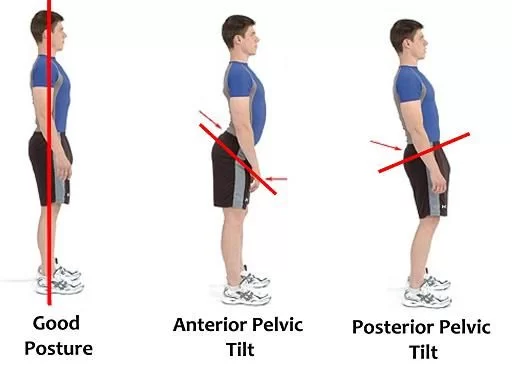
- Your pelvis or spine may be being pulled out of alignment by tense muscles, which can lead to poor posture and balance problems.
- Naturally, having strong muscles aids with balance, but they also need to be flexible.
- Your body can move more freely once your muscles aren’t shortened and rigid, which will stabilize every action as best it can!
Why is yoga good for balance training?
How can one develop bodily balance?
- One of the most popular and advised techniques for balance training is yoga.
- Yoga might help you move more steadily if you’re a little unsteady.
- This is the reason yoga is so good for balance:
Practice yoga to build stronger deep stabilizer muscles
- You might not even be aware that you have such muscles, yet they are crucial for maintaining your equilibrium.
- These are the deepest muscles that span joints and hug bones to provide stability whether you’re sitting on a bar stool or jogging.
- Since you cannot see them, they are not very popular to train, therefore having a powerful deep stabilizer system won’t change the way you appear.
- This is where yoga comes in; it works these little muscles as well as the larger ones, so you don’t have to focus on anything in particular.
- You develop your deep stabilizer muscles in almost every yoga position.
- You might not be able to stand on one leg or hold your knee straight when you first start, but with a little practice, you will be able to!
Your core strength grows with yoga
- This complements the previous statement because core strength encompasses more than just the deep stabilizers that surround your spine.
- When you move your limbs, your core muscles assist in maintaining the stability of your lower back and torso.
- Alternatively, they engage your core when your limbs are stationary, as in arm balances.
- Your back muscles, pelvic floor muscles, glutes, and all of your abdominal muscles make up your core muscles.
- As you move through your yoga practice, you strengthen them all – or you can do a targeted practice.
- Having a strong core can be the difference between falling and regaining your balance when you slip on an uneven surface.
Your body awareness and attention will increase with yoga
- Even if you don’t always pay attention, your mind is always aware of what your body is doing.
- Yoga helps you become aware of your breathing patterns, how you carry yourself, if one shoulder is higher than the other, and other physical cues.
- Additionally, yoga trains you to be more focused and in the present moment.
- Yoga enhances your body awareness on and off the mat by achieving all of that.
- Being conscious of your body language increases the likelihood of having a symmetrical posture and a better foundation for balance.
Your response time will speed up with yoga
- The moment you lose your equilibrium, the response time matters.
- When you do yoga regularly, your body will instinctively stabilize your poses more quickly.
- It indicates that you have a quick reflex to regain equilibrium, which might help you avoid harm.
Your functional strength is trained through yoga
- It teaches entire muscle groups in meaningful patterns that you may employ in your everyday life.
- It helps you shift your body weight with ease and does more than merely work certain muscles to give them a nice appearance.
- And for balance, that’s really helpful!
How else can I Improve my balance?
- Although yoga helps with balance, there’s always room for improvement.
- Being active and going outside are two fundamental factors that help to enhance your balance.
- Your stabilizer muscles are activated by uneven surfaces, and your brain is stimulated by the constantly changing surroundings.
- Stress might make it difficult for you to balance, so occasionally you need to move, but other times you might simply want to be motionless.
- That’s okay, you can just take a seat and relax.
- You may enhance your balance by managing stress via the use of yogic breathing techniques.
- Try easy breathing exercises.
How can one improve their balance the most effectively?
- Concentrate on a few basic yoga positions to establish and develop balance.
- These poses are the gateway to learning how to employ alignment, activate your muscles, and concentrate your mind.
- Your ability to maintain balance will gradually improve if you practice often and with dedication.
- A nutritious, balanced, and healthful yoga lifestyle can also help you maintain your physical equilibrium on the mat.
- It is obviously not good to receive criticism or judgment, therefore work on being humble and humorous and try your best to keep your ego outside of your practice.
The scientifically proven way to build balance
- When we think of balance, we frequently imagine ourselves in a beautiful Half Moon or Tree Pose.
- However, falls typically occur during movement, transitioning, or adjustment rather than when you are still.
- The secret to improving balance, and coordination, and avoiding falls as we age is to become proficient in transitions and power training.
- We have investigated the patterns of muscle use in several yoga positions in collaboration with the University of Miami.
- During each stance, we discovered which muscles are being engaged and how active they are.
- For instance, in electromyography (EMG) research, which measures the electrical activity generated by skeletal muscles, the major balance muscles are targeted because the more toes that are recruited in standing postures, the higher the lower leg muscle activity.
- We developed a sequence that has been scientifically shown to improve balance and reduce the risk of falls as a result of this sort of information and creativity.
- The sequence of three microflows that follows was created by rewiring your brain’s normal processes in order to improve balance, motor abilities, and functional living.
- It was taken from our study.
- This sequence challenges your musculoskeletal system with its unique neuromuscular rhythm and focused positions.
Yoga Poses To Improve Balance
Which types of yoga improve balance?
- Your balance will greatly improve with these positions.
- As you can maintain each position without wavering, you will know that you are improving.
- If you can maintain the position right away, practice your balance by maintaining it longer or by holding it twice or three times.
- This is a great balancing yoga pose:
Following are the 20 best yoga poses to Improve your balance and stability
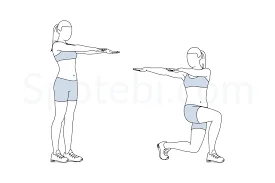
Chair pose
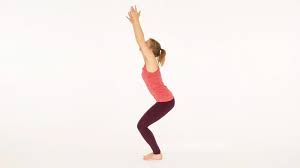
Steps To Follow:
- Keep your feet in line with the Hip firmly.
- Inhale and extend your arms back a little bit.
- Exhale, lean your body forward so that your fingers may lightly touch the floor, bend your knees as though you were sitting in a low chair, and keep your back straight.
- Inhale, raise your torso and arms over your head while maintaining a bent knee position.
- Exhale, raise your hands, and sit in your seat. Verify that your toes are visible immediately in front of your knees.
- Maintain the posture by looking forward, maintaining a straight back, and keeping your knees parallel to each other.
- Stay there for 10 slow, deep breaths, and then stand back up.
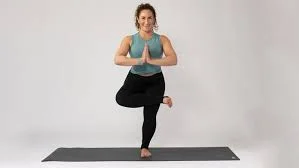
Tree pose
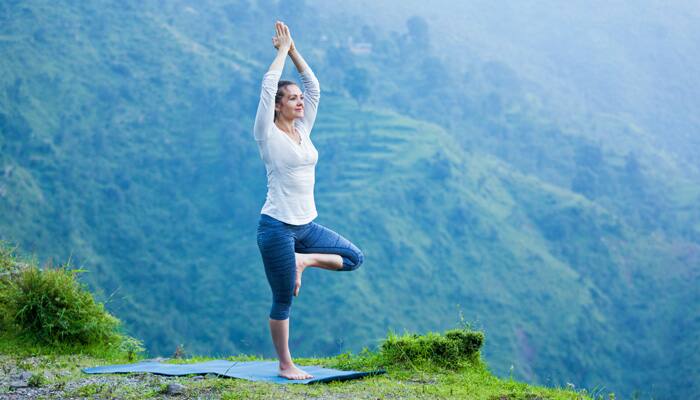
Steps To Follow:
- Maintain your balance by standing with your feet hip-width apart, shifting your weight to your right foot, and lifting your left heel off the ground.
- Next, raise your left foot fully and place its sole on your inner calf to regain your balance.
- With your left toes pointing down and your heel pressing on the inner thigh, raise your left foot as high as you can, grasp it with your hands, and direct it to your inner right thigh.
Eagle pose
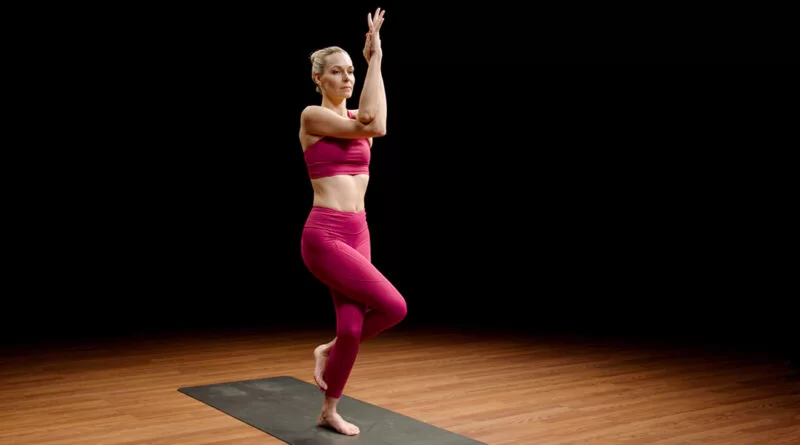
Steps To Follow:
- Spread your toes wide and Keep your feet hip-width apart.
- That could be sufficient if you bend your knees and raise your left leg, crossing it over your right calf so that your left toes are adjacent to your right calf.
- Wind your left toes behind your right leg and loop them over your shin, if your knees permit.
- Breathe in and extend your arms; exhale and bring your arms forward, crossing your right arm over your left.
- Bend your elbows and bring your hands together such that your left fingers are in contact with your right hand’s palm.
- If that isn’t feasible, it will suffice if your hands’ backs meet, or you may try hooking your thumbs.
- Raising your elbows and keeping your hands away from your face so they are pointing straight up, inhale.
- Exhale, sit a little lower, and slightly bend your knees.
- Take 10 deep breaths in this stance, then switch to the opposite side.
Warrior II
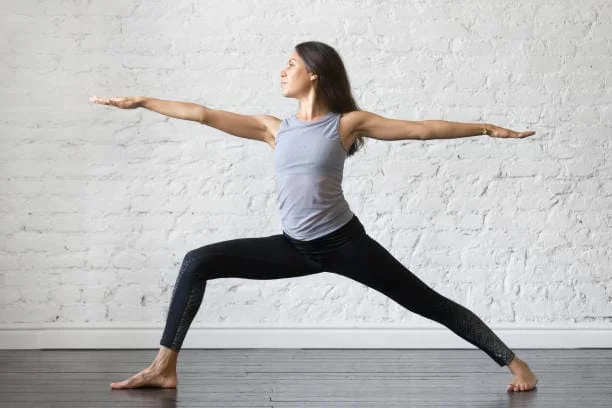
Steps To Follow:
- Face ahead and stand erect in front of your mat.
- Take a large stride back with your right leg while maintaining the position of your left foot and bending your knee.
- After landing, align your foot with the mat’s short edge and point your right toe in that direction.
- Maintain your right leg straight, feet firmly planted on the mat, and your front and back heels aligned while bending your left knee to sit squarely above your ankle.
- When you inhale, lift your arms so that they are parallel to the floor and in line with your shoulders.
- Then, concentrate on your front (left) fingers and take 10 deep breaths there. Repeat on the opposite side.
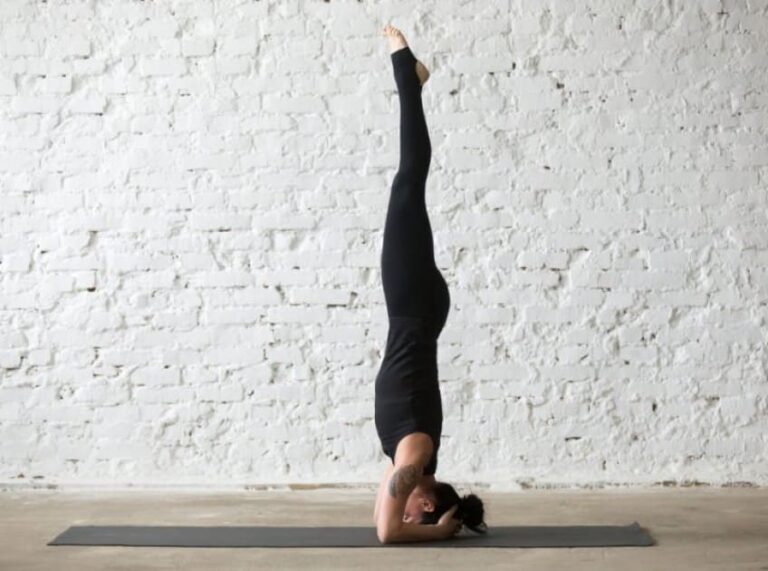
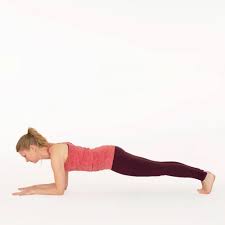
Plank pose

Steps To Follow:
- With your hands behind your shoulders and your fingers extended wide, begin on all fours.
- Take a step back to assume the push-up position.
- Using your hands, press into the ground as though you were trying to move the floor off your shoulders and towards your feet rather than allowing it to sink in between your shoulder blades.
- Verify your lower back is straight by drawing your belly button towards your spine.
- Ensure that your heels are higher than your toes.
- At least ten breaths should be held there; gradually add more.
- These positions help you improve both your flexibility and balance.
- Although they can seem difficult at first, you will become better with each practice.
- Generally speaking, you should always exhale as you move deeper into any of these stances.
- You have more flexibility as a result.
High lunge
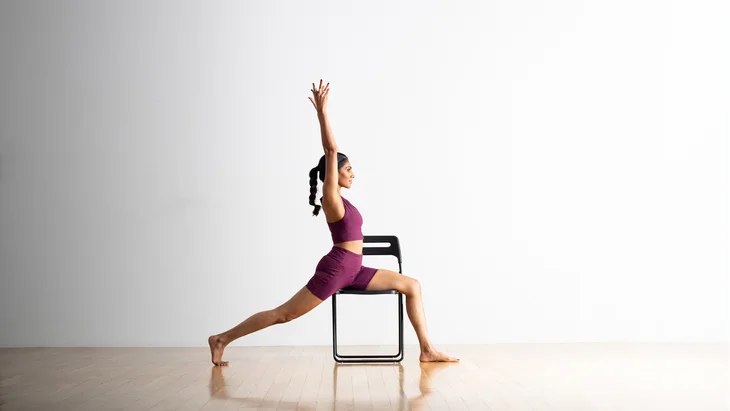
Steps To Follow:
- Pose with your hands on your hips and your feet hip-width apart at the front of your mat.
- With your pelvis looking forward, take a large stride back with your right foot and land on your right toes.
- You might need to change your posture because your left knee is bent and directly over your ankle.
- Breathe in and raise your arms over your head with your palms facing each other.
- Breathe out and maintain your arm raise while settling into the posture.
- Most people can go a little lower.
- After 10 slow, deep breaths, stay in the position, come back to standing, and repeat on the opposite side.
Low lunge with a twist
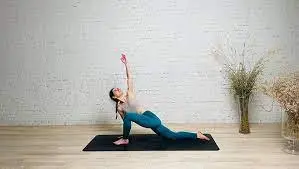
Steps To Follow:
- Bend forward from a standing posture until your fingertips touch the floor.
- Then, step back with your right foot, bringing your knee down to the floor.
- Hands are on each side of your left foot, and your left knee is over your ankle.
- Inhale, raise your arms over your head while maintaining a level pelvis, and then combine your palms.
- Lower your hands to your breast bone while exhaling, then turn your body to the left and place your right elbow on your left knee.
- Keeping your hands near your breastbone, use your knee as a lever to further rotate your body to the left. – optional: Raise your rear knee off the ground.
- After 10 deep breaths, unfurl, take a step forward, and repeat on the opposite side.
Triangle pose
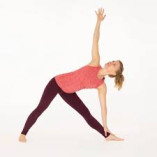
Steps To Follow:
- With your hands on your hips and your feet hip-width apart, take a stance in front of your mat.
- With your right foot, take a stride back that is roughly the length of your leg.
- Extend your right toes such that your foot is parallel to the mat’s short border and your pelvis is oriented to the right.
- Inhale deeply and lift your arms so they are parallel to your shoulders.
- Push your left hip back at the same moment to move your entire pelvis beneath your body and towards the rear of the mat.
- Your left hand should be extended forward as you bend your body over your left leg to place your fingers on your shin, ankle, or the floor outside of your left leg.
- Maintain a rigid sideways posture with your right arm extended and resting squarely over your right shoulder.
- Try to expand your chest further while you gaze up at your right hand and take 10 deep breaths while holding that position.
- After the final breath, glance down microbead your front knee, and raise your body. After that, get back up and repeat on the other side.
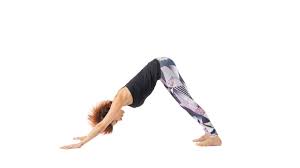
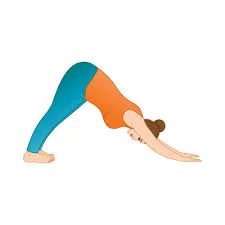
Downward dog
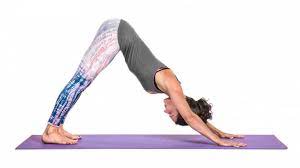
Steps To Follow:
- Beginning on all fours, spread your hands slightly wider than the breadth of your shoulders.
- Elevate your pelvis so that your body forms a triangle with your sacrum at the top.
- If necessary, move your feet farther apart to ensure they are hip-width apart.
- Make sure your legs are parallel to one another and slightly bent, with your heels pressed into the floor (this stance is difficult for most people to achieve).
- With your head hanging between your shoulders and your elbow pits facing each other, press onto your hands as if you were trying to push the earth away from you.
- Pinch your sacrum firmly while sticking your “tail” up.
- Stay there for a minimum of 10 slow, deep breaths.
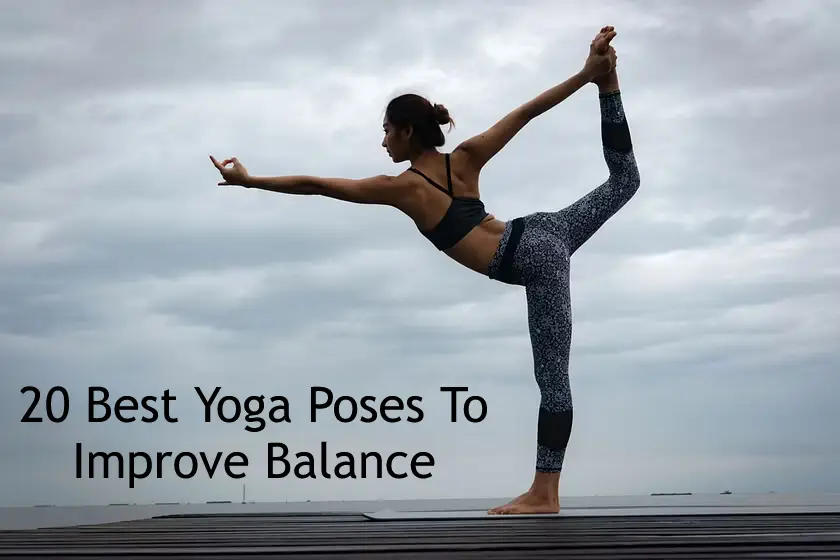
Dancer pose
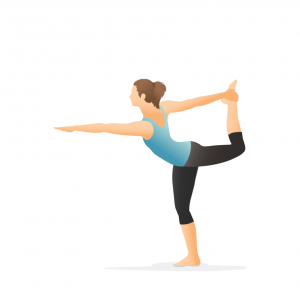
Steps To Follow:
- Spread your toes, stand erect, and plant your feet.
- Bring your right heel towards your butt by shifting your weight to your left leg and bending your right knee. the top of your foot with your right fingers wrapped around it.
- As you begin to lean your body forward and press your right foot onto your right hand, extend your left arm in front of you to act as a counterbalance.
- Proceed slowly, halting at around a 45-degree angle. Then, if your body permits descend a little more while maintaining a microbend in your left knee and gazing forward.
- Take five to ten deep breaths while holding the stance, then switch to the opposite side.
- We could become less active as we age, which would make us less steady on our feet.
- Balance can be affected by a number of age-related conditions, injuries, and low self-confidence.
- It’s quite normal to have some insecurity, but you can quickly get better balance by attempting these five yoga positions!
Mountain pose
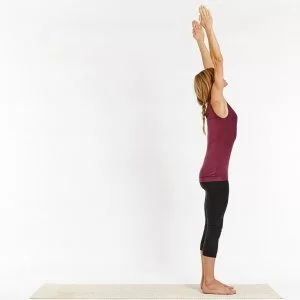
Steps To Follow:
- Place your feet hip-width apart, lift and spread your toes, and then firmly plant them on the ground.
- Maintain a neutral pelvic tilt and face forward while letting your arms hang loosely by your sides.
- To discover your optimum center, consider moving your weight left and right, forward and back.
- After taking five deep breaths there, close your eyes and take five more.
Figure four
Steps To Follow:
- With your left ankle resting on your right thigh and your left knee inclined to the left, raise your left leg from the Mountain position and gently bend your knees to cross it over your right.
- With your elbows widely apart, join your hands in front of your heart, or raise your arms.
- Inhale, maintain motionless, and then exhale to sink a bit lower and lean your body forward. Repeat this five times, then hold still for an additional five breaths.
- To avoid straining your knee, keep your back straight and your standing leg in a straight line.
- Get back up to your feet and repeat on the opposite.
Low lunge
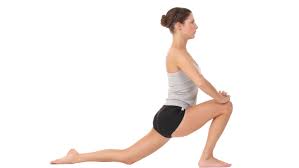
Steps To Follow:
- Bend forward until your fingertips contact the floor while standing, then take a stride back with your right foot to bring your right knee down to the floor.
- Using blocks beneath your hands to bring the floor closer, position your left knee over your ankle and place your hands on each side of your left foot.
- Place your hands back on the blocks on the floor and tilt your pelvis forward.
- Inhale deeply and raise your arms above your head.
- Maintain a level pelvis when facing forward.
- Ten deep breaths should be held there before you put your hands back down, go forward, and repeat on the opposite side.
Balancing table pose
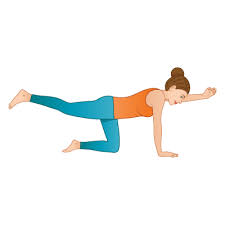
Steps To Follow:
- Begin in a neutral posture with your hands behind your shoulders and your ankles beneath your hips.
- Don’t allow your right leg to raise your pelvis to the right; instead, bring it straight behind you and in line with your torso.
- Next, raise your left arm until it is parallel to your body and immediately in front of you.
- Keep your neck extended and glance at the ground below.
- After five full breaths, hold the position and switch sides.
- On each side, repeat three times.
Forearm plank
Steps To Follow:
- Beginning on all fours, place your elbows beneath your shoulders as you descend your forearms parallel to the mat.
- Reposition your feet so that your body forms a continuous line and your lower back does not dip.
- Adapt your posture by lifting your shoulders to avoid your upper back dropping between your shoulder blades, maintaining a long neck, and pulling your belly button in the direction of your spine.
- Ten deep breaths, or longer if you can, should be spent there!
Reclining Pigeon Pose (Figure Four)
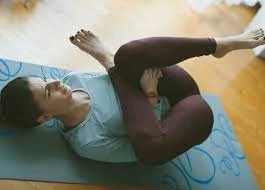
Steps To Follow:
- Cross your right ankle across your left knee while lying on your back with your legs bent.
- Spread your toes.
- Using your right arm as leverage, press your right leg forward while you reach through your legs to grip your left shin or the back of your left thigh.
- After five breaths of holding, switch sides.
Croc Hops
Steps To Follow:
- This is a fantastic method for building strength in the upper body and improving response speed.
- Step forward into Plank Pose and bend your elbows into Chaturanga from Camel Pose.
- Next, raise your entire body off the ground by pressing with your hands and feet simultaneously or just your hands while your knees are bent.
- Feel the presence of Chaturanga.
- Five times in a row, repeat.
Ardha Ustrasana (Half Camel Pose)
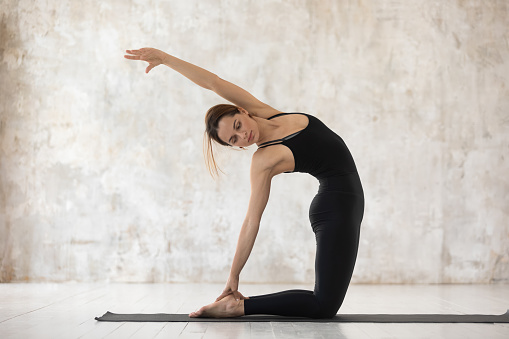
Steps To Follow:
- After completing the Twisting Lunge, lower your back knee and perform a Half Camel.
- For additional support, reach back and rest your hand on your lower back or grasp your back heel.
Twisting Lunge
Steps To Follow:
- Turn around from Warrior II and perform a lunge, twisting your arms across your front knee.
- You might have your back knee up or down.
- As you inhale, lengthen your spine, and as you exhale twist.
Downward-Facing Dog Pose
Steps To Follow:
- Draw your shoulders away from your ears, spread your fingers widely, place your hands shoulder-distance apart or slightly wider, and raise your sitting bones.
Benefits of Balancing Poses
- strengthens the legs, glutes, and lower body
- maintains proper posture and core muscles
- enhances stability and balance
- improves attention and awareness
- test your equilibrium while having fun!
- The goal of staying upright is undoubtedly a satisfying and essential component of the difficulty of one-leg balance.
- Maybe the goal should be to develop emotional control, attention, focus, and a good sense of humor—even when you have the wobbles—rather than necessarily avoiding falling over.
- Poses that involve balance may strengthen your legs and core, increase attention, and help you achieve better ankle joint stability.
- They can also change tendencies of mindlessness into mind-fullness and provide us with immediate feedback when we’re not being completely present.
FAQs
What advantages can standing yoga postures offer?
You may strengthen your lower body, especially your ankles, glutes, hamstrings, and quadriceps, by doing standing postures. According to Mosley, they also enhance your mobility and flexibility in addition to your core stability and balance. Certain poses, such as the mountain position, are beneficial for enhancing posture.
Why is it that yoga balancing postures are important?
Yoga balancing postures not only help us attain physical stability but also mental and emotional steadiness. In a balancing stance, being firm and centered helps reduce tension and enhance attention. This is due to the fact that you have to maintain focus and awareness while attempting to avoid stumbling and falling.
Which kind of yoga enhances balance?
Ways to Enhance Equilibrium
since per the Vestibular Disorders Association (VEDA), individuals with vestibular disorders can benefit from Iyengar yoga, which is a precision-based practice. However, Bikram, Ashtanga, or Vinyasa should be avoided since they employ a flow sequence that may cause issues.
How can I do yoga with better body balance?
Regardless of age or experience level with yoga, everyone can improve their balance. The secret is to begin by establishing a connection with our deep stabilizing muscles and foundation, selecting balancing alternatives that extend our stay for optimal effects, and paying attention to how we focus our energy with our breath and eyes.
Why does my yoga balance seem so off?
You won’t be able to learn how to balance for extended periods of time without falling over if your hips, legs, ankles, and core are weak. You may maintain balancing poses for longer by developing your strength and balance via consistent practice over time.
References:
- Mooney, K., & Mooney, K. (2023, April 10). 15 Poses Proven To Build Better Balance. Yoga Journal. https://www.yogajournal.com/practice/yoga-sequences/fall-yoga-15-poses-proven-build-better-balance/
- Clayton, K. (2020, June 29). Benefits of Balancing Poses – Tutorial: Hand to Big Toe Pose. Kat Clayton Yoga. https://katclaytonyoga.com/benefits-of-balancing-yoga-poses-feature-pose-hand-to-big-toe-pose/
- Charvátová, V. P. (2021, August 10). Yoga for Balance: 15 Yoga Poses for Balance and Flexibility. Skill Yoga. https://skill-yoga.blog/yoga-for-balance/
- Lapidos, R. (2021, October 6). 13 Yoga For Balance Poses That’ll Improve Your Stability. Bustle. https://www.bustle.com/wellness/yoga-for-balance