Powerful Exercises to Keep Your Digestive System in Top Shape
Introduction
The process of removing stool from the body is called bowel movement. It can occasionally be challenging or uncomfortable, but it is a normal and healthy aspect of life. A variety of factors, such as low fiber intake, dehydration, and some drugs can cause constipation.
Constipation can be eased and regularity is encouraged with exercise. It aids in intestinal muscle stimulation, facilitating feces’ passage through the digestive system. Additionally, exercise helps lower stress, which has been linked to constipation.
Your initial reaction to constipation could be to hunch down in a position of fetal position and hold your stomach. But exercising your body and getting off the couch is far more useful.
Exercise is one of the best lifestyle tricks for maintaining regularity and relieving constipation. While practically any type of exercise can facilitate the passage of stool through the intestines, the following four techniques are the most frequently suggested for individuals who suffer from chronic constipation.
Exercises for Bowel Movement
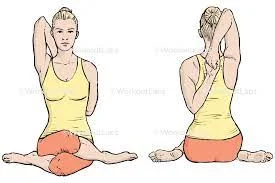
Vajrasana
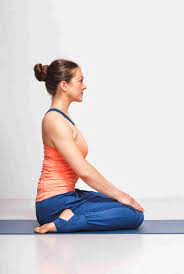
A simple yoga practice that helps your abdomen’s blood circulation is vajrasana.it is also referred to as a thunderbolt pose
How it assists: One of the few poses that can be done right after a meal is the vajrasana Position. it works so well to improve digestion and prevent constipation from ever starting. vajrasana aids the digestive system as well.
Use these steps to do this yoga position for constipation: Bent on a mat with your feet slightly apart and your knees together.
Hands resting on thighs, reclining on heels.
Maintain an erect spine and relaxed shoulders.
Place your hands comfortably down or up.
Take deep breaths, unwind, and find serenity.
Focus on your breathing while you hold for a few minutes.
Lean forward and come out of the posture to release
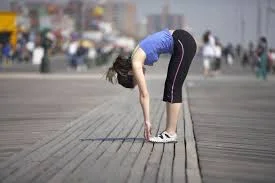
Bending forward while seated

This yoga pose, also called Paschimottanasana, helps to ease constipation symptoms by slowing down the flow of the bowels. Stress can be reduced by sitting forward, improving blood flow to the brain. In addition to gently stimulating your stomach and intestines to help digestion, folding your legs over stimulates your kidneys and liver.
To do this yoga position, take the following actions: Take a deep breath from Staff Pose, raise your arms above your head, and extend your arms through your fingers and the top of your head.
Breathe out, swing your hips, and progressively bring your body down to your legs. Put your hands on your ankles, feet, or toes.
Employ your arms to gently pull your head and body closer to your knees to deepen the stretch. Exert pressure with your heels and nudge your toes in the direction of the individual.
Hold your breath for three to eight breaths.
To release: A) Return to Staff stance by gradually rolling up the spine. B) Take a breath and raise your body back into the Staff pose in yoga by stretching your arms past your head.
advantages of a forward-leaning seat
The entire posterior side of the body, from the heels to the neck, can be deeply stretched with a seated forward bend. The forward bend stimulates the reproductive and urinary systems while calming the neurological system and moods.
Beginner advice: Bend your knees more if you find it difficult to bend forward. You could also use loosely rolled blankets to support them. Just make sure that the kneecaps remain aimed upwards. Fight the urge for your sitting bones and legs to roll toward the floor as your body moves forward and your chest comes up. Face upwards with the feet, knees, and quadriceps.
Avoidance: Injuries to the arms, hips, ankles, or shoulders, whether recent or ongoing.
Adjustments to the seated forward bend: If the individual is unable to reach the hands to the feet: A) Encircle your feet with a yoga belt while holding onto the strap with both hands. B) Position the head on the knees and bend the knees just enough to reach the feet with the hands.
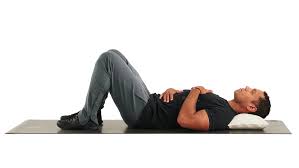
Pose for Relieving Wind
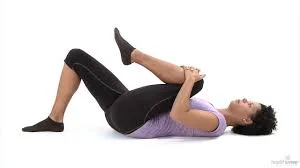
This yoga pose, also called Pavanamuktasana, is a great way to get rid of gas in your digestive tract. In addition, it treats digestive issues like acid reflux, dyspepsia, and other similar conditions.
Use these steps to do this yoga position for constipation: On the yoga mat, lie on your back. Close your legs to your body with a hug.
Now straighten out one leg.
Maintain this role for three minutes, and then change the leg
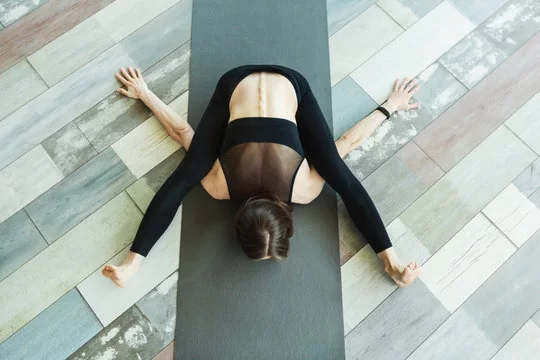
Child Pose

Known by many as Balasana, this yoga pose facilitates movement in the digestive tract and helps massage and soothe the internal organs of your body. A highly therapeutic pose that promotes relaxation and central nervous system regulation is a child’s pose. Additionally, by massaging your body’s interior organs, this posture encourages better bowel movement.
To do this yoga position, take the following actions: Initiate on a mat on all fours.
Extend your arms out on the ground and fall your hips toward your ankles.
Make sure you tuck your head in between your arms.
Take steady breaths and sustain the infant’s posture for ten to fifteen seconds before letting go.
To stretch the hips and lower back, you can either maintain the knees bent or widen them.
Get back to the initial pose.
Five times through, repeat this process as a constipation workout.
For everyday constipation, attempt this asana.
Yogi squat
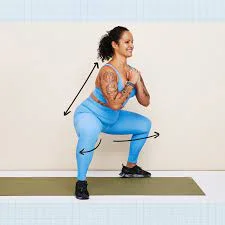
This yoga position, also known as Malasana, stimulates the colon’s lining and improves digestive reactivity, which permits improved colon function. It functions to improve the colon’s general function and stimulate it.
Use these steps to do this yoga position for constipation: Place your feet slightly wider than the breadth of your hips while standing. Turn your toes out so that your heels are facing one another.
Drop your hips to the yoga mat as you exhale.
Put your elbows between your knees as you bring your hands together.
Press your knees slightly outward using your elbows and stretch as far across your back as you can.
maintain yogi squat for at least one minute
Bow pose
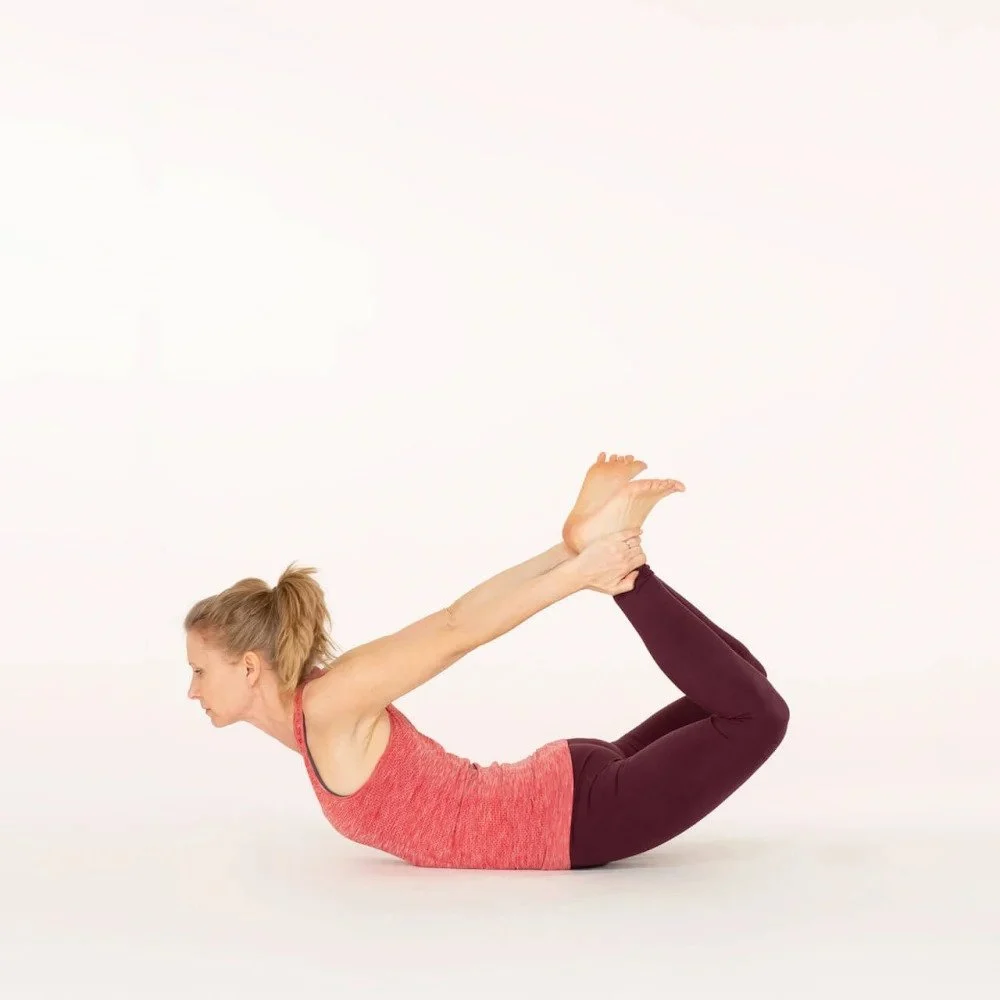
The bow posture applies pressure to your abdominal muscles to assist in relieving stomach issues.
To do this yoga position, take the following actions: Arms by your sides, legs outstretched, lie on your stomach.
Reach back to grasp your ankles by bending your knees.
Breathe in, raise your thighs and chest, and pull your ankles.
Raise your chest and legs to form a bow.
Keep your head up and inhale deeply.
Pause while tensing your back muscles and sensing the strain.
Let out a breath and drop on the mat.
In the child’s pose, relax.
Halasana
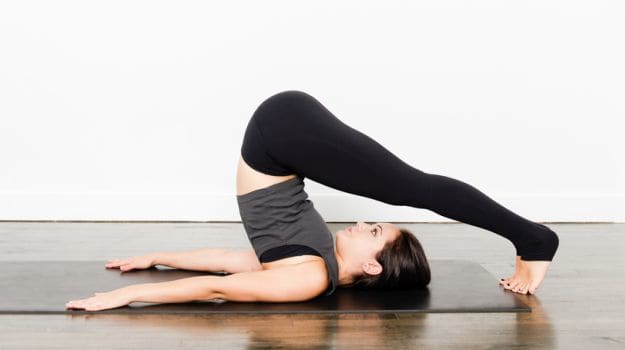
This yoga stance also referred to as the plough pose, helps to cure digestive issues as well as stimulate and improve digestion.
Use these steps to do this yoga position for constipation: On the yoga mat, supine on the back.
With your hands pointing down, place your arms next to yourself.
As you inhale, lift your legs to a vertical 90-degree angle.
Take a step back off the mat and lift your hips.
Until your toes hit the mat, allow your legs to swing 180 degrees over your head.
Maintain this position with your back straight against the floor for a brief period.
Half-spinal curve pose while sitting
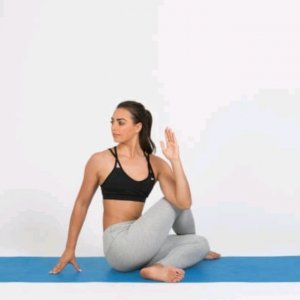
This yoga pose, also known as Ardh Matsyendrasana, releases constipation by activating and relaxing the muscles involved in bowel movement. A great way to stimulate the GI tract is with twists. In addition to improving blood flow to this area of the body, twists also help to induce the required movement to relieve constipation.
To do this yoga position, take the following actions: Maintain a straight back when sitting on the yoga mat.
Extend your legs and place your left leg beneath your right.
After turning your body slightly to the right, put your right hand behind your back.
maintain the right ankle with the left hand.
Before adjusting, maintain this posture for roughly ten seconds.
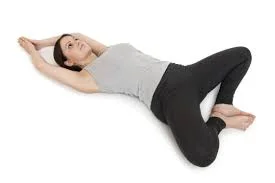
Supine spinal rotation
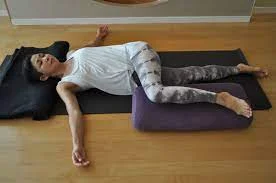
A supine spinal twist helps to loosen and supple the muscles in your lower back. This can ease tension and relieve stress after strenuous weight-bearing tasks.4. This is how to twist your spine while lying down.
how to assist: To begin, extend your legs wide and lie back.
Stretch your arms out in a T shape perpendicular to your body, with your hands facing down.
After bending your left knee to a 90-degree angle, lower it toward your right. With the inside facing up, your left knee should be facing the ground.
Try to maintain your shoulders level with the ground as you twist the spine.
Instead of focusing on your bent knee, tilt your head to look at your right fingertips.
Stretch by lying back and allowing gravity to pull your knee toward the floor.
After 30 to 60 seconds of preservation, switch up the legs twice or three times a day.
Dog leaning downward
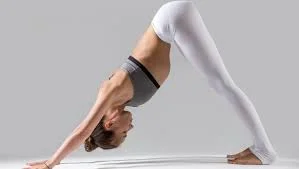
How it helps: An inversion position is what a down dog is.
By raising the heart above the level of the head, inversion poses help to improve blood and lymph circulation. Additionally, it flips the digestive system, facilitating the passage of waste through the intestines.
The downward dog can help you regain equilibrium in both your body and mind. Your head is lower than your heart because it is an inversion. Stress is reduced, circulation is enhanced, and your body’s equilibrium is restored. This is an example of the downward dog.
how to assist: With your hands shoulder-width apart on the floor and your palms facing up, begin in the position of a tabletop with your knees beneath your hips.
Extend your fingers widely and tuck your toes under.
Use the balls of your feet and your hands to push up, drawing your hips toward the ceiling.
Straighten your legs as you lift your knees off the ground.
Breathe in and out deeply while you extend the soles of your feet, the backs of your legs, and your upper back. Soften the head and neck as nicely.
Hold for 30 to 60 seconds.
This yoga pose, also known as Adho Mukha Svanasana, improves blood circulation, facilitates the passage of waste through the intestines, and reduces constipation.
Chair twist pose
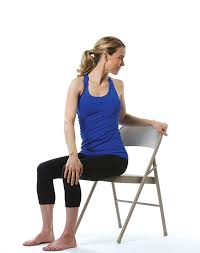
How to assist: Position your hands on your thighs, place your feet flat on the floor, and sit upright on a chair.
Lean forward, place your hands on the ground, and hold for a moment.
come back to normal pose and do that again.
Bend the head to touch the knee as you bring one leg up to the chest.
Repeat after releasing after a brief hold.
Continue with the opposite leg.
Do the set around twelve times over.
Constipation can be relieved with this bowel movement workout.
Squeeze the Pelvic Tilt with Ball
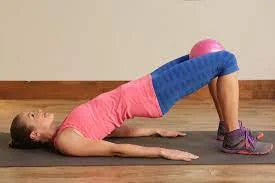
How to assist: With your knees bent, lie down.
Put a medicine ball in the space between your knees.
Tilt your pelvis to the side and press your lower back to the ground.
Squeeze the ball with your legs while raising both of yours.
Release after three counts of holding.
To relieve constipation, repeat five times.
Cat-cow position
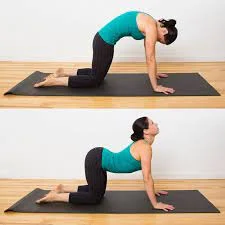
Your abdominal muscles and organs expand and contract in this position. It aids in stimulating the digestive system and alleviating bloating, gas, and menstrual pain.
How to assist: initiate by obtaining on your hands and knees on the ground. keep in mind that the wrists are beneath the shoulders and the knees are beneath the hips. Assume a neutral spine position in the beginning, keeping your back flat and your abs tight. Breathe deeply and deeply.
As you release the breath, curve your back toward the ceiling and visualize dragging your belly button toward your spine to fully contract your abs. Bring your chin up to your chest and relax your neck. This is how you look like a cat
As you take a breath, arch your back and loosen up your abdomen. Without putting undue strain on your neck, raise your head and tailbone toward the sky. The cow part of the stance is this.
Go back and forth between the Cat and Cow poses, coordinating each movement with your breath: exhale into the Cow pose and inhale into the Cat pose.
Continue for a minimum of ten rounds.
Position yourself on a bridge
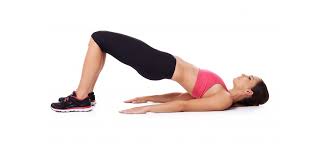
How to behave: Lay on your back with your legs bent, and place your feet on the mat hip-distance apart. Try putting your feet as close to your glutes as possible.
Lay your arms out by your sides, palms down.
As you respiration, lift your hips from the pubic bone rather than the navel, employing your feet as a firm pressure point.
Apply force to your upper arms. You can clinch your hands behind your back and press your pinkie fingers against the mat. Spread your collarbones and roll your shoulders under you.
Bring your thighs closer together and firmly press on your heels to keep a hip-distance posture.
arrive at the back of the thighs toward the knees to extend the spine.
To finish the practice, blow as you free your hands and firmly lower yourself to the mat. Three times a week, ten reps
The first portion of advice: If you have painful hands when trying to bind your hands behind your back, or if your shoulders are stiff, just keep your arms at your sides, palms down.
Maintaining the natural bend of your neck is a crucial component of this position. Resist from pushing the back of your neck into the mat.
Straighten your chest and tuck your upper arms beneath your shoulders after your hands are clasped. To prevent straining your neck, try not to pull your shoulders too far away from your ears.
In this position, neglect to twist the head to one side
preserve a perfect line of the place toward the ceiling
Bird dog approach
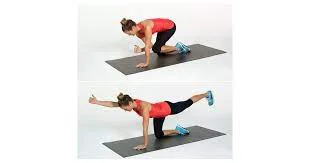
You will require an exercise mat for bird-dog exercise. For additional padding, arrange a folded towel or flat cushion beneath your knees. A mirror can be used to verify your alignment.
This is how you do it: Initiate in the tabletop posture on all fours.
set the hands under the shoulders and the knees beneath the hips.
Make sure your abs are working to keep your spine neutral.
Press the blades of your shoulder together.
Maintaining your shoulders and hips parallel to the floor, raise your left leg and right arm.
To look down at the floor, drop your chin toward your chest and lengthen the back of your neck.
After a short while, maintain this position and then return to the position from which you began.
Raise your right leg and left arm, and stay in this posture for a little while.
Get back to where you were before. This round is it.
execute two to three sessions of eight to twelve reps.
muscles involved: gluteus, erector spine, and rectus abdominis
aligning advice: You must appropriately align your body and apply the proper techniques to ensure that you are getting the most out of the bird dog workout.
If you’re new to this practice, it could feel overwhelming to absorb all of the following advice. Rather than trying to master all of these tips at once, try concentrating on a handful of them at a time:
Maintain hip level. Avoid twisting your pelvis.
Steer clear of overextending your leg or letting your spine flex past its normal posture.
From your fingertips to the tips of your toes, sense a line of energy traveling throughout your body.
To stop your back from drooping, keep your spine neutral and tighten your abdominal muscles.
Keep your chest from lowering near the ground.
drop the shoulder blades down, away from the ears, and back.
Maintain alignment of the back of your neck with your spine.
Move deliberately and slowly.
Continue breathing evenly and smoothly.
Squeeze the stomach
The layer of muscles at the base of your pelvis that support your bladder and colon is known as your pelvic floor. You may strengthen these muscles and make it easier for them to pass feces through your colon by exercising them.
This is a brief and simple workout to help strengthen your pelvic floor muscles
With your legs slightly apart, choose a comfortable posture to sit, stand, or lie in. First, you must determine which muscles are involved. Pull up and tighten the muscles surrounding your back channel, as though you’re attempting to prevent yourself from breathing in. This is the posterior region of the pelvic floor, and you should be able to feel the muscle contract.
Now see yourself trying to stop the flow of pee as you are about to pass water. The front portions of the pelvic floor are the muscles that tense up as you try to stop passing water. Tighten and slowly raise your pelvic floor muscles as firmly as you can, pulling them up from the rear towards the front. After squeezing for as long as possible—up to ten seconds—relax the muscles. Take a three- or four-second break and then try another pull-up. Begin by performing them five times, and then progressively increase the quantity (up to 8–12 times).
Now swiftly and firmly pull up the muscles, and then release them right away.
These pull-ups are quick. Once more, begin by performing these five times, and then slowly increase the number up to ten times.
You might attempt to hold each pull-up a little bit longer after each set of slow pull-ups. Additionally, aim to perform more quick pull-ups after each set.
repeat: Three times a day, you should work on your pelvic floor. After you’ve learned the exercises and recognized the right muscles, you should be able to perform them in any position without drawing attention to yourself. You may attempt to form a routine of performing the exercises each time you perform another routine, like brushing your teeth or going to work.
These exercises should not take long, but you will need to be able to focus completely to complete them, especially when you first start performing them right. Try to schedule some quiet time to do them.
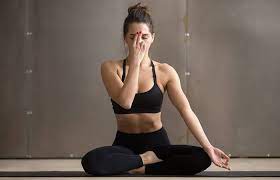
Seated meditation
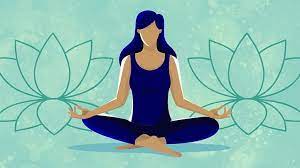
Anxiety and nerves may cause havoc with your body, especially the bowels. In certain cases, psychological stress can even result in bowel problems due to the influence of the brain on the functioning of the gastrointestinal system.
For this reason, you may need to reset your thinking if you’re experiencing constipation. Your body can relax and your restless brain can be quieted using breathing techniques and meditation. Furthermore, let nature take its course while you’re relaxed and at ease.
It’s crucial to pay attention to your breathing and visualize great ease in your belly, in your heart, and in your life when practicing seated meditation.
how to assist: take a seat on the floor as tall as you can comfortably sit use a chair or bolster if required.
Keeping your eyes slightly closed, focus on your breathing and the organic movements of your body. Take note of how your belly expands with inhales and contracts with exhales.
Breathe a little bit more deeply as you become aware of the breath, taking conscious breaths and intentionally filling and emptying your lungs with each inhale and exhale.
When you inhale, picture and make an effort to generate more space wherever you experience tightness or discomfort, focus your pressure where you feel the most tightness in your belly as you release the breath, going a little more with the belly’s natural girdling in.
For three to five minutes, keep doing this, and then let the breath come in. with no hard work while maintaining the awareness of the sensation of breathing and the motion it causes in the body
Twist lunge crescent
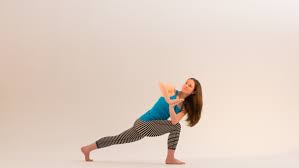
Simple twists can support the gastrointestinal tract’s natural peristalsis, adding that this pose in conjunction with deep breathing may help with healthy digestion and relief from constipation.
Stated differently, the act of wringing helps food pass through your body more easily, promotes digestion, and aids in detoxifying.
How to assist: Take a standing stance and lunge forward with your right leg.
Maintain a straight backward-facing posture with your left leg and your right knee bent, positioned above your heel.
Reach your left arm straight up to help stretch through that side of your torso, and place your right hand on your right hip to help support it. Placing the left elbow on the right knee and reaching forward while rotating to the right. Set the left elbow on the right knee and put the palms together in a prayer pose to achieve greater aid to the spinal rotation
For a duration of one to two minutes, maintain this position while keeping your breathing constant. Release the twist somewhat with each inhalation and explore twisting a little bit more with each exhale, focusing the twist in the belly and mid-spine and paying attention to any distress in the lower back or neck.
On the other side, repeat.
Advice: Attempt stretching your left shoulder across your right knee and extending your left hand to the floor next to your right foot for an even more intense pose. If you are able, raise your right arm straight up from your rear leg and extend it overhead.
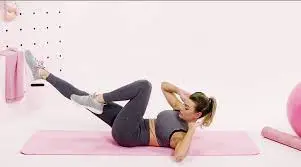
Butterfly crunch
By boosting the blood supply to the colon and inducing peristalsis, rhythmically activating the ab muscles can induce a bowel movement. This may facilitate the stool’s somewhat quicker passage through the colon.
Check that there are toilets close by before using the mat to practice butterfly crunches when you’re backed up.
how to work: Lay flat on your back in a butterfly role, with your knees apart and your soles touching. Extend your arms skyward.
Raise your head and shoulders, squeeze your rib cage toward your pelvis, and extend your arms in front of you as you release the breath.
At the peak of the movement, pause, and then slowly descend to the beginning position.
Snake Pose

Breathing deeply into your abdomen in this stance might “help relieve pressure in your lower back and stimulate movement in your GI tract,” according to Stephens. This is because each time you exhale completely, your abdominal muscles contract, gently pressing on various areas of the gastrointestinal tract. Additionally, this stretch could help with other gastrointestinal issues like gas.
how to work: with your forehead on the ground and your palms resting on the floor near your shoulders, lie on your stomach and shrug your shoulder blades down your back.
To engage your legs and bring your tailbone back toward your heels, firmly plant the tops of your feet on the ground.
Draw the spine forward toward the heart by raising your chest as high as you can without using your hands, then pressing them down. This will raise your chest a little higher with each breath.
To save the area across your chest and your neck, keep your shoulders down your back.
Proceed in this manner, reaching the deepest back bend while being comfortable, one breath at a time. Lift just as high as the belly button stays on the ground to avoid putting too much strain on the lower back.
After holding the position for five to ten breaths and letting go gently, practice the pose two or three times.
The posture of the forward bend
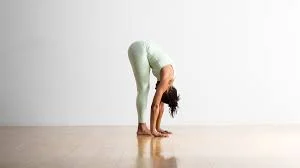
how to work: Hinging at the hips, gradually bending forward from a standing position.
Lengthen the spine, keep your legs slightly bent, and allow your head to drop to the floor.
Place your hands on the ground, clasp your opposite elbows in front of or behind your thighs, or weave your hands behind your back.
Sustain a forward-bending stance while standing for 30 seconds.
If your hands are too high off the ground, you can modify this stretch. Put your hands on a block or other substantial object rather than the floor. You’ll keep receiving the same benefits.
Corpse posture
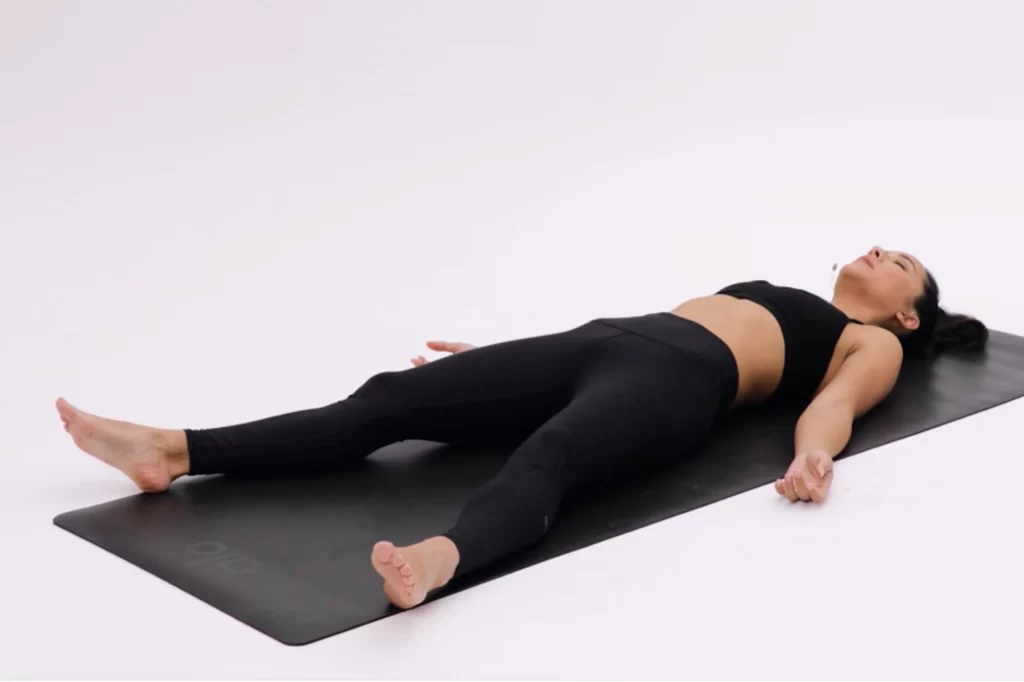
Another name for the corpse pose is Savasana
Full instructions: Put yourself on your back. Keep your legs apart. Give up attempting to hold the legs straight and permit the feet to fall freely to either side.
Lift the arms to the sides, a little separated from the body. Don’t endeavor to keep your palms open when you turn the palm to face upward. Twist your fingers inward.
For aid, fold the shoulder blades into your back. This is a small intensive understanding of tucking the shoulders underneath in the Bridge Pose.
Let go of the need for keeping your limbs in place once you have them positioned. Provide the face and total body with a slight relaxation. Allow your limbs to feel heavy. give a grant to your breathing to occur on its own. You can concentrate on breathing if your ideas are lost, but attempt not to concentrate on it too greatly.
Spend at least five minutes there. Better is ten minutes. Set an alarm if you are training at home so you won’t be distracted by constantly checking the time.
Breathe deeper before attempting to exhale. Next, start moving your fingers and toes to gradually revive your body.
Raise your arms overhead to lengthen the whole body from your hands to the feet.
Shutting the eyes, lift your legs to your chest and roll to one side. Imagine a fetal pose and use your lower arm as a pillow. for some respiration. Transfer yourself so that you sit further, utilizing your hands to help yourself.
Typical Errors
Difficulty Staying Silent: The most challenging yoga pose is savasana, which is just a fancy way of expressing that it’s incredibly difficult for certain individuals to do nothing for ten minutes. If you find it difficult, try naming each body part as you scan your body from toe to head, then letting go of it. This period is necessary for your body to process the new knowledge it has learned from the physical practice.
Mind in Action: Even when the body is at ease, the mind frequently wants to remain engaged. Even though your mind was at ease during your sequence of poses, you now need to cultivate that same level of peace while you’re not moving. Try the fundamental meditation techniques of observing your thoughts, recognizing them as thinking, and then letting them go if your mind won’t stop chattering.8. Similar to other forms of yoga, this requires repetition. You will eventually come to realize that your mind also becomes peaceful when your body enters Savasana. When practicing savasana, personal trainers advise utilizing a high-quality yoga blanket to enhance your relaxation.
Pose of Fish
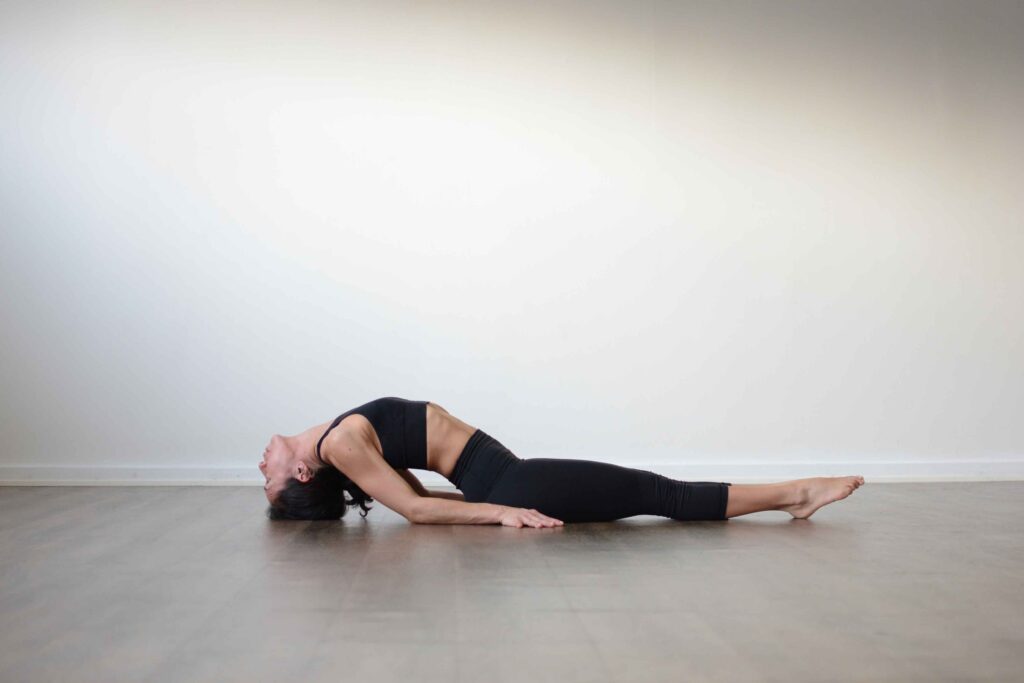
Method by Step Directions: Place your feet on the ground and bend your knees while lying on your back on the floor. Taking a breath, raise your pelvis slightly off the ground, and place your hands beneath your buttocks, palms down. Then, as you execute this stance, place your buttocks on the backs of your hands (don’t raise them off). Make sure to tuck your elbows and forearms in tight to your sides.
Breathe in and firmly plant your elbows and forearms on the ground. Next, elevate your head and upper torso off the ground by pressing your shoulder blades into your back while taking a breath. Next, return your head to the floor.
The back of the height of your head will rest on the floor, depending on how high you raise your chest and arch your back. To prevent straining your neck, wear as little weight as possible on your head.
You can extend your legs onto the floor or maintain a bent knee position. If you choose the latter, push out through your heels while maintaining a dynamic thigh.
Breathe easily while you remain still for 15 to 30 seconds. Exhale, lowering your head and torso to the ground. Squeeze your belly by drawing your thighs up into it.
Beginner advice: When in this stance, beginners occasionally strain their necks. Put a thickly folded blanket under your head or droop your chest slightly toward the floor if you have any discomfort in your throat or neck.
Advantages: Matsyasana is the one who destroys all ailments.
stretches the muscles between the ribs, known as the intercostals, and the deep hip flexors, or psoas.
stretches and tones the muscles in the front of the neck and the belly.
stretches and activates the stomach and throat organs
bolsters the back of the neck and upper back muscles
enhances posture
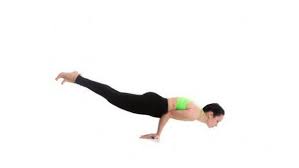
The locust pose
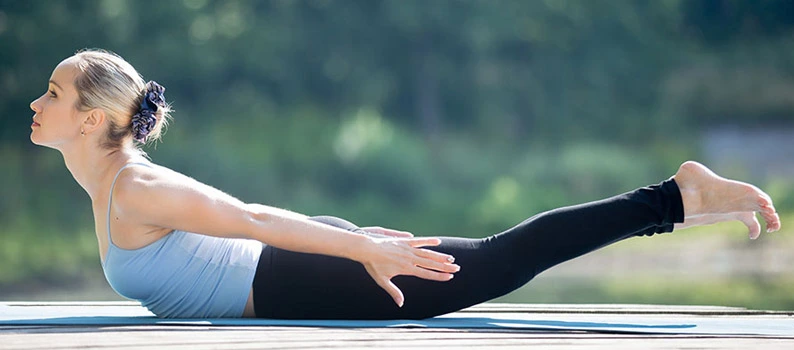
How to: Start on your stomach, placing your feet together and your hands palm down in front of you.
To work your quadriceps, extend your big toes straight back and apply pressure with all ten toenails.
To enlarge your lower back, rotate your inner thighs toward the ceiling.
Raise your head, torso, and legs, starting with your inner thighs, while keeping your hands lightly on the mat.
Raise and roll your shoulders away from the ground. Focus on raising your sternum rather than your chin by keeping the back of your neck extended. Avoid clenching your glutes.
Release the stance slowly to exit it. this pose is also termed salabhasana
newbie advice: In this pose, beginners may find it challenging to maintain the lift of the legs and body. With your hands flat on the floor, slightly behind your shoulders, and closer to your waist, start the position. To assist with raising the upper torso, take a breath and softly press your hands against the floor. Next, maintain the hands in place throughout the posture, or swing them back into the position mentioned in step 3 after a few breaths to establish the chest lift.
Examine the posture: You can perform this pose by lifting your legs off the floor alternately. For instance, raise your right leg off the floor first if you wish to maintain the position for a full minute. raise the right leg ff the floor for 30 sec then the left leg for 30 seconds
Triangle stance
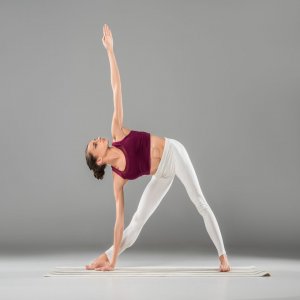
How to do it: Step forward with your left foot in a wide stride to lengthen your left lunge while standing. Place the left foot on the ground or mat gradually. With your right hand on the floor close to your left foot, turn your upper body to the left and extend your left arm toward the ceiling. Repeat on the other side after 30 seconds of holding.
Why it works: Once again, mobility is a crucial component. This often-overlooked stretch can help you considerably enhance your thoracic or mid-back mobility. It’s great for opening up and stretching the hip flexors, and it’s incredibly easy to adjust to your current level of flexibility.
Take your time and give each action your whole attention because this is often done quickly as a warm-up.
Legs raise the wall a pose
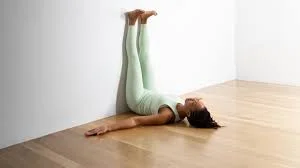
How to assist: Sit with the right side of the body pressed up against a wall.
Swing your legs up the wall as you recline on your back.
set the hips up against or near the wall.
Place your arms overhead, in front of you, or at your sides.
Legs up the wall for five minutes or longer is the recommended position.
two or three daily sessions
Moderate inversion posture in yoga
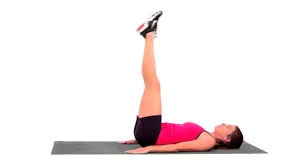
This exercise tones your lower abs by forcing your abdominal muscles to raise your hips and legs off the floor in an upright column. To finish this task
How to assist: Lie down on your back to begin. You can use a mat for comfort. Put the hands by the sides with the palms showing down.
raising your legs off the floor and pointing them upward toward the ceiling. Create a “L” with your body.
Focus on using your lower abs to raise your hips gently off the floor while keeping your legs straight. Return your hips to the floor following a brief period of inaction. Instead of hopping or jerking, move steadily and deliberately.
Repeat: Work out for four sets of fifteen repetitions, or until the burn of nature subsides.
To get the most out of this workout, keep your arms raised off the ground. You can hold the arm above the floor or raise it above your head.
Crunches
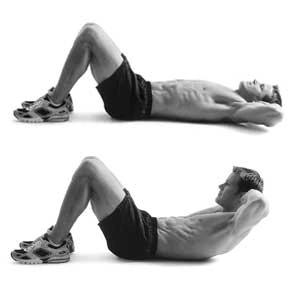
Crunches are a classic abdominal exercise that targets the rectus abdominis, or front abdominal muscles.
Increased peristalsis, or the wave-like contractions that move food through the digestive system, leads to better bowel movements.
The instructions are to lie on your back with your feet flat on the ground and your knees bent.
Position the hands across the chest or behind the head.
Pull your upper body off the ground by contracting your abdominal muscles and curling toward your knees.
Breathe out as you raise your upper body and in as you drop it back down.
Repeat a predetermined number of times.
Crunches with bicycle pose
Bicycle crunches work on numerous muscle groups dynamically, including the obliques, hip flexors, and abdominals.
Digestion and bowel motions are encouraged by this activity.
Bicycle crunches are performed by lying on your back with your knees bent and your feet elevated off the ground.
Spread your elbows and clasp your hands behind your head.
Raise your shoulder blades off the ground and straighten your left leg while bringing your left elbow up to your right knee.
Switch sides, straightening your right leg and bringing your right elbow up to your left knee.
For the predetermined amount of repetitions, keep alternating in a cycle motion.
Plank
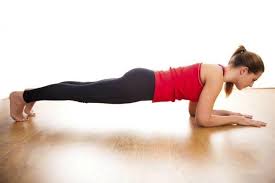
A static exercise that works the entire core including the lower back, hips, and abdominal muscles is planks.
Because they strengthen the core, planks promote better digestion and help with regular bowel motions.
Planks are performed by starting in a push-up position with your arms extended and your hands flat on the floor.
Make sure your hips, heels, and shoulders all line up in a straight line with your body.
Hold the position for a predetermined amount of time, beginning with a few seconds and working your way up. Contract your abdominal muscles.
Throughout the activity, keep in mind to breathe steadily.
After releasing and taking a break, repeat for more sets.
Lunge forward
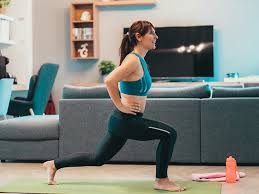
The aim is exceptional knee rehabilitation exercises to enhance knee strength and control
Starting stance: upright, feet pointed forward
Action: Step forward with one leg and bend your back knee while maintaining most of your weight on your front leg. To stand up again, raise your front leg off the ground.
ten to thirty reps for every leg
Best Advice: Keep your toes pointed forward and your back upright.
Step forward even further if you see that your front knee is crossing your toes.
Growth: Pick up weights as you work out.
Standing and flexing the quadriceps
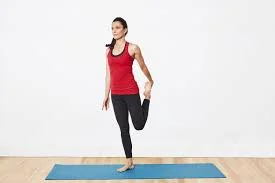
Primary muscles targeted: quadriceps; the standing quad stretch should be felt in the thigh’s front.
How to achieve it: Hang onto the back of a chair or rest one hand on a wall for balance.
Lift one foot behind the body and cover the ankle with your hand.
Preserve the back straight and the knees close together.
Take the heel in toward the buttocks, being careful not to strain it too much.
Release the leg gently after a maximum of 30 seconds of holding.
Switch sides and continue.
Guidance: Don’t bend or twist your back.
Stretching your hamstrings while standing
In addition to being less stressful on your lower back than toe touches, stretching your hamstrings while standing is a fantastic way to loosen up the backs of your legs.
How to appear: Stand with your feet shoulder-width apart and maintain a straight stance.
Bending slightly at the hips, extend the right leg a few inches in front of the body. Allow the left leg to slightly bend.
Lower your chest gradually while keeping your back straight.
As low as you are willing to bend without risking injury. Enjoy a 30-second respite.
After carefully repositioning the leg around the body, stand up straight.
Proceed with the other leg.
Hamstring stretches while supine
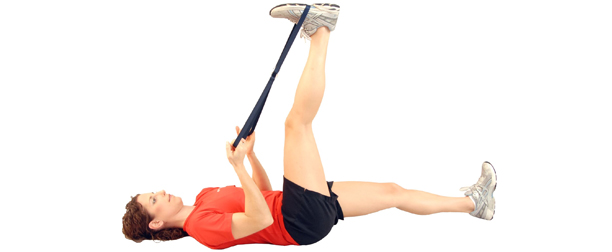
This stretch targets your hamstrings or the muscles in the back of your thigh.
Feel this stretch at the back of your leg and up to your glutes. If you bend your foot, you might also feel a stretch in your calves.
To do this exercise: Place a pad underneath your back to give cushion the stretch.
Laying on the mat or the floor, straighten both of your legs. If it feels more comfortable, you can bend both knees while keeping your feet flat on the ground.
Elevate one leg off the floor. Using your hands behind your thigh but behind the knee, slightly pull your knee toward your chest until you feel a minor stretch.
The stretch shouldn’t hurt. Hold it for 30 seconds, then move your legs back and forth. Repeat twice on each side.
Hip flexor elongation
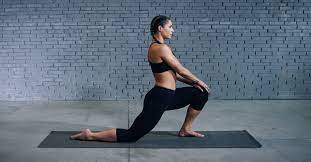
How to behave: Drop to your knees. Put a towel or exercise mat under your knee if you’d like.
Bend your left knee to a 90-degree angle while extending your left foot. Put the top of your right foot down to make sure your right leg is straight behind you.
Squeeze your glutes and place your hands on your hips to curl your pelvis under. You can lay the knee on your knee or keep your hands there for the next section.
Keeping your back straight and your eyes forward, shift your weight until you feel a stretch in the front of your right hip. Hold this position for a minute or two without moving or jumping.
Return your left knee to the floor, shift your weight back, and repeat on the other side.
Rear extension stretches
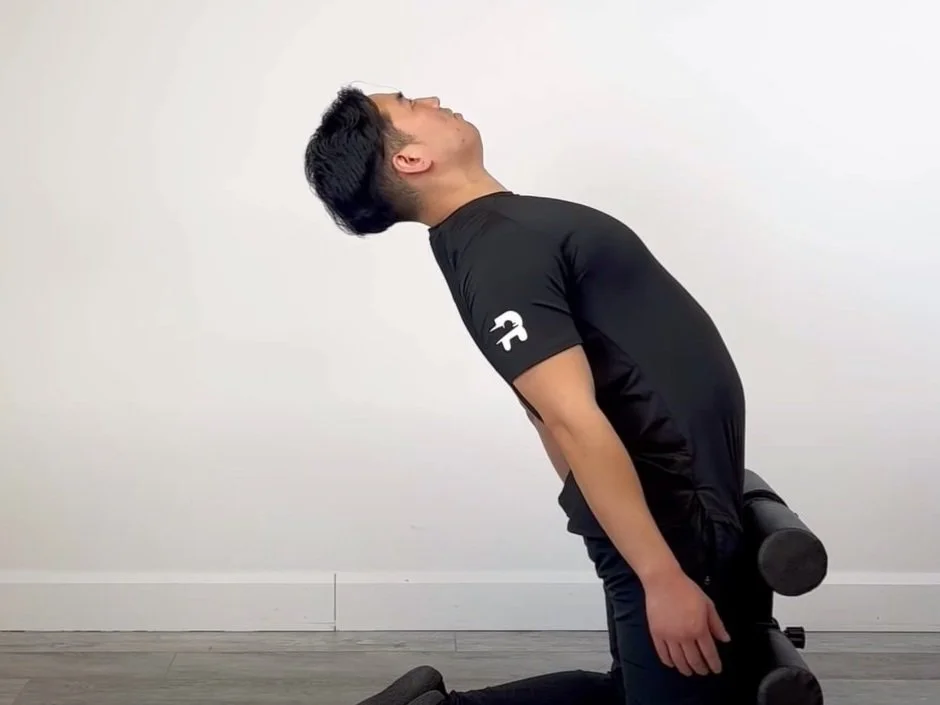
How to behave: Spread your legs wide in a kneeling pose with the sole of your foot.
It is appropriate to bend both knees. Put both hands behind your leg, and straighten it with both hands.
Keeping your upper body calm and your arms straight, moving your core backward. Attempt to get your core properly stretched in kneeling and maintain balance on the knee for 2 to 3 sec. There’s no requirement for pulling extremely hard. Straighten your core while pointing your foot toward the ceiling. Next, consciously and slowly bend your leg back to relieve tension. Just straighten as back as feels comfortable if you are unable to do so.
Continue this extension and straightening for a duration of one to two minutes.
After straightening and relieving the position to the floor.
Calves stretch
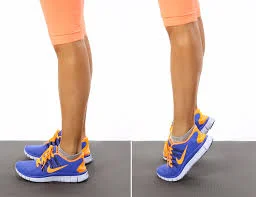
The main muscle employed was the gastrocnemius-soleus complex.
Your calf should be sore after this exercise.
Equipment needed: Chair for support
reps: two sets of ten repetitions, five to six days a week
Step-by-step instructions: Equally distribute your weight across both feet when you stand. Hung to the back of a chair or wall for balance.
Lift your unaffected foot off the ground so that you may place all of your weight on your affected foot.
Lift the heel of the afflicted foot as high as you can and then lower it back down.
Repeat ten times.
Suggestion: Keep your weight on the ball of your working foot.
Adductor stretching
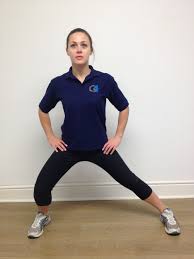
Start by standing up and taking a wide stance. Not spreading their feet widely enough is the primary error that most people make when doing this stretch. Starting with nearly all of the slack out of the adductors is crucial. In this manner, relatively little movement is required to create a stretch
The pelvis is frequently pulled out of alignment as the adductors pull tight, which is the other significant mistake with this stretch. Holding an abdominal brace and a posterior pelvic tilt while performing the stretch can frequently assist in avoiding this.
After assuming the proper beginning position, move your hips to one side and bend one knee. The inside of the opposing thigh should stretch as a result of this. To release the stretch, return to the beginning position after holding the stretch for one to two seconds you can optionally increase the hold period if needed.
Turn of the trunk
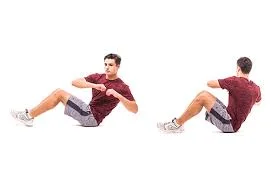
How to assist: with your feet in front of your face and your knees bent ninety degrees, sit up straight.
Elevate your feet about a foot off the ground and contract your core.
While keeping the legs in front of the face, completely rotate the upper body to the right or left.
Do ten repetitions on the left or right side of the body.
Three classes each day
For the next stage, start with a minimum-weight dumbbell and work your way up to a maximum-weight dumbbell or a medicine ball for more intensity.
Internal and external obliques are the targeted muscles.
Peacock posture
Another name for it is a mayurasana.
This peacock stance is an excellent approach to relieve constipation, blockages, and digestive problems. In addition to improving digestion, mayurasana also reduces the effects of unhealthy eating, raises intra-abdominal pressure, and shrinks the enlargements of the liver and spleen. Mayurasana is considered a more advanced asana and should be performed by experienced practitioners rather than beginners.
Full instructions: Peacock Pose can be done on a yoga mat, a carpeted floor, or any other kind of soft surface. While not necessary, yoga blocks and towels are an optional addition.
Sit up straight in the beginning. In the Hero Pose Virasana, sit with your legs bent and your heels up. Your hips will open up if your knees are kept apart.
Put your hands on the ground in front of you and slant your shoulders forward. Bending forward will cause your elbows to slightly bend. Ensure that your elbows and hands are pointing in the direction of your heart.
Your body will press on the backs of your upper arms as you drive your palms into the floor. You’ll turn your head to face the mat.
Straighten your knees and put your legs out in front of you, tiptoes down. You should evenly distribute your body weight over your hands and feet.
As you get ready to transfer your lower body’s weight to your upper body, contract your core.
To make your legs into a single unit, squeeze your thighs together. To transfer the weight to your upper body, utilize your toes.
One at a time, raise your feet off the ground. Elevate your legs till they are perpendicular to the floor as soon as your arms stabilize.
Raise your watch and focus ahead. Maintain the stance for 15 to 30 seconds while maintaining an engaged pelvis, thighs, and core.
Lower your feet to the floor, then your knees, to come out of the pose. To relieve the strain on your wrists, raise off your hands and recline into your heels and knees.
Common Errors
Avoiding these typical blunders is crucial to maintaining appropriate form and avoiding sprains or injuries. It’s important to use extra caution to prevent wrist strain.
Avoid striking this posture to begin your sequence: You should do this stance close to the middle or end of your sequence. Start with simple positions to build strength and balance before moving into this one. For an advanced stretch, ease your wrists into additional arm-balancing poses. Stretch your wrists if necessary to prevent strain.
swaying from side to side while in the highest position: Feeling like a seesaw or teeter-totter, you attempt to balance the weight of your lower body on your wrists and arms. Keep your elbows close together. Instead of placing your arms shoulder-length apart,
This will establish a solid base for the pose. You might also need to practice your balance more.
Overly forward-leaning: There’s a reason this stance is called a balancing pose. Even though the upper body bears the majority of the body weight, you shouldn’t lean completely forward. Leaning the head toward the ground might damage your bones since it puts your wrists in a susceptible position and your fingers pointed toward your pelvis. As you strike a balance between leaning forward and backward, maintain your erect posture.
Avoid raising your legs sharply: During the process of moving your body weight to your arms, it can be easy to raise yourself abruptly. But doing so raises the possibility that you will trip and fall and maybe hurt your wrists. Lift one foot at a time instead. Before you go into the final pose, make slight adjustments to give your upper body time to adjust.
Release the stance safely: You should slowly return to the floor rather than hurriedly, much as you would when taking off. You can drop to the ground if you suddenly release the stance. By lowering one foot at a time and transferring the weight from your wrists to your lower body, you can securely and gracefully exit the posture.
Pranayama yoga
Nadi Shodhanam is the name for alternate nostril breathing, which slows down inhalation and exhalation. Apart from regulating and equalizing energy through the left and right sides of the body, this method also balances the autonomic and thoracolumbar nerve systems, which in turn creates an environment of inner tranquility, stability, and mental clarity.
The Nadi Shodhanam technique: Find a location on the floor or chair that feels cozy. It’s also feasible to be still or to be lying down.
Close your eyes and take several slow, deep breaths through your nose.
employing the thumb of the right hand, close the right nostril. Remove your thumb after inhaling through your left nostril for five counts. Using a separate finger on your right hand, close your left nostril, then release five breaths via your right nostril.
Now switch it up by inhaling through your left nostril and expelling through your right, five times each.
Repeat three through nine times.
Practices for deep breathing
Another simple technique to assist in enhancing your digestive system and reducing the stress that can be causing your constipation is to practice deep breathing. Deep breathing exercises are fantastic since they can be done almost anywhere and just take a few minutes.
The 4-7-8 technique is the name of this brief deep breathing technique:
With your hands comfortably folded on your lap, take a seat in a chair with your back straight.
Exhale fully through your mouth after you’ve finished breathing. For four seconds, seal your lips and breathe in through your nostrils.
Take a deep inhale and maintain that inhale for seven seconds.
Take a deep breath and release it through your mouth for eight seconds.
You will have completed four complete cycles by repeating these instructions three more times.
Breathing diaphragmatically
Support your head and bend your legs as you lie on your back on a level surface.
Put one hand directly below the ribs and the other on your chest.
Breathe in slowly enough to allow your tummy to expand and press against your lower hand. Keep your hand on your chest; don’t move it.
With pursed lips, release the breath and contract the muscles in your stomach, allowing them to collapse inward.
The hand on top of the chest needs to stay put and not move.
For five to ten minutes, repeat. Initially, you can apply this method three to four times a day, and then you can progressively extend the duration.
Minimal cardio
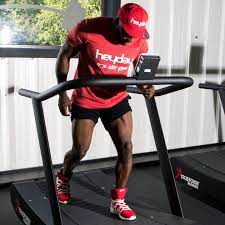
To encourage bowel movements, you don’t need to work out as hard. Gentle walks and bike rides as ways to stimulate the gastrointestinal tract and raise heart rate slightly without inducing the significant shift in blood flow away from the intestines that comes with higher intensity and -impact running. Light cardio can also help promote regularity. meeting the current federal standards of 150 minutes a week of light aerobic activity.
These minutes don’t have to be limited to organized physical activity. Doing housework, gardening, and an active commute all qualify as good for your digestive system and general well-being.
The Right Posture to Alleviate Constipation
It’s critical to position yourself for success while utilizing the proper technique for defecating. By adopting the posture shown below, you can facilitate bowel evacuation by relaxing the pelvic floor muscles and moving the diaphragm lower.
Proper posture for emptying the bowels: Sit with your feet supported and your legs spread wide apart on the toilet seat (never hover).
Forward flexion at the hips
With your hands or elbows resting on your thighs, support your trunk.
Maintain a raised chest and a long, straight spine.
Throughout your bowel movement, keep your lower back’s inward curve in place.
It is generally a question of personal opinion, however, some people find that utilizing a small footstool to help with bowel evacuation is beneficial.
Brace and Bulge or “Moo to Poo”
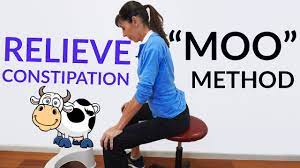
The “Brace and Bulge” method is the best way to empty your colon without straining.
Relaxing the pelvic floor muscles and applying pressure inside the belly instead of pushing and straining through the pelvic floor, this approach helps you avoid straining when you have constipation.
Bowel emptying using the Brace and Bulge technique: Take a deep breath, allowing your tummy to drop forward as you inhale.
Take four or five deep breaths again.
Say the letter “M” while spreading your waist wide. The pressure needed for your bowel movement is produced by this motion.
Say “OO” while bringing your lower abdomen forward. By doing this, you can open your anal sphincter and relax the surrounding circular muscles. If further pressing pressure is required, make the “M” sound once again.
Keep your breathing steady while using this method.
When you’re done emptying, pull up via your pelvic floor muscles.
To alleviate constipation with this approach, a well-formed soft stool is necessary.
Walking
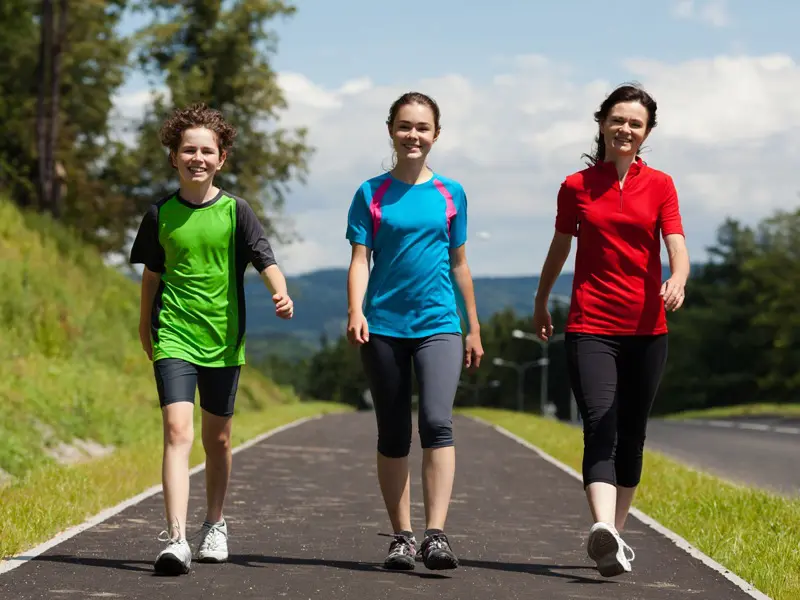
One of the best total-body exercises for optimum health is walking. One of the best ways to fit exercise into your everyday routine is to go on walks. Walking quickly can help cure and reduce a number of medical issues. Walking promotes physical health for various conditions, including obesity, irritable bowel syndrome, heart disease, and type 2 diabetes. Walking stimulates the movement of the absorption system. Food and trash can flow through your intestines thanks to this movement, which causes your digestive system to constrict. As a result, your gastrointestinal tract experiences less gas and bloating and more frequent bowel motions. To begin, set aside 20 to 30 minutes for walking three to five times a week.
Biking
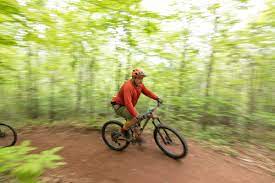
One of the best ways to help your body’s digestion is to ride a bike. It’s a workout that makes sure food passes through your digestive system quickly. Additionally, biking can aid in lowering the amount of water lost in feces, which enhances digestion in general. Cycling is also a great way to lose belly fat generally, which helps to improve the efficiency of the digestive system and results in more regular bowel movements, less bloating, and increased energy. As directed by your physician, incorporate bicycling into your cardiovascular exercise regimen a few times each week.
The advantages of yoga
You probably associate deep stretches and calming music with yoga. But there’s much more this ancient art does. From your head to your toes, practicing yoga has several benefits, such as lowering the risk of postpartum depression and reducing inflammation in those suffering from heart failure. Indeed, that encompasses your stomach as well.
Our fast-paced, unhealthy lifestyle most frequently causes constipation, gas, and other digestive issues. Hard stools as well as loose stools or infrequent bowel motions can be a digestive system symptom of poor dietary habits, stress, and busy lifestyles.
How to ease constipation with yoga?
Constipation is relieved by yoga in two ways.
Controlling stress: To start, it aids in controlling your stress reaction, which can significantly enhance how well your digestive system works. You might see that you’re more likely to become “blocked up while you’re under stress.” All you have to do is breathe deeply and meditate to make progress.
Digestive massage: Yoga’s twisting poses, inversions, and forward folds are the second ways it helps your digestive system. These poses help to stimulate the movement of feces through your system, improve blood flow and oxygen supply, massage your digestive organs, and help with peristalsis. daily yoga practice should lead to regular, healthful bowel movements.
Twists can be exceedingly difficult or painful for excessively bloated people, have distended stomachs, or just have a little extra body fat around the center. The general rule is to avoid something if it hurts. As long as it’s not painful, a little discomfort is acceptable. Consider sticking to seated or supine twists if you have trouble with twists. These include twisting while lying on your back. These poses can be helpful if you’re seeking a natural solution to ease your constipation. Spread your mat out and give it a go.
more advice about constipation
consuming more fiber
consuming more fluids
exercising frequently, practicing bowel training, which involves trying to have a bowel movement regularly, such as after eating; utilizing a footstool to help relax the muscles while using the restroom; and using osmotic agents or fiber supplements, such as milk of magnesia. using mineral oil as a lubricant, laxative, or stool softener A stimulant or prescription medicine may be necessary to relieve constipation if it is severe or other therapies are not working.
Giving your belly a massage
It’s a great idea to know how to self-massage your abdomen, especially if you get constipation frequently. Massaging the abdomen should aid in stimulating the muscles in the digestive system and promote bowel movements.
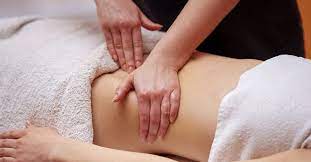
How to assist: Lay flat on your back to start. This can be done on a yoga mat, on the carpet, or on your bed. Place both hands just above your pubic bone on your lower abdominals. Gently massage this area of your stomach with your hands in a clockwise circular motion. Continue this self-massage for a few minutes, paying particular attention to any tense or uncomfortable places. To release the tension in your abdominal muscles, you can gently rock yourself back and forth while bringing both knees into your chest.
beverages that ease constipation

Constipation can also be relieved or prevented by drinking other beverages like unsweetened juices, water, clear soups, green smoothies made with spinach and other high-fiber vegetables, osmotic laxatives like Miralax, which draws water into the bowel, herbal teas for constipation, and goldenseal kefir, which may improve the frequency and consistency of stool.
A pharmacist can provide laxative granules for purchase. When utilizing these preparations, people should adhere to the directions. They take two to three days to work and are only meant for short-term use.
Have some coffee, ideally a hot

When faced with the problem of how to make yourself poop, this is frequently the first thought that enters your head. For those who enjoy their coffee, there is good news: In general, warm drinks can help start things going, especially a nice cup of tea or coffee in the morning. Although the coffee’s heat can activate your digestive system, the beverage’s high caffeine content is also known to stimulate colon motility. But keep in mind that you drink a mess of water. caffeine can dehydrate you and function as a diuretic, which could exacerbate the effects of constipation.
Get unlimited access to digital content, premium workouts, and more by signing up for WH+ today. Both warm and cold coffee work well. However, the effects of other cold caffeinated drinks won’t be the same, such as caffeinated sodas or iced tea.
Consider using an over-the-counter laxative. The ingredients in polyethylene glycol 3350, often known as MiraLAX, are indigestible and non-absorbable, which results in diarrhea.
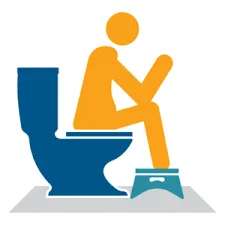
It can cause diarrhea at higher doses, but it can also help avoid constipation at lower amounts. Consequently, if you wish to slightly accelerate things, you can change the dosage. When you think you might be ready to go, try squatting over the toilet
Squatting affects the anatomy by relaxing the muscles in that area and elevating the section of your colon that facilitates easier bowel evacuation. You can simulate the squatting position by placing a stool beneath your feet to elevate your knees. The easier it is for you to poop, the closer you are to a complete squat.
Think about taking a supplement of magnesium

Magnesium has numerous vital functions in the body. It helps with constipation and stimulates the creation of energy as well as the function of muscles and nerves. Patients with normal renal function can safely treat constipation with a 400–800 mg daily magnesium supplement. As an osmotic laxative, it draws water into the colon to produce a mass of soft stool. elevate bowel action
Almonds, beans, fortified foods, leafy greens, milk, nuts, seeds, and whole-grain products are some other dietary sources high in magnesium.
Stool softener get one
Stool softeners might take anywhere from 12 to 72 hours to start working to aid with stool passage.It makes it simpler for the stool to pass through the colon by facilitating the entrance of water and fat into the stool substance. He suggests Docusate, a stool softener. Most individuals can use it safely, however, you should take it with water. However, diarrhea, vomiting, nausea, and cramping in your abdomen are possible side effects. A rash, wheezing, and shortness of breath are a few uncommon adverse effects. Docusate shouldn’t be taken frequently since it can depend on it
prevent meals that could make you constipated
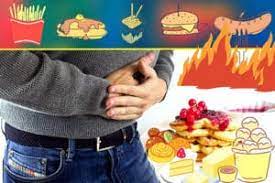
Constipation can be caused by certain foods, including dairy products, fried and fatty foods, persimmons, and white bread. Large, hard-to-pass stools can be the result of eating foods high in fat or carbohydrates, which are generally harder for your body to process and digest. This can cause constipation.
Additionally, since alcohol can lead to both diarrhea and constipation, you should restrict your intake of red meats because they are often heavy in fat and poor in fiber. Patients who consume large amounts of alcohol are commonly dry, and because alcohol is a diuretic, it creates us required to urinate more frequently, which aggravates the issue.
Common Errors to Neglect With Constipated
Damage to the pelvic floor can result from repeated straining or even from a single, strong episode of straining
Those who are constipated frequently make these same blunders when attempting to pass gas.
Common errors that lead to pelvic floor injuries and constipation include:
- pushing through the pelvic floor in a bearing manner
- Trying not to spill
- drawing the abdominal muscles inward
- slumping forward and losing the lower back’s inward curve
- circling the toilet instead of using the seat
- In the short term, constipation may get worse when you consume more fiber. If your stool is too hard to empty using the method outlined above, talk to your doctor or pharmacist about stool-softening medications. Once you’ve effectively cleared your system, you can gradually reintroduce the right diet to prevent constipation.
- Problems with emptying the bowels can arise from postponing the impulse to do so.
- Attempt to go when you first have the urge, unless you need to undergo bowel retraining or are prone to fecal incontinence issues.
When to visit a physician
A lot of folks will occasionally become constipated. Most of the time, dietary adjustments and over-the-counter medications can provide symptom alleviation.
On the other hand, a person needs to see a doctor if they:
- alterations to bowel habits
- intense stomach aches
- unexpected loss of weight
- prolonged constipation despite exercising and consuming more fiber
A person with constipation may need to increase their fiber intake and exercise regularly. It could also be a sign of underlying diseases like irritable bowel syndrome. When in doubt, seeking a diagnosis from a physician is advised.
Can drinking juices relieve constipation?
Less than bowel motions per week indicate constipation. Over time, feces that stay in the digestive tract will solidify, making passage difficult and occasionally painful. Dietary and lifestyle modifications are usually highly beneficial in alleviating occasional constipation symptoms.
As a temporary fix, using over-the-counter (OTC) laxatives can be beneficial, but they may have unforeseen adverse effects like dehydration. Additionally, there is a chance that people will get physically dependent on laxatives. Some people may get relief from constipation by consuming specific liquids. Fruit and vegetable juices can contain sorbitol and dietary fiber, which can help control bowel motions.
Juices also include a lot of water, which helps keep the body hydrated and may help soften stiff stools.
The reasons juices, being high in fiber, can aid in the relief of constipation are discussed in the following sections. Certain fresh juices are often high in dietary fiber even if they are a liquid—just not as much as if the fruit or vegetable is eaten raw. The body does not digest fiber. Rather, fiber helps maintain a healthy gut by passing through the digestive system. Diets rich in dietary fiber encourage frequent, healthy bowel movements.
Depending on their age, adult females consume 22–28 grams (g) of dietary fiber daily, while adult males consume over 28–34 g. Constipation may require consuming more dietary fiber than those who should not Attempt a moderate increase in fiber consumption coupled with lots of water, as increasing fiber intake without getting adequate fluids may make constipation worse.
Two forms of dietary fiber found in fruits and vegetables promote regular bowel movements and lessen constipation:
Water is absorbed by soluble fiber, which also provides feces with a softer, more flexible nature that facilitates passage. Soluble fiber can be found in psyllium, beans, fruits, vegetables, nuts, seeds, and oats.
Water cannot be absorbed by insoluble fiber. This kind of fiber aids in the passage of waste products through the digestive system. Also, insoluble fiber clears the stomach of harmful microorganisms. Fruit and vegetable skins, bran, whole wheat, rye, nuts, and seeds are sources of insoluble fiber.
Removing the skin from apples before juicing, re-incorporating the pulp into the juice, or adding high-fiber fruits like berries are some ways that people might boost the fiber content of their homemade juice.
Sorbitol is a sugar alcohol found in several fruits that attracts water into the large intestine. Hard stools are made easier to pass through the digestive tract by having more water in the gut.
Sorbitol-containing fruits include: pears, apples, grapes, pitted fruits (like plums, peaches, and apricots), and dried fruits like prunes and dates
Prunes can be one of the greatest fruits to help cure constipation because they are one of the richest fruit sources of sorbitol.
They are hydrated: One of the main causes of constipation is dehydration. Enough water is needed in the digestive tract to keep food waste flowing through it. If not, the feces may become lumpy, hard, and challenging to pass. Constipation is often relieved by consuming plenty of water and healthy juices.
The fruit juices listed below have sorbitol, fiber, and water, all of which can aid in the relief of constipation.
prune juice: Prunes, or dehydrated cherries, are a popular food because of their natural laxative properties, which also improve gut health and digestion in general.
Prunes have few advantages for digestive health. eating 80 grams (g) of prunes daily increased the weight and frequency of passing wastes substantially. Although there is a lot of dietary fiber in prunes, much of it is lost during the juice-making process. Rather, because prune juice includes sorbitol, magnesium, and potassium—all of which help with bowel function—it serves as a laxative.
Lemon juice: Lemons include a lot of vitamin C, which is an antioxidant that draws water into the digestive system. Stools can be made softer and bowel motions can be encouraged by increasing the amount of water in the gut. Constipation may result from mild dehydration. Drinking more water could aid with constipation relief. Some people may find that drinking a lemon-water mixture helps with their constipation. Lemon water can be used to stay hydrated, and people can incorporate lemon juice into their diets. When feasible, choose lemons that are fresh and from your local area.
Apple liquid: Because apples are strong in sorbitol and dietary fiber, they may help ease constipation. 18.91 g of sugar and 4.37 g of fiber may be found in one medium apple. Among other nutrients, apples have calcium, vitamin A, and vitamin C.
Pectin, a water-soluble fiber found in apples, may also encourage bowel motions. Apple juice has a comparatively higher sugar content than other fruit juices. Those with delicate intestines may experience digestive distress after consuming big quantities of apple juice. Additionally, juicing apples greatly lowers their fiber content, which may explain why apple juice isn’t as efficient as other juices in relieving constipation. When feasible, use organic, fresh apples that are sourced locally.
How much juice should You consume to relieve constipation?
Juices can be made by consumers themselves or bought from stores. To begin with, folks should start with small amounts of juice to prevent negative consequences. For the first several days, try a quarter or a half serving.
A maximum of one small glass (150 milliliters) of naturally sweetened or unsweetened juice should be consumed per day, according to some guidelines. Juice may be difficult for some people to tolerate, so they may want to start with smaller dosages and work their way up. Gradually increase your intake of dietary fiber over a few days or weeks; abrupt increases might aggravate constipation and produce discomfort in the digestive tract and diarrhea. Attempt to acquire 100% fruit juices when buying readymade juices.
Fruit concentration and added sugar are included in certain fruit juices and drinks. These liquids won’t relieve constipation to the same extent as pure fruit juice.
What Length of Time Should You Keep Up Kegel Exercises?
Exercise for your pelvic floor muscles is something you should do from childhood to old age, as it is in your own best interest to maintain them in good condition, just like any other group of muscles.
Should you already be experiencing symptoms that could be related to a weak pelvic floor, don’t give up if you don’t see results from your exercises within a month or two—this is a lengthy process that requires perseverance and determination. For clarification on how to perform the exercises correctly, speaking with a continence physiotherapist or professional consultant may be helpful. Additionally, they might be able to recommend extra workouts, workout equipment, or muscle stimulation which should speed up the process
What time of day is ideal for bowel exercise?
After a large meal, wait an hour before engaging in any strenuous physical activity. Your body uses the increased blood flow to your stomach and intestines after eating to aid in food digestion. Blood moves from your stomach to your heart and muscles when you exercise soon after eating. Less blood in the gastrointestinal tract results in weaker contractions, which will cause food to pass through your intestines more slowly. This is because the strength of the contractions in your gut is dependent on the amount of blood in it. Constipation, gas, and bloating may result from this. Give your body time to process a large lunch before embarking on that nature excursion.
Which Exercises Should the Best for Constipation?
The act of moving around can help ease constipation. Even only 10 to 15 minutes of walking many times a day can make a big difference in how well the body and digestive system function. If you’re in good shape, you may go for an aerobic workout like swing dancing, swimming, jogging, or running. These activities are all beneficial for maintaining a healthy digestive system. Constipation may also be relieved by yoga and stretching
How Can Physical Activity Aid in Constipation?
By reducing the amount of time food takes to pass via the large intestine, exercise helps relieve constipation. As a result, your body will absorb less water from the feces. Dry, firm stools are more difficult to pass. Aerobic exercise also raises your heart rate and respiration rate. This aids in promoting the intestines’ normal muscle contractions, also known as squeezing. Better squeezing intestinal muscles will facilitate the rapid evacuation of feces.
Outline
A person suffering from constipation could find some relief with yoga. Pose variations may stimulate the gastrointestinal tract to expel gas or feces.
When attempting any of the more difficult yoga positions, exercise caution. A person should contact a doctor if yoga, nutritional, and lifestyle modifications do not help, or if they discover blood in their stool.
Finding the exercise that works best for you may take some trial and error, but being active is crucial to controlling your constipation and lowering your stress levels.
Always get medical advice before starting a new workout program to prevent putting too much stress on your body.
Once you try a new physical activity and notice any health problems that weren’t there before, cease using that strategy and get in touch with your doctor right away.
FAQ
How should you extend your pelvic floor for constipation?
There are stretching exercises that might assist in easing pelvic floor tension. Stretching the piriformis and abductor muscles as well as breathing into the diaphragm are possible exercises.
Can constipation result from a tight pelvic floor?
Instability or tightness in the pelvic floor muscles can also lead to constipation. This could occur if someone overworks their pelvic floor or if it is hyperactive. Symptoms of an overly tight pelvic floor include pain during intercourse, difficulty peeing, and incontinence.
Which physical activities promote bowel movement?
Regular physical activity of any kind may aid in promoting bowel motions. Exercise at a moderate level may assist in increasing the frequency and consistency of stools
What do you do if you want to relieve constipation in less than 30 minutes?
Thirty minutes is all it takes to relieve constipation; you can do this by taking warm water, doing some light abdominal exercises, or eating foods high in fiber, like prunes. For long-lasting relief, however, long-term maintenance and medical advice are recommended.
What are some natural constipation relief methods?
Increasing your intake of fiber-rich foods like whole grains, legumes, and leafy greens; drinking enough water to stay hydrated; engaging in regular physical activity; controlling your stress levels; and thinking about taking natural supplements like psyllium husk or probiotics are some natural ways to relieve constipation.
Which foods are recognized to be constipation-causing?
Foods heavy in fat and sugar in processed foods, low-fiber items like white bread and pasta, dairy products, red meat, and fried or greasy foods are all known to induce constipation.
Which ten foods are the best for easing constipation?
Prunes, apples, pears, kiwi, berries, flaxseeds, chia seeds, leafy greens, whole grains, and legumes are the top ten foods that cure constipation.
What is a rapid bowel movement exercise?
The Top 6 Workouts To Help You Immediately Pass Out
Give your abdomen a massage. It’s a great idea to know how to self-massage your abdomen, especially if you get constipation frequently.
Inhaling deeply. Shutterstock, Wind-Relieving Pose, Squats, Seated Twist, and Low-Intensity Cardiowork.
How can you encourage a bowel movement with the body?
Digital stimulation can be used to induce bowel movement: Slide a fingertip greased into the anus. Once the sphincter muscle relaxes, move it in a circular motion. This could require many minutes.
What kind of activity makes your bowels clean?
Crunches: This exercise can be tried in a variety of ways, such as vertical leg crunch, long arm crunch, and reverse crunch. One of the best activities for a healthy digestive procedure is crunches or sit-ups. Your intestines and bowel movements are strengthened by the muscles in your belly and core.
How can you get rid of your waste every morning?
Drink warm water with lemon in the morning to hydrate the body and encourage bowel movement. Eat meals high in fiber, such as fruits and whole grains, to promote regularity and better digestion. Probiotics can aid in bowel movement regulation and gut health improvement.
Do bananas relieve constipation?
Bananas usually help people feel less constipated than they do. They have dietary fiber in them, which helps stools become softer and more substantial. See your doctor or a certified nutritionist if you think bananas are making your constipation worse.
Can constipation result from excessive walking?
Regular exercisers typically don’t experience constipation. In essence, the colon reacts to movement. Regular bowel movements periodically depend on a healthy muscular tone. During the defecation process, the diaphragm and the muscles of the abdominal wall are very important.
The 7-Second Poop Method What is it?
Squatting down on a seat It’s not proven that sitting in a certain posture for seven seconds eases constipation. However, you might make things easier by adjusting your posture while using the restroom. To raise your knees above your hips, set your feet on a stool.
References
- Osnato, J. (2020, February 10). Exercises to Stimulate Bowel Movement. LIVESTRONG.COM. https://www.livestrong.com/article/337331-exercises-to-stimulate-bowel-movement/
- Boyle, C. (2023, February 8). Smooth Moves: Yoga Poses for Constipation. Healthline. https://www.healthline.com/health/fitness-exercise/yoga-for-constipation#TOC_TITLE_HDR_1
- Bruce, D. F. (2007, June 24). Exercise to Ease Constipation. WebMD. https://www.webmd.com/digestive-disorders/exercise-curing-constipation-via-movement
- Sissons, B. (2023, May 18). Can pelvic floor exercises help constipation? https://www.medicalnewstoday.com/articles/pelvic-floor-exercises-for-constipation#contacting-a-doctor
- Holton, J. (2019, February 6). Relieving Constipation Through Exercise – Colon & Rectal Surgery – New York. Colon & Rectal Surgery – New York. https://colonandrectalsurgeryofnewyork.com/relieving-constipation-through-exercise/
- Ambatkar, N. (2023, August 22). Gentle Exercises or Yoga for Constipation. https://www.truemeds.in/blog/exercise-for-constipation
- Acko, T. (2023, November 3). Yoga For Constipation: Top 10 Yoga Poses to Relieve Constipation. Acko General Insurance. https://www.acko.com/health-insurance/health-guides/yoga-for-constipation/
- Mellardo, A. (2023, March 27). The 6 Best Exercises To Help You Poop Immediately. Eat This Not That. https://www.eatthis.com/exercises-to-help-you-poop/
- 10 Yoga Poses for Chronic Constipation | Exercise at Home. (2022, December 15). Pristyn Care. https://www.pristyncare.com/blog/yoga-poses-for-chronic-constipation/
- Savory, G., & Savory, G. (2021, August 26). Pelvic Floor Exercises. Bladder & Bowel Community. https://www.bladderandbowel.org/help-information/resources/pelvic-floor-exercises/
- Relieve Constipation Naturally – 3 Step Emptying Technique – Pelvic Exercises. (2022, February 14). Pelvic Exercises. https://www.pelvicexercises.com.au/relieve-constipation/
- : Bhardwaj, N. (2020, June 22). These 5 yoga poses will help you poop and keep constipation at bay. Health shots. https://www.healthshots.com/preventive-care/self-care/these-5-yoga-poses-will-help-you-poop-and-keep-constipation-at-bay/
- 14 Exercises for Constipation Relief. (2023, July 11). TUSHY. https://hellotushy.com/blogs/good-hygiene/exercises-for-constipation
- Yoga Poses and Exercise for Irritable Bowel Syndrome (IBS) Patients. (2020, September 18). https://www.pacehospital.com/yoga-poses-and-exercise-for-irritable-bowel-syndrome-ibs-patients
- Umipig, K. (2023, September 12). 5 Abdominal workouts that can relieve constipation symptoms. Longevity.Technology Lifestyle | Health, Fitness & Technology. https://longevity.technology/lifestyle/5-abdominal-workouts-that-can-relieve-constipation-symptoms/
- User, G. (2021, August 24). 5 Exercises that Aid in Optimal Digestive Health | GHA. Gastroenterology HealthCare Associates. https://www.giwebmd.com/blog/2021/5/25/5-exercises-that-aid-in-optimal-digestive-health
- 8 Exercises That Can Help To Manage Constipation | L. . . (2022, February 23). Leckey. https://www.leckey.com/blog/2022/february/8-exercises-that-can-help-to-manage-constipation
- Benton, E., & Martens, A. (2023, August 11). How To Make Yourself Poop: 14 Doctor-Recommended Tactics For Short- and Long-Term Relief. Women’s Health. https://www.womenshealthmag.com/health/a19984082/how-to-make-yourself-poop/
- Yoga for Constipation: Top 10 Yoga Poses to Relieve Constipation & Gas. (2023, November 10). Digit Insurance. https://www.godigit.com/health-insurance/exercise/yoga-for-constipation
- Bowel retraining: MedlinePlus Medical Encyclopedia. (n.d.). https://medlineplus.gov/ency/article/003971.htm