The Best Hip Adductor Exercises for Runners, Cyclists, and Other Athletes
The hip adductor muscles, often referred to as the inner thigh muscles, play a crucial role in hip stability, leg movement, and overall lower body strength. These muscles help bring the thighs together and are actively engaged in activities such as walking, running, and maintaining balance. Incorporating hip adductor muscle exercises into your fitness routine can improve your lower body strength, enhance your athletic performance, and help prevent injuries.
In this guide, we will explore various hip adductor muscle exercises that target and strengthen these essential muscles. Whether you’re an athlete looking to improve your agility, a fitness enthusiast striving for well-rounded leg strength, or someone seeking to alleviate discomfort caused by muscle imbalances, these exercises can be beneficial.
What is the Hip Adductor Muscle?
The hip adductor muscle tissue is a group of five muscles originating from the pelvis and inserted into the femur (thigh bone). These muscular tissues work collectively to shift the thigh in the direction of the midline of the frame, a motion known as hip adduction. The 5 hip adductor muscle masses are:
- Adductor Brevis: This muscle is the shortest of the hip adductors and originates from the inferior pubic ramus (a part of the pelvis) and inserts into the linea aspera (a ridge at the again of the femur).
- Adductor Longus: This muscle is longer than the adductor brevis originates from the pubic bone and inserts into the linea aspera of the femur.
- Adductor Magnus: This muscle is the biggest of the hip adductors and has components – a superficial part and a deep part. The superficial element originates from the ischial tuberosity (part of the pelvis) and inserts into the linea aspera of the femur. The deep component originates from the ischial tuberosity and inserts into the adductor tubercle (a small bump at the again of the femur).
- Gracilis: This muscle is a short, thin muscle that originates from the pubic bone and inserts into the tibia (shin bone) on the interior of the knee.
- Pectineus: This muscle is a short, thick muscle that originates from the pubic bone and inserts into the linea aspera of the femur.
All of these muscle tissues work together to adduct the hip, however in addition they are used in other functions. The adductor magnus, In addition to their role in hip motion, muscle tissues additionally assist in stabilizing the pelvis throughout the movement and maintaining balance.
Hip adductors exercise
Standing Leg Circles
Standing Leg Circles is an exercise that targets the hip adductors, which are the muscles responsible for bringing the legs towards the midline of the body. This exercise is done in a standing position, making it a convenient and simple workout that can be done anywhere.
To perform Standing Leg Circles, follow these steps:

- Stand straight with your feet shoulder-width away.
- Raise your right leg off the surface and extend it out in front of you.
- Slowly rotate your right leg in a circular motion, keeping it straight and maintaining your balance.
- Finish 10 circles in one direction, then change and do 10 circles in the opposite direction.
- Lower your right leg back to the ground and repeat the exercise with your left leg.
Side-Lying Hip Adduction
Side-lying hip Adduction is an exercise that targets the hip adductors, which are the muscles responsible for bringing the legs toward the midline of the body. This exercise is done in a side-lying position, making it a convenient and simple workout that can be done anywhere.
To perform Side-Lying Hip Adduction, follow these steps:

- Lie on your side and your legs should be straight and your bottom arm should be extended out in front of you in order to provide support.
- Bend your top leg and put your foot on the floor in front of your bottom leg.
- Slowly lift your bottom leg up towards the ceiling, keeping it straight and maintaining your balance.
- put your leg back to the initiate position.
- Complete 10 repetitions on one side, then switch and do 10 repetitions on the opposite side.
Squat Side Kick
Squat Side Kick is an exercise that targets the hip adductors, which are the muscles located on the inner thigh that bring the legs towards the midline of the body. This exercise is a combination of a squat and a sidekick, making it a dynamic and challenging workout that can help improve lower body strength and stability.
To perform Squat Side Kick, follow these steps:

- Stand with your feet shoulder-width away and your toes should be pointing forward.
- Lower down into a squat position by bending your knees and pushing your hips back, keeping your chest lifted and your weight in your heels.
- As you come up from the squat position, lift one leg out to the side and kick it out as far as you can while keeping your balance.
- Lower your leg back down to the ground and immediately go back into a squat position.
- Repeat the squat and side-kick motion on the same leg for 10 repetitions, then switch and do 10 repetitions on the opposite leg.
Standing side Leg Raise
Standing Side Leg Raise is a workout that objectives the hip adductors, which are the muscle groups positioned on the inner thigh that carry the legs closer to the midline of the body. This exercise is an easy yet powerful manner to bolster and tone the internal thigh muscle mass, enhance stability and balance, and grow flexibility inside the hips.
To perform Standing Side Leg Raise, follow the steps:

- Stand with your feet shoulder-width apart and your feet pointing ahead.
- Shift your weight onto one leg and raise the other leg out to the aspect as high as you may whilst retaining your balance.
- Hold the leg up for some seconds, then lower it back off to the ground.
Four. Repeat the side leg enhance motion on the equal leg for 10 repetitions, then transfer and do 10 repetitions on the alternative leg.
Sumo Squat
Sumo Squat is an exercise that goals the hip adductors, which might be the muscular tissues positioned on the inner thigh that carry the legs closer to the midline of the body. This exercise is a variation of the traditional squat and includes a much wider stance with feet pointing outwards. It is a powerful way to reinforce and tone the inner thigh muscle mass, improve average lower body strength, and increase flexibility inside the hips.
To perform Sumo Squat, follow these steps:

- Stand along with your feet wider than shoulder-width apart and your feet should be pointing outwards at a forty-five-degree perspective.
- Maintain your chest lifted and your core muscles engaged.
- Lower your body down by bending your knees and pushing your hips again as in case you are sitting on a chair.
- Maintain your weight on your heels and decrease your body till your thighs are parallel to the ground.
- Pause for a few seconds, then push through your heels to face again as much as the beginning role.
- Repeat the Sumo Squat movement for 10-15 repetitions.
Cross Scissors
Cross Scissors is an exercise that targets the hip adductors, which are the muscles located on the inner thigh that bring the legs towards the midline of the body. This exercise is a great way to strengthen and tone the inner thigh muscles, improve overall lower body strength, and increase flexibility in the hips.

To perform Cross Scissors, follow these steps:
- Lie on your back with your arms should be by your sides and your legs have to be extended straight up towards the ceiling.
- Maintain your core engaged and your lower back pressed into the surface.
- Slowly lower your right leg towards the ground as far as you can without lifting your left leg off the ground.
- Once you reach your lowest point, slowly lift your right leg back up to the starting position.
- Repeat the same motion with your left leg, lowering it towards the ground as far as you can without lifting your right leg off the ground.
- Continue alternating between your right and left leg for 10-15 repetitions.
Dumbbell Side Lunge
Dumbbell Side Lunge is an exercise that targets the hip adductors, which are the muscles located on the inner thigh that bring the legs towards the midline of the body. This exercise is a great way to strengthen and tone the inner thigh muscles, improve overall lower body strength, and increase flexibility in the hips.
To perform Dumbbell Side Lunge, follow these steps:

- Stand with your feet hip-width away, keeping a dumbbell in both hands.
- Take a large step to your right side, keeping your left foot in place and your toes pointing forward.
- As you step to the side, bend your right knee and lower your body towards the ground, keeping your left leg straight.
- Keep your chest lifted and your back straight as you lower your body towards the ground.
- Once you reach your lowest point, push off your right foot and return to the starting position.
- Repeat the same motion on your left side, taking a large step to your left side and bending your left knee while keeping your right leg straight.
- Continue alternating between your right and left sides for 10-15 repetitions.
Cossack squat
The Cossack squat is an exercise that targets the hip adductors, which are the muscles located on the inner thigh that bring the legs toward the midline of the body. This exercise is a great way to strengthen and tone the inner thigh muscles, improve overall lower body strength, and increase flexibility in the hips.
To perform the Cossack squat, follow these steps:

- Stand with your feet wider than shoulder-width apart, with your toes pointing a little bit outward.
- Shift your weight to one side, bending your knee and lowering your body towards the ground while keeping your other leg straight.
- Keep your chest lifted and your back straight as you lower your body towards the ground.
- Once you reach your lowest point, push off your bent leg and return to the starting position.
- Repeat the same motion on the other side, shifting your weight to the opposite side and bending your other knee while keeping your first leg straight.
- Continue alternating between sides for 10-15 repetitions.
Copenhagen Side Plank
The Copenhagen Side Plank is an exercise that targets the hip adductors, which are the muscles located on the inner thigh that bring the legs toward the midline of the body. This exercise is a great way to strengthen and tone the inner thigh muscles, improve overall lower body strength, and increase stability in the hips.
To perform the Copenhagen Side Plank, follow these steps:

- Lie on your side with your elbow directly beneath your shoulder and your legs must be extended out straight.
- Lift your top leg and place your foot on a bench or box that is about knee height.
- Engage your core raise your hips off the surface, and make a straight line from your head to your feet.
- Hold this position for 10-15 seconds, then lower your hips back down to the ground.
- Repeat for 10-15 repetitions on one side, then switch to the other side and repeat.
Cable Hip Adductor
The Cable Hip Adductor is an exercise that targets the hip adductors, which are the muscles located on the inner thigh that bring the legs towards the midline of the body. This exercise is a great way to strengthen and tone the inner thigh muscles, improve overall lower body strength, and increase stability in the hips.

To perform the Cable Hip Adductor, follow these steps:
- Attach an ankle cuff to a low pulley cable machine and attach it to your ankle.
- Stand facing toward the machine with your feet shoulder-width away.
- Engage your core and keep your back straight as you lift your cuffed leg out to the side, away from the machine.
- Slowly bring your leg back towards the midline of your body, crossing it over your stationary leg.
- Pause for a moment, then slowly return your leg to the starting position.
- Repeat for 10-15 repetitions on one side, then switch to the other side and repeat.
Seated Hip Adduction
Seated Hip Adduction is an exercise that targets the hip adductors, which are the muscles located on the inner thigh that bring the legs toward the midline of the body. This exercise is a great way to strengthen and tone the inner thigh muscles, improve overall lower body strength, and increase stability in the hips.
To perform the Seated Hip Adduction, follow these steps:
- Sit on a bench or chair and your back should be straight and your feet flat on the surface.
- Place a resistance band around your ankles and keep your knees bent at a 90-degree angle.
- Engage your core and keep your back straight as you squeeze your legs together, bringing your knees towards each other.
- Pause for a moment, then gradually release back to the initiate position.
- Repeat for 10-15 repetitions.
Adductor machine
The Adductor machine is a piece of gym equipment that is designed to target the hip adductor muscles, which are located on the inner thigh. This machine is generally found in most gyms and fitness centers and is the best way to isolate and strengthen the adductor muscles.
To perform the Adductor machine exercise, follow these steps:

- Adjust the machine so that the pads are positioned at your inner thighs.
- Sit on a bench or chair and your back should be straight and your feet should be flat on the surface.
- Place your thighs against the pads and grip the handles for support.
- Press your thighs together against the pads, using your inner thigh muscles to control the movement.
- Pause for a moment, then gradually release back to the initiate position.
- Repeat for 10-15 repetitions.
Wide stance squat
The wide stance squat is an exercise that targets the hip adductors, which are located on the inner thigh. This exercise is performed with a wider-than-shoulder-width stance, which places more emphasis on the adductor muscles.
To perform the wide stance squat, follow these steps:

- Stand with your feet wider than shoulder-width away, with your toes pointing a little outward.
- Hold a barbell across your upper back, with your hands gripping the bar wider than shoulder-width apart.
- Keeping your chest up and your core engaged, slowly lower your body down towards the ground by bending at the knees and hips.
- Maintain your knees in line with your toes and your weight should be on your heels.
- Pause for a moment at the bottom of the squat, then slowly push back up to the starting position.
Standing banded adduction
Standing banded adduction is an exercise that targets the hip adductor muscles, which are located on the inner thigh. This exercise is performed using a resistance band, which provides constant tension throughout the movement.
To perform standing banded adduction, follow these steps:

- Attach a resistance band to a sturdy object, such as a squat rack or pole.
- Stand facing the anchor point with your feet shoulder-width apart and the resistance band around your ankles.
- Engage your core and slowly lift one leg out to the side, keeping your knee straight and your foot flexed.
- Pause for a moment at the top of the motion, then gradually lower your leg back down to the initiate position.
- Do it again for several repetitions, then switch sides and repeat.
Seated banded adduction
Seated banded adduction is an exercise that targets the hip adductor muscles, which are located on the inner thigh. This exercise is performed using a resistance band, which provides constant tension throughout the movement.
To perform seated banded adduction, follow these steps:
- Sit on a bench or chair and your back should be straight and your feet should be flat on the surface.
- Place a resistance band around your ankles and secure the other end to a sturdy object, such as a squat rack or pole.
- Engage your core and slowly push your legs out to the side, keeping your knees straight and your feet flexed.
- Pause for a moment at the end of the movement, then slowly bring your legs back together.
- Do it again for a few repetitions.
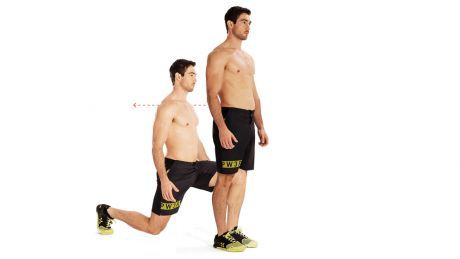
Lateral lunge
The lateral lunge is an exercise that targets the hip adductors, which are located on the inner thigh. This exercise is done by stepping to the side and bending the knee of the leading leg while maintaining the other leg straight.
To perform a lateral lunge, follow these steps:

- Stand with your feet shoulder-width away and your toes should be pointing forward.
- Take a large step to the side with your right foot, maintaining your left foot planted on the surface.
- Shift your weight onto your right foot and bend your right knee, lowering your body towards the ground.
- Maintain your left leg straight and your left foot flat on the surface.
- Push off with your right foot and get back to the initiate position.
- Do it again on the other side, stepping to the left and bending your left knee.
Hip adductor stretch
Standing Lateral Lunge Adductor Stretch
The Standing Lateral Lunge Adductor Stretch is an exercise that targets the adductor muscle groups, which are located on the internal thighs. This stretch allows for enhanced flexibility and mobility within the hips and groin region.
Here are the stairs to perform the Standing Lateral Lunge Adductor Stretch:

- Start by standing with your toes shoulder-width apart and your feet pointing ahead.
- Take a wide step to the proper with your proper foot, retaining your left foot planted firmly on the ground.
Three. As you step to the right, shift your body weight onto your proper foot, bending your correct knee and keeping your left leg immediately. - Keep your torso upright and your chest lifted during the stretch.
- As you decrease into the lunge, you have to experience a stretch along the internal thigh of your left leg.
- Hold this position for 20-30 seconds, or longer in case you feel comfortable.
- To deepen the stretch, you can lean slightly forward, bringing your torso in the direction of your proper thigh.
- After holding the stretch, slowly push off with your right foot and return to the starting function.
- Repeat the same steps on the alternative side by stepping to the left with your left foot and lunging to the left facet.
Overall, the Standing Lateral Lunge Adductor Stretch is an effective workout for concentrating on the adductor muscle tissue and improving flexibility within the hips and groin location. It can be integrated right into a heat-up routine or used as a standalone stretching exercise.
Adductor AIS Release
The Adductor AIS (Active Isolated Stretching) Release is a specific technique used to stretch and release tension in the adductor muscles. AIS is a dynamic stretching method that involves actively contracting the opposing muscles before stretching the target muscle, allowing for a deeper and more effective stretch.
To perform the Adductor AIS Release, follow these steps:
- Begin by lying on your back and your legs should be extended.
- Bend your right knee and place your right foot flat on the ground, keeping your left leg straight.
- Engage your core muscles and actively contract your left quadriceps (thigh muscles) by straightening your left leg and lifting it slightly off the ground.
- While keeping your left leg straight and active, use your hands to hold onto the back of your left thigh, just above the knee.
- Gently pull your left leg towards your chest, feeling a stretch in your left adductor muscles (inner thigh).
- Hold this stretch for 1-2 seconds, then release and return your left leg to the starting position.
- Repeat this stretch for a total of 8-10 repetitions.
- Switch sides and perform the same stretch with your right leg.
The Adductor AIS Release is an effective technique for stretching and releasing tension in the adductor muscles. It can help improve flexibility, reduce muscle tightness, and prevent injuries in the groin and hip area. Incorporating this stretch into your regular stretching routine can help maintain optimal muscle function and range of motion.
Butterfly Stretch
The Butterfly Stretch is a popular and effective stretch for targeting the hip adductor muscles, which are located on the inner thighs. This stretch helps to improve flexibility and range of motion in the hips and groin area.

To perform the Butterfly Stretch, follow the below steps:
- begin by sitting on the surface or a mat while keeping your back straight and your legs should be extended in front of you.
- Bend your knees, bring the soles of your feet closer, and allow your knees to fall out to the sides.
- Use your hands to hold onto your ankles or feet, gently pulling them closer to your body.
- Sit up tall and engage your core muscles to maintain good posture throughout the stretch.
- Slowly and gently press your knees towards the floor, feeling a stretch in your inner thighs.
- Hold this position for 20-30 seconds, while breathing deeply and relaxing into the stretch.
- If you want to increase the intensity of the stretch, you can gently lean forward from your hips, keeping your back straight.
- Hold this forward-leaning position for an additional 20-30 seconds, feeling a deeper stretch in your hips and groin.
- Gradually release the stretch and get back to the initiate position.
The Butterfly Stretch is an excellent stretch for targeting the hip adductor muscles and improving flexibility in the hips and groin area. It can be performed as part of a warm-up routine before exercise or as a standalone stretch to relieve muscle tightness and tension. Regularly incorporating this stretch into your routine can help maintain optimal hip and groin function.
Supine Wall Stretch
The Supine Wall Stretch is another effective stretch for targeting the hip adductor muscles, specifically the inner thighs. This stretch is performed lying on your back with your legs up against a wall. It helps to improve flexibility and range of motion in the hips and groin area.
To perform the Supine Wall Stretch, follow these steps:

- Start by finding an open wall space where you can comfortably lie down with your legs extended up against the wall.
- Lie down on your back and scoot your hips as close to the wall as possible.
- Extend your legs up the wall, and maintain them straight and parallel to each other.
- Allow your arms to rest by your sides or place them in a comfortable position, such as placing your hands on your belly or extending them out to the sides.
- Relax your body and focus on deepening your breath, allowing yourself to settle into the stretch.
- You should feel a gentle stretch in your inner thighs and groin area as gravity helps to open up the hips.
- Hold this position for 1-2 minutes, or longer if desired, while breathing deeply and relaxing into the stretch.
- If you want to increase the intensity of the stretch, you can gently press your knees towards the wall, feeling a deeper stretch in your hip adductors.
- Remember to avoid forcing your knees down if you feel any pain or discomfort. Only perform as far as you feel comfortable.
- Slowly release the stretch by bending your knees and sliding your feet down the wall, returning to a lying position on the floor.
The Supine Wall Stretch is a beneficial stretch for targeting the hip adductor muscles and improving flexibility in the hips and groin area. It can be performed as part of a cool-down routine after exercise or as a standalone stretch to relieve muscle tightness and tension. Regularly incorporating this stretch into your routine can help maintain optimal hip and groin function.
Standing Adductor Stretch
The Standing Adductor Stretch is an effective stretch for targeting the hip adductor muscles, which are responsible for bringing your legs together towards the midline of your body. This stretch helps to improve flexibility and range of motion in the inner thighs.
To perform the Standing Adductor Stretch, follow these steps:

- Begin by standing upright with your feet shoulder-width away.
- Take a step to the side with your right foot, widening your stance so that your feet are wider than your shoulders.
- Keep both feet flat on the ground, with your toes pointing forward.
- Shift your body weight to your right side, bending your right knee and keeping your left leg straight.
- Slowly lower your body down towards the right side, keeping your back straight and chest lifted.
- As you lower down, you should feel a gentle stretch in your left inner thigh.
- Hold this position for 20-30 seconds, or longer if desired, while breathing deeply and relaxing into the stretch.
- To increase the intensity of the stretch, you can lean slightly forward, allowing your torso to come closer to your right thigh.
- Remember to avoid leaning too far forward or forcing your body into a position that causes pain or discomfort. Only perform as far as you feel comfortable.
- Slowly return to an upright position by pushing through your right foot and straightening your right knee.
- Repeat the stretch on the other side by stepping out with your left foot and bending your left knee while keeping your right leg straight.
The Standing Adductor Stretch is a beneficial stretch for targeting the hip adductor muscles and improving flexibility in the inner thighs. It can be performed as part of a warm-up routine before exercise or as a standalone stretch to relieve muscle tightness and tension. Regularly incorporating this stretch into your routine can help maintain optimal hip and groin function.
Frogger stretch
The Frogger stretch, also known as the Frog Stretch or the Frog Pose, is an effective stretch for targeting the hip adductor muscles, inner thighs, and groin area. It is useful in improving flexibility and range of motion in these areas.
To perform the Frogger stretch, follow these steps:
- Start by getting down on your hands and knees on a comfortable surface, such as a yoga mat or carpet.
- Position your hands directly under your shoulders and your knees directly under your hips, creating a tabletop position.
- Slowly and gently, begin to widen your knees apart, keeping them in line with your hips. Your lower legs and feet should be in contact with the ground.
- Gradually slide your knees away from each other, moving them as far apart as you comfortably can without feeling any pain or discomfort.
- Allow your hips to sink towards the ground, maintaining a neutral spine and keeping your head in line with your spine.
- You should feel a deep stretch in your inner thighs and groin area. If the stretch is too intense, you can adjust by bringing your knees closer together slightly.
- Hold this position for 20-30 seconds, or longer if desired, while breathing deeply and relaxing into the stretch.
- To increase the intensity of the stretch, you can gently rock your hips back and forth or side to side.
- Remember to avoid any bouncing or jerking movements, as this can strain the muscles.
- Slowly return to the starting position by bringing your knees back together, maintaining control and stability throughout the movement.
The Frogger stretch is an effective stretch for targeting the hip adductor muscles, inner thighs, and groin area. Regularly incorporating this stretch into your routine can help improve flexibility, range of motion, and overall hip and groin function.
Kneeling adductor stretch
The kneeling adductor stretch is another effective stretch for targeting the hip adductor muscles, inner thighs, and groin area. It helps in improving flexibility and range of motion in these areas.
To perform the kneeling adductor stretch, follow the below steps:

- Start by kneeling on a comfortable surface, such as a yoga mat or carpet. Place a folded towel or cushion under your knees for extra support if needed.
- Extend your left leg out to the side, keeping it straight and perpendicular to your body. Your left foot should be flexed, with the toes pointing upwards.
- Slowly and gently, begin to shift your weight towards your left side, allowing your left knee to bend slightly. maintain your torso upright and aligned with your hips.
- As you shift your weight, you should feel a stretch in the inner thigh and groin area of the extended leg. If the stretch is too intense, you can adjust by bending your knee slightly or reducing the distance between your legs.
- Hold this position for 20-30 seconds, or longer if desired, while breathing deeply and relaxing into the stretch.
- To increase the intensity of the stretch, you can lean forward slightly, bringing your chest closer to your extended leg.
- Remember to avoid any bouncing or jerking movements, as this can strain the muscles.
- Slowly return to the starting position by bringing your left leg back in and kneeling upright.
- Repeat the stretch on the other side by extending your right leg out to the side and following the same steps.
Incorporating the kneeling adductor stretch into your routine can help improve flexibility, range of motion, and overall hip and groin function. It is a great complement to the Frogger stretch for targeting the same muscle group.
Half-kneeling adductor dips
Half-kneeling adductor dips are another variation of the adductor stretch that specifically targets the hip adductor muscles, inner thighs, and groin area. This stretch helps in improving flexibility and range of motion in these areas.
To perform the half-kneeling adductor dips, follow the below steps:

- Start by kneeling on a comfortable surface, such as a yoga mat or carpet. Place a folded towel or cushion under your knees for extra support if needed.
- Extend your left leg out to the side, keeping it straight and perpendicular to your body. Your left foot should be flexed, with the toes pointing upwards.
- Slowly and gently, begin to shift your weight towards your left side, allowing your left knee to bend slightly. maintain your torso upright and aligned with your hips.
- As you shift your weight, you should feel a stretch in the inner thigh and groin area of the extended leg. If the stretch is too intense, you can adjust by bending your knee slightly or reducing the distance between your legs.
- From this position, slowly lower your upper body towards the ground by bending at the waist. maintain your back straight and engage your core muscles in order to support your lower back.
- As you lower your upper body, you will feel an increased stretch in your inner thigh and groin area. Only go as far as you feel comfortable, avoiding any pain or discomfort.
- Hold this position for 20-30 seconds, or longer if desired, while breathing deeply and relaxing into the stretch.
- To come out of the stretch, slowly raise your upper body back up to an upright position while keeping your leg extended to the side.
- Repeat the stretch on the other side by extending your right leg out to the side and following the same steps.
Incorporating the half-kneeling adductor dips into your routine can help improve flexibility, range of motion, and overall hip and groin function. It is a great complement to the kneeling adductor stretch and Frogger stretch for targeting the same muscle group.
Crossover stretch
The crossover stretch is a dynamic stretching exercise that targets the hip adductor muscles, inner thighs, and groin area. This stretch helps to improve flexibility, range of motion, and muscle activation in these areas.
To perform the crossover stretch, follow these steps:
- Begin by standing with your feet hip-width away and your arms should be relaxed at your sides.
- Take a step to the right with your right foot, crossing it in front of your left foot. Your feet should be staggered, with your right foot in front of your left foot.
- Keep your feet facing forward and your toes pointing straight ahead.
- Slowly and gently, begin to shift your weight towards your right side, allowing your right knee to bend slightly. maintain your torso upright and keep aligned with your hips.
- As you shift your weight, you should feel a stretch in your left inner thigh and groin area. If the stretch is too intense, you can adjust by bending your knee slightly or reducing the distance between your feet.
- From this position, slowly lower your upper body towards the ground by bending at the waist. maintain your back straight and engage your core muscles in order to support your lower back.
- As you lower your upper body, you will feel an increased stretch in your left inner thigh and groin area. Only go as far as you feel comfortable, avoiding any pain or discomfort.
- Hold this position for 20-30 seconds, or longer if desired, while breathing deeply and relaxing into the stretch.
- To come out of the stretch, slowly raise your upper body back up to an upright position while keeping your feet staggered.
- Repeat the stretch on the other side by stepping to the left with your left foot and crossing it in front of your right foot, following the same steps.
Incorporating the crossover stretch into your routine can help improve flexibility, range of motion, and overall hip and groin function. It is a great complement to other adductor stretches, such as the half-kneeling adductor dips and the Frogger stretch, for targeting the same muscle group.
Lateral squat
The lateral squat is a dynamic exercise that targets the muscles of the lower body, including the glutes, quadriceps, hamstrings, and adductors. This exercise helps to improve hip mobility, flexibility, and strength in the legs.
To perform the lateral squat, follow these steps:
- Begin by standing with your feet a little bit wider than shoulder-width away. Your toes should be pointed a little bit outward.
- Keep your chest lifted and engage your core muscles to maintain good posture throughout the exercise.
- Begin by shifting your weight to one side and bending that knee, while keeping the other leg straight. Imagine sitting back into a chair on the side you are bending towards.
- As you bend your knee, push your hips back and keep your chest lifted. Your bent knee should track over your toes, and your straight leg should remain firmly planted on the ground.
- Lower your body down as far as you can comfortably go, aiming to bring your thigh parallel to the ground. If you cannot go as low, that is okay – just go as far as you can while maintaining proper form.
- Once you have reached the lowest point of the squat, push through the heel of your bent leg to return to the starting position.
- Repeat the movement on the other side by shifting your weight to the opposite leg and bending that knee while keeping the other leg straight.
- Continue changing sides for several repetitions or times.
Incorporating the lateral squat into your routine can help improve hip mobility, strengthen the lower body muscles, and enhance overall lower body function. It can be done as part of a warm-up or as a standalone exercise.
Reclining angle bound pose
The Reclining Angle Bound Pose, also known as Supta Baddha Konasana in Sanskrit, is a restorative yoga pose that stretches the inner thighs, groin, and hips. It is a relaxing pose that helps to open up the hips and release tension in the lower body.
To perform the Reclining Angle Bound Pose, follow these steps:

- Begin by sitting on the ground and your legs should be extended in front of you.
- Bend your knees and keep the soles of your feet together, keeping your knees from falling out to the sides.
- Gently slide your feet towards your pelvis, bringing your heels as close to your body as is comfortable.
- Allow your knees to drop towards the floor, creating a diamond shape with your legs.
- Slowly lower yourself down onto your back, using your hands for support if needed.
- Once you are lying down, adjust your position so that your spine is long and straight, and your shoulders are relaxed.
- You can choose to keep your arms by your sides, or you can place your hands on your belly or rest them on the floor above your head.
- Close your eyes and take deep, slow breaths, allowing your body to relax and sink into the pose.
- Stay in this position for 1-5 minutes, or longer if desired, focusing on deepening your breath and releasing any tension in your body.
- To come out of the pose, gently bring your knees together and use your hands to guide them back to a neutral position.
- Then, extend your legs out in front of you and take a moment to notice the effects of the pose on your body.
Incorporating the Reclining Angle Bound Pose into your yoga practice can help improve hip flexibility, release tension in the lower body, and promote relaxation.
It is a great pose to practice at the end of a yoga session or as part of a restorative practice.
Seated Adductor Stretch
The Seated Adductor Stretch is a yoga pose that targets the adductor muscles, which are located on the inner thighs. This stretch helps to improve flexibility in the hips and groin, and it can be particularly beneficial for individuals who sit for long periods or engage in activities that involve repetitive movements of the legs.
To perform the Seated Adductor Stretch, follow these steps:

- Begin by sitting on the ground and your legs should be extended in front of you.
- Take a deep breath in and lengthen your spine, sitting up tall.
- Bend your knees and keep the soles of your feet closer, keeping your knees from falling out to the sides.
- Use your hands to grasp onto your ankles or feet, rely on your flexibility.
- Gently press your elbows against the inside of your thighs, applying gentle pressure to encourage a deeper stretch.
- Maintaining your spine long and straight, and avoid rounding your back.
- Do a deep breathing and allow your body to relax into the stretch.
- If you feel comfortable, you can gently lean forward from the hips, keeping your back straight and your chest lifted. This will intensify the stretch in the inner thighs.
- Hold the stretch for 30 seconds to 1 minute, or longer if desired.
- To release the stretch, slowly sit back up and extend your legs out in front of you.
Incorporating the Seated Adductor Stretch into your yoga practice can help improve hip and groin flexibility, release tension in the inner thighs, and promote overall lower body flexibility. It is a great stretch to practice regularly, especially if you have a sedentary lifestyle or engage in activities that involve repetitive leg movements.
Squatting Groin Stretch
The Squatting Groin Stretch is another yoga pose that targets the adductor muscles, but it also engages the hip flexors and stretches the lower back.
This stretch helps to improve flexibility in the hips, groin, and lower back, and it can be particularly beneficial for individuals who have tight hips or experience lower back pain.
To perform the Squatting Groin Stretch, follow these steps:

- Initiate by standing with your feet a little bit wider than hip-width away.
- Turn your toes out at a 45-degree angle, so that your feet are in a wide “V” shape.
- Bend your knees and lower your hips down towards the ground, as if you were sitting back into a squat position.
- Keep your chest lifted and your spine long, avoiding rounding your back.
- Bring your hands together at your heart center, using your elbows to gently press against the inside of your thighs.
- Apply gentle pressure with your elbows to encourage a deeper stretch in the inner thighs and groin.
- If you feel comfortable, you can deepen the stretch by gently pressing your knees outwards with your elbows.
- Maintain your chest raised and your spine long.
- Take deep breaths and permit your body to relax during the stretch.
- Hold the stretch for 30 seconds to 1 minute, or longer if desired.
- To release the stretch, slowly straighten your legs and stand back up.
Incorporating the Squatting Groin Stretch into your yoga practice can help improve hip and groin flexibility, release tension in the inner thighs and lower back, and promote overall lower body flexibility. It is a great stretch to practice regularly, especially if you have tight hips or experience lower back pain.
Groin Stretch
Groin Stretch, also known as the Bound Angle Pose or Baddha Konasana, is a yoga pose specifically targeting the adductor muscles in the inner thighs. This pose helps to stretch and lengthen these muscles, increasing flexibility and range of motion in the groin area.
Here is a step-by-step guide on how to perform the Groin Stretch:
- Initiate by sitting on the floor and your legs should be extended in front of you.
- Bend your knees and bring the soles of your feet closer, keeping your knees from falling out to the sides.
- It is important to note that the closer your feet are to your pelvis, the deeper the stretch will be. You can maintain the distance between your feet accordingly.
- Maintain onto your ankles or feet with your hands. You can also use a yoga strap or towel if you cannot reach your feet comfortably.
- Sit up tall and lengthen your spine, engaging your core muscles.
- Gently press your elbows against the inside of your thighs, using them as leverage to deepen the stretch.
- Allow your knees to gently relax towards the ground, but do not force them down. The goal is to find a comfortable stretch without any pain or discomfort.
- Maintain your shoulders relaxed and at a distance from your ears.
- Breathe deeply and relax into the pose, allowing gravity to open up your hips and groin area gradually.
- Maintain the pose for 1-3 minutes, targeting the gradual and steady breathing.
- To release the pose, gently release the pressure with your hands and bring your knees back together, extending your legs out in front of you.
Regular practice of Groin Stretch can help improve flexibility in the inner thighs, relieve tension in the groin area, and increase overall mobility in the hips. It is a beneficial pose for athletes, runners, and individuals who engage in activities that involve the adductor muscles.
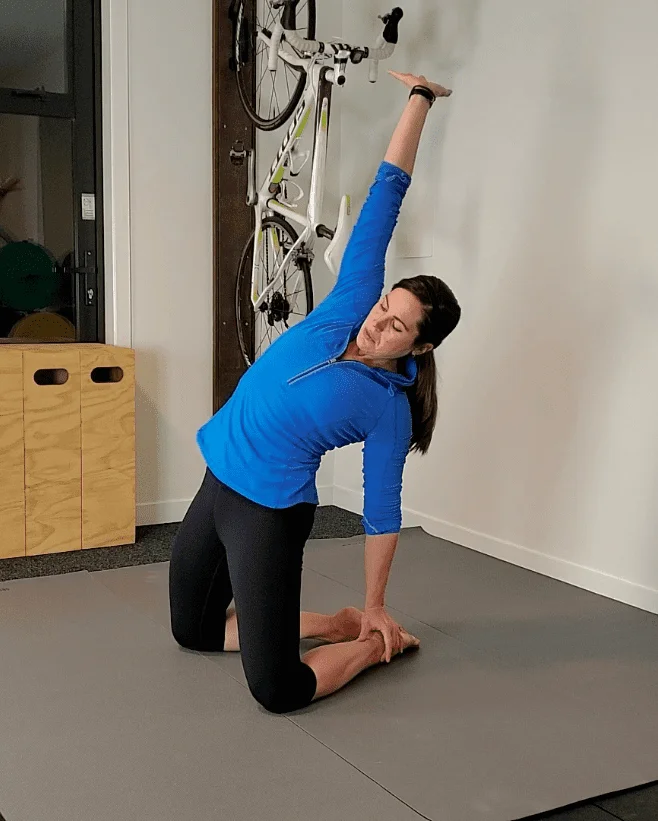
Wide-Leg Side Bend
Wide-Leg Side Bend, also known as Prasarita Padottanasana, is a yoga pose that primarily targets the hamstrings, inner thighs, and side body. This pose helps to stretch and lengthen these muscles, improving flexibility and releasing tension in the lower body.
Here is a step-by-step guide on how to perform the Wide-Leg Side Bend:
- Begin by standing at the top of your mat with your feet hip-width away.
- Step your feet wide distance, approximately 3-4 feet, according to your comfort level.
- Turn your toes slightly inward and ensure that your heels are aligned with each other.
- Engage your quadriceps by lifting your kneecaps and firming your thigh muscles.
- Inhale and lengthen your spine, and stretch out the crown of your head in the direction of the ceiling.
- Exhale and begin to hinge forward from your hips, maintaining a flat back.
- Place your hands on your hips for support or interlace your fingers behind your back, extending your arms overhead.
- As you fold forward, keep your spine long and extend through the crown of your head.
- Allow your torso to descend towards the ground, leading with your heart.
- Once you have reached your maximum forward fold, release your hands to the ground or grab onto your ankles or big toes.
- Keep a slight bend in your knees if needed to avoid strain on the hamstrings.
- As you settle into the pose, focus on breathing deeply and relaxing any tension in the body.
- If it feels comfortable for you, you can gently sway from side to side, deepening the stretch in the inner thighs and side body.
- Hold the pose for 1-3 minutes, continuing to breathe deeply and find ease in the posture.
- To release the pose, engage your core muscles and slowly lift your torso back up to a standing position.
Regular practice of Wide-Leg Side Bend can help improve flexibility in the hamstrings and inner thighs, strengthen the core and legs, and increase overall body awareness. It is a beneficial pose for athletes, dancers, and individuals looking to release tension in the lower body and improve their posture.
Runner’s Lunge
Runner’s Lunge, also known as Anjaneyasana, is a yoga pose that primarily targets the hip flexors, quadriceps, and hamstrings. This pose helps to stretch and strengthen these muscles, improve balance, and increase flexibility in the lower body.
Here is a step-by-step guide on how to perform Runner’s Lunge:

- Initiate by standing at the top of your mat with your feet hip-width distance.
- Step your right foot forward into a lunge position, keeping your right knee directly above your ankle.
- Lower your left knee to the ground, placing it on a mat or blanket for support if needed.
- Softly slide your left leg backward until you experience a comfortable stretch in the front of your left hip and thigh.
- Ensure that your right knee is aligned with your ankle and pointing straight ahead.
- Engage your core muscles by drawing your navel towards your spine and lengthen your spine by reaching your head towards the ceiling.
- Place your hands on your right thigh for support or bring your hands to the ground on either side of your right foot.
- If you have the flexibility, you can also lift your arms overhead, reaching toward the ceiling.
- Relax your shoulders far from your ears and soothe your facial muscles.
- Keep a slight bend in your left knee if needed to avoid strain on the knee joint.
- As you settle into the pose, focus on breathing deeply and allowing the stretch to deepen with each exhale.
- If it feels comfortable for you, you can gently rock back and forth, shifting your weight between your front and back legs, to further open up the hips and stretch the muscles.
- Hold the pose for 1-3 minutes, continuing to breathe deeply and find stability in the posture.
- To release the pose, engage your core muscles and slowly lift your torso back up to a standing position.
- Repeat the pose on the other side, stepping your left foot forward into a lunge position.
Regular practice of Runner’s Lunge can help improve flexibility and strength in the lower body, increase hip mobility, and enhance overall balance and stability. It is a beneficial pose for runners, athletes, and individuals looking to improve their leg strength and prevent injuries.
Frog Squat With Arm Raise
Frog Squat with Arm Raise is a yoga pose that primarily targets the quadriceps, glutes, inner thighs, and shoulders. This pose helps to strengthen and tone these muscles, improve hip mobility, and enhance overall body strength and flexibility.
Here is a step-by-step guide on how to perform Frog Squat with Arm Raise:
- Start by standing at the top of your mat with your feet slightly wider than hip-width apart and your toes turned outwards.
- Bend your knees and lower your hips down towards the ground, coming into a deep squat position. maintain your heels on the surface as much as possible.
- Bring your hands together at your heart center, with your elbows pressing against the inside of your knees. Use your elbows to gently push your knees outwards, opening up your hips.
- Engage your core muscles by drawing your navel towards your spine and lengthen your spine by reaching the crown of your head towards the ceiling.
- Take a deep breath in, and as you exhale, press through your feet and straighten your legs slightly, lifting your hips up towards the ceiling.
- At the same time, extend both arms forward and parallel to the ground, keeping them shoulder-width apart.
- Inhale as you lower back down into the deep squat position, bending your knees and lowering your hips towards the ground.
- As you exhale, press through your feet and lift your hips up again, straightening your legs slightly and raising your arms parallel to the ground.
- Repeat this movement, flowing smoothly between the deep squat and the lifted position, while synchronizing your breath with the movements.
- Focus on keeping your spine long and upright throughout the pose, avoiding rounding or collapsing in the upper body.
- Keep your knees tracking in line with your toes and avoid letting them collapse inward or extend beyond your toes.
- Continue the movement for 1-3 minutes, maintaining a steady and controlled pace.
- To release the pose, lower your arms down to your sides and slowly come back up to a standing position, straightening your legs.
- Take a moment to rest and observe any sensations in your body before moving on to the next pose or transitioning into a cool-down sequence.
Regular practice of Frog Squats with Arm Raises can help improve lower body strength, increase hip mobility, enhance shoulder stability, and promote overall body awareness and coordination. It is a beneficial pose for individuals looking to strengthen their legs, hips, and shoulders, as well as improve their overall physical fitness.
Benefits of hip adductors exercise
The hip adductors are a set of muscle mass positioned at the inner facet of the thigh that assist in conveying the legs closer to the midline of the body. Strengthening these muscle groups via hip adductor exercises gives several blessings:
- Improved stability and stability: Strong hip adductors contribute to better balance and balance, particularly all through sports that involve lateral moves or modifications in route. This is particularly critical in sports like football, basketball, and tennis, where quick modifications in direction are commonplace.
- Injury prevention: Weak hip adductors can lead to imbalances inside the lower body, increasing the danger of injuries which include groin strains, hip aches, and knee instability. Strengthening these muscles helps prevent such injuries by means of presenting a better guide to the hip and knee joints.
- Enhanced athletic performance: Strong hip adductors play a critical position in various athletic moves, together with running, jumping, and lateral actions. By improving their power, athletes can generate extra energy and performance in these actions, leading to enhanced performance.
- Improved posture: Weak hip adductors can contribute to bad posture, especially an anterior pelvic tilt (when the pelvis tilts ahead). Strengthening these muscle masses helps maintain proper alignment of the pelvis and backbone, promoting desirable posture and reducing the chance of lower back aches.
- Increased hip balance: The hip adductors work in conjunction with other hip muscle tissues to provide balance to the hip joint. Strengthening these muscle tissue improved overall hip stability, lowering the chance of hip dislocations or different hip-associated problems.
- Enhanced purposeful actions: Strong hip adductors are important for normal moves like taking walks, climbing stairs, and getting up from a seated function. By strengthening those muscle tissues, people can carry out these activities with extra ease and efficiency.
- Targeted muscle toning: Hip adductor exercises mainly target and tone the inner thigh muscle tissue, helping to shape and define this area. This can be particularly beneficial for individuals who desire more sculpted legs or want to reduce excess fat in the inner thigh region.
To experience those benefits, it is crucial to carry out hip adductor exercises correctly and gradually grow the depth and resistance over time. It is likewise advisable to consult with a fitness expert or physical therapist to ensure the right shape and prevent any potential accidents.
Contraindications of the hip adductors exercise
While hip adductor sports can deliver numerous advantages, there are a few contraindications or situations where those physical activities need to be avoided or changed. It is critical to not forget these contraindications to prevent harm and provide the protection of individuals performing these sporting activities. Some commonplace contraindications of hip adductor sporting activities include:
- Acute injuries: If a person has lately suffered from any acute harm, consisting of muscle pressure or a tear inside the hip or groin place, it is crucial to avoid hip adductor sporting events until the injury has been cured. Performing those sporting events too quickly can cause harm and postpone the recovery process.
- Chronic hip pain or infection: Individuals with persistent hip pain or infection, such as hip bursitis or osteoarthritis, need to avoid or adjust hip adductor sports. These sporting events can create extra pressure on the hip joint, doubtlessly worsening the ache or inflammation. It is recommended to discuss with a healthcare provider before performing those physical activities if experiencing chronic hip issues.
- Hip joint instability: Individuals with hip joint instability, together with a record of hip dislocations or ligament laxity, ought to be careful whilst performing hip adductor exercises. These physical games can place additional stress on the hip joint, elevating the hazard of further instability or injury. It is really helpful to visit a healthcare issuer or bodily therapist for appropriate modifications or alternative physical games.
- Pelvic floor dysfunction: Individuals with pelvic floor disorder, which includes pelvic organ prolapse or urinary incontinence, ought to be cautious while doing hip adductor physical activities. These sports can create extra pressure on the pelvic floor muscular tissues, doubtlessly exacerbating symptoms or causing discomfort. It is really helpful to discuss with a healthcare issuer or pelvic floor specialist for steerage on appropriate exercise plans.
- Recent surgical treatment: Individuals who have these days passed through hip or groin surgery have to not carry out hip adductor physical games till they have completely recovered and obtained clearance from their healthcare provider. These exercises can create pressure on the healing tissues and delay the restoration system.
- Pregnancy: Pregnant individuals must be careful whilst performing hip adductor physical activities, especially throughout the later ranges of pregnancy. The hormone relaxin, which is released all through pregnancy, can loosen the ligaments and joints, making them extra liable to damage. It is recommended to talk with a healthcare provider or prenatal health specialist for secure modifications or opportunity exercises.
- Pain or discomfort at some stage in the workout: If a character experiences ache or pain in the hip or groin area whilst doing hip adductor sports, it is vital to prevent the exercise and consult with a healthcare company. Continuing to work out via pain can worsen the condition or lead to additional damage.
It is important to concentrate on your body and exercise within your limits. If you have any concerns or underlying health situations, it is nice to seek advice from a healthcare provider or fitness professional earlier than beginning any new exercise program. They can provide personalized steerage and tips based on your unique wishes and boundaries.
FAQ
What are hip adductors?
The hip adductors are a group of muscles placed on the inner thigh that help to bring the legs closer.
What are hip adductor exercises?
Hip adductor exercises are exercises that focus the muscles on the inner thigh, such as the adductor magnus, adductor longus, and adductor brevis.
What are the benefits of hip adductor exercises?
Hip adductor exercises help improve hip stability, raise leg strength, and prevent injuries.
What are some examples of hip adductor exercises?
Examples of hip adductor exercises include side-lying leg lifts, seated leg presses, standing leg lifts, and cable machine exercises.
How often should I do hip adductor exercises?
It is advisable to do hip adductor exercises 2-3 times per week, with at least one day of rest in between.
Are there any precautions I should take when doing hip adductor exercises?
Yes, it is very crucial to use proper form and initiate with lighter weights or resistance bands to avoid injury. It is also necessary to listen to your body and stop if you feel any pain or discomfort.
Can hip adductor exercises help with sports performance?
Yes, strong hip adductors can improve athletic performance in sports that need lateral movement, such as soccer, basketball, and tennis.