Top Mat Exercises for a Full-Body Workout
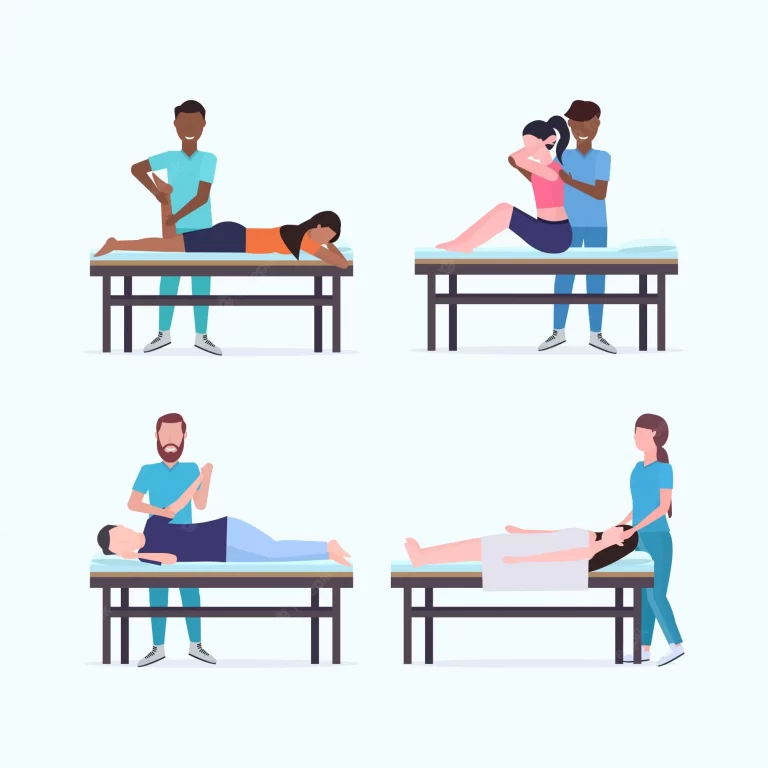
Mat activities are a good stepping stone for improving core strength and improving posture, particularly for individuals who want to improve their core strength.
In addition, it provides an opportunity to practice essential positions and movement patterns that will help to gain strength and mobility.
What Are Mat Exercises?
Mat exercises are, as the name implies, physical workouts that you can perform on a mat. These can change depending on your desired level of fitness or your goals. Exercises with dumbbells, for example, are not the same as those performed on a yoga mat.
Beginners should start with mat exercises because they typically don’t require a lot of strength or flexibility. Depending on your level of physical ability, you can also choose your own sets and repetitions. Similar to this, the positions and exercises performed on a yoga mat can be altered to meet individual demands and specifications.
Mat activities are given to:
- Promote balance
- Facilitate stability
- Mobilize and strengthen the back and limbs.
- Train for functional activities
Mat exercises should be arranged in an easier-to-difficult order and progression through the sequence should be considered to achieve the desired result of the treatment program. The therapist chooses the kind of mat exercises the patient will receive based on the patient’s health and strength level.
The patient’s ability determines how much an activity can be performed and how long it takes to learn. Therapists should put a lot of effort into enhancing the patient’s timing and quickness.
Benefits of Mat Exercises
Although the benefits of each of the mat workouts we listed above are distinct, using the mat for core exercises has some similar advantages. Among them are:
- Improve core, glutes, back, and shoulder muscles
- Enhance flexibility and stability
- Relieve back and neck pain
- Strengthen muscles and burn calories
- Relieve stress and anxiety
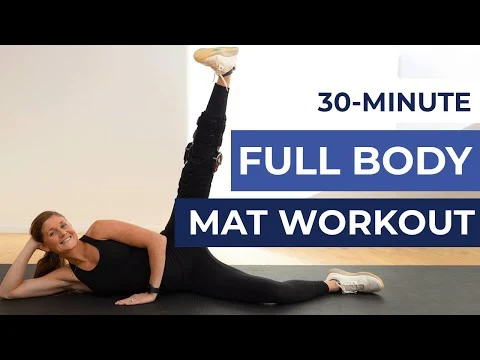
Here we describe different Mat Exercises for full-body workouts:
You can choose any five to seven exercises from this listed exercise and perform it for thirty minutes to get better results.
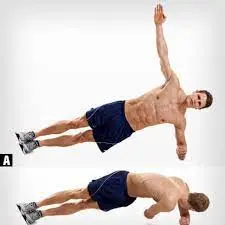
Plank
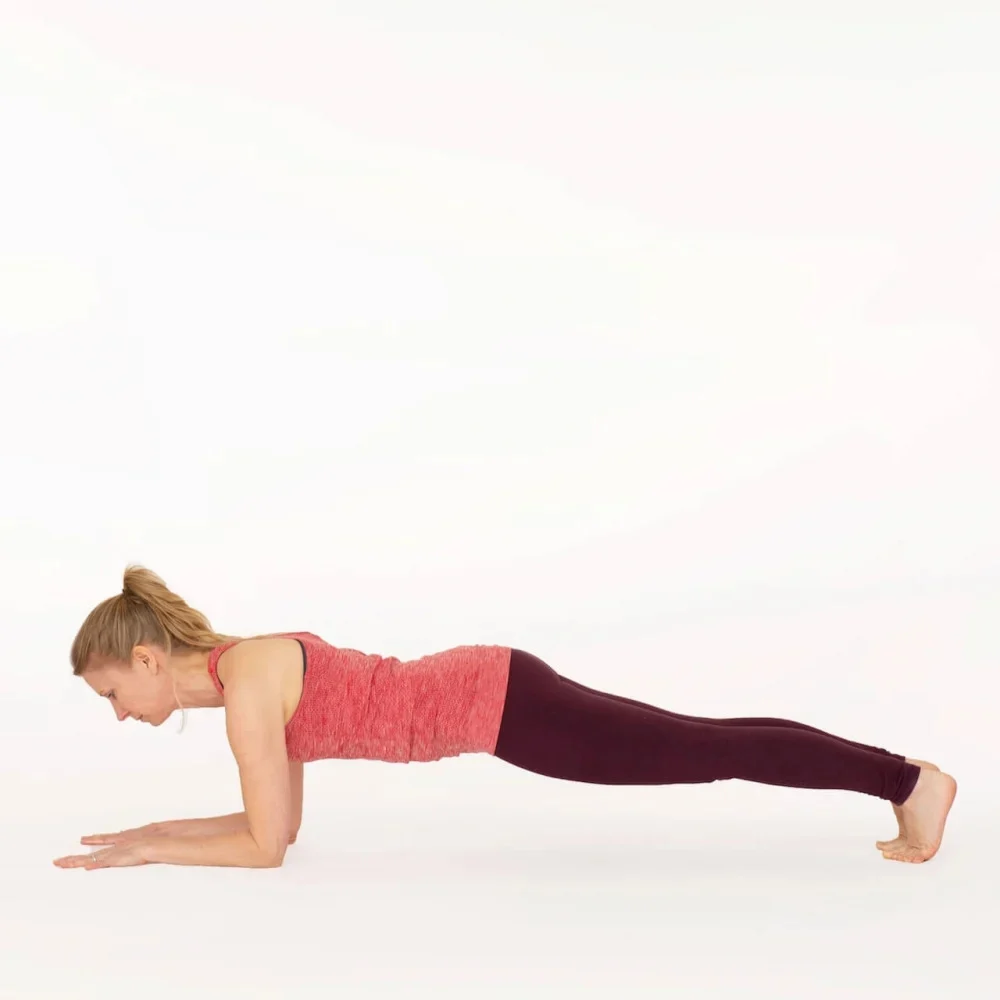
Planks are a great way to work out your entire body in one exercise, as long as you maintain perfect form. Using an activity mat will give you sufficient padding to be comfortable on all four limbs. You can select whether to do a plank on your palms or your forearms. A combination of wrist wraps is available to provide joint support.
- Start in the plank position, with your forearms and toes on the ground and your face down. Your forearms are pointing forward, and your elbows are exactly beneath your shoulders. Your head is relaxed, but you should be looking at the floor.
- contract your belly muscles, drawing your navel toward your spine. Keep your trunk straight and rigid and your body in a straight line from your ears to your toes with no sagging or bending. This is the normal spine position. Make sure your shoulders are down and not tucked up close to your ears.
- Maintain this position for ten seconds. Release to floor.
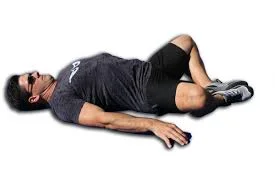
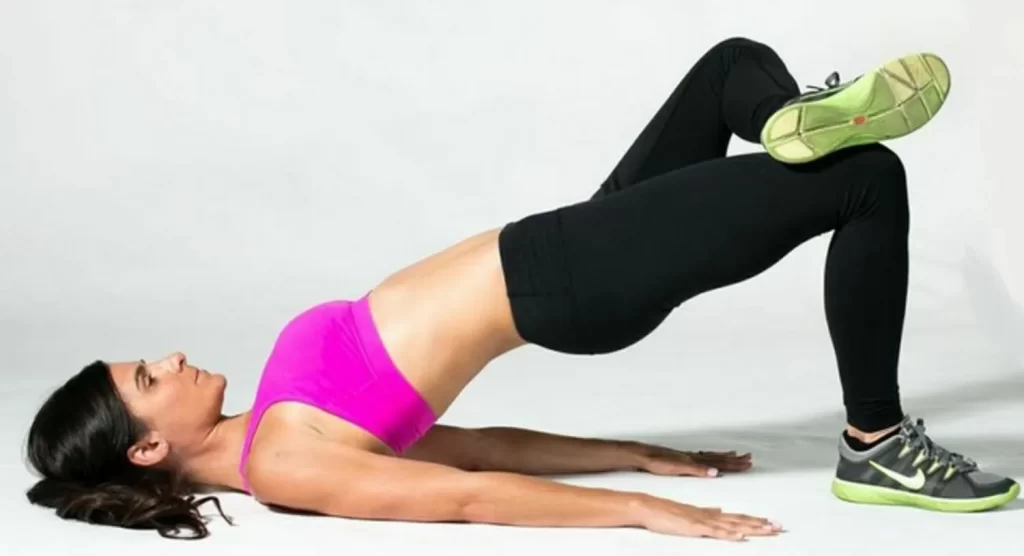
Bridges
As its name suggests, this mat workout calls on you to bend your back into a bridge shape. We recommend giving this belly mat exercise a try if you’re searching for some.
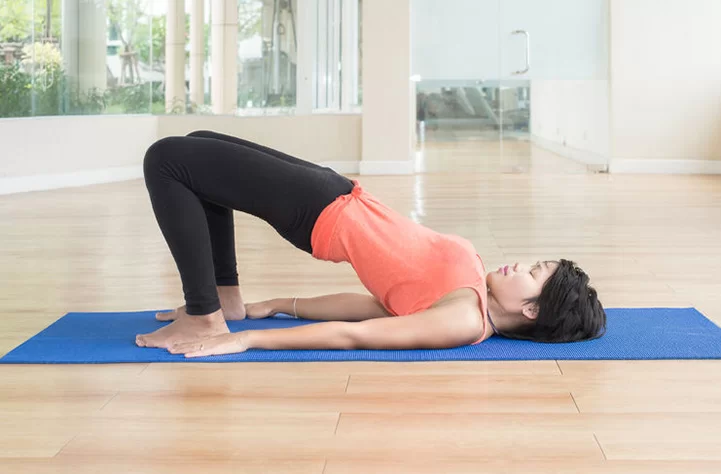
- If you have a mat, use it to lie on your back in an open area of the floor. Put your feet flat on the floor beneath your knees, bend your knees, and rest your hands by your sides.
- Press your lower back against the floor to tense your buttocks and abdominal muscles.
- Raise your hips to make a straight line between your shoulders and knees.
- Pull your belly button back towards your spine while tensing your abdominal muscles.
- Keep it in for 20 to 30 seconds.
- To get back to the starting position, sag your hips.
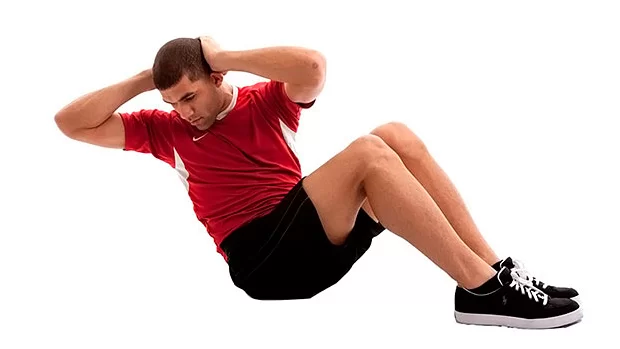
Crunches
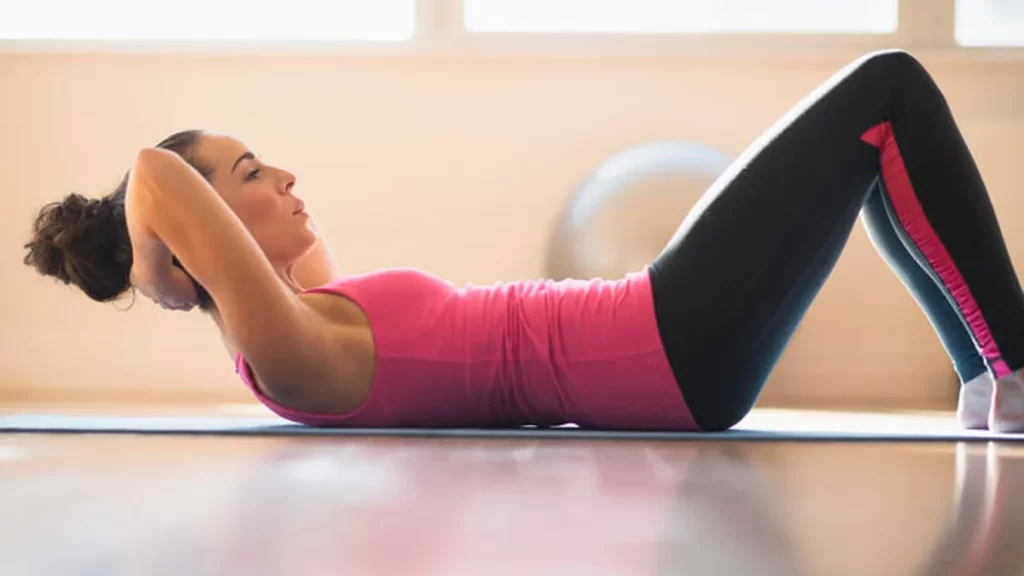
It works the muscles in your back and rectus abdominus, which are the muscles that form your abs. You perform the typical crunch on the ground. You can perform it on a yoga mat or exercise mat to make it more comfortable.
- Lie down on your back. Place the bottoms of your feet hip-width apart. Cross your arms over your chest and flex your knees. Contract your abdominals and breathe in.
- Breathe out and raise your upper body, keeping your head and neck comfortable.
- Inhale deeply and take a step back to start.
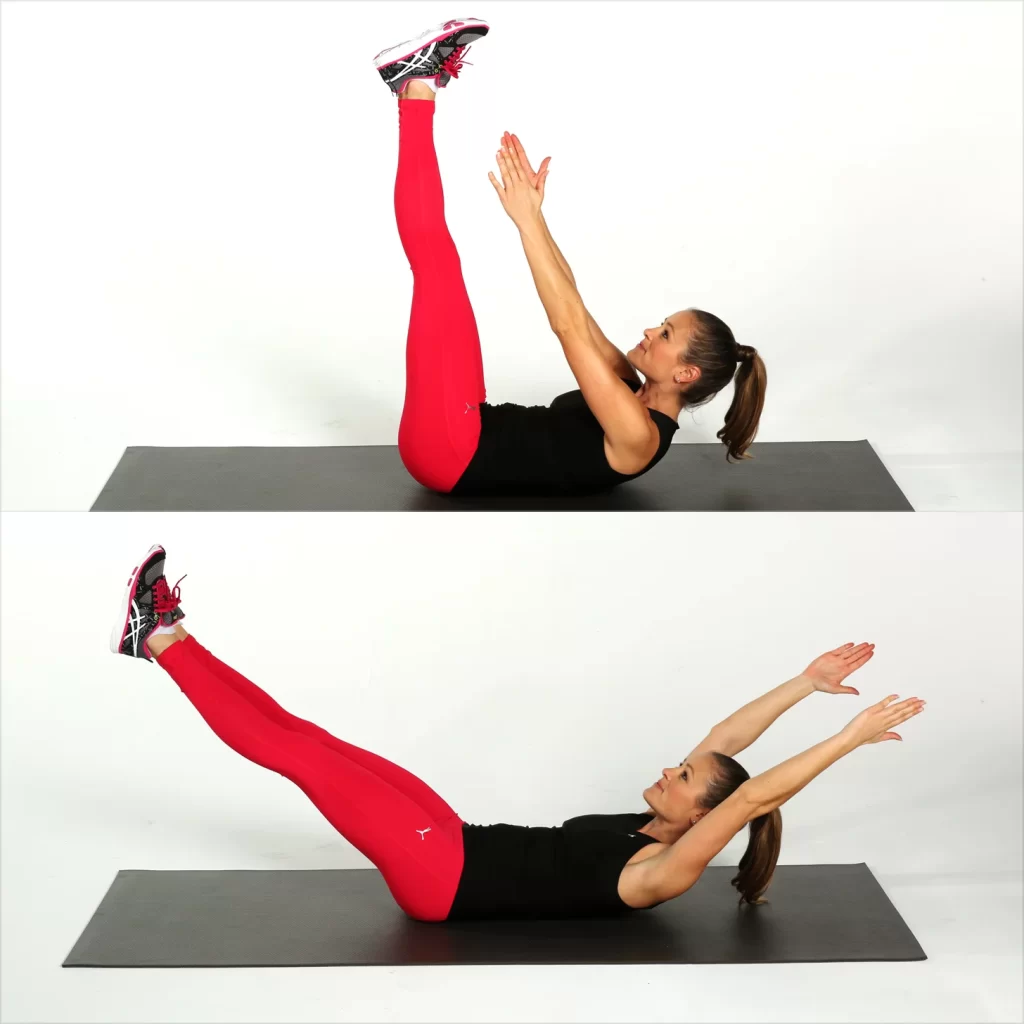
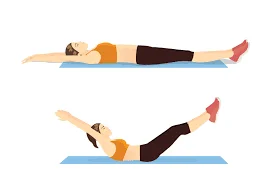
Leg Raises
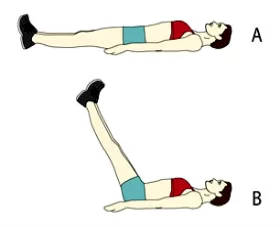
- Lying leg raises also helps your lower back pain by enhancing strength and stability in the part.
- To start this exercise you have to take a supine lying position and place the arms by the sides of your body.
- now, extend the legs.
- Breathe out and raise your legs.
- For five to ten seconds, maintain this position.
- During the lowering legs, you will inhale and control the legs on the way down maintaining the floor contact with the lower back. At the bottom of the movement, keep the feet hovering off the floor, then repeat the above 3 steps for the 10 repetitions.
Superman
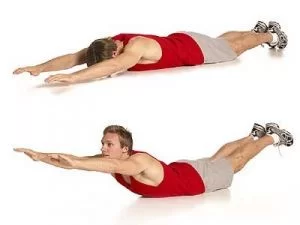
- Lie on the floor face-down with legs straight, tips of toes touching the ground, arms stretched overhead, palms facing one another and pinkies resting on the floor.
- Maintaining neck neutral and gazing toward the ground, engage back, core, and glutes, and gradually raise both arms and legs a few inches off the floor.
- Pause at the top for 2 seconds, then slowly lower arms and legs back to the starting position.
Pilates 100s
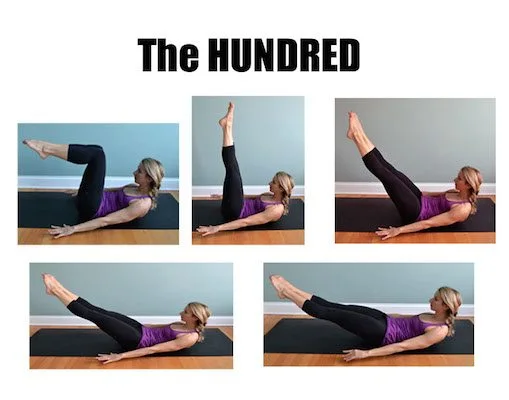
The mat exercise is incomplete if it does not contain any Pilates mat exercises. So, here is the definitive move that is often recommended to beginners.
The reason for the exercise’s name is that you have to have your legs extended and your head and shoulders off the mat while performing 100 arm muscle beats. The hundred can also be used as a vigorous warm-up before lunge and abdominal exercises.
- Assume a prone position. With your shins and ankles parallel to the floor, raise your legs and bend them at the knee to assume the tabletop position.
- Take a breath.
- Let out a breath. Raise your head and chin to the base of your shoulder blades, then curl your upper spine off the ground utilizing your abdominal muscles. Maintain a downward-sloping shoulder flexion and back engagement. Look down into the abs’ scoop. Hold on and take a breath.
- Let out a breath. At the same moment, lengthen your arms and legs and draw your abs deeper. Stretch your legs in the direction of the junction of your front wall and ceiling. If necessary, you can set them lower for more complex work, or higher. Only drop your legs as far as it is safe for you to do so without trembling or having your lower back rise off the mat. Straighten and lower your arms so that your fingertips are pointing towards the distant wall, only a few inches off the ground.
- Maintain your position. Breathe in five short breaths and release five short breaths (sniff in, puff out). During this exercise, pump your arms slightly yet briskly up and down. Make careful to maintain a relaxed neck and shoulders. The muscles in the abdomen should exert the most force.
- Perform ten complete breath cycles. There are five brief inhalations and five brief exhalations in every cycle. The arms move in sync with your breathing, pumping up and down in a 6- to 8-inch pump. Maintain a flat back, a scooped abs, and a downward-facing head that extends your spine. Taking deep breaths is crucial. Inhale deeply into your sides and back. If you’re not familiar with this, work on your lateral breathing.
- Finally, when you pull your knees towards your chest, maintain a curved spine. Grasp your knees, roll your head to the floor, and roll your upper spine. Inhale deeply, then exhale.
Seated Russian Twist
Seated Russian twists are a great way to strengthen your shoulder and core muscles. The workout is not so easy, even though it can be incorporated as a yoga mat practice for beginners.
- To do that, you need a great deal of strength and assistance.
- With your feet flat on the floor and your knees bent, take a seat on the floor to begin. After that, sag backward such that your upper body is facing 45 degrees towards the ground. It will be easy to slump your shoulders forward throughout this exercise, but resist the urge and keep your back straight. Brace your core after joining your hands in front of your chest. Singly move your arms, then in the opposite direction. That counts as one rep.
Mountain Climber
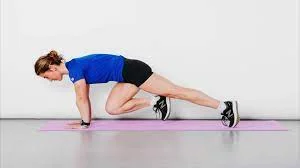
It will appear as though you are sprinting against the ground. You can attempt mountain climber variations once you have mastered this maneuver.
- Try the exercise’s classic variation when you first start:
- Ensure that your weight is equally distributed between your hands and toes as you assume a plank position. your head should be aligned, your hands should be roughly shoulder-width apart, and your back should be flat.
- As much as you can, bring your right knee up to your chest.
- Make a leg switch by bringing one knee in and pulling the other out.
- Run your knees in and out as quickly and as far as you can while keeping your hips down. With every leg shift, alternate between inhaling and exhaling.
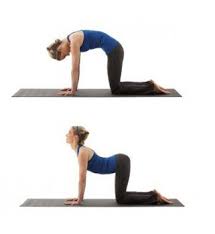
Cat-Cow
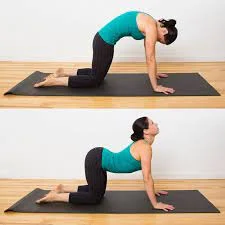
For people who spend a lot of time sitting at work, this is the ideal form of exercise.
- Start on all fours, hands, and knees, with knees under hips and wrists under shoulders or slightly forward, to enter the Cat position.
- Extend your fingers and apply pressure through the base and fingertips of your fingers.
- Pull your belly in, raise your side waists, circle your back, and let your head fall to the floor in a cat position as you release your breath.
- Feel the stretch in your back as you firmly push the floor away.
- Take a breath and return to your beginning neutral stance.
- After a few rounds of the Cat-Cow pose, the Cow pose is typically performed to warm up the spine.
Downward Dog
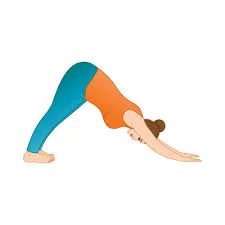
Your entire body is stretched during the activity, which also improves flexibility and balance.
- This is a position that you may do anyplace a yoga mat is set up.
- With your wrists beneath your shoulders and your knees under your hips, go to your hands and knees.
- To raise your hips and straighten your legs, tuck your toes beneath and push back through your hands.
- Extend your digits and apply pressure from the forearms to the fingertips.
- To enlarge the collarbones, rotate your upper arms outward.
- Shift your shoulders from your ears to your hips, letting your head hang loose.
- To remove the weight of your body off your arms, firmly contract your quadriceps. This is a resting stance because of this movement.
- Keep your tail up, rotate your thighs inward, and press your heels down towards the ground.
- Bring yourself forward to a plank position to ensure that the spacing between your hands and feet is correct. Both of these stances should have the same amount of space between the hands and the feet. To bring the heels to the floor in Down Dog, avoid stepping the feet in the direction of the hands.
- Return to your hands and knees, exhaling and bending your knees to release.
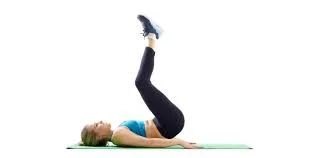
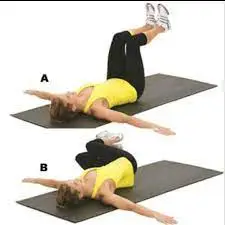
Double-Leg Stretch
An intermediate exercise that targets the abdominals and radiates from the core powerhouse is the double-leg stretch. Try doing this exercise one leg at a time if it feels too difficult. An alternative is to stretch the legs fully but with a small bend in the knees.
- Stretch your lower back by bringing both knees to your chest while holding onto your ankles.
- Draw in your midsection.
- Let out a breath and raise your arms and legs to the sky, maintaining the position as demonstrated.
- After ten prolonged, deep breaths, hold the pose and then release.
- Perform ten iterations.
Single-Leg Circles
The single-leg circle tests your pelvic stability and core strength. Also, it helps a healthy hip joint and tones the hamstrings and quadriceps. Just stretch the leg as much as you can if you are unable to extend it straight up towards the roof.
- Extend and raise your right leg.
- Stretch your left leg out from under you.
- Use both hands to hold the toes if you can. If you are unable to balance on your toes, reach your heel to the ceiling while holding onto your thigh or calf.
- For ten counts, hold this position.
- Give up gripping and extend your arms and hands to your sides.
- Stretch out your leg and make ten little circles in each direction.
- Continue on the opposite side.
Hip-Opening Exercise
- You can perform the frog, a hip-opening exercise, in a seated or lying position. In any case, hip openers support the flexibility and alignment of your hips and spine.
- As near to your torso as possible, bring the soles of your feet together.
- Stretch your knees as far apart as feels comfortable.
- Breathe deeply while you rest, keeping your knees open.
Split Squats
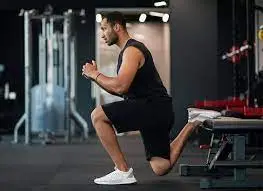
- Stretch your legs wide apart and take a big step forward. Position your other leg directly in front of you, and position your back leg on the ball of your foot, lifting a good portion of your foot off the ground.
- With equal weight on both legs, descend to the floor now.
- When your front leg is at its lowest position, your thigh and calf make a 90-degree angle.
- Restart the workout by lifting to your starting position and doing it more times. Next, put your back leg in front and reverse the position of your legs.
Burpees
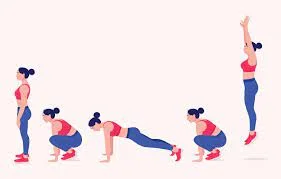
- Take a position like a push-up.
- Instead of lowering your body to the ground and performing the push-up, lift by jumping with your feet forward until your knees almost touch your elbows.
- After that, raise your arms off the ground and squat down.
- From the squatting position, jump up by pushing up with the strength of your leg muscles.
- At your highest point, your legs should be completely straightened and your tiptoes just above the ground.
- After that, perform the whole sequence backward until you return to your initial position.
- If you want to, you can intensify this activity by lingering in your push-up or squatting position for a bit longer.
Push-ups
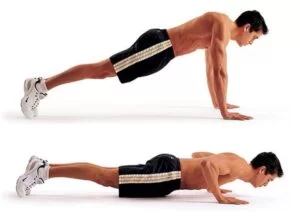
- Get on the ground on all four limbs.
- Placing your hands on the ground, support yourself.
- Now extend your legs back and make sure to contract all of your muscle groups in this position. Maintain your legs closely together and balance on your hands and toes while holding your feet hip-width apart.
- Spread your arms to shoulder-width roughly in chest height.
- From this position, flex your arms and lower yourself down until your nose is about to touch the ground. Then, push back up through your hands, returning to the initial position.
- Make sure to tuck your elbows tightly to your chest while completing the training.
Side-Plank Crunch
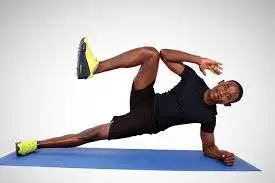
- Start in a side elbow plank with your left elbow down and your right hand behind your head.
- Maintaining your trunk stable and your waist lifted, bring your right leg up toward your shoulder to lightly tap your right elbow.
- Extend your right leg back to the initial position to complete one repetition.
- complete as many repetitions as you can in thirty seconds and then switch sides for another thirty seconds.
Seated Knee Tuck
- Begin this exercise by sitting on the floor or a weight bench. Put your hands about an inch behind your back with your fingers facing forward. Set your feet flat on the ground.
- Raise both feet off of the floor and extend both legs as you simultaneously lower your upper body. Ensure that both your hips and legs are fully stretched.
- With control, bring your legs back to your chest without touching the floor with your feet and return to the initial position.
Plank With Lateral Arm Reach
- Begins this exercise in a plank position.
- Maintaining your trunk stable, gradually reach your left arm out to your side. contract through the abs by pulling your navel to your spine. Maintain this position for ten seconds. If you feel unbalanced, try moving your right hand so it is under the center of your chest rather than under your right shoulder.
- Maintaining your trunk stable, obtain your arm back to the plank position. Do not round your back or turn your spine.
- Repeat this same movement on the opposite side, extending your right arm to your side. this is one repetition.
Plank With Alternating Arm and Leg Raise
- Put your shoulders over your wrists and adopt a plank stance, keeping your arms and legs straight.
- With control, raise your right arm as you simultaneously raise your left leg off of the ground.
- Make sure your upper body and hips do not rotate. Hold on for a brief moment.
- Return to the beginning posture with control by lowering your left leg and right arm. It is equivalent to one rep. Repeat with the opposite leg and hand.
Bird-Dog
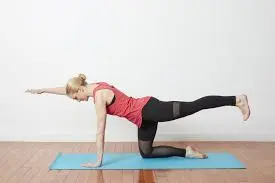
- come on all four limbs, with your knees under your hips and your hands under your shoulders. maintain your back flat.
- Stretch your left leg out behind you while reaching out with your right hand.
- Round your back and head to join your right elbow with your left leg under your body. This completes one repetition.
Diamond Sit-Up
- Take a supine position, open your legs into a diamond shape (aka butterfly legs) with the soles of your feet pressed together and knees out wide. straight the arms overhead.
- Breathe in to curl the trunk up, and tap the ground in front of your feet to stretch your glutes a bit.
- Gradually lower back to the initial position.
- This is one repetition.
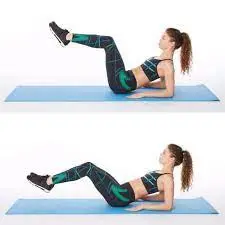
Reverse Crunch
- Take a supine lying position, raise your legs in the air with your knees flexed. Place your hands on your sides.
- Without momentum, use your lower abdominals to gradually curl the hips off the ground and into your chest. Gradually lower them back to the initial position.
- This counts as one rep.
T-Cross Sit-Up
- Start lying on the ground with your arms wide to the sides, making a T with your body.
- Seat up raise your right leg, and twist to bring your left hand to your right toes. Gradually roll back down, and repeat on the other side.
- This completes one repetition.
Straight-Leg Sit-Up
- Start on your back with your legs extended and arms raised toward the top.
- Focus on your abdominals as you roll up to a sitting position. One vertebra at a time, carefully roll back down to the mat.
- This completes one rep.
Runner’s Crunch
- Begin on your back with your elbows resting on the ground at a 90-degree angle.
- With your core contracted, roll up to almost seated while bringing your right knee up to meet your left elbow.
- It should have an almost running-like sensation.
- Controllably extend your knee and gradually lower your back vertebra by vertebra until your shoulders are the last to contact the mat.
- Alternate with your other leg to complete one rep.
V Crunch
- lying on your back, extend your arms and legs towards the ceiling. Reach your hands towards your feet and raise your upper back off the ground.
- Reach your arms upwards and descend your knees towards the floor while
- keeping your shoulders off the mat and your lower back pressed into it.
- For one repetition, repeat the crunch movement.
Double Crunch
- Lift your arms and legs to a ninety-degree angle while lying on your back on the ground.
- To elevate your shoulders and pelvis off the ground, tense your abdominal muscles. Feel your toes with your fingers.
- To accomplish one rep, progressively lower them back to the starting position while keeping your core engaged the entire time.
Scissor Abs
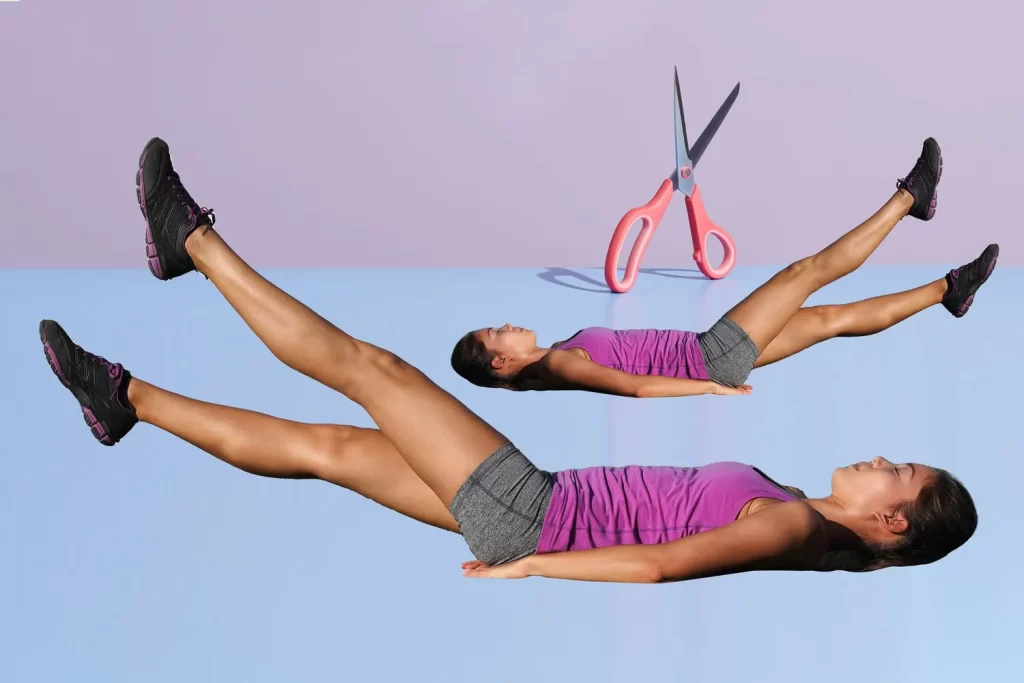
- Take a supine lying position. Extend your arms so they are against the sides of your body with your palms pressing into the ground, or flex your elbows and put your palms under the back of your head. Flex your knees and draw them into your ribs. This will make it easier to draw your navel in toward your spine and actively press your lower back flat on the floor.
- Raise both legs straight up toward the roof, continuing to contract your abdominals and pressing your lower back into the floor. Maintaining your core strong, gradually lower your right leg down toward the floor until it is a few inches above.
- Then gradually scissor your legs, raising your right leg back up as you lower your left leg down toward the floor. This completes one repetition.
Oblique V-Crunch
- With your right hand on the ground and your left hand behind your head, lie on your right side.
- Bringing your torso towards your legs, lift your straight legs off the floor and press down into your right hand.
- Return to initial position. This completes one rep.
Tabletop to Reverse Pike
- Place your hands eight inches behind your head when you first sit on your bum. Put your heels about a foot away from your hips and bend your knees. Ensure that the distance between them is hip-width.
- Taking a deep breath, raise your hips off the floor so that your arms are straight and your body is parallel to the floor. Make any little modifications necessary to ensure that your hands are squarely below your shoulders and your ankles are underneath your knees. To improve the stretch in your neck and chest, droop your head behind you. Exhale relax your hips and straighten your legs so that your hips are hovering above the floor, holding your breath for the full duration while maintaining a straight arm position. Balance on your hands and heels while contracting your abs and attempting to maintain a long spine. Take a deep breath, then take another and push yourself back into the starting position.
Modified Windshield Wipers
- To stabilize your spine and shoulders, lie on your back with your arms planted firmly into the ground, your palms facing away from your shoulders, and your arms at a 90-degree angle.
- Raise your legs off the floor and make a 90-degree bend in your knees to resemble a chair.
- Lower your feet to one side slowly and deliberately. Attach your navel to your lumbar region. As you turn, your spine will lift slightly off the ground; however, strive to keep your spine pressed into the ground as much as you can.
- To raise your legs back to the beginning position, contract your abdomen.
- Lower to the opposite side and repeat. This completes one rep.
Windshield Wiper Abs
- To stabilize your spine and shoulders, get on your back and position your arms 90 degrees out from your shoulders, palms facing down, and firmly pressed into the ground.
- Legs should be straight, and feet should be relaxed. For the duration of the exercise, try to keep your hips at a 90-degree angle.
- Lower both of your legs and feet to one side slowly and carefully. Grab your navel to your vertebral column. Turning will cause your spine to lift a little off the ground, but for as long as you can, strive to keep it pressed into the earth.
- Pull your legs back to the beginning position by using your abs.
- Lower yourself to the opposite side and repeat. This ends with one rep.
Boat Pose
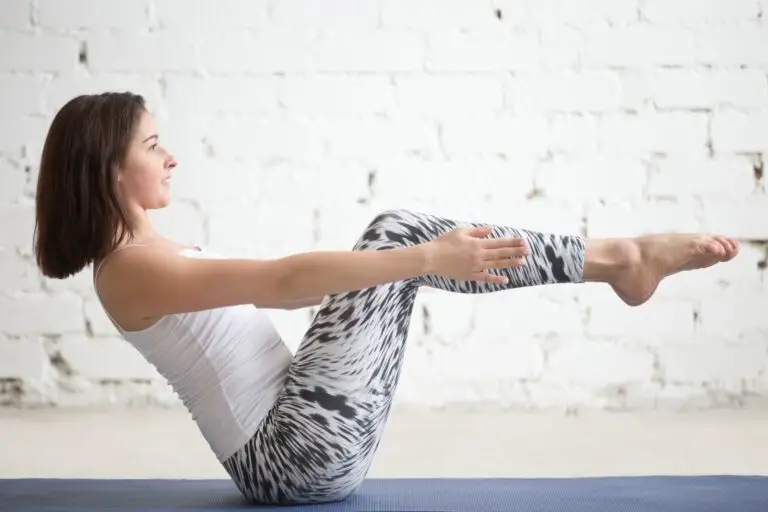
- On your mat, take a seat. Taking your feet off the ground and bending your knees, you can balance on your buttocks. As much as you can without rounding the back, keep your spine long and your legs straight. Maintaining the bent knee position will still engage your core even if this is too difficult.
- Maintain for thirty seconds.
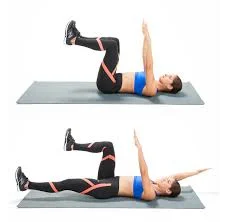
Hollow Body Hold
- Starting from the back, position your arms high and your legs straight.
- Your belly button should be drawn into your spine as you firmly press your lower back onto the floor.
- Take a deep breath and slowly raise your arms, legs, and shoulders off the ground. While maintaining your lower back pressed into the floor, keep your hands and heels as low as possible. Sustain taut glutes and abs. If erect legs are too difficult for you, it’s ok to bend your knees. You have to maintain this position for 30 seconds.
Dead Bug
- Place your palms into your thighs slightly above your knees while lying on your back with your hips and knees at right angles and your spine in a neutral position.
- Draw your abs in towards your spine while extending your right arm and leg until they are nearly parallel to the floor, maintaining your rib cage and pelvis in place. As the arm and leg move, maintain perfect stability for your torso and spine.
- To complete one rep, go back to the beginning and repeat on the left side.
Extended Dead Bug
- Take a hollow body hold position and raise your legs and arms to the ceiling.
- Pull your navel to your spine and press your lower back into the floor while using your abs.
- As low as you can without allowing your back to arch off the floor, lowering your left leg and right arm. Stretch your leg out in the opposite direction and extend your arm backward.
- Relax
- On the other side, repeat likewise. This completes one repetition.
Twisting Side Plank
- Take a side plank position on your right side by placing your weight on your right elbow and stacking your feet one on top of the other. Extend your fingers palm down, away from your body.
- To get ready, put your left arm behind your head and take a breath.
- To activate your deep abdominal muscles and twist your left rib cage towards the floor, exhale and bring your navel to your spine. Take a moment to stay there, and then bring your navel in even more towards your spine to strengthen your abdominal connection.
- After eight repetitions total—seven more times starting at the beginning—switch sides.
Figure Four Bridge
- Take a supine lying position with knees flexed, feet flat on the ground with heels a few inches away from your buttocks. Cross the right ankle over the left knee and extend your arms in a low “V” next to the body with palms facing up. Push through the left heel to lift your hips a few inches off the mat. Pause, then gradually return hips to the mat.
Precaution
Here are a few basic precautions to take for the exercises to do on a yoga mat:
- Check that you are in proper posture.
- Don’t rush through the workouts.
- If you are pregnant, stay away from mat exercises like downward dog and planks.
- Consult a physician before beginning mat workouts if you have back or shoulder pain.
- Eat nothing before or after any of these exercises.
FAQ
What kind of exercises are mat exercises?
Mat exercises are an excellent starting point for strengthening the core and enhancing posture, particularly for people who use wheelchairs. Furthermore, it offers a chance to rehearse basic postures and gait patterns that will facilitate functional tasks like getting in and out of bed.
What advantages do mat activities offer?
Strengthens Core Muscles.
Enhances Flexibility and Balance.
Improves Posture.
Boosts Overall Strength and Endurance.
Promotes Weight Loss.
Stress Relief.
Improved Cognitive Function.
Are mat workouts effective?
You’ll notice that you become stronger, more shaped, and more flexible when you perform basic Pilates exercises with awareness. For both strength training and learning how to activate the correct muscles.
What materials are used to make exercise mats?
Material: PVC, rubber, foam, and even cloth can be used to make exercise mats. Rubber mats may not be as soft as PVC mats, but they are more likely to stay in place. Though they’re both excellent, the choice ultimately depends on how you want to use this mat.
References
- Fit, C. (2022, August 19). Mat exercises: Top 10 exercises you can do on a mat. blog.cult.fit. https://blog.cult.fit/articles/mat-exercises-top-10-exercises-you-can-do-on-a-mat
- Dip, P. (2023, July 31). Training with The Exercise Mat – All Benefits and The 10 Best Exercises. Pullup & Dip. https://www.pullup-dip.com/blogs/training-camp/exercise-mat-exercises
- Findley, D. (2023, November 26). MAT exercise program for strength and flexibility – 17 movements. Over Fifty and Fit. https://overfiftyandfit.com/mat-exercise-program/
- Ryan, M. (2021, May 1). 32 No-Equipment AB exercises you can do on a mat | POPSUGAR Fitness. POPSUGAR Fitness. https://www.popsugar.com/fitness/ab-exercises-you-can-do-on-a-mat-47181352
- Fitness, F. (2021, November 7). 6 Exercises to build strength at home on your mat | Form. Form. https://www.theform.co.uk/form-family/6-exercises-build-strength-home
- CPT, B. L. (2015, February 11). 50 Shades of Glutes: mat Exercises. SELF. https://www.self.com/gallery/50-shades-glutes-mat-exercises