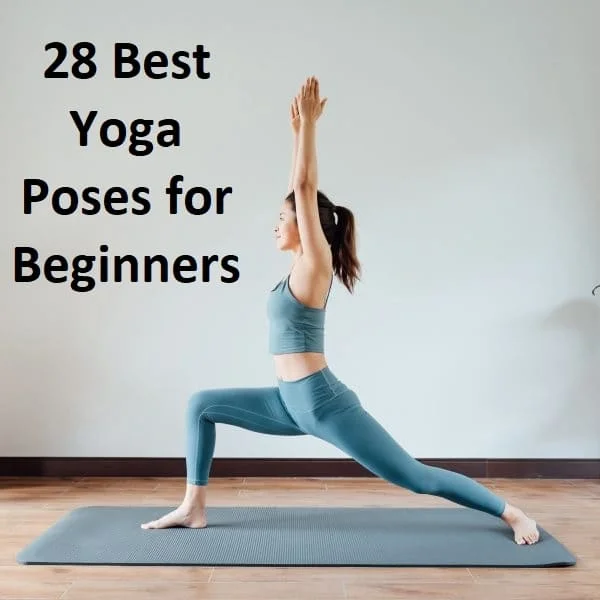
28 Best Yoga Poses for Beginners
What Is Yoga?
Yoga poses is a spiritual and physical practice rooted in Indian philosophy that has lived for thousands of years, according to the National Institutes of Health National Center(NIHNC) for Complementary and Integrative Health. Several diverse sorts of yoga pose range from mild, meditative experiences to more physically intense formats. Mind-body training typically consists of doing a series of physical poses combined with in-depth breathing methods.
“Yoga” is a bit like attempting to the best concept like spirituality or culture,” Rayburn says.
Yoga Health Benefits
- Stress relief
- Injury prevention
- Weight management
- Enhanced body awareness
- Help with pain management
- Improved flexibility and balance
- Boosted strength and muscle tone
- Manage chronic disease symptoms
Best Yoga Poses for Beginners
Child’s Pose
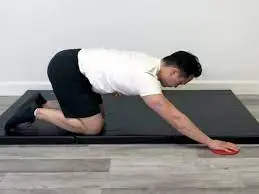
This relaxing pose is a good defaulting break position. You can utilize the child’s pose to relax and refocus before continuing to your next yoga pose. It gently lengthens your lower shoulder, back, hips, thighs, knees, and ankles and soothes your spine and neck.
Steps:
Skip it: If you have knee injuries and ankle issues. Avoid even if you have high blood pressure or are pregnant.
Modify: You can relax your head on a cushion and block. You can place a moved towel under your ankles if they are painful.
Be mindful: Concentrate on soothing the muscles of the spine and lower back as you breathe.
Kneel and position on your knees with your knees slightly far. Lean forward, fold your arms in the facade of you on the ground floor, and relax your forehead on your arms. Inhale and exhale, slowly and profoundly, for at least 8 breaths.
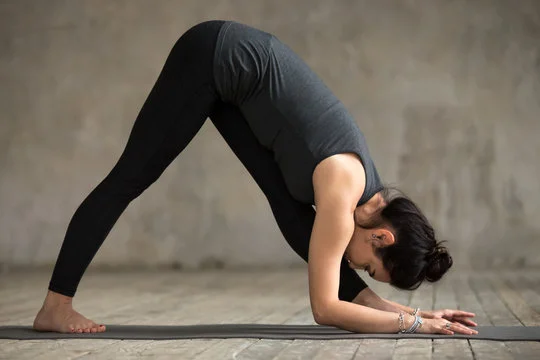
Downward-Facing Dog
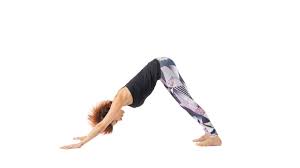
Adho Mukha Svanasana strengthens the shoulders, and back while extending the hamstrings, and arches of your feet. It can even support relieving back aches.
Do it: To support and reduce backache.
Skip it: This pose isn’t recommended if you have carpal tunnel syndrome(medial nerve compression) or other wrist issues, have high blood pressure, or are in the late steps of pregnancy.
Modify: You can accomplish the yoga pose with your elbows on the ground floor, which brings the weight off your wrists. You can even utilize blocks under your hands, which may feel additionally relaxed.
Be mindful: Concentrate on spreading the weight evenly through your palms and lifting your hips up and back, away from your shoulders.
Arrive on your hands and knees with your wrists under the shoulders and your knees under the hips. Bend your toes under and press back via your hands to lift your hips and straighten your legs. Extend your fingers and ground floor down from the forearms into the fingertips.
Four-Limbed Staff Pose
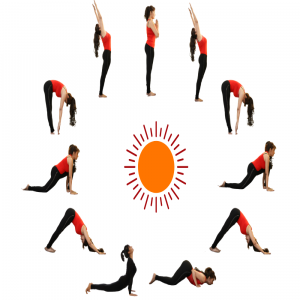
This push-up deviation follows the plank pose in a common yoga pose series known as the sun salute. It is the most useful yoga posture to learn if you want to finally perform additional advanced postures, such as arm balances or inversions.
Do it: Like plank, this yoga pose strengthens arms, and wrists and tones the belly.
Skip it: If you have carpal tunnel syndrome(medial nerve compression), lower back pain, a shoulder injury or are pregnant.
Modify: It’s a good idea for beginners to modify the pose by maintaining your knees on the ground floor.
Be mindful: Press your palms into the ground floor and pull your shoulders away from the ground floor as you hold a yoga pose.
Begin in a high plank place. Drop your knees to the ground floor. Maintain your back straight and your shoulders above your wrists. As you boost your strengthening stability, you gradually start to lower your upper body into a Dandasana.
Cobra Pose

This back-bending pose can support and strengthen the back muscles, increase spinal flexibility, and lengthens the chest, shoulders, and stomach.
Do it: This post is best for strengthening the back.
Skip it: If you have arthritis in your spine or neck, a low-back injury, or carpal tunnel syndrome (medial nerve compression).
Modify: Only lift a few inches, and don’t attempt to straighten your arms.
Be mindful: Attempt to maintain your navel drawing up away from the ground floor as you hold this pose.
To begin with, on your abdomen, toes pointing straight back, hands beneath the shoulders, elbows close to the body. As you inhale, pull up side your chest from the back of your heart. Lift your head last. Arrive down again as you exhale. For the third duration you come up with, utilize your hands to discover your full expression of the posture.
Tree Pose
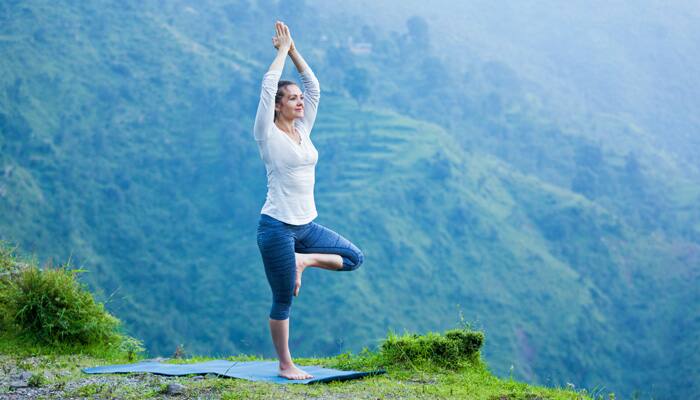
Beyond supporting enhance your balance, it can even strengthen your ankles, thighs, core, and spine.
Do it: Excellent for performing on your balance and posture.
Skip it: You want to skip this yoga pose if you have low blood pressure and any medical disorders that affect your balance.
Modify: Seat one of your hands on a wall for support.
Be mindful: Concentrate on your breath in and out as you maintain this pose.
Bring into place. With both feet planted firmly on the ground floor and your weight adequately divided so that you are balanced. Turn one leg at the knee. Lengthen your body. Maintain and replicate.
Triangle Pose
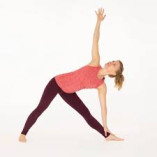
Regarding, a region of more yoga pose series supports creating strength in the legs and lengthens the spine, shoulders, hamstrings, and calves. It can even support boost mobility in the hips and neck.
Do it: This pose is great for creating strength and endurance.
Skip it: Avoid this yoga pose if you have a headache and low blood pressure.
Modify: If you have high blood pressure, bend your head to gaze downward in the last pose. If you have neck problems, don’t bend your head to look upward; look straight ahead and maintain both sides of the neck long.
Be mindful: Maintain lifting your extended arm toward the ceiling. It supports maintaining the pose buoyant.
Bring into place. Tree pose often begins from mountain pose, with both feet planted firmly on the ground floor and your weight adequately separated so that you are balanced. Turn one leg at the knee. Lengthen your body. Maintain and replicate.
Bridge Pose

This is a back-bending pose that prolongs the muscles of the chest, back, and neck. It also creates strength in the back and hamstring muscles.
Do it: If you sit most of the day, this pose will support you in opening your upper chest.
Skip it: don’t do this yoga pose if you have a neck injury.
Modify: Place a block between your thighs to support maintaining the legs and feet in proper alignment. Or you can set a block underneath your pelvis if your lower back is bothering you.
Be mindful: Maintaining this yoga pose, attempt to keep your chest pulled and your sternum toward your chin.
Lying on your back, turn both knees and position the feet flat on the ground floor hip-width apart. Press the feet into the ground floor, inhale, and lift the hips, moving the backbone of the ground floor. Press into the arms and shoulders to pull the chest. Respire and hold for 4-8 breaths.
Corpse Pose
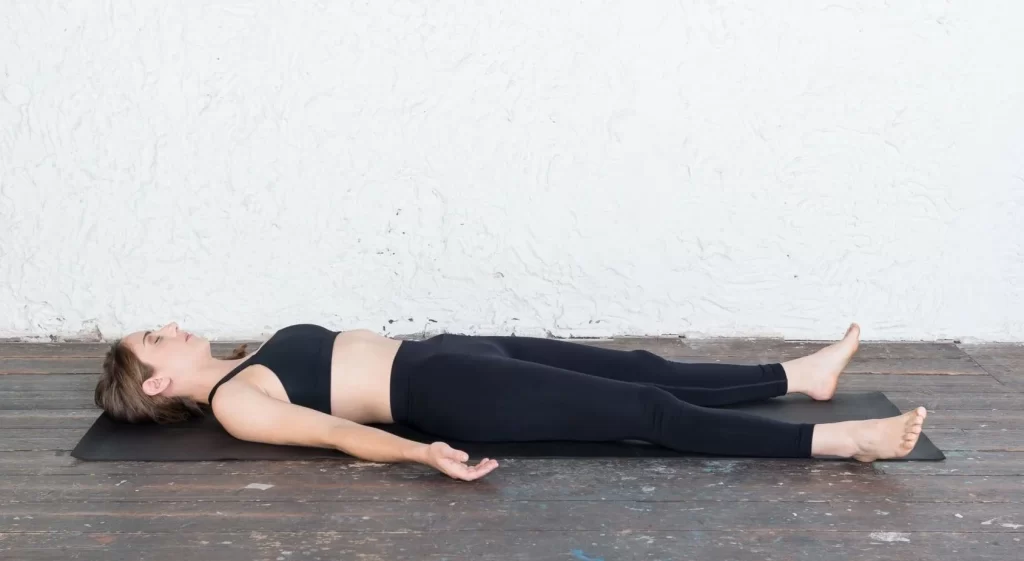
Like life, yoga pose classes typically finish with this yoga pose. It allows for a moment of relaxation, but a few individuals discover it difficult to stay still in this pose. Regardless, the additional you attempt this pose, the more comfortable it is to sink into a relaxing, meditative state.
Do it: daily.
Skip it: If you don’t want to have a motion calm.
Modify: Position a blanket under your head, if that feels additionally comfy. You can even roll up a blanket and seat that under your knees if your lower back is smooth or bothering you.
Be mindful: Sense the weight of your body sinking into your mat or carpet one region at a duration.
Lie on your back. At the finish of your yoga pose practice, lie down on your mat or carpet. Maintaining yourself is essential. Concentrate on soothing tense muscles. Meditate. Release your breath. Stay a while. Slowly arise via the fetal position. Return to a comfortable seat position.
Chair Pose (Utkatasana)
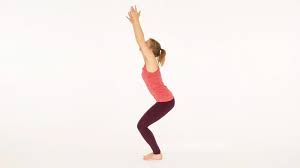
This strong yoga pose is best for strengthening the legs, arms, and core. Stand tall and inhale as you increase your arms straight overhead. Keep your arm should be in front of ears while your palms should face inward. Turn your knees as you exhale, helping your thighs to be similar to the ground floor. Maintain the yoga pose for 30 seconds up to a minute.
Mountain Pose (Tadasana)

Mountain posture may not be as popular as Downward Facing Dog, but it is equally necessary. This is a perfect duration to talk about alignment, which is how your body regions are ideally seated in each yoga pose.
The alignment in the Tadasana pose depicts that straight line from the crown of your head to your heels, with the shoulders and pelvis piled along the queue. Every individual’s body is diverse, so concentrate on rooting down with your feet and lengthening up with your backbone.
Following are the stages to conduct Tadasana: Stand upright, maintaining a space of two inches between your feet. Inhale and lift your arms in the facade, leveling up to your shoulders. Lock the fingers of both hands together and then slowly bend your wrist outwards.
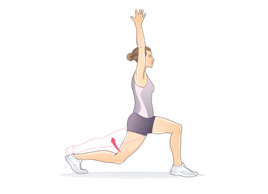
Warrior I (Virabhadrasana I)
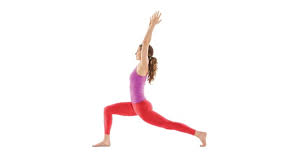
The crucial thing to remember in Virabhadrasana I is that the hips are front-forward. Think of your hip points as headlights—they should be roughly parallel to the facade of your mat. This may need you to bring a wider stance.
Start by standing straight with your feet three-four feet apart. Twist your right foot out. Then, it is at an angle of 90 degrees. Bend your left foot in by around 15 degrees. Now, slowly lift both arms sidewise to your shoulder height. Exhale deeply and turn your right knee.
Warrior II (Virabhadrasana II)
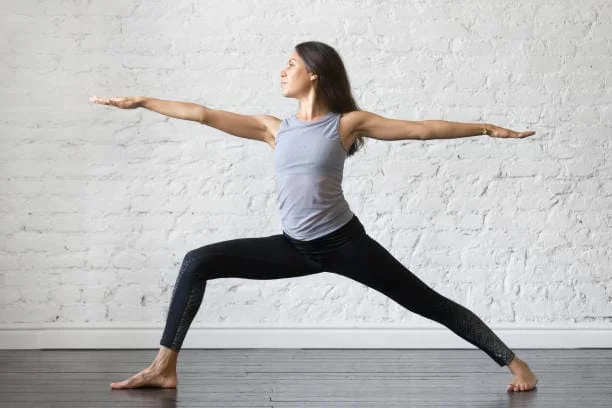
In Warrior I, in Warrior II, the hips front of the side of the mat or carpet. The hips and shoulders are expanded to the side when moving from Warrior I to Warrior II.
You’ll even rotate your back foot, angling your toes at about forty-five degrees. Both Virabhadrasana postures, help to maintain your front knee stacked over the ankle. Your front toes face forward.
Press through the heel of your facade foot while grounding through the outer edge of your back foot. Curl your facade thigh outward and press via your back heel. Draw your tailbone down and sweep your internal pelvis in and up.
Extended Side Angle (Utthita Parvakonasana)
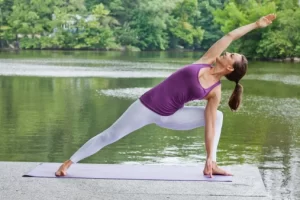
One modification of the Extended Side Angle Pose is to get your forearm to your thigh instead of placing your hand on the ground floor. It should relax lightly on your thigh and not carry much weight. This modification enables you to maintain your shoulders open. You can even position your hand on a block.
Sit upright. Lengthen your arms backward to set your palms after you. Arch and slowly drop your head backward. Permit your arms to help your upper body. Inhale, make sure that your feet are set flat against the ground floor and have a firm grasp. Breathe evenly.
Standing Forward Bend (Uttanasana)
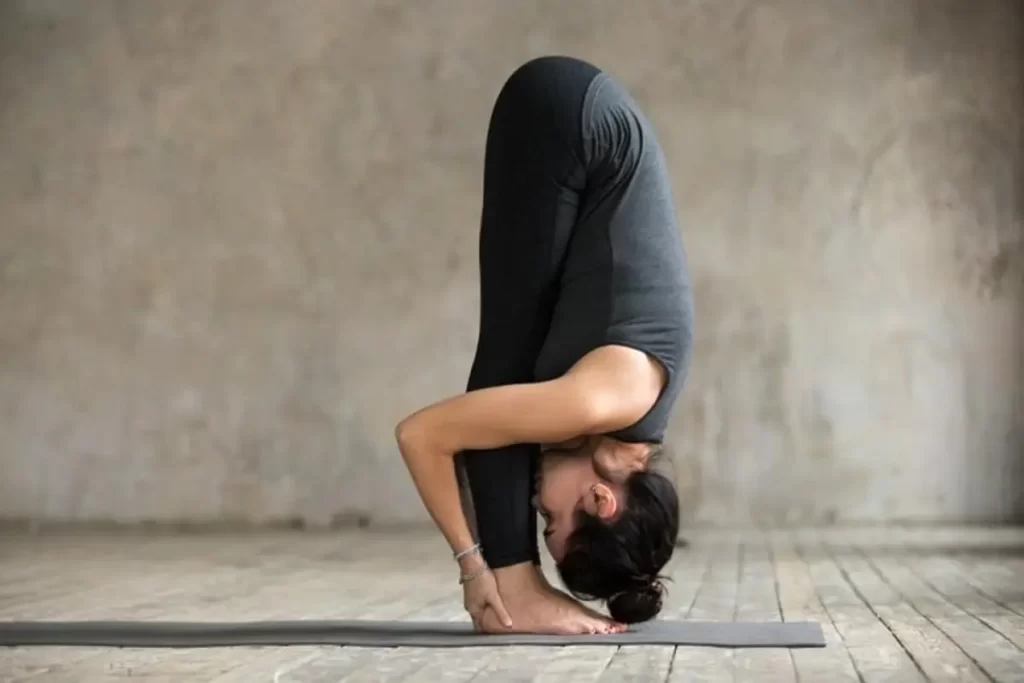
To do Standing forward, exhale, and fold over your legs. If the hamstrings feel a small tight at first, turn the knees so that you can remove your backbone. Let the head hang heavy.
Maintain the legs gently turned with feet hip-width apart for better stability. You can maintain opposite elbows with opposite hands while swaying wildly from side to side.
Inhale and extend your chest to lengthen your backbone. Exhale and mild press both legs straight without hyperextending. Lift the kneecaps and mild curl your upper, inner thighs back. On an exhalation, extend your torso down without turning your back.
Reverse Warrior (Viparita Virabhadrasana)
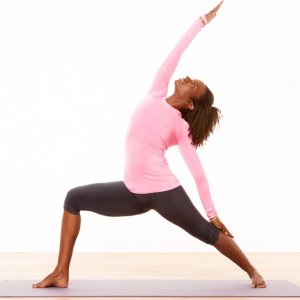
Reverse Warrior transfers a parallel stance to Warrior I and incorporates a slight heart-opening side turn or optional backbend.
To remain static in the yoga posture, it’s essential to root into the sole of the facade foot, anchor the external side edge of the back foot, and engage the glutes.
Concentrate your look up toward the palm as it gets overhead. Maintain your front knee tracking over your ankle as you sink more in-depth into the hips.
Inhale to lengthen your spine. Exhale, tilt your torso forward, and reach your arms externally ahead. Shift your weight into your facade foot, and move forward as you lift your left leg until it is similar to the ground floor. Your upper arms formulate your ears, and your head, pelvis, and lifted leg form a straight line.
Garland Pose (Malasana)

Regardless, it’s a good stretch for the muscles around the pelvis, creating what is often named a “hip opener” in yoga postures.
Perhaps surprisingly, it’s even best for your feet, which are often neglected. If squatting is problematic for you, props can support you. Attempt seating on a block or rolling a towel under the heels. Maintain pressing your heels down toward the ground floor.
To begin, stand in a Tadasana. Reach into a squat position (Bend the knees and lower the hips to the ground floor). Just lean forward and take your arms to the inside of your bent knees.
Pyramid Pose (Parsvottanasana)
Upright forward turns like the Parsvottanasana posture is an ideal duration to break out your yoga blocks to make the pose additionally accessible. position a block on either flank of your facade side foot to boost the ground floor to a level your hands can comfortably reach. Your hamstrings will still relish a good stretch, and they’ll thank you for your contemplation.
Line up heel to heel with your back foot at around a 30- to 45-degree angle. By pressing down with your right big toe mound for the same amount of time as you drag your left hip back and in towards your right heel, you can keep your hips pointing forward and both sides of your waist stretched.
Raised Hands Pose (Urdhva Hastasana)
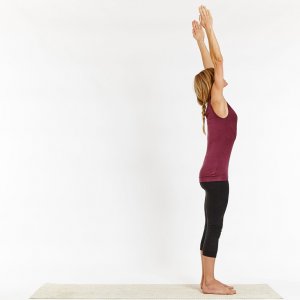
Created upon the foundation of the Mountain pose, Raised Hands Pose (Urdhva Hastasana) requires you to continue to root into the ground floor with your legs while going for the sky with your arms. The effect is a whole-body stretch, the best path to conduct in the physical region of your yoga session.
Stand with your feet hip space vast. Indicate your big toes forward. Permit your arms to hang by your sides. Arrive your arms forward and up with an inhale, palms facing forward. mild arch back and look diagonally upward. Maintain the posture for a moment. Lower your arms with an exhale.
Low Lunge
The alignment of your lunge is super necessary. Attempt to create a right angle with your front leg so that your knee is immediately over your ankle and your thigh is parallel to the ground floor. At an equal duration, maintain your hips level and energize your back leg.
Multiple individuals don’t go in-depth enough into the front leg and sag in the back leg. Glance in the mirror to make sure you’re bringing it right.
To change, set your hands on blocks and lower your back leg to the mat or carpet (with a towel as required for cushioning).
Start in the Down Dog place. Inhale, moving your weight to your left foot. Exhale, stepping your right foot forward. Roll your position forward, and pile your right knee over your right ankle. Lower your left knee to the ground floor. Inhale, lifting your hands to rest on top of your proper thigh.
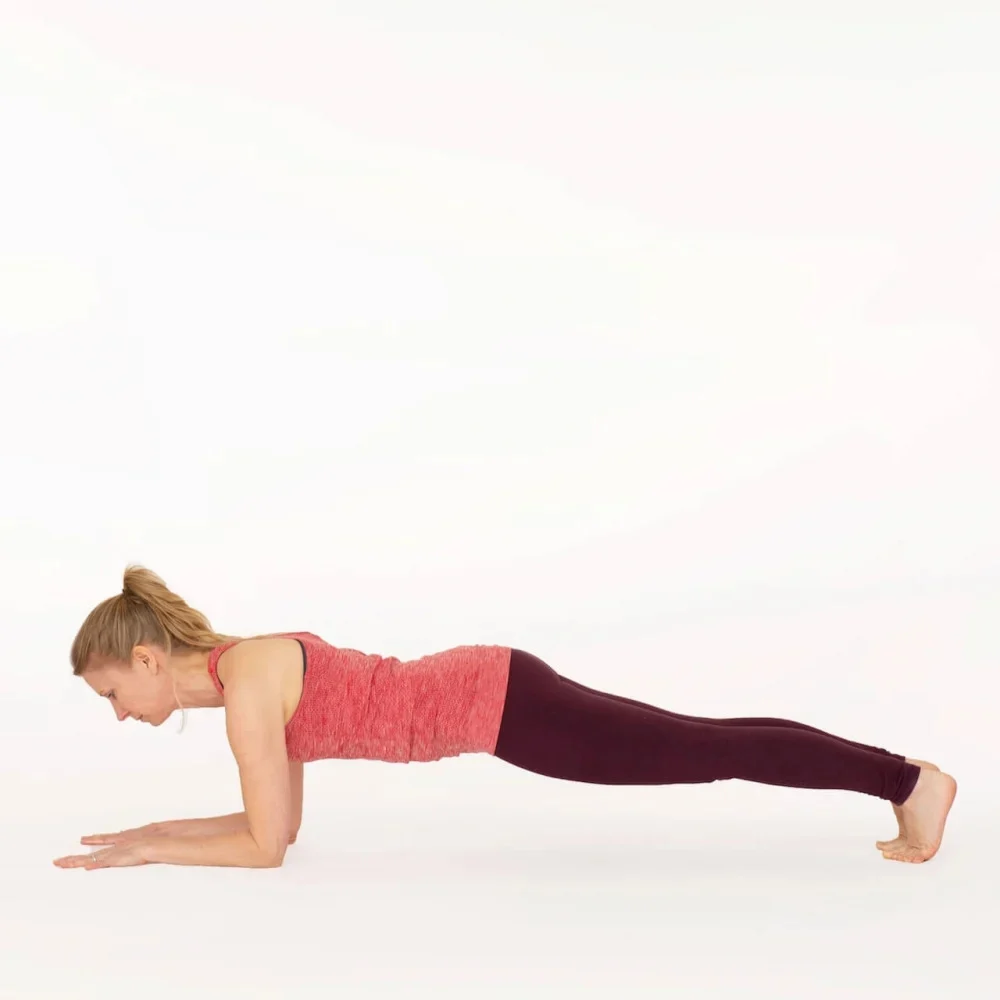
Plank Pose (Phalakasana)
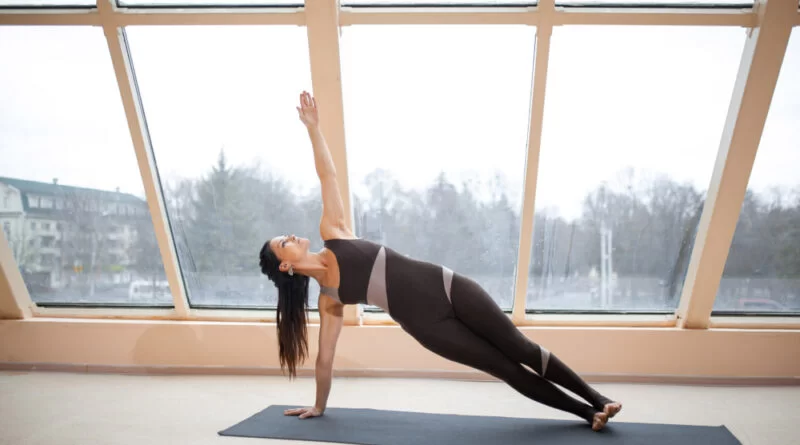
It might appear strange to name the Phalakasana pose a balancing posture since the trouble of failing over is appealing and minimal, but it brings to the heart what this yoga posture is about core strength.
A strong core is essential for so numerous yoga poses, including standing balances and arm balances, and plank is an excellent path to professional on your stability and stamina. Aim to keep your hips and backbone in a neutral place.
From all 4th bring your shoulders over your wrists, fingers outspread, middle finger indicating forward. Press your hands into the ground floor, and firm the upper arms in towards each other. Draw the lower belly in and up. Prolong one leg back with your toes folded and then the other leg, so you are in a heightened push-up position.
Cat-Cow Stretch (Chakravakasana)
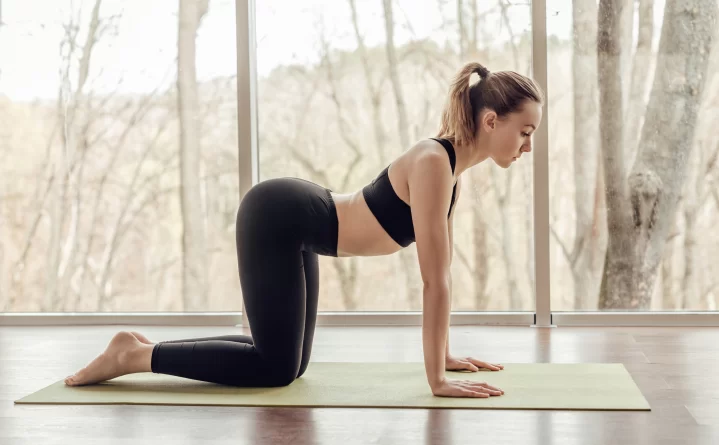
It’s the best of both worlds. The spinal extension is followed by spinal flexion. Moving spine and forth awakens and warms the back, enhances body attention, and is a basic introduction to accomplishing a vinyasa series by corresponding your motions to your breath.
Chakravakasana may be the numerous essential yoga pose you learn when beginning yoga, especially if you have back pain. If you never build it to more additional than a few yoga practices, continue accomplishing this expanse on your own.
Maintain your hands shoulder-width apart and your knees presently below your hips. Inhale, deeply while twisting your lower back and getting your head up, tilting your pelvis up like a “Chakravakasana.” Exhale deeply and get your abdomen in, arching your backbone and bringing your head and pelvis down like a “cat.” Replicate several duration.
Knees, Chest, and Chin pose (Ashtanga Namaskara)
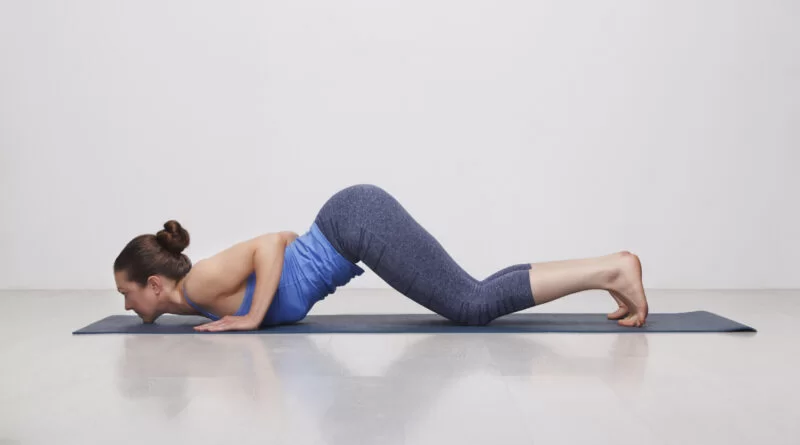
Ashtanga Namaskara was once taught to all start yoga researchers as an alternative to and practice for Chaturanga Dandasana. In current years, it’s fallen out of favor.
As a result, a few pupils are rushed into Chaturanga before they are prepared. It belongs in the sun salutation sequence for beginners. Plus, it is a perfect warm-up for more in-depth backbends.
Take your period and enter the yoga pose slowly from a plank position. Start by lowering your knees to the yoga mat or carpet, with your toes tucked beneath.
Then maintain your elbows pushed toward your body as you lower your chest and chin to the ground floor. Shoulders should hover over your hands.
First, lie down on the mat or carpet in a prone position, i.e. sleep on your abdomen. Next, lift your hips, buttocks, and stomach upwards, pull your abdomen in, and slightly arch your back, as indicated in the image above.
Staff Pose (Dandasana)
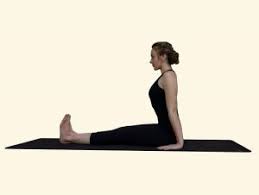
Dandasana postures are equal to a sit version of the mountain pose in that it offers alignment instruction for diverse other seated yoga postures. Engage the leg muscles and bend the feet.
Lift the chest and relax the shoulders. You can even permit a mild turn in the knees, which can make comfort for the shoulders to stack over the hips.
Change by utilizing a block or a folded blanket or two if you have a problem sitting straight with your butt flat on the ground floor. In a typical yoga pose rehearsal, this yoga pose leads to a forward turn.
Seat with your legs together and prolonged out in front of you. Flex your feet and lengthen out via the heels. Draw your lower stomach in and up. Glide your shoulder blades back and down along your backbone. Get your chin slightly back and down and maintain the ground floor of your neck smooth.
Cobbler’s Pose (Baddha Konasana)
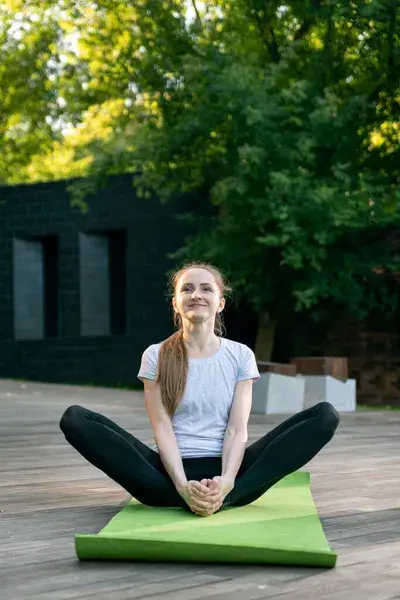
Let gravity perform on extending your internal thighs in Cobbler’s pose. If you discover this position difficult, props can create a large difference. Sitting on a block, cushion raises your hips so your knees can open additionally naturally.
If your knees are high, it brings a lot of effort to maintain them up, and your legs require you to be comforted to enjoy the advantages of the stretch. The solution is to place a block under each knee to provide them with something to relax upon.
Seat in the Staff Pose. Currently, Turn your knees and join the soles of your feet. Now hold your feet or ankles. Roll your heels to the groin as so much as doable. Breathe out and let down your knees to the ground floor.
Ardha Matsyendrasana
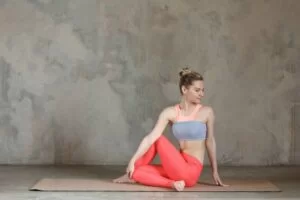
Twists are an essential part of yoga. They support and enhance spinal mobility and can even bring things rolling along your digestive tract.
It’s to extend your bottom leg in this pose if it’s painful to have it turned after you. You can even modify it by seating on a blanket. Setting the bent leg inside the extended leg is great for relaxing the shoulder, hip, and backbone.
Seat down with your legs straight and rest the entire body. Turn the left leg and put the left heel near the right buttock. Put the sole of the right foot flat on the ground floor outside of the left knee. Both buttocks should stay on the mat or carpet. The back should be comfortable and vertical.
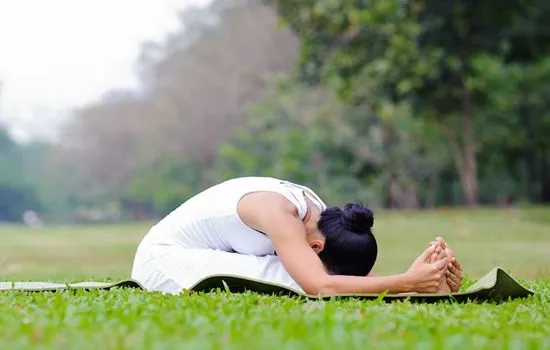
Head to Knee Pose (Janu Sirsasana)
Forward turns can be problematic for anyone with tight hamstrings. Janu Sirsasana is additionally accessible because you only prolong one leg at a duration. You can even utilize a strap around the foot to support and extend your reach.
Seat with your legs extended in front of you (Staff Pose / Dandasana). Turn your right knee and position the right foot against the left internal thigh, comforting the knee down. As you inhale, flex the left foot, press the top of the thigh down, extend the backbone, and extend your arms on either side of your head.
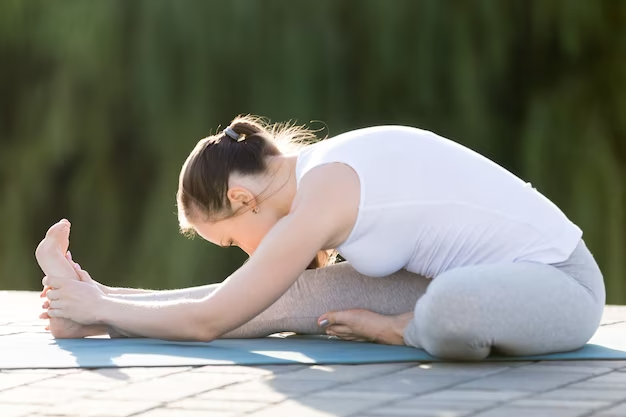
Seated Forward Bend (Paschimottanasana)
There are multiple hamstrings lengthened in beginning yoga for a good reason. The hamstrings tend to bring short and tight in individuals who sit a lot, which can contribute to low back pain. Lengthening them, as you do during the seated forward turn, is useful.
This yoga pose offers a spread to the entire back of the body. Bend your hips, and support your neck aligned with your backbone.
Get your arms straight out to the sides and up over your head, going toward the ceiling. Inhale and draw your backbone up long. As you exhale, start to reach forward, hinging at your hips.
Seated Wide Angle Straddle (Upavistha Konasana)

Separate your legs into a broad region.
Flex both feet and engage both legs down more powerfully, reaching into Upavistha Konasana.
Forward bending, extending the backbone on your inhales, and deepening the yoga posture on your exhales.
However, though it may look like the mandate is to bring your chest to the ground floor, it is not about that. Instead, concentrate on maintaining your back flat, turning the pelvis forward instead of crunching forward through your backbone, and maintaining your feet flexed. If you accomplish whole three of these things, it does not matter how far forward you lean.
Turn your feet, and maintain your knees and toes pointed up towards the ceiling. Press your legs and seating bones down, and prolong up through your backbone. With a long backbone, turn from the hips. Set your hands between your legs on the ground floor, and slowly exhale as you begin to walk your hands forwards.
Benefits of Doing Yoga for Beginners Workouts
Yoga pose for beginners isn’t only for enhancing your physical health. This effective method also proves effective in keeping mind and spiritual health. Beneath are a few of the benefits you can bring from conducting online yoga poses for beginners.
Beginners’ yoga poses concentrate on enhancing the flexibility of the shoulder, spine, legs, hips, and different other body regions. A few basic yoga poses aid the digestive system, and kidney health to alleviate the condition. Yoga even enhances blood circulation.
A few yoga poses and meditation for beginners support in relieving stress and anxiety effectively. It regulates your breathing. A few individuals even conduct yoga for weight loss and toned muscles. Individuals can even benefit from yoga for lower back pain, neck pain, menstrual ache, and other painful illnesses.
FAQs
1. Which yoga is best for beginners?
Hatha yoga
Hatha yoga is daily suggested for beginner yogis as it’s considered a gentler form of yoga. It is, traditionally, a slower-rolling style where you maintain every pose for a few breaths while keeping concentration and awareness on enhancing the posture.
2. Can I do yoga daily as a beginner?
You can do yoga poses as small or as often as you like, but you’ll see the most advantages when you show up more often. We advised beginners to start with one to two classes a week and scale up from there. Though ultimately, everyday practice will provide you with a good experience for your mind-body connection.
3. How much duration a day should a beginner do yoga?
It is, traditionally, a slower-rolling style where you maintain every pose for a few breaths while keeping concentration and awareness on enhancing the pose. Further, experienced yogis might rehearse daily or have longer sessions on a timetable to allow for recovery.
4. Can you stay in shape with yoga alone?
If you’re interested in whether yoga pose is the best enough workout, the answer is “yes, if maintain in your brain that you’ll want to discover a practice that you’ll relish committing to for at least 30 minutes, 5 days per week, that you’ll be capable to stick with consistently, and that gets your heart pumping and challenges yours.
5. Can yoga help you lose weight?
There is a best investigation that yoga poses may support you manage anxiety, enhancing your mindset, curbing emotional eating, and making a community of support, all of which can help with weight loss and maintenance. Yoga pose can support you burn calories, as well as boost your muscle tone.