
Choking
What is choking?
- Choking is a blockage of the upper airway by a foreign body such as food or other objects, which stops a person from breathing effectively. Choking should cause easy coughing, but complete blockage/obstruction of the airway should lead to death.
- Choking, also known as foreign body airway obstruction, is a phenomenon that happens when breathing is inhibited by a blockage inside the respiratory tract. An obstruction that stops oxygen from entering the lungs results in oxygen deprivation. Although oxygen stored in the blood and lungs should hold a person alive for several minutes after breathing stops
- choking for a child typically occurs when the food is stuck in the trachea this occurs because air can not flow normally into or out of the lungs, so the child can’t breathe correctly.
- The trachea is normally covered by a little flap of tissue named the epiglottis. The trachea and the esophagus transfer an opening at the back of the throat. The epiglottis works like a cover, cracking closed beyond the trachea individually time a person swallows. It permits food to pass down the esophagus and stops it from reaching down the trachea.
- But every onetime in a while, the epiglottis doesn’t close fast sufficiently and an object can fall into the trachea. This is what occurs when something goes down the incorrect line.
- Most of the time, the food or object just partially blocks the trachea, is coughed up, and breathing returns fast. Kids who appear to be choking and coughing but still should breathe and talk normally like nothing happened to them regain without help. It should be uncomfortable and upsetting for them, but children are normally fine after a few seconds.
Types of Choking
- There are two major types of choking. One is known as a partial airway obstruction or mild choking, and the further is a complete airway obstruction or severe choking. It is important to specify what kind of airway obstruction a person is suffering from, as this will inform the needed type of help
How to Identify the Type of Choking
- If an individual has a partial airway obstruction: the individual should be capable to breathe.
- Their breathing may sound different as air passes via a thinner space.
- They should be capable to cough.
- They should be capable to cry.
- They will generally be capable to clear the blockage themselves.
- If an individual has a complete airway obstruction: the individual will be not able to breathe.
- The individual will be not able to cough.
- The individual will be not able to cry.
- The individual will need help, and without the help, they will lose consciousness.
Signs of choking
- Coughing or gagging.
- Saturated eyes.
- An unable to talk properly or at normal volume.
- Maintaining a red, puffy face.
- Huffing or abnormal breathing sounds.
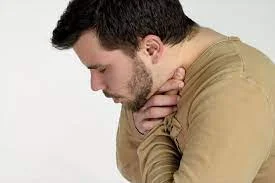
- Signs of distress, such as throat clenching or overreactive hand motions.
- Blue color lips and skin.
- Passed away.
- A choking person should present very softly, particularly in the setting of long-term unfamiliar body aspiration. Cough is seen in 80 percent of unfamiliar body aspiration cases, and shortness of breath is seen in 25 percent. Individuals should be not able to speak, try to use hand movements to show they are choking, try to force vomiting, or squeeze at their throat.
Symptoms of choking
respiratory
- Respiratory symptoms can involve spontaneous cough, gurgling, shortness of breath, struggled breathing, or huffing. Loss of consciousness should happen if breathing should not revive. In the setting of lower airway aspiration, patients might have pneumonia-like symptoms such as fever, chest pain, foul-smelling sputum, or blood in the sputum hemoptysis. In the case of long-term foreign body aspiration, patients should present with signs of lobar pneumonia or pleural effusion.
- The time a choking victim is even alive without brain damage can alter, but generally, brain damage should happen when the patient stays without air for about three minutes it is unstable. Death should happen if breathing is not recovered in six to ten minutes (alters depending on the person). However, life should be expanded by using cardiopulmonary resuscitation for unconscious persons of choking
Skin
The face turns blue termed cyanosis from lack of oxygen if breathing is not recovered. Cyanosis should also be seen on the fingertips
cyanosis
- Cyanosis is the change of body tissue color to a bluish-purple as a result of accepting reduced amounts of oxygen bound to the hemoglobin in the red blood cells of the capillary bed. Body tissues that show cyanosis are normally in locations where the skin is thinner, involving the mucous membranes, lips, nail beds, and ear lobes. Some medications containing amiodarone or silver, Mongolian spots, large birthmarks, and the consumption of food products with blue or purple paints should also result in bluish skin tissue discoloration and may be misunderstood for cyanosis.
- Cyanosis is further classified into central cyanosis and peripheral cyanosis.
Pathophysiology of the cyanosis
- The mechanism back off cyanosis is different depending on whether it is central or peripheral.
Central cyanosis
- Central cyanosis is caused by a reduction in arterial oxygen saturation (SaO2) and starts to show once the concentration of deoxyhemoglobin in the blood reaches a concentration of 85 percent.
Peripheral cyanosis
- Peripheral cyanosis happens when there is a raised concentration of deoxyhemoglobin on the venous side of the peripheral circulation. In other terms, cyanosis depends on the concentration of deoxyhemoglobin. patients with raised amounts of red blood cells should appear cyanotic actually with lower concentrations of deoxyhemoglobin.
Causes of the Central cyanosis
- Central cyanosis frequently happens because of a circulatory or ventilatory problem that tends to poor blood oxygenation in the lungs. central cyanosis grows when arterial oxygen saturation falls below 85 percent or 75 percent
- Acute cyanosis should be a result of suffocation or choking and is one of the actual signs that ventilation should be blocked.
- A child with central cyanosis that is aggravated by measles.the bluish-purple discoloration of the fingernails, lips, eyelids, and nose, along with major nail clubbing.
- Central cyanosis should occur because of the following causes: Central nervous system (impairing normal ventilation, Intracranial hemorrhage, Drug overdose (e.g. heroin), and Generalized tonic-clonic seizure (GTCS). A respiratory system such as Pneumonia, Bronchiolitis, Bronchospasm asthma, Pulmonary hypertension, Pulmonary embolism, Hypoventilation, Chronic obstructive pulmonary disease, emphysema
- A cardiovascular system such as Congenital heart disease (Tetralogy of Fallot, right to left shunts in heart or great vessels), Heart failure, Valvular heart disease, and Myocardial infarction. At high altitudes, cyanosis should develop in upgrades to heights greater than 2400 m.
Hypothermia
- it is described as a body temperature below 35.0 degrees C in humans. Symptoms depend on the temperature. In mild hypothermia, there is vibration and mental confusion. In moderate hypothermia, vibrating finishes, and confusion gains. In severe hypothermia, there may be hallucinations and paradoxical breathing undressing, in which a person releases their clothing, as well as raises the risk of heart-stopping.
- Hypothermia has two major types of causes. It classically happens from exposure to cold temperatures and cold water immersion. It should also happen from any condition that reduces heat production or raises heat loss. Generally, this involves alcohol intoxication but should also involve low blood sugar, anorexia, and advanced age. Body temperature is generally maintained near a constant level of temperature 36.5 to 37.5 degrees C via thermo regulation. Steps to raise body temperature involve shivering, increased voluntary activity, and placing on warmer clothing. Hypothermia might be diagnosed based on either a person’s symptoms in the fact of risk factors or by estimating a person’s body temperature.
Frostbite
- it is a skin injury that happens when exposed to severely low temperatures, causing the freezing of the skin or other tissues, generally affecting the fingers, toes, nose, ears, cheeks, and chin areas. Most frequently, frostbite happens in the hands and feet. The initial symptoms are normally a feeling of cold and tingling or numbing. This may be followed by a presence awkward with a white or bluish color to the skin. Swelling or blistering may happen following treatment. Complications might involve hypothermia or compartment syndrome.
- People who are exposed to low temperatures for extended periods, such as winter sports lovers, military people, and homeless people, are at the most significant risk. Other risk factors involve drinking alcohol, smoking, mental health problems, certain medications, and previous injuries because of colds. The primary system involves injury from ice crystals and blood clots in little blood vessels following warm-up. Diagnosis is based on symptoms. Severity might be divided into superficial 1st and 2nd degree or deep 3rd and 4th degree. A bone scan or MRI may assist in specifying the area of the injury.
- Prevention consists of wearing proper, fully-covering clothing, preventing low temperatures and current, maintaining hydration and nutrition, and satisfactory physical activity to maintain core temperature without fatigue Treatment is done by again warm, by immersion in warm water near body temperature, or by body contact, and should be done just when the consistent temperature should be maintained so that refreezing is not a risk. Fast heating or cooling should be prevented since it could potentially cause burning or heat stress. Stroking or using force on the affected areas should be prevented as it should cause further damage such as bruises. The use of ibuprofen and tetanus toxoid is suggested for pain relief or to lessen swelling or inflammation. For severe injuries, iloprost or thrombolytics should be used. Surgery is sometimes required. Amputation should be suggested a few months after exposure to believe whether the area of injury is permanent damage and therefore necessary for an extreme treatment.
- Obstructive sleep apnea: Obstructive sleep apnea is the most common sleep-related breathing disorder and is represented by recurrent episodes of a complete or partial blockage of the upper airway leading to less or absent breathing during sleep. These episodes are termed apneas with complete or near-complete termination of breathing, or hypopneas when the lessening in breathing is partial. In either case, a drop in blood oxygen saturation, a disturbance in sleep, or both should result. A high frequency of apneas or hypopneas during sleep may interrupt healthy sleep, which in combination with disturbances in blood oxygenation is supposed to donate to negative effects on health and quality of life. The terms obstructive sleep apnea syndrome or obstructive sleep apnea-hypopnea syndrome should be used to direct obstructive sleep apnea when it is connected with symptoms during the daytime such as intensive daytime sleepiness and reduced cognitive function.
Peripheral cyanosis
- Peripheral cyanosis is the blue tint in fingers or extremities, because of insufficient or obstructed circulation. The blood reaching the extremities and the oxygen is not rich and when viewed via the skin a combination of factors should lead to the appearance of a blue color. All factors donating to central cyanosis should also cause peripheral symptoms to occur but peripheral cyanosis should be observed in the absence of heart or lung failures. Small blood vessels might be limited and can be treated by raising the normal oxygenation level of the blood.
- The initial direction of blood flow in patients with patent ductus arteriosus. Once the pressure of the pulmonary arteries raises more than the aorta because of right heart hypertrophy, the direction of blood flow changes, sending deoxygenated blood via the patent duct straight into the descending aorta while limiting the brachiocephalic trunk, left common carotid, and left subclavian artery, therefore causing the differential cyanosis.
- Peripheral cyanosis should be due to the following causes
- All common causes of central cyanosis
- Reduced cardiac output such as heart failure or hypovolemia
- Cold exposure
- Chronic obstructive pulmonary disease
- An arterial obstruction such as peripheral vascular disease, Raynaud phenomenon
- A venous obstruction such as deep vein thrombosis
Differential cyanosis
- The cyanosis was gained by increasing and tightening the blood pressure cuff on the right arm.
- Differential cyanosis is the bluish coloration of the more down but does not include the upper extremity and the head. this is shown in the patient with a patent duct arteriosus. Patients with a large ductus create progressive pulmonary vascular disease, and pressure overload of the right ventricle happens. As soon as pulmonary pressure overreaches aortic pressure, shunt reverses right-to-left shunt happens. The upper extremity stays pink because deoxygenated blood flows via the patent duct and directly into the descending aorta while limiting the brachiocephalic trunk, left common carotid, and left subclavian arteries.
Causes of choking
- dysphagia difficulty swallowing
- Eating or drinking too fast.
- Not correctly chewing large pieces of food before swallowing.
- Wearing wrongly fitting dentures.
- Distractions although eating and drinking, such as laughing or moving around.
- Choking on one’s vomit especially after drinking big amounts of alcohol.
- Foreign things causing obstruction are a typical cause in younger children as children usually explore the world surrounding foreign things by placing things in their mouths.
- sudden incapability to talk
- Choking happens when a foreign body obstructs the airway. The block can be located in the pharynx, the larynx, the trachea, or the lower respiratory tract. The blockage can be either partial insufficient air passes via the lungs or a complete blockage of airflow
- children, the most frequent causes of choking are toys, and balloons. peanuts are the most frequent object found in the airway of children assessed for guessed foreign body aspiration. Small, round non-food objects such as balls, marbles, toys, and toy parts are also connected with a high risk of choking death because of the possibility of completely blocking a child’s airway. Children younger than age three should specifically be at risk of choking because of a lack of fully developed chewing habits, and the direction to insert objects in their mouth as they explore the environment. Because a child’s airway is smaller in diameter rather than that of an adult’s, smaller objects can more frequently cause airway obstruction in children. Also, infants and young children produce a less forceful cough rather than adults, so coughing may not be as useful in reducing airway obstruction.
Diagnosis of the choking
- Recognition and diagnosis of choking concern recognition of the signs and symptoms such as coughing and huffing. Choking should show a full block of the airway and should encourage other actions from anyone noticing a choking episode. For choking episodes that need emergent assessment by a doctor, several other devices should be used by diagnosis.
Imaging and Visualization Techniques for choking
Bronchoscopy
- Imaging modalities in the healthcare setting individually have their advantages and disadvantages. the bronchoscopy is a dedicated process used to imagine the cause of choking when not determined through oxygen and supportive care. Further imaging modalities should be used before bronchoscopy, an invasive approach.
- Bronchoscopy is an endoscopic procedure for imagining the inside of the airways for diagnostic and therapeutic goals. An instrument bronchoscope will be inserted into the airways, generally via the nose or mouth, or sometimes via a tracheostomy. This permits the practitioner to examine the patient’s airways for abnormalities like foreign bodies, bleeding, tumors, or inflammation. Samples should be taken from inside the lungs. The structure of bronchoscopes varies from rigid metal tubes with connected lighting devices to flexible visual fiber instruments with real-time video equipment.
types of bronchoscopy
Rigid
- The rigid bronchoscope is a concave metal tube used for checking the lower airway. It should be for either diagnostic or therapeutic reasons. Modern usage is exclusively for therapeutic indications. Rigid bronchoscopy will be utilized for regaining foreign objects. Rigid bronchoscopy will useful for recovering inhaled foreign bodies because it permits for protection of the airway and prevents the foreign body during recovery
- Giant hemoptysis, described as a loss of over 600 mL of blood in 24 hours, is a medical emergency and should be managed with the initiation of intravenous fluids and analysis with rigid bronchoscopy. The larger lumen of the rigid bronchoscope versus the narrow lumen of the flexible bronchoscope permits therapeutic methods like electrocautery to support the control of the bleeding.
Flexible (fiberoptic)
- A flexible bronchoscope is longer and thinner rather than a rigid bronchoscope. It includes a fiberoptic system that sends an image from the tip of the instrument to an eyepiece or video camera at the opposite end. Utilizing Bowden cables attached to a lever at the handpiece, the instrument’s tip should be instructed, permitting the practitioner to guide the instrument into particular lobar or segmental bronchi. Most flexible bronchoscopes also contain channels for suctioning or instrumentation, but flexible bronchoscopes should be particularly smaller than those in a rigid bronchoscope. Flexible bronchoscopy generates less discomfort for the patient than rigid bronchoscopy, and the technique should be achieved smoothly and safely under mild sedation. It is the method of choice nowadays for most bronchoscopic approaches.
procedure of bronchoscopy
- Bronchoscopy should be performed in a special room selected for such procedures as an operating room, an intensive care unit, or a further location with resources for the management of airway emergencies. The patient will usually be given antianxiety and antisecretory medications to control oral secretions from obstructing the view, commonly atropine, and occasionally an analgesic like morphine. During the process, sedatives like midazolam or propofol should be utilized. A local anesthetic should usually be given to anesthetize the mucous membranes of the pharynx, larynx, and trachea. The patient will be observed during the process with periodic blood pressure reviews, continuous electrocardiogram observation of the heart, and pulse oximetry.
- A flexible bronchoscope will be inserted with the patient in a sitting or supine position. Once the bronchoscope is inserted into the upper airway, the vocal cords should be examined. The instrument is developed to the trachea and also down into the bronchial system and each location will be examined as the bronchoscope passes. If an abnormality should be found, it should be tested using a brush, a needle, or forceps. A sample of lung tissue transbronchial biopsy should be tested utilizing real-time X-ray fluoroscopy or an electromagnetic tracking system. Flexible bronchoscopy should also be conducted on intubated patients, like patients in intensive care., the instrument will be inserted via an adapter attached to the tracheal tube.
- Rigid bronchoscopy should be executed under general anesthesia. Rigid bronchoscopes are too large to permit parallel sequences of other devices in the trachea; thus the anesthesia device is attached to the bronchoscope and the patient will ventilate via the bronchoscope.
Recovery
- Although most patients tolerate bronchoscopy nicely, a brief period of observation should be needed after the process. Most difficulties happen early and are readily prominent at the time of the process. The patient will be evaluated for respiratory difficulties like stridor and dyspnea resulting from laryngeal edema, laryngospasm, or bronchospasm. Monitoring continues until the effects of sedative drugs wear off and the gag reflex should return. If the patient had a transbronchial biopsy, doctors should take a chest X-ray to judge any air leakage in the lungs termed pneumothorax after the process. The patient might require to be hospitalized if any bleeding, pneumothorax, or respiratory distress happens
X-ray for choking
- An X-ray uses high-frequency electromagnetic radiation to imagine the human body involving the lungs through a chest X-ray. Many objects should not show up on an X-ray radiolucent. Approximately 10 percent of the objects are radio-opaque-like and should be imagined utilizing X-ray. X-rays are more affordable rather than other imaging modalities but disclose a person to radiation. In cases where X-ray is undetermined, fluoroscopy may be able to show radiolucent or smaller foreign bodies. Chest fluoroscopy is a real-time X-ray image occasionally directed as an X-ray movie to view breathing and coughing.
- Fluoroscopy is an imaging procedure that uses X-rays to get real-time moving images of the interior of an object. There are two major sub-categories of Fluoroscopy. Larger, typically Floor, Wall, or Ceiling climbed devices are usually called Cath Lab, and Smaller but also categorized as Full Size & Mini size C-Arm Mobile C-Arm. In its primary application of medical imaging, a fluoroscope permits a surgeon to watch the internal structure and function of a patient especially during surgery so that the pumping action of the heart or the movement of swallowing, This is useful for both diagnosis and therapy and happens in general radiology, interventional radiology, and image-guided surgery.
- Mobile C-Arm Full Size and Mini C-Arm should normally use for surgical and pain control in many different fields including Vascular, Orthopedic, Urology, Fertility clinic, and multiple others where the use of LIVE X-Ray is required. While some Mobile C-Arms should use for vascular cases, in most cases for Mobile C-Arm to be capable to see structures spine, and other bones for injection or minimally invasive surgical methods. The main difference between Full Size and Mini C-Arm will be based on what the object’s claim target is. For extremity procedures hands and foot, a Mini C-Arm can do the position while Shoulder, Hips, and Spine should need a bigger-sized, Full-Size c-Arm.
- In its simplest form, a fluoroscope contains an X-ray source and a fluorescent screen, between which a patient is positioned. However, since the 1950s most fluoroscopes have contained X-ray image intensifiers and cameras satisfactorily, to improve the image’s visibility and make the image available on a remote display screen. For many decades, fluoroscopy managed to create live pictures that were not recorded, but since the 1960s, as technology improved, recording and playback became the standard.
- Fluoroscopy is equal to radiography and X-ray computed tomography in that fluoroscopy produces images using X-rays. The original difference is that radiography fixed even images on film, whereas fluoroscopy provided live-moving pictures that were not stored. However, radiography, CT, and fluoroscopy are all digital imaging modes with image research software and data storage and return.
Mechanism of action
- Although visible light should be seen by the unaided eye and therefore forms images that people will watch, it should not penetrate most objects just translucent ones. In contrast, X-rays should penetrate a wider variety of objects like the human body, but they should be hidden from the unaided eye. To bring the advantage of the penetration for image-forming goals, one must watch somehow convert the X-rays’ intensity variations which coordinate to material contrast and therefore image contrast into a form that is visual. Classic film-based radiography gains image contrast in the form of the variable chemical changes that the X-rays affect in the film and classic fluoroscopy achieves film by fluorescence, in which certain materials convert X-ray energy or other parts of the spectrum into visible light. This use of fluorescent materials creates a viewing scope of how fluoroscopy gained its name.
- As the X-rays pass via the patient, they are weakened by varying amounts as they pass via or reflect off the different tissues of the body, casting an X-ray shadow of the radiopaque tissues like bone tissue on the fluorescent screen. Images on the screen should generate as the unweakened or mildly weakened X-rays from radiolucent tissues interact with atoms in the screen via the photoelectric effect, providing their energy to the electrons. While great energy given to the electrons is consumed as heat, a fraction of it’s handed off as visible light.
Computerized Tomography for choking
- A CT scan uses a tube with multiple X-ray machines to create a 3D image from 2D X-ray images from multiple cross-sections. Radiolucent objects should be better captured on Computerized Tomography scans rather than X-rays. Since Computerized Tomography is multiple X-rays, the exposure to radiation is extremely greater.
- A computed tomography scan is normally shortened to a Computerized Tomography scan; previously named computed axial tomography scan is a medical imaging procedure utilized to get detailed internal images of the body. The person that conducts Computerized Tomography scans is named radiographers or radiology technologists.
- Computerized Tomography scanners utilize a rotating X-ray tube and a row of sensors positioned in a gantry to calculate X-ray weakness by different tissues inside the body. The multiple X-ray measurements should carry from different angles and then processed on a computer using tomographic reconstruction algorithms to generate tomographic cross-sectional images of a body. A Computerized Tomography scan should be used in patients with metallic implants or pacemakers, for whom magnetic resonance imaging is contraindicated.
types of Computerized Tomography in choking
Spiral Computerized Tomography
- Spinning tube, normally called spiral Computerized Tomography, or spiral Computerized Tomography, is an imaging procedure in which an entire X-ray tube is rotated near the central axis of the area being checked. These are the dominant type of scanners on the market because spiral Computerized Tomography has been fabricated longer and offers a lower cost of production and purchase. The major limitation of spiral Computerized Tomography will be the size and laziness of the equipment X-ray tube body and the detector will show on the opposite side of the circle which limits the speed at which the equipment should spin. Some designs use two X-ray sources and detector arrays counteracted by an angle, as a method to improve temporal resolution
Electron beam tomography
- Electron beam tomography is a typical form of Computerized Tomography in which a large enough X-ray tube is formed so that only the path of the electrons, touring between the cathode and anode of the X-ray tube, should utilizing using deflection coils. This type of electron beam tomography should have a major advantage since sweep speeds should be much faster, permitting for less blurry imaging of moving structures, like the heart, and arteries. Fewer scanners of this design are produced when corresponding with spinning tube types, mainly because of the higher cost connected with creating a much larger X-ray tube and detector array and restricted anatomical coverage.
Dual-source Computerized Tomography
- Dual-source Computerized Tomography is an advanced scanner with a two X-ray tube detector system, unlike conventional single-tube systems. These two detector systems should climb on a single platform at 90 degrees in the same plane. Dual-source Ct scanners permit fast scanning with a higher temporal resolution by developing a full CT piece in only half a rotation. Fast imaging lowers the motion blurring at high heart rates and potentially permits shorter breath-hold time. This is particularly helpful for ill patients who maintain difficulty in holding their breath or are incapable to take heart-rate-lowering medication.
Computerized Tomography perfusion imaging
- Computerized Tomography perfusion imaging is a specific form of CT to evaluate flow via blood vessels whilst injecting a different mechanism. Blood flow, blood transit time, and organ blood volume, should all be estimated with reasonable sensitivity and specificity. This type of CT should be utilized on the heart, although sensitivity and specificity for noticing abnormalities should still be lower than for other forms of Computerized Tomography. perfusion imaging should also be utilized on the brain, whereas Computerized Tomography perfusion imaging should usually detect poor brain perfusion well before it will be detected utilizing a conventional spiral Computerized Tomography scan.
Magnetic Resonance Imaging
- An MRI scan utilizes a radio-frequency pulse under a magnetic field to create a high-resolution image of the body. Magnetic Resonance Imaging should detect foreign bodies with higher accuracy rather than X-ray or computerized tomography. Magnetic Resonance Imaging should not reveal the person to radiation. sedation should be needed to undergo Magnetic Resonance imaging.
Treatment of airway management for choking
- it is utilized to refill a person’s ventilation which contains severity assessment, and procedural planning, and should consist of multiple treatment modalities to refill the airway.
- Treatments will alter based on the severity and stage of airway obstruction. In basic airway management, treatment normally contains anti-choking first aid methods, like the Heimlich maneuver. In advanced airway management, complex methods should be used.
- Airway management involves a set of procedures and medical approaches performed to stop and reduce airway obstruction. This will be achieved by either clearing a previously blocked airway; or by stopping airway obstructions like anaphylaxis, the weakened patient, or medical sedation.
- Airway management is generally divided into two categories: basic and advanced.
- Basic methods are generally non-invasive and should not need specialized medical equipment or advanced training. basic methods involve head and neck movements to optimize ventilation, abdominal thrusts, and back blows.
- Advanced techniques need specialized medical training and equipment, and are also classified anatomically into supraglottic devices like oropharyngeal and nasopharyngeal airways, infraglottic methods like tracheal intubation, and surgical methods like cricothyrotomy and tracheotomy
- Airway management is a primary concern in the fields of cardiopulmonary resuscitation, anesthesia, emergency medicine, intensive care medicine, neonatology, and first aid. The “A” for the airway in the ABC treatment
Basic airway management for choking
- it involves maneuvers that should not require specialized medical equipment in contrast to advanced airway management. It is mostly used in first aid since it is non-invasive, fast, and relatively simple to execute. The simplest way to define if the airway should be obstructed will be by evaluating whether the patient will be able to speak. Basic airway management should be separated into treatment and prevention of a block in the airway.
- Basic airway management is a set of medical processes performed in order to control airway obstruction and therefore provide an open pathway between a patient’s lungs and the outside world. This is achieved by clearing or preventing obstructions of airways, frequently referred to as choking, caused by the tongue, the airways themselves, foreign bodies, or materials from the body itself, such as blood or aspiration. Contrary to advanced airway management, minimal-invasive methods should not trust the use of medical equipment and should be performed without or with slight training. Airway management is a primary need in cardiopulmonary resuscitation, anesthesia, emergency medicine, intensive care medicine, and first aid.
Evaluation of Consciousness of the patient
- Symptoms of airway obstructions involve
- The person should not speak or cry out or have great difficulty and limited capacity to do so.
- Breathing, if possible is struggled, generating gasping, or huffing.
- The person has a forceful and largely spontaneous cough, gurgle, or vomiting noise, though the more serious choking person will have a limited capacity to generate these symptoms since they need at least some air movement.
- The person desperately squeezes his or her throat or mouth or tries to induce vomiting by putting their fingers down to their throat.
- If breathing is not reformed, the person’s face turns blue from lack of oxygen.
Evaluation of Unconscious patient
- Evaluation of an unconscious patient’s breathing will usually be performed by the look, listen, and feel method. The ear is placed beyond the person’s mouth so breathing should be heard and felt while looking for a raised chest or abdomen. The method should not take longer than 10 seconds. As in conscious patients, the stridor breathing sound should be heard if there is an airway obstruction. The backdrop of the tongue results in a snoring sound. In the unconscious patient agonal breathing pattern is usually misunderstood for airway obstructions. If there is a respiratory arrest or agonal breathing CPR will indicate.
Treatment for basic airway management
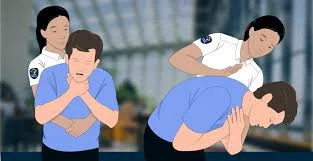
- Treatment of choking in basic airway management involves a number of approaches aiming at removing foreign bodies from the airways. Most modern protocols, involving those of the American Heart Association, American Red Cross, and the European Resuscitation Council, suggest several stages, created to apply to raise. Most protocols suggest inspiring the person to cough, followed by hard back slaps, and if none of these things work; abdominal thrusts (Heimlich maneuver) or chest thrusts. Some methods suggest alternating between abdominal thrusts and back slaps.
- Encouraging the person to cough: This stage will be analyzed in many protocols as it was found that numerous people were too quick to undertake potentially dangerous interventions, like abdominal thrusts, for items that could have been removed without intervention. Also, if the choking is caused by an aggravating substance rather than an obstructing one, and if conscious, the patient should be permitted to drink water on their own to try to clear the throat. Since the airway is already closed, there is a very small danger of water penetrating the lungs. Coughing is normal after most of the patients have cleared the cough, and at this point, the patient will likely refuse any extra water for a short time. because cleared the airway
- Basic Treatment (First Aid): Basic treatment of choking involves several non-invasive procedures to help clear foreign bodies from the airways.
General Strategy: “Five and Five”
- For a conscious choking person, the general protocol of first aid: encouraging the victim to cough, followed by hard back slaps. If the hardback slap attempts should not effective, abdominal thrusts (the Heimlich maneuver) or chest thrusts if the victim should not receive abdominal pressure will be used. There are additional methods available for victims who should not receive pressure to the abdomen like babies or people with disabilities
- If none of these techniques are effective, the protocol by various institutions recommends alternating sequences of back slaps and sequences of thrusts on the abdomen or chest, depending on the person, 5 times each method and repeat five or five.
- In systems in which the general first aid courses are not resolving the choking, involvement of emergency medical services will require and management of first aid should be continued until emergency services come.
- Choking should change the color of the person’s face because of lack of oxygen, which places the person at risk of loss of consciousness and falling to the ground. It should be suggested to avoid panic and start appropriate resuscitation procedures.
Back blows
- encouraging the victim to cough, followed by hard back slaps with the heel of the hand on the upper back of the person. The number to be used varies by a training organization, but is normally between five and twenty. For example, the European Resuscitation Council and the Mayo Clinic suggest five blows between the shoulder blades. The back slap is developed to use percussion to generate pressure behind the blockage, helping the patient in shifting the report. In some cases, the physical vibration of the action should also be enough to cause movement of the report satisfactory to permit clearance of the airway
Abdominal Thrusts (Heimlich Maneuver)
- Abdominal thrusts should be performed with the rescuer hugging the belly of the choking person from the back. Then, the rescuer closes his/her dominant hand, holds it with the other hand, and presses forcefully with hands on the area located between the chest and the belly button of the person, in a direction of inside and upward. abdominal thrusts try to generate enough pressure upwards to remove the object that blocks the airway. The strength should not be concentrated directly against the ribs, to avoid damaging the ribs. If the first thrust should not solve the choking, it should be repeated several times.
- The use of abdominal thrusts should not be suggested for infants under 1 year of age because of the risk of causing injury, so there are transformations for babies, but a kid that is too big for the baby’s transformations would need normal abdominal thrusts according to the size of the body. Besides, abdominal thrusts should not be utilized when the person’s abdomen presents problems to receive the person, like pregnancy, or excessive size; in these cases, chest thrusts should advise
- if of choking alone, abdominal thrusts should be one of the opportunities that should be tried on oneself.
- The goal of abdominal thrusts is to produce enough pressure to remove the object weakened upwards in the airway, relieving the obstruction. Heimlich declared that maneuver is better than back blows, discussing that back blows could cause the block to become more deeply weakened in the person’s airway. That started a discussion in the medical community, that ended up with the guidance of alternating both techniques back blows and abdominal thrusts, but, to stop complications, the back blows would be performed making the patients flex their back and helping the person’s chest. the patient’s chest should be assisted during the back slaps.
- Although it is a well-known technique for choking intervention, the Heimlich Maneuver is supported by little evidence and unclear guidelines. The use of the maneuver is saved much stamina but should create harmful effects if not performed correctly. This includes rib fracture, perforation of the jejunum, and diaphragmatic herniation, among others
Chest Thrusts
- When abdominal thrusts should not be performed on the person such as serious injuries, pregnancy, or belly size that is too large for the savior to actually perform the abdominal thrust method, chest thrusts should advise instead.
- Chest thrusts should be performed with the rescuer hugging the chest of the choking victim from behind. Then, the rescuer closes his/her dominant hand and holds the chest with the other hand. chest thrusts should generate several kinds of fists with the hand, but any of them can be valid if the rescuer should be put on the person’s chest without falling a bend too painfully. Keeping the fist with both hands, the rescuer uses the fist to press forcefully inwards on the lower half of the chest bone sternum. The pressure should not be focused on the very endpoint called the xiphoid process to avoid damaging the xiphoid process. When the victim is a woman, the zone of the pressure of the chest thrusts would generally be above the level of the breasts. If the first thrust should not solve the choking, it should be repeated several times.
Anti-Choking instrument

- anti-choking devices should be based on a mechanical vacuum effect, without a power source. Most utilize a connected mask to create a vacuum from the patient’s nose and mouth. The current models of anti-choking devices are relatively similar: a direct plunger tool like LifeVac, and a vacuum syringe backward syringe that also maintains the tongue in position by inserting a tube in the mouth named the Dechoker tube. anti-choking devices are conveyed to be effective in actual choking cases. Other mechanical models should be in a growth state, such as Life, which produces a vacuum by direct pressure against the patient’s face.
Unconscious Victims
- A choking victim who becomes unconscious must be slightly caught before falling and put lying on a surface. That surface should be firm enough it should suggest positioning a layer of something like a met, a bedsheet on the floor and laying the victim above the met, bedsheet. Emergency medical services must be called if this method of rescuing should not success
- While waiting for emergency services to come, the unconscious choking victim should obtain cardiopulmonary resuscitation for choking victims, which should quite similar to CPR for any other non-breathing patient. Infants less than one-year-old need a special adaption for unconscious babies of that cardiopulmonary resuscitation
- The anti-choking cardiopulmonary resuscitation for unconscious adults or children, but not infants.it is a cycle that alternates a series of compressions with a series of ventilation rescue breaths.
- In that CPR: Each round of compressions applies 30 compressions on the lower half of the chest bone sternum, at an approximate rhythm of nearly 2 per second. After that series, the rescuer looks for the blocking object and, if it is observable, the rescuer makes a try to drag the blocking object, normally by using a finger sweeping. There are no compressions during the drag of the obstructing object step, but, if the removal confuses and takes a lot of time, it should need repeating compressions at some points, obviously without causing blocks to the extraction. The object can be found and removed in this step or not, but the CPR approach must continue anyway until the victim should breathe by his/her self or emergency medical services come. Next, the rescuer applies a rescue breath, squeezing the victim’s nose and puffing air inside of the mouth. It is suggested, additionally, to tilt the victim’s head upward and downward, to reposition the head trying to open an entry for the air, and then give an additional rescue breath. The rescue breaths would normally fail while the object is still inside the airway stopping the airway for rescue breath, but then the rescuer should just continue with the next step. Anyway, rescue can be successful, and then the chest of the victim would rise. When a rescue breath comes from the lungs, it happens because the object has been shifted to an unknown position that goes some open space, so it should be useful to make the next rescue breaths more softly to avoid pushing the object to a new blocking position again, and, in case of the soft rescue breaths are not successful, raising the strength of blowing in the next one’s rescue breath. The color of the victim’s face would improve after several rescue breaths should successful. After the rescue breaths, the resuscitation returns to the 30 initial compressions, in a cycle that repeats continually, until the victims should breathe by themselves.
- An anti-choking device should unblock the airway of an unconscious person but should not necessarily remove the obstructing object from the mouth, which should need manual removal. The person will then require a normal cardiopulmonary resuscitation, in the way that only alternating the 30 compressions and the two rescue breaths.
Finger Sweeping
- It is essential to avoid blindingly cleaning the airway unless there is direct visualization of the airway, in fact, finger-sweeping procedures are instructed only to be executed in more controlled environments such as an operating room. In an unconscious choking person, sweeping fingers across the back of the throat try to remove airway obstructions. Many modern protocols suggest other treatment modalities should superior. Red Cross procedures also advise rescuers not to perform a finger sweep unless an object should be clearly seen in the person’s mouth to stop driving the obstruction deeper into the person’s airway. Other protocols suggest that if the patient is conscious they will be capable to remove the foreign object his/herself, or if the persons are unconscious, the rescuer should put the person in the recovery position to permit the drainage of fluids out of the mouth instead of down the trachea because of gravity. There is also a risk of causing further damage involving vomiting, by using a finger sweep method. the usefulness of the finger sweep method when there is no visible object in the airway. Suggestions for the use of the finger sweep should be based on anecdotal evidence
Advance airway management for choking
- Advanced airway management is the subset of airway management that includes advanced training, skill, and invasiveness. It contains different methods performed to initiate an open or patent airway a clear path between a patient’s lungs and the outside world.
- This is achieved by clearing or preventing obstructions of airways. Obstructions should be caused by many things, involving the patient’s own tongue or other anatomical parts of the airway, foreign bodies, excessive amounts of blood and body fluids, or aspiration of food particles.
- Unlike basic airway management such as head tilt/chin lift or jaw-thrust scheme, advanced airway management depends on the use of medical equipment and advanced training. Specific invasive airway management approaches should be performed blind or with visualization of the glottis. Visualization of the glottis should be performed either directly by using a laryngoscope blade or by using newer video technology options.
- In approximately increasing order of invasiveness is the use of supraglottic devices such as oropharyngeal, nasopharyngeal, and laryngeal mask airways. Laryngeal mask airways should exist be used to provide general anesthesia. These are tracked by infraglottic techniques, such as tracheal intubation, and finally surgical techniques.
- Advanced airway management is a key component in cardiopulmonary resuscitation, anesthesia, emergency medicine, and intensive care medicine. The airway deals with critically ill patients which stand for airway management. Many airways should straightforwardly manage. However, some should be difficult. Such complications should be indicated by the sensitivity and specificity of the various bedside tests commonly used to signify difficulty in airway management.
Pharyngeal airways
- Pharyngeal airway devices should be used in spontaneously breathing patients to move the tongue away from the back of the throat to correct airway patency. Obstruction of the upper airway caused by the tongue most commonly happens during times of reduced levels of consciousness. Pharyngeal airway devices contain nasopharyngeal airways and oropharyngeal airways. pharyngeal devices are the simplest artificial airway devices.
Oropharyngeal airways
- An oropharyngeal airway is a rigid tube that is inserted into the mouth via the oropharynx and set beyond the tongue to move the tongue away from the back of the throat. oropharynx should be more commonly used than the nasopharyngeal airways. Oropharyngeal airways should only be used in completely unresponsive or unconscious patients without a gag reflex. Placement of the device might stimulate the gag reflex and cause vomiting, aspiration, and laryngospasm. Complications from Oropharyngeal airway placement involve damage to the teeth and the lingual nerve, which might cause changes in the taste and sensation of the tongue.
Nasopharyngeal airways
- A nasopharyngeal airway is a flexible tube that is passed via the nose into the back of the throat. Nasopharyngeal airways are the artificial airways of choice in patients who are conscious and have intact gag reflexes because Nasopharyngeal airways should less likely to stimulate the gag reflex rather than oropharyngeal airways. Nasopharyngeal airways should also be used in other situations where oropharyngeal airways should not, such as in patients with restricted mouth opening or oral trauma. Nasopharyngeal airways should normally not be advised if there is doubt of a fracture to the base of the skull because of the risk of the tube entering the cranium. Nasopharyngeal airways should also contraindicate in the presence of significant facial trauma. Epistaxis is a complication of Nasopharyngeal airways that might result from the use of excessive force during placement.
Extraglottic airways
- Extraglottic airway devices make a patent airway without entering the trachea. Extraglottic airway devices are highly effective for supplying oxygenation and ventilation. Extraglottic airways should be used as primary airway devices, such as during cardiopulmonary resuscitation, or as rescue devices in situations where securing an airway using other devices has failed. Extraglottic airways should be particularly good savior devices for obese patients and patients with significant facial trauma. Extraglottic airways should not protect the trachea from blockage or aspiration. Extraglottic airways might be used for several hours until a definitive airway should be secured.
- Each type of Extraglottic airway has different features, involving the ability to remove air from the stomach gastric decompression and perform tracheal intubation. All Extraglottic airways should be positioned without directly seeing the glottis also called “blind” placement. Extraglottic airways can be classified into supraglottic airways and retro-glottic airways.
Supraglottic airways
- Supraglottic airway devices make a seal beyond the glottic opening to transmit oxygen directly into the trachea. The Supraglottic airways consist wholly of laryngeal masks. Several manufacturers produce Supraglottic airway devices, the most well-known being the laryngeal mask airway. Success rates of Supraglottic airways in connecting airways should similar between the different models, and Supraglottic airways devices supply effective ventilation in more than 98 percent of patients. Supraglottic airways should be positioned in under 30 seconds, making the Supraglottic airways devices advantageous for emergency use. Serious complications should and normally result from nerve and soft tissue trauma in the pharynx during placement.
Retroglottic airways
- Retroglottic airway devices should pass behind the glottis and into the esophagus to make a seal permitting oxygen to be delivered directly to the trachea. The Retroglottic airways are developed as laryngeal tubes. the effectiveness of the Retroglottic airways is lacking. Like supraglottic airways, most complications from Retroglottic airways result from trauma to the pharynx during placement
Particular cases of the choking
Infants
- The majority of choking injuries and fatalities happen in children aged 0 to 4 years, highlighting the importance of the widespread circulation of the appropriate anti-choking techniques for infant age groups. In fact, increased parental education should reduce choking rates among children.
- For infants under 1 year old, The size of the children’s body is the most essential aspect in specifying the correct anti-choking technique. Children who should be too large for the babies’ approaches require the standard first aid techniques against choking.
Unconscious Infants
- If the infant becomes unconscious, emergency medical services might be called. Until emergency services reach suggests starting an anti-choking cardiopulmonary resuscitation (CPR) modification for infants. In this procedure, the baby is placed face-up on a firm, horizontal surface the floor should be used. The baby’s head might be in a straight position, looking frontally, because tilting too much a baby’s head backward should close the entrance to the trachea. Then, it is applied a cycle of resuscitation that rotates compressions and rescue breaths, like in normal CPR, but with some differences:
- The rescuer makes 30 compressions with just two fingers in the lower half of the chest bone (sternum), at an about rhythm of nearly 2 per second. At the end of the round of compressions, the rescuer looks into the mouth for the obstructing thing. And, if it is visible, the rescuer makes an attempt to remove the thing primarily using a finger sweep. If the removal is complicated and takes too much time, it should need repeated compressions at some moments, without restricting the extraction. A rescuer that already knows that the choking thing is a bag or similar like that should not need to see the object before attempting to remove it because there should be no risk of falling the thing much deeper, and it should easy to notice by using the touch over sternum carefully. Being an object removed or not, the cardiopulmonary resuscitation procedure must persist until the babies should breathe by themselves. Next, the rescuer makes a rescue breath, covering the baby’s mouth and nose simultaneously with the rescuer’s own mouth, and blowing air inside. After that first rescue breath, it should be instructed to tilt the baby’s head upward and downward but leave the head about straight also, trying to open a space for the air in mouth to nose manner, and then give an extra rescue breath. The rescue breaths normally fail while the object will still blocking, but then the rescuer should only continue with the next step. and then the chest of the baby should be seen raising. If a rescue breath reaches the baby’s lungs, it should because the thing should move to an unknown situation that exits some open space, so it should be useful to create the next rescue breaths more softly to neglect to move the object to a new blocking situation again, and, in case of those soft rescue, breaths are not successful, improving the strength of blowing in the next ones. But it must be noted that the bodies of the babies should soft, and, when the airway should not block, only a little force in blowing should be sufficient to fill the infant’s lungs. The infant’s color would improve after some successful rescue breaths. After the rescue breaths, the rescuer should return to the 30 initial compressions, repeating the same resuscitation cycle again for the infants
Patients who are Pregnant or have Obesity
- Some choking victims should not obtain pressure on their bellies, replacing abdominal thrusts with chest thrusts.
- These victims should involve patients with serious injuries in the abdomen, pregnant women, and obese patients. Yet, in the case of obese victims, if the rescuer should capable sufficiently to effectively cover their arms near the circumference of the victim’s abdomen, it should possible to use normal first aid against choking, with abdominal thrusts.
- Chest thrusts should be conducted in a similar way to the abdominal thrusts, but with the fist positioned on the lower half of the chest bone (sternum), rather than beyond the middle of the abdomen. in women, the area of the pressure of the chest thrusts would be generally higher than the breasts. It should suitable to avoid putting the fingers too painfully. Finally, strong inward thrusts should then be applied.
- The rest of the first aid protocol will be the same, starting with asking the victim to cough freely, and then, if the victim should not cough, the sequence of chest thrust should be rotated with a series of slaps on the back. Those back slaps should be used normally: bending forward the back of the person and supporting his/her chest with one hand.
- if the pregnant woman is still not conscious call the emergency medical service for general first aid treatment and check the vitals, and an attempt should carry on to become the pregnant woman conscious till the emergency medical care should not reach the marked location
In Wheelchair choking
- If choking occurs in a person in a wheelchair, the method will parallel the case of the other victims. The difference is in attempting to apply the methods instantly, while the person will be seated in the wheelchair.
- Coughing should be promoted first before using the techniques. When the person should not cough, it will suggest an alternating sequel of back blows and thrusts, as in other cases.
- Back blows (back slaps) should be utilized after bending forward the back of the person very greatly and supporting the person’s chest with the other hand.
- Abdominal and chest thrusts should also be used. To perform the abdominal thrusts, the rescuer must reach behind the wheelchair. Then the rescuer should adopt the person’s abdomen from the back and overhead, leaning beyond the top of the wheelchair’s backrest. If this will too difficult, then the rescuer should get down and adopt the person from after the person’s abdomen and the wheelchair’s backrest all things together. In little spaces that should not be opened, the position should be achieved by turning the person to one side. Finally, the rescuer would grasp the own hand with the other hand, put the hands between the chest and the belly button of the person, and apply sudden pressures with hands-on that zone, in a direction of inward and upward. If the person should not receive abdominal thrusts having serious injuries in the belly, and others, chest thrusts might be used instead. chest thrusts should be applied while the person is in the wheelchair too, but creating sudden inward pressures on the lower half of the breast bone. If the space is too limited and impossible to enlarge,
- An alternate of back slaps and thrusts series will be used until the choking should solve, as in other victims.
- If choking stays unresolved, calling emergency medical services is vital and first aid should be continued until they arrive.
- If a victim of choking in a wheelchair becomes unconscious, it is required anti-chocking cardiopulmonary resuscitation and is precisely the same as in the case of non-disabled persons choking. Anyway, it was noted that the person requires to be taken from the wheelchair to be placed lying face-up on a suitable surface not too hard or too soft, and it is feasible to put a layer of something like a bedsheet between the floor and the victim. When the person comes, the rescuer applies anti-choking cardiopulmonary resuscitation for unconscious victims.
- As a preventive measure, it is convenient to avoid placing patients with disabilities in narrow and covered spaces at mealtimes, as more open spaces permit easier access for rescuers. Besides, putting an anti-choking device nearby is like nearby a common safety measure in environments.
Bedridden Patient with choking
- If the choking victim should lie in bed, but conscious and unable to sit up like in patients with disabilities or injuries, the first aid would be the same but performed by sitting the patient on the end range of the treatment table
- Before changing the patient’s position, the rescuer tries that the person coughs freely and with strength. The person would cough better by turning to one side. When coughing should be too difficult or impossible, the rescuer would sit the person on the bed’s end range, to make coughing easier or to apply the anti-choking maneuvers these should be required if the victim should not cough.
- This can be achieved by holding the person by the legs behind the knees, or by the calf muscle or ankles and turning the knees until the knees should be out of the bed. Next, the rescuer would sit the person upward on the end range of the bed, drawing the shoulders or arms in the forearms or wrists. Then it should possible to apply the anti-choking maneuvers from the posterior: a series of back slaps after bending too much the back of the victim and supporting the chest with one hand and a series of abdominal thrusts sudden compressions on the part of the victim’s belly that is between the chest and the belly button, in a direction of inward and upward. When the victim should not receive abdominal thrusts. rescuer must be changed the method for chest thrusts and sudden inward pressures on the lower half of the breast bone.
- When a rescuer should not able to sit the victim upward, it is possible to perform chest or abdominal thrusts frontally while the victim should lie on the bed despite the abdominal and chest would be less effective in that horizontal position. in a downward and frontward movement between the chest and the belly button.
- When the victims of choking in bed become unconscious, victims require the same anti-choking cardiopulmonary resuscitation technique that is used for other unconscious choking victims.
- significantly, it is important to know that eating while laying in bed grows the risk of choking. When a person with a disability or injury should present, a common measure of prevention is placing an anti-choking device in a proper space.
On the Floor, a person with a Disability or Injury
- It should possible, though rare, that a choking victim should be lying on the floor but conscious. someone has a disability that creates the person impossible to sit up and to keep standing up on his/her own feet. in this case, also the first aid is the same, but after sitting the person on the floor.
- A rescuer would sit the victim up by drawing the shoulders or arms in the forearms or wrists. When the victim is sitting up, the rescuer will sit behind the person to apply the anti-choking maneuvers: back slaps and abdominal thrusts. When victims should not receive abdominal thrusts properly (as the seriously injured in the belly, and the pregnant women), rescuers should require to change the approaches for chest thrusts to instant pressures inward on the lower half of the breast bone.
- In some conditions, it will impossible to sit the victim up, and then the rescuer should try one of the thrust techniques frontally on the laying victim despite it would make them lose effectivity. Anyway, the method should be made by putting one hand on top of the other and using them to make strong pressure downwards on the lower half of the breast bone the sternum, or downwards and forwards on the abdomen in the middle of the chest and the belly button.
- If choking stays unresolved, calling emergency medical services is vital and first aid should be continued until they reach the.
- If the victim will unconscious, he/she should need the same anti-choking cardiopulmonary resuscitation method that was used in other unconscious choking victims.
- In the prevention of choking, it should be remembered the practice of placing an anti-choking device around people with disabilities.
Seizing a Victim with choking
- Seizing should happen for a multitude of reasons but is common in those diagnosed with epilepsy. During a seizure, victims should experience strangulation or throat constriction during consciousness. The victim will not have control of their bodily functions and will require someone to create a safe area for approaches. One should clear a space where the victim can lie down and remove or loosen anything that is around their neck. Then one should turn the person sideways to help the person breathe and to stop potentially choking on the saliva.
- for all the particular cases of choking maneuvers should be either change or alter depending upon the person’s ability and condition
Self-Treatment for choking
- First aid anti-choking techniques can be applied to oneself if others are not around to perform general first aid. This should contain bringing an approved anti-choking device nearby or performing first aid techniques on oneself, mainly by his/her own hand:
- The most widely recommended maneuver consists of positioning one’s own abdomen over the border of an object: usually a chairback, but it could work on an armchair, railing, or countertop, and then pushing the abdomen upon the boundary, creating sharp thrusts in an inwards-an-upwards direction. It is possible to place a fist or both fists between the selected border and the belly, to raise the pressure of the maneuver and make it easier depending on the situation. It is also possible to try to fall on the edge, aiming to achieve more pressure in that way. Another variation of this consists in pressing one’s own belly with an appropriate object, in an inwards-and-upwards direction.
- Additionally, abdominal thrusts should be self-applied only with the hands. This should be achieved by making a fist, grasping it with the other hand, and placing hands on the area located between the chest and the belly button. Then the body should bend forward and the hands made strong compressions pressing in an inwards-an-upwards direction. it is concluded that the self-administered abdominal thrusts were as effective as those performed by another person.
- When certain procedures make it impossible for self-treatment with abdominal thrusts like serious injuries, pregnancy, or obesity, the self-application of chest thrusts will advise, although more difficult. It is suitable to relax the chest for a better blowout. Another variation of this is the use of an appropriate object to press inwards at the same point, being equally suitable to receive the compressions when the chest is relaxed.
- Making tries to cough, when it is possible, should also benefit in clearing the airway.
- Alternatively, multiple sources of evidence suggest applying the head-down inverse position is a promising self-treatment. To perform this maneuver, place the hands on the floor and then place the knees on an upper seat as on a bed, a sofa, or an armchair. Other movements up or down should be tried in this position.
Risk factors of choking
- foreign body airway obstruction for people of any age involves the use of alcohol or sedatives, techniques including the oral cavity or pharynx, oral instruments, or medical conditions that cause difficulty in swallowing or damage the cough reflex. In older adults, risk factors also involve living alone, wearing dentures, and having difficulty swallowing. Children and adults with neurological disorders such as stroke, Parkinson’s, Alzheimer’s disease, and cognitive, or psychiatric disorders should be at a raised risk of choking and should experience a delay in diagnosis because no known history of a foreign body joining the airway.
- Choking on food is only one type of airway obstruction; others contain blockage because of tumors, swelling and inflammation of the airway tissues from organic foreign bodies, and compression of the laryngopharynx, larynx, or vertebrate trachea in strangulation. Foreign bodies should also enter the reparatory tract via the chest wall, such as in the area of a gunshot injury.
Foods
- Hot dogs particularly cut into a coin shape, meats, links, and fish with bones
- Popcorn, chips, pretzel chunks, and snack foods
- Candy particularly hard or sticky candy, cough drops, gum, lollipops, marshmallows, caramels, hard candies, jelly beans, etc.
- Whole grapes, raw vegetables, raw peas, fruits, fruits with skins, seeds, carrots, celery, cherries, etc.
- Dried fruits, sunflower seeds, and all nuts, involving peanuts
- Peanut butter, particularly in spoonfuls or with soft white bread
- Ice cubes and cheese cubes
- Foods that clot, are sticky or slippery, or dry and hard textured
- Food size and shape, specifically round or a shape that should declare the shape and size of the trachea windpipe. The size of a young child’s trachea windpipe or breathing tube is around the size of a drinking straw in diameter.
- Combinations of food size, smoothness, and shape should pose a danger. a slippery hard candy with a round shape around the size of a drinking straw could block an airway windpipe
- Household Items and Toys which include balloons, coins, marbles, toys with mini parts, mini balls, pen or marker caps, button type batteries, medicine syringes, screws, stuffing from a bean bag chair, rings, earrings, crayons, erasers, staples, safety pins, small stones, small figures, and holiday decorations involving ornaments and lights
Precautions and Prevention for choking
- Never leave a small child alone while he/she eating. Direct supervision must essential.
- Children should sit up straight when eating, should have an acceptable number of teeth, and the muscular and developmental capability required to chew and swallow the foods chosen. Remember, not all kids will be at the same developmental level. Children with special health care requirements should be especially powerless to choking risks.
- Children should have a calm, slow meal and snack time.
- Children should not consume a portion of food when walking, riding in a car, or playing.
- Cut foods into small pieces, takeout seeds, and pits. Cook or boil vegetables to soften their texture. Cut hot dogs lengthwise and widthwise.
- Model safe eating habits and chew food entirely.
- Offer enough liquids to children when eating, but solids and liquids should not be consumed at equal times. Offer liquids between bites.
- Use just a small amount of peanut butter when the kid is ready and use it with jelly, or cream cheese on whole-grain pieces of bread. peanut butter can stick to the roof of a child’s mouth and form a chunk.
- Think of shape, size, consistency, and combinations of these when selecting foods.
- Pay particular concentration to those foods, toys and household dangers mentioned that pose choking risks to assure child safety.
- instructs the caregivers and the community about choking risks and precautions to take to prevent choking. Recognize emergency resources and contacts.
- Become familiar with life-saving techniques such as child cardiopulmonary resuscitation, Heimlich Maneuver, Automated External Defibrillators, or calling 911.
Hydration
- A simple prevention tip should be to drink a small amount of water before taking the pill. Keeping the throat moist will make the throat much less likely that the pill will grab onto the throat while a person is swallowing.
- Some pills may tend to be drier than others, and some people simply tend to have issues with pills getting choked in their throats.
- In hydration, should help to drink water before taking the pill, swallow the pill with a big glass of water, and continue drinking water after swallowing the pill.
Relaxation
- Sometimes, the muscles in the throat should be too compressed when taking the pill. relaxation should help to relax the throat muscles by leaning the head forward while swallowing.
- relaxation should also assist to provide the pill with as little resistance to gravity as possible. This should mean sitting up or standing when taking the pill, as lying downward should make the pill harder to swallow. Take the pill with something else
- If a person should take the pill with food, a few smooth foods should make the pill easier to swallow. Foods to try involve:
- mashed potatoes, applesauce, yogurt, smoothies
- Chewing up a bite of food totally and then adding the pill to the mouth before swallowing the whole piece should also help.
- Opening or crushing the pill
- Talk to a doctor or pharmacist regarding the possibility of powdering the pill. before choking the pill in the throat
- Some pills should work only as well if the person grinds the pills into a powder or drains the capsule. Then the person may simply mix the powder with a liquid or smooth food to bring it.
- This may not be suitable for every pill, however, and the effects of the drug should change depending on how the person takes the pill.
- Always consult a doctor or pharmacist before taking the pills
prevention of basic airway
- Prevention strategies focus on preventing the tongue from falling back and obstructing the airways, like head-tilt/chin-lift, and jaw-thrust maneuvers, while the use of the recovery position specifically prevents aspiration of things like stomach content or blood. If head-tilt chin-lift and jaw-thrust maneuvers should perform with any objects in the airways it might remove the objects further down the airways and thereby cause more blockage and harder removal.
- The head-tilt/chin-lift is the basic maneuver used in any patient in whom cervical spine injury is not a problem. The simplest way of assuring an open airway in an unconscious patient is by using a head-tilt/chin-lift approach, thereby lifting the tongue from the back of the throat. The maneuver should perform by tilting the head backward in unconscious patients, frequently by applying pressure to the forehead and the chin. Head-tilt/chin-lift is taught in most of the first aid courses as the standard route of clearing an airway.
- The jaw-thrust maneuver is an effective airway method, particularly in patients in whom cervical spine injury is a situation. The jaw thrust is a technique used on patients with a suspected spinal injury and should also use on a supine patient. The practitioner uses their index finger and middle fingers to physically push the posterior aspects of the mandible upwards while the practitioner’s thumbs push down on the chin to open the mouth. When the mandible should be displaced forward, it drags the tongue forward and prevents the tongue from blocking the entrance to the trachea.
- The recovery position directs to one of a sequence of variations on a lateral position or three-quarters prone position of the body, in which an unconscious but breathing loss should be placed. The benefit of the recovery position prevents aspiration.
- Most airway maneuvers are related to some movement of the cervical spine. Actually, though collars for holding the head in line should cause problems maintaining an airway and maintaining blood pressure, it is not recommended to remove the collar without satisfactory people to manually hold the head in place.
Prevention for Babies and Children
- All young children require care in eating and must learn to chew their food completely to avoid choking. Feeding young children while they are running, playing, laughing, etc. raises the risk of choking. Caregivers must watch children while eating or playing. Pediatricians and dentists should provide information on various age groups to parents and caregivers about what food and toys should be appropriate to prevent choking. The American Academy of Pediatricians suggests waiting until 6 months of age before presenting solid foods to infants. Caregivers should avoid giving food to children younger than 5 years old that pose a high risk of choking, such as hot dog pieces, bananas, cheese sticks, and chunks. Later, when the young child is habituated to the foods, it is suggested to serve them and divide them into small pieces. Some foods such as hot dogs, bananas, or grapes should normally be split lengthwise, sliced, or both. Parents, teachers, and other caregivers for children should be advised to be trained in choking first aid and cardiopulmonary resuscitation
- Children readily put small objects into their mouths, which can lead to choking. A complicated obstruction for babies is choking on reduced balloons including preservatives or plastic bags. This also includes the nappy bags, used for covering dirty diapers, which should sometimes be dangerously placed near the babies. To prevent children from swallowing things, precautions must be taken in the environment to keep dangerous objects out of their reach. Small children must be observed closely and taught to avoid putting things into his/her mouths. Toys and games might indicate on the things packages the ages for which young children are safe. In the united states, children’s toy and product manufacturers are needed by law to apply appropriate warning labels to their packaging, but toys that should be resold may not have warning labels. Caregivers can try to prevent choking by considering the features of a toy like size, shape, texture, and small parts before giving it to a child Children’s products that are found to pose a choking risk must be taken off the market.
- Small Parts Test Fixture is used to specify whether toys and other products pose a choking risk to children under 3 years old
Anticipatory Guidance from Pediatricians
- As a part of good visits, pediatricians give education to parents and their children regarding their development. Contained in these visits is anticipatory guidance, which provides guidance to parents and children as prior prevention of disease and illness containing choking. for a child that will 7 to 9 months old, children start to develop a pincer grasp that permits them to reach for objects. The ability to place these objects in their mouths especially increases choking risk.
anticipatory guidance for children 7 to 9 months old
- Infants should avoid moving when feeding like riding in a car or stroller toy. Infants should be sitting properly and remain still to maintain that position.
- Infants should be observed when feeding including children younger than 3 years old
- Infants will attempt to feed themselves. avoid some foods which should Difficult to swallow foods like peanut butter and marshmallows should be given with a warning.
- Specifically, toys like marbles, balls, and balloons should not be given to children younger than 3 years old.
Regulations for Children
- Several laws and councils are aimed at preventing choking hazards in children. alongside the passing of the Consumer Products Safety Act, the Consumer Product Safety Commission handles consumer projects that may pose an “unreasonable risk” of injury to its users. The Consumer Products Safety Act permitted the consumer product safety commission to prohibit or place alerts on objects that could harm clients. A Small Parts Test Fixture is a cylinder measuring 2.25 inches long by 1.25 inches wide that determines whether a choking hazarding warning will be put on the product Also, the Consumer Product Safety Improvement needs any advertisements or websites regarding the sale of a product to display choking hazard warnings.
- the warning labels are an effective preventive step against choking accidents. Items that include many parts must contain pieces that should be considered choking hazards. Labels on children’s toys must display instructed age ranges, and other items must carry a warning sign. Warning labels are clearly placed and written, normally involving an obvious image.
- While products should be covered, there are currently no Food and Drug Administration regulations regarding food choking hazards.
Prevention for Other Groups at Risk
- Some population groups must a higher choking risk, such as the elderly, persons with disabilities physically or mentally, individuals under the effects of alcohol or drugs, people who have taken medications that reduce the ability to salivate or respond, patients with difficulties in swallowing (dysphagia), suicidal people, people with epilepsy, and people on the autism spectrum disorder. People just need more assistance to feed themselves, and it should be essential to observe that people while they eat. People who should unable to chew properly should not be served hard food. In cases where a person is not able to safely eat, food should be given by feeding syringes. People who have taken any medication that lessens saliva should not eat solid food until the people’s salivation will be restored.
Treatment for difficulty in swallowing for choking
Effortful Swallow
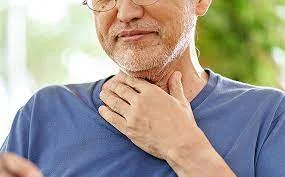
- Purpose: Improve the touch and coordination between the different muscles utilized while swallowing
- Step 1: Collect the salivary secretion in the mouth in the center of the tongue.
- Step 2: Keep the lips pressed together.
- Step 3: Swallow all over the salivary secretions at once time like swallowing grapes or/and a pill.
Dynamic Shaker
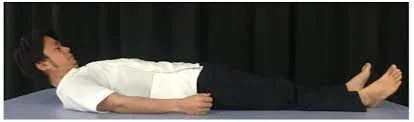
- Purpose: To strengthen muscles and improve the capability to swallow
- Step 1: Lie on the back supine lying on a flat surface or treatment table. Make sure the shoulders will be against the surface and will not use a pillow or/and headrest.
- Step 2: To manage the shoulders on the flat surface, lift up the chin as if attempting to look at the feet.
- Step 3: Lower the head down to the flat surface.
- Step 4: Repeat 30 times. Then rest for 2 minutes. Repeat more times as suggested by a therapist.
Jaw Thrust
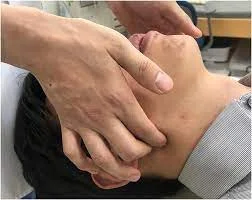
- Step 1: provide thrust the lower jaw as far front side as likely, putting the lower teeth in front of the upper teeth.
- Step 2: Hold the position of jaw thrust for the dose of time decided by the doctor or/and therapist.
- Step 3: Repeat the jaw thrust more times as the doctor or physical therapist suggests.
Masako Maneuver

- Step 1: stick the tongue out of the mouth.
- Step 2: Bite down softly on the tongue to hold the tongue in place.
- Step 3: Swallow the salivary secretion while maintaining the tongue in the center of the teeth.
- Step 4: Release the tongue. Then, repeat more times as told by a doctor or therapist.
Mendelsohn Maneuver
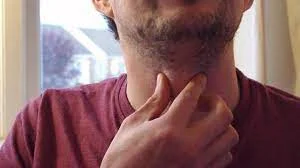
- Step 1: Press the index, middle, and ring finger of one hand either right or left on the neck to find your apple the small bump, or/and positively the skin on the front side of the neck under the chin.
- Step 2: Swallow the salivary secretion one time, seeing how the apple moves ups and downs when you swallow.
- Step 3: Swallow again, but this time, squeeze the throat muscles to maintain the apple at its most important point.
- Step 4: Hold the maneuver for a prolonged time told by the therapist, or as long as you should if you shouldn’t yet hold for that long.
Supraglottic Maneuver

- Purpose: Improves the capability to swallow food
- Step 1: collect a dose of saliva in the mouth.
- Step 2: Take a deep breath/inhalation and maintain that deep breath/inhalation.
- Step 3: Swallow the saliva while holding your breath.
- Step 4: Instantly after swallowing, cough.
- Step 5: Once you should swallow downward with saliva, you should attempt to take the food or drink, at the place of a therapist’s suggestion.
Hyoid Lift Maneuver

- Purpose: Forms swallowing muscle strength and control
- Step 1: collect materials like a drinking straw, pieces of paper towel, and a glass. You should start with 3 to 5 pieces of paper and perform up to 10 times as strength raise.
- Step 2: Position the straw in the mouth.
- Step 3: absorb anything with the straw, and take up a piece of paper with the suction that forms.
- Step 4: Hold the suction strong enough to obtain each/every piece of paper beyond a cup.
- Step 5: Stop absorbing and allow the paper to fall down into the cup.
- Step 6: Repeat till all pieces of paper drop down in the cup.
straw drink: Put a straw into a glass and the other flat end against the upper teeth. Position the tip of the tongue on the spot with elastic. close the lips tightly. You must keep the teeth jointly, then time start for the drinking process. Goal: suck up a one-fourth cup of water in under 30 seconds
balloon pops: Fill the cheeks with the air, close the lips tightly, and use a flat hand to immediately squeeze the air out with a burst of sound.
blowing balloon utilizing the nose
Ways to remove food choking in the throat
- The following methods should assist in removing food that’s become stuck in the esophagus.
The ‘Coca-Cola’ trick
- drinking a Coke, or another carbonated beverage should help remove food from stuck in the esophagus. Doctors and emergency workers usually use this simple method to split up food.
- Although doctors don’t know precisely how the coca-cola trick works, doctors believeTrusted Source that the carbon dioxide gas in soda benefits spoil food. It’s also assumed that some of the soda reaches into the stomach, which then removes gas. The pressure of the gas should remove the stuck food.
- Try a few bottles of diet soda or seltzer water at home instantly after observing the choking food. Purchase seltzer water online.
Simethicone
- Over-the-counter medications developed to treat gas pain should help to remove food chokes in the esophagus. In the same way as carbonated sodas, medications containing simethicone (Gas-X) make removing food chokes easier for the stomach to generate gas. This gas raises the pressure in the esophagus and should push the food loose.
- Follow the standard dosing instruction on the package. Shop for simethicone medications.
Water
- A few big glasses of water should help to wash down the food stuck in the esophagus. Generally, the saliva generates enough lubrication to help the food fall easily down the esophagus. If the food wasn’t chewed correctly, it might be too dry. Repeated glasses of water should moisten the stuck food, making that stuck food go down more smoothly.
A watery piece of food
- It should feel uncomfortable to swallow something else, but occasionally one food should help to push another food down. Try dipping a piece of bread in water or milk to soften it, and take fewer little bites.
- Another effective option should be to grab a bite of a banana, a naturally soft food.
Alka-Seltzer or baking soda
- An effervescent drug like Alka-Seltzer should help to break down food that’s stuck in the throat. Effervescent drugs go from a solid to a liquid state when mixed with a liquid. Similar to soda, the bubbles generate when mixed should help spoil the food and produce pressure that will remove it.
- If you don’t have Alka-Seltzer, you should attempt mixing some baking soda sodium bicarbonate, with water. This mixture should help remove food in the same way. purchase for sodium bicarbonate.
Butter
- Sometimes the esophagus requires an extra bit of lubrication. As disliked as it may sound, it should help to eat a tablespoon of butter. butter must occasionally assist to moisten the lining of the esophagus and make it easier for the stuck food to push down into your stomach. Wait it out. Food that gets stuck in the throat generally passes on its own, given some time. Give it the chance to the body to do its own thing.
FAQs
What Should I Do if Someone begins to Choke?
Choking is an emergency. Call 911 emergency medical services. should not attempt to drive a car to the choking person to reach a hospital emergency department. It is best not to do anything if the person should cough strongly and does not turn a bluish color. Ask the person, Are you choking? If the person will capable to answer you by speaking, it should be a partial airway block. Stay with the person and motivate him or her to cough until the obstruction should clear.
should not provide the person with anything to drink because fluids might bring up space required for the passage of air. Somebody who should not answer by speaking and only nod movement of the head has a complete airway obstruction and requires emergency help.
What should I do if back blows don’t stop the individual from choking?
If back blows do not stop the blockage, stand behind the person, join the hands around the person’s tummy, and make a fist. Drag the hands smartly inwards and upwards. Repeat up to five times.
This is occasionally called the Heimlich maneuver or abdominal thrust.
What are important facts about choking?
Choking is the fourth leading cause of unintentional death in children under the age of 5 years. Children under the age of 5 years must be at the greatest risk for choking injury and death. Toys, household items, and food must all be choking risks. The most typical cause of nonfatal choking in immature children is food.
How long can a human survive choking?
To completely close down the trachea (windpipe), three times as much pressure as 33 lbs is necessary. Brain death will happen in 4 to 5 minutes if choking still remain.
Can choking cause brain damage?
A choking person’s airway may be blocked so that not sufficient oxygen reaches the lungs. Without oxygen, brain damage should occur in as little as 4 to 6 minutes.
What is the fear of choking called?
Phagophobia and swallowing phobia are other usually used synonyms for choking phobia. It is supreme importance to differentiate choking from organic dysphagia before labeling choking to be of psychogenic origin.
Where do most of the choking happen?
Choking happens when a foreign body obstructs the airway. This obstruction can be located in the pharynx, the larynx, the trachea, or the lower respiratory tract
Does choking increase with age?
People beyond 65 years of age have a 7 times higher risk for choking on food rather than children aged 1 to 4 years. The surface of the food-modified foods must be provided clinically to reduce choking risk and manage dysphagia.
What is the best way to prevent choking?
Cut all the food into small pieces.
Chew the food gradually and entirely, particularly if wearing dentures.
Avoid laughing and speaking while chewing and swallowing the food.
Avoid extreme intake of alcohol before and during meals.
do swallowing exercises
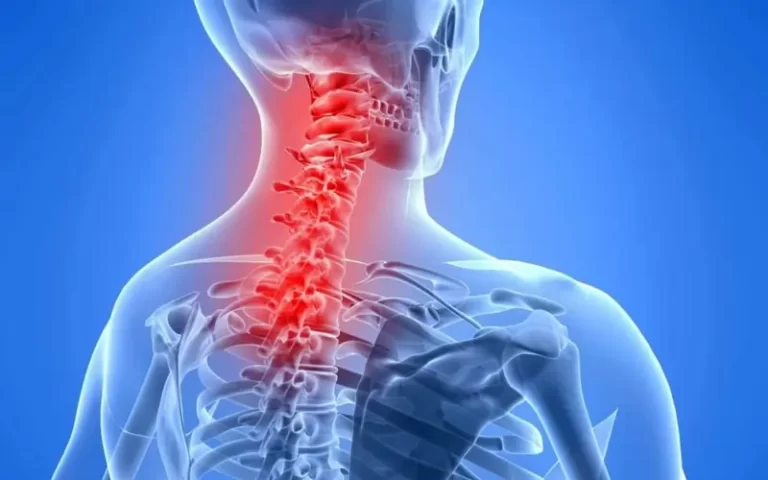
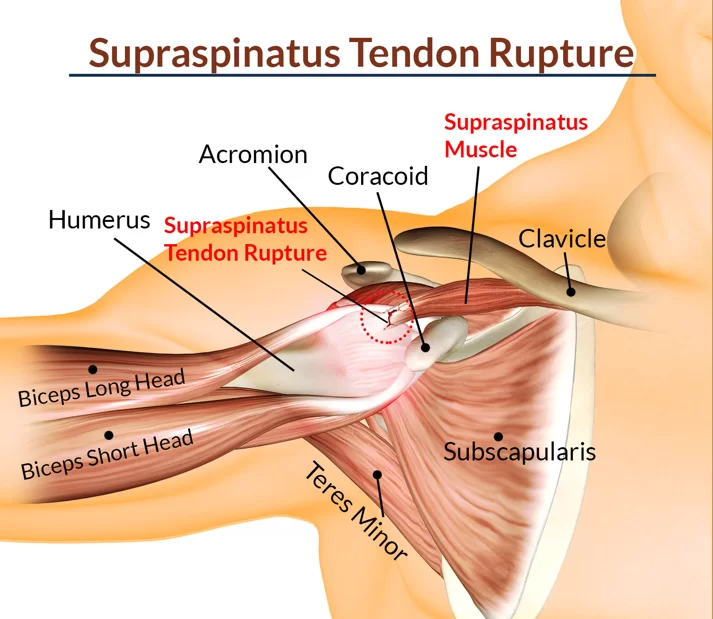
One Comment