
Compartment Syndrome of the forearm: Cause, Symptoms, Diagnosis, Treatment
What is Compartment Syndrome of the forearm?
Compartment means a group of muscles, blood vessels, and nerves. A thin but firm covering called a fascia lies over each compartment. It keeps the muscles in place. But the fascia is not meant to stretch or expanded much. This Syndrome of the forearm is a condition in which pressure inside the closed osteofascial compartment raises to such an extent that there is a compromise of microcirculation, leading to tissue damage.
This syndrome is a condition in which raised tissue pressure within a limited space compromises the circulation and function of the contents of that space. This happens when pressure is raised over a certain level for some time sufficient to decrease capillary perfusion. The insufficient tissue perfusion then leads to inadequate tissue oxygenation to the nerves as well as muscles within the affected compartment. This syndrome occurs when pressure rises in and around muscles.
The pressure is painful and also can be dangerous. This syndrome can limit the flow of blood, oxygen, and nutrients to muscles and nerves. It can cause serious damage. This syndrome occurs most often in the lower leg. But it can also impact other parts of the leg, as well as the arms, hands, abdomen (belly), buttocks, and feet. It can be described as bleeding or edema that leads to raised pressure within the fascial compartment and compromises circulation within that space, as well as the function of tissues in that area, causing ischemia. It may or may not be a fracture or traumatic injury. Although uncommon, this syndrome of the forearm is a well-recognized diagnosis that can lead to significant morbidity and mortality if not diagnosed and treated early in the clinical course.
This syndrome usually results from bleeding and swelling after an injury. The dangerously high pressure in compartment syndrome disrupts the flow of blood to and from the affected tissues. It can be an emergency, requiring surgery to avoid permanent injury. This pressure can reduce blood flow, which avoid nourishment and oxygen from reaching nerve and muscle cells. though this condition can occur in many areas of the body, This syndrome is a painful and potentially serious condition caused by bleeding or swelling within an enclosed bundle of muscles also known as a muscle compartment Each group of muscles in the arms and legs, together with nearby blood vessels and nerves, is contained in a space surrounded by tissue called fascia. This syndrome occurs when the pressure within a compartment raises, disrupts the blood flow to the area, and potentially damages the muscles and nearby nerves.
There are 2 types of compartment syndrome.
- Acute compartment syndrome
- Chronic compartment syndrome
1.Acute compartment syndrome
This type of compartment syndrome is having severe symptoms for a short period.
It is usually caused by a bad injury and is a medical emergency. It is usually caused by a severe injury and is acutely painful. Without treatment, it can permanently damage muscles. It can also lead to disability and paralysis. This type of compartment syndrome generally occurs after you experience a major injury. In a few cases, it can also be developed after a minor injury. most common symptom of acute compartment syndrome is severe pain that does not improve after keeping the injured area raised or taking medication. Your leg or arm may feel damage when you stretch it or use the injured muscle.
Another symptom may include a feeling of tightness in the muscle or a tingling or burning sensation in the skin around the affected area. These Symptoms of advanced acute compartment syndrome can include numbness or paralysis. This is generally a sign of permanent damage.
Without treatment, it can cause permanent muscle damage. generally, a fracture or severe injury is a medical emergency and requires urgent treatment.It can cause permanent muscle damage if not treated quickly.
For example, you may have developed acute compartment syndrome:
after an injury that crushes your arms or legs as a result of a severely injured muscle from wearing a cast or tight bandage from heavy drinking or drug use First aid for broken bones and fractures
2.Chronic compartment syndrome
This type of compartment syndrome, also known as exertional compartment syndrome, is usually not a medical emergency. It is most generally caused by athletic exertion and is reversible with rest.
Chronic compartment syndrome usually isn’t an emergency. It often leads to physical exertion, such as intense exercise. Healthcare providers sometimes call it exertional compartment syndrome for that reason also called exertional.The understated injury is Overexertion.
Generally during and immediately after repetitive exercise (such as running or cycling). mostly passes within minutes of stopping the activity is not a medical emergency and does not lead to permanent damage.Pain or cramping when you exercise is the most common symptom of this type of compartment syndrome. After you stop exercising, the pain or cramping generally goes away within 30 minutes. If you continue to do the activity that is causing this condition, the pain may start to last for longer periods.
Other symptoms may include:
- having trouble moving your, arm, or affected area..
- numbness.
- a noticeable bulge in the affected muscle.
- It occurs most frequently in people under 40 of age, but you can develop it at any age.
- You are more at risk for developing this type of compartment syndrome if you do activities such as swimming, playing tennis, or running. Intense or constant workouts can also increase your risk.
- The link between exercise and chronic compartment syndrome is not fully understood.
Anatomy of the forearm
Your forearm is the part of your arm in between your elbow and your wrist.
The forearm is made up of the ulna bone and radius bone. two long bones radius bone lateral side and ulna bone medial side form the forearm. These two long bones form a rotational joint, allowing the forearm to turn so that the palm faces up or down. The forearm is covered by skin, which provides a sensory function.it has two compartments anterior compartment (flexor) and a posterior compartment (extensor). forearm muscles work together to move the elbow, forearm, wrist, and fingers.
Two large arteries run the area of the forearm, and these are the radial and ulnar.
Nerves
There are the main three nerves of the forearm 1. median nerve 2. ulnar nerve 3. radial nerve.
There are also three nerves. 1. medial cutaneous nerve 2. lateral cutaneous nerve 3. posterior cutaneous nerve.
All these nerves branch from the brachial plexus in the axillary region of the arm and transverse down the upper extremity to the hand.
The median nerve and ulnar nerve these two nerves provide the innervation of the flexor compartment and the radial nerve provides innervation for the extensor compartment.
The medial cutaneous nerve, lateral cutaneous nerve, and posterior cutaneous nerve are that innervate the skin.
The muscles are involved in a compartment syndrome of the forearm.
- Volar (anterior) compartment
A.Flexor carpi radialis
Origin: Medial epicondyle of the humerus by common flexor tendon.
Insertion: Palmer surface of base of second and third metacarpal bones.
Innervation: Median nerve ( C6 – C7 ).
Action: Flexion of the wrist and abduction of the wrist.
Blood supply: Anterior recurrent ulnar artery, posterior recurrent ulnar artery, and radial artery.
B.Palmaris longus
Origin: Medial epicondyle of the humerus by common flexor tendon.
Insertion: Distal half of flexor retinaculum of the anterior surface and central part of the palmar aponeurosis.
Innervation: Median nerve (C7 and C8).
Action: Flexion of the wrist.
Blood supply: Median artery, anterior ulnar recurrent artery.
C.Flexor carpi ulnaris
Origin: Medial epicondyle of the humerus by common flexor tendon, medial margin of the olecranon process of the ulna, and upper two-thirds of the posterior border of the ulna.
Insertion: Attached to the palmer aspect of pisiform bone, inserted to hook of hamate bone and base of 5th metacarpal bone.
Innervation: Ulnar nerve(C8 and T1).
Action: Flexion of the wrist and adduction of the wrist.
Blood supply: Ulnar artery and posterior recurrent ulnar artery.
D.Pronator teres
Origin: Humeral head: lower part of the medial supracondylar ridge and medial epicondyle of humerus by common flexor tendon.
Ulnar head: the coronoid process of the ulna( medial side ).
Insertion: Lateral surface of shaft of radius(distal to supinator).
Innervation: Median nerve(C6 and C7).
Action: Pronation of forearm during active or forceful pronation at the proximal radioulnar joint and flexion of the forearm at the elbow joint.
Blood supply: Branches of ulnar, radial, and brachial artery.
E.Flexor digitorum superficialis
Origin: Humeroulnar head: Medial epicondyle of the humerus by common flexor tendon and medial side of coronoid process of the ulna.
Radial head: anterior border of radius.
Insertion: Tendons are divided and inserted into the sides of the shaft of the middle phalanx of second to fifth fingers.
Innervation: Median nerve (C8 and T1).
Action: Flexion of proximal interphalangeal and Metacarpophalangeal(MCP) joints of medial four fingers.
Blood supply: Median artery, radial artery, and Ulnar artery.
F.Flexor digitorum profundus
Origin: Upper three-fourth of the anterior and medial surface of shaft of ulna and ulnar half of anterior surface of the interosseous membrane.
Insertion: Palmar surfaces of bases of distal phalanges of medial four fingers.
Innervation: fingers 2and3: Anterior interosseous nerve branch of the median nerve.
fingers 4and5: Ulnar nerve (C8 and T1).
Action: Flexion of distal interphalangeal and Metacarpophalangeal(MCP) joints of medial four fingers.
Blood supply: Ulnar recurrent artery, anterior interosseous artery, Ulnar artery, common interosseous artery, ulnar collateral artery, and median artery.
G.Flexor pollicis longus
Origin: Anterior surface of radial half of interosseous membrane.
Insertion: Palmer surface of base of distal phalanges of the thumb.
Innervation: Anterior interosseous branch of the median nerve(C8 and T1).
Action: Flexion of the Metacarpophalangeal(MCP) joint of the thumb and flexion of the interphalangeal (IP) joint of the thumb.
Blood supply: Lateral part: radial artery.
Medial part:ulnar artery(anterior interosseous artery).
H.Pronator quadratus
Origin: A lower quarter of the anterior surface of the ulna.
Insertion: A lower quarter of the anterior surface of the radius.
Innervation: Anterior interosseous branch of the median nerve(C8 and T1).
Action: Pronation of forearm: proximal radioulnar joint.
Blood supply: anterior interosseous artery.
- Dorsal(posterior) compartment
A.Extensor carpi ulnaris
Origin: Lateral epicondyle of the humerus by common extensor tendon.
Insertion: Base of the fifth metacarpal bone.
Innervation: Posterior interosseous branch of the radial nerve (C7 and C8).
Action: Extension of wrist joint and adduction of the wrist joint.
Blood supply: Radial artery, posterior interosseous artery.
B.Extensor digitorum
Origin: Lateral epicondyle of the humerus by common extensor tendon.
Insertion: Extensor expansions of digits 2-5.
Innervation: Posterior interosseous branch of the radial nerve (C7 and C8).
Action: Metacarpophalangeal (MCP) and Interphalangeal joints medial four Finger extension.
Blood supply: Posterior interosseous artery, anterior interosseous artery, and radial recurrent artery.
C.Extensor digiti minimi
Origin: Lateral epicondyle of the humerus by common extensor tendon.
Insertion: Extensor expansion of digit of the little finger.
Innervation: Posterior interosseous branch of the radial nerve (C7 and C8).
Action: Little Finger extension: Metacarpophalangeal joint.
Blood supply: Anterior interosseous artery, radial recurrent artery, and posterior interosseous artery.
D.Abductor pollicis longus
Origin: Middle third of the posterior surface of the proximal half of shaft of radius, lateral part of the posterior surface of shaft of ulna and interosseus membrane.
Insertion: Base of the first metacarpal bone (trapezium bone).
Innervation: Posterior interosseous branch of the radial nerve (C7 and C8).
Action: Carpometacarpal(CMP) joint of thumb extension of thumb and abduction of the thumb.
Blood supply: Posterior and anterior interosseous artery.
E.Extensor pollicis longus
Origin: Posterior surface of middle third of the ulna and interosseus membrane.
Insertion: Posterior aspect of the base of distal phalanx of the thumb.
Innervation: Posterior interosseous branch of the radial nerve (C7 and C8).
Action: Metacarpophalangeal(MCP) joint and interphalangeal (IP)joint of the thumb: Thumb extension.
Blood supply: Posterior and anterior interosseous artery.
F.Extensor pollicis brevis
Origin: Lower part of the posterior surface of the distal third of shaft of radius and the interosseus membrane.
Insertion: Posterior aspect or dorsal surface of base of proximal phalanx of the thumb.
Innervation: Posterior interosseous branch of the radial nerve (C7 and C8).
Action:Carpometacarpal(CMP) joint and metacarpophalangeal(MCP) joint: extension of thumb.
Blood supply: Posterior and anterior interosseous artery.
G.Extensor indicis
Origin: Lower part of the posterior surface of the distal third of shaft of ulna and interosseus membrane.
Insertion: Common extensor expansion of index finger.
Innervation: Posterior interosseous branch of the radial nerve (C7 and C8).
Action: Wrist joints: assists in extension of the wrist.
Metacarpophalangeal(MCP) joint and interphalangeal(IP) joint of index finger: extension of the index finger.
Blood supply: Posterior and anterior interosseous artery.
- Mobile wad compartment
A.Brachioradialis
Origin: Upper two-thirds of the lateral supracondylar ridge of the humerus and lateral intermuscular septum of the arm.
Insertion: Lateral surface of lower end of the radius and just above the styloid process.
Innervation: Radial nerve (C5andC6) .
Action: Elbow joint: Forearm flexion (when semi-pronated).
Blood supply: Radial collateral artery, radial recurrent arteries, and Radial artery.
B.Extensor carpi radialis logus
Origin: Lower one-third of the lateral supracondylar ridge of the humerus and lateral intermuscular septum of the arm.
Insertion: Lateral side of dorsal surface or posterior aspect of the base of the second metacarpal bone.
Innervation: Radial nerve (C5toC8).
Action: Wrist joints: extension of the hand, radial deviation of hand, and abduction of hand.
Blood supply: Radial collateral artery, radial recurrent arteries, and Radial artery.
C.Extensor carpi radialis brevis
Origin: Lateral epicondyle of the humerus by common extensor tendon.
Insertion: Lateral side of dorsal surface or posterior aspect of the base of the third metacarpal bone.
Innervation: Radial nerve (C5 and C6).
Action: Wrist joints: Extension of hand, radial deviation hand, and abduction of hand.
Blood supply: Deep brachial artery, radial artery, and Radial recurrent artery.
Pathophysiology of compartment syndrome of forearm
Compartment syndrome develops after raised compartment pressure leads to muscle and nerve ischemia. When fluid is introduced into the compartment, the tissue pressure raises the venous pressure.
In a normal human body, blood flow from the arterial system (high pressure) to the venous system (low pressure) requires a pressure gradient. When this pressure gradient is diminished or reduced, blood flow from the artery to the vein is decreased. This lead to a backup of blood and excess fluid leaking from the capillary wall into spaces between the cells of the soft tissues, causing swelling of the extracellular space and a rise in intracompartmental pressure. This swelling of the soft tissues surrounding the blood vessels compresses the blood and lymphatic vessels further, leading to more fluid entering the extracellular spaces, causing additional compression.
The pressure continues to raises due to the non-compliant nature of the fascia containing the compartment. This worsening cycle can eventually cause a lack of sufficient oxygen in the soft tissues (tissue ischemia) and tissue death (necrosis). Tingling and diminished or decreased sensation (paraesthesia) can begin as early as 30 minutes from the start of tissue ischemia and permanent damage can occur as early as 12 hours from the onset of the inciting injury. generally, a non-contracting muscle contains a pressure near zero.
The connective tissue forming a compartment is not pliable, so when bleeding or swelling occurs within the compartment and the intra-compartmental pressure rises. If the pressure increases up to 30 mmHg, the vessels will be compressed, resulting in pain and a decreased or reduced blood flow.
Lymphatic drainage will activate to avoid increasing interstitial fluid pressure.
Once the effects of lymphatic drainage have reached their maximum, the pressure within the compartments will lead to physiological defects, such as nerve dysfunction and deformation.
Hemorrhage or edema leads to the interstitial pressures within the soft tissues to raise, creating possible ischemia by loss of capillary refill.
When a body part is not provided with blood for more than eight hours, injured is irreversible and may lead to the death of the concerning tissues.
What are the causes of compartment syndrome in the forearm?
1.Acute compartment syndrome
Acute compartment syndrome can be caused by:
- After an injury that crushes your arms or legs.
- As a result of a severely injured muscle.
- From heavy drinking or drug use.
- A broken bone or a crush injury – is the most common cause.
- A plaster cast or bandage that is too tight is applied to a limb before it has stopped swelling.
- Burns can lead to the skin becoming scarred and tight.
- Surgery to repair a damaged or blocked blood vessel (once blood can flow back into a muscle, it can lead to swelling)
- Very bruised muscle.
- Severe sprain.
- Loss of blood supply due to the use of positioning during surgery.
2.Chronic compartment syndrome
- The exact cause is unknown.
- This type of compartment syndrome can be caused by repetitive activities, such as running. The pressure in a compartment only raises during that activity and goes down after the activity is stopped. This condition is generally or usually less limiting and does not lead to loss of function or limb. However, the pain can limit activities and endurance.
- This type of compartment syndrome usually occurs in young people who do regular repetitive exercises, such as running and cycling. A leading theory is that it is caused by temporary swelling of the muscles during exercise affecting the blood supply to a whole group of the muscles.
What are the signs and symptoms of compartment syndrome in the forearm?
Acute compartment syndrome
Symptoms can include:
- Pain and paraesthesia are common symptoms of this type of compartment syndrome. pallor and pulselessness are uncommon symptoms of this type of syndrome
- Pain, paraesthesia (diminished or decreased sensation), paralysis, pallor, and pulselessness. paresthesia and Pain are the early symptoms of compartment syndrome
- Symptoms of acute compartment syndrome usually develop after an injury and then get quickly worse.
- Intense pain, specifically when the muscle is stretched, which seems much worse than would normally be expected for the injury. tightness in the muscle. and tenderness in the affected area. a tingling or burning sensation. in severe cases, numbness and weakness (these are signs of permanent damage)
Chronic compartment syndrome
Symptoms of chronic compartment syndrome tend to develop regularly during exercise and improve with rest.
Symptoms can include:
- Cramping pain during exercise and most often in the legs.
- Swelling or a visibly bulging muscle.
- A tingling sensation.
- The affected area turning pale and cold.
- In severe cases that difficulty moving the affected body part.
How to diagnose compartment syndrome in the forearm?
Compartment syndrome is a clinical diagnosis, based on the signs and symptoms and risk factors present. Clinicians should therefore have a high degree of clinical suspicion for compartment syndrome in postoperative patients.
The clinically have been five symptoms 1. pain out of proportion 2. paralysis 3. pulselessness 4. pallor and 5. paresthesias (reduced or diminished sensation). and sixth symptoms of pain with passive stretching is now included as a part of a diagnostic sign.
ICP ( Intra-Compartmental Pressure Monitoring): Not required but can aid in diagnosis if uncertainty exists. measurement of ICP using a solid-state transducer intracompartmental catheter (STIC) can aid in a diagnosis. Compartment pressures are often measured with a manometer, it is a device that detects intracompartmental pressure by measuring the resistance that is present when a saline solution is injectable into the compartment. Another method employs a slit catheter, whereby a catheter is situated within the compartment, and the pressure is measured with an arterial line transducer. The diagnostic test is sitting on an intra-compartmental pressure monitor, which may be utilized where there is clinical uncertainty, such as in atypical presentations or if the patient is unconscious / intubated. normal compartmental pressures are less than 8mm Hg.
A creatine kinase (CK) level may aid diagnosis, if raised (or trending upwards).
You think if you have acute compartment syndrome, go to an emergency room right away. It’s a medical emergency that needs treatment. If you think you have the exertional type of compartment syndrome, call your healthcare provider.
A healthcare provider are will do a few things to diagnose compartment syndrome:
Physical examination: The healthcare provider will look for signs you might have something else. For example, the healthcare provider will check your tendons for tendinitis and your shins for shin splints.
X-ray: The healthcare provider may ask for an X-ray to see if you have a fracture of the bone.
Compartment pressure measurement test: This test is if the provider suspects compartment syndrome, you will need a test to measure the pressure. The healthcare provider will insert a needle into the muscle. the machine attached to the needle will give the pressure reading. The healthcare provider can insert the needle in several different places.
Repeat pressure test: For exertional compartment syndrome, the test gets repeated after you do exercise. The healthcare provider will compare the before and after results.
Less Invasive Measurement of the Techniques
Laser Doppler ultrasound
Methoxy isobutyl isonitrile enhanced MRI (magnetic resonance imaging)
Phosphate-NMR(nuclear magnetic resonance) spectroscopy
Investigations
- X-ray
- Ultrasound
- Urine myoglobin
- Coagulation profile
- Creatinine phosphokinase
- Full blood count
Differential diagnosis
- Cellulitis
- DVT (deep vein thrombosis) and thrombophlebitis
- Gas gangrene
- Peripheral vascular injuries
- Necrotizing fasciitis
How is treated compartment syndrome in the forearm?
Medical treatment
Chronic compartment syndrome
Exertional (chronic) compartment syndrome generally goes away if you stop exercising. But you should still discuss it with your healthcare provider or doctor.
Your healthcare provider may recommend nonsurgical treatment methods first, including:
- Anti-inflammatory medications like NSAIDs(non-steroidal anti-inflammatory drugs).
- Orthotics
- Cross-training (mixing up exercise types, the alternative of doing the same thing over and over).
- Low-impact exercise.
- Physical therapy.
- Physical therapy to stretch the muscle.
- Change the type of floor you exercise on.
- Performed low-impact activities as part of your exercise routine.
- Elevating the extremity.
- Icing the extremity after activity.
- Resting after an activity or modifying the activity.
- Exertional compartment syndrome can first be treated by avoiding the activity that caused it and with stretching and physical therapy exercises. Nonoperative treatment includes the removal of tight bandages or splints, however, there should be an extremely low threshold to proceed with compartment pressure measurement or decompression if the patients do not rapidly improve.
- If those options don’t work, surgery may be an option.
- Surgery is generally more effective than nonoperative methods for treating chronic compartment syndrome.
- Surgery is not urgent in chronic or exertional compartment syndrome, but it may be required to relieve pressure.
Surgical treatment
Acute compartment syndrome
Acute compartment syndrome must get immediate surgery to reduce the compartment pressure. The surgeon will perform an operation called a fasciotomy. the only treatment option is surgery for this type of compartment syndrome. the surgeon makes an incision through the fascia and the skin. The process involves cutting or incision opening the fascia to reduce the pressure in the compartment. In severe cases, your doctor will have to wait for the swelling and pressure to go away, and the surgeon will close the incision. Sometimes that can’t happen right away. and some of these wounds are required skin grafting. The surgeon may do a skin graft, and take skin from other areas of your body to put over the incision.
If you developed this type of condition because of a tight bandage or, cast the material will need to be removed or loosened.
Surgical decompression and fasciotomy are done for acute forearm compartment syndrome to avoid irreversible muscle and nerve damage. Adequate decompression of the forearm requires fascial release of both the dorsal compartment and volar compartment, with the volar compartment best released from the carpal tunnel distally to across the lacertus fibrosus proximally. Fasciotomy wounds must be assessed every 2 days( 48 hours) to 3 days ( 72 hours) and additional soft tissue coverage procedures for wound closure are common.
Physiotherapy treatment
Your physical therapist may recommend:
- Wearing more appropriate clothes
- Choosing more appropriate surfaces
- Avoiding certain activities altogether
- Maintenance or care of good health (e.g., allowing muscles and joints are properly rested time)
- Modified your workplace to lower the risk of injury
Scar management
Scars form as a normal or unaffected part of healing when the skin is damaged from a burn, trauma, or surgery. Everyone forms different scars.
Keep it moist and covered
Electrotherapy
Electrotherapy is a method of medical treatment that uses electric current to the affected or injured areas. Pain medication or physiotherapy some people may need a different solution for dealing with their pain.
Electromodalities: Your physical therapist may use electromodalities like ultrasound, moist heat, and cold therapy as a part of your rehabilitation program. Your physical therapist will discuss the purpose of every modality with you.
Therapeutic ultrasound (US)
Therapeutic ultrasound (US) is a form of mechanical energy, not electrical energy. The application of therapeutic Ultrasound helps in increasing the blood flow of a localized area to reduce the swelling and inflammation in that area. It is also used to enhance the healing process.
Massage techniques
Sutures have been taken out or dissolved, and his or her doctor will let you know when it is time to start scar massage (usually 2 to 3 weeks after surgery)
For the first two to four weeks, you should gently rub the incision for 5 to 10 minutes two times daily in the same direction as the incision. You must use sufficient pressure to change the color of the incision from pink to pale.
After about 4 weeks, you can start to massage the scar using different motions.
Massage in all directions: up, down, side to side, circular, pulling apart, pulling outward, folding together, and crisscrossing.
Oils, such as vitamin E oil, gels such as aloevera, and lotions, are moisturizing and can be used to help soften the scar and make scar massage easier. use to avoid skin resistance. Avoid using lotions with strong fragrances.
Benefits of massage therapy
- Reduce stress and increase relaxation.
- Reducing pain and muscle soreness and tension.
- Improve circulation, energy, and alertness.
Silicone gels or sheets
Silicone gels or sheets can be used on healing skin (not open wounds) to help soften and flatten a scar. it can also relieve discomfort and itching.
To be effective, silicone gels or sheets should be placed over the scar for twelve hours a day for at least 3 months. They can be washed and reused.
Exercise for compartment syndrome in the forearm
A week after surgery post fasciotomy physiotherapy includes scar tissue mobilization for the formed scar tissues and gentle stretching exercises. These are followed by a range of motion exercises and manual therapy techniques that help to improve tissue flexibility and mobility of the surrounding fascia.
Physical therapists can help to identify the factors that may be caused by chronic compartment syndrome and help people successfully manage their condition. They also help people regain their normal range of motion, strength, and function after any needed surgery.
Physical therapists are movement experts who improve quality of life through hands-on care, help to regain the range of motion, patient education, and prescribed movement.
If diagnosed with compartment syndrome, your physical therapist will play an important role in the treatment of this condition, whether it requires surgery or not. Your therapist will work with you to design an individualized treatment program based on your condition and your personal goals.
Your physical therapist may recommend:
Range-of-Motion Exercises. Stretching exercises can be used to help to improve the range of motion in these joints to minimize undue muscle tension.
Manual Therapy. Many physical therapists are trained in manual therapy or hands-on, using their hands to move and manipulate the muscles and joints to help improve motion and strength. These techniques can target some areas that are difficult to treat on your own.
Education:Your treatment will include education about how to safely return to your past activities, particularly if your condition required a fasciotomy.
Stretching exercise
Stretching exercises increase the muscle blood flow, and help to increase the joint of the full range of motion. Improve your ability to daily doing activities and diminished the risk of injuries. This exercise can do after the removal of stitches.

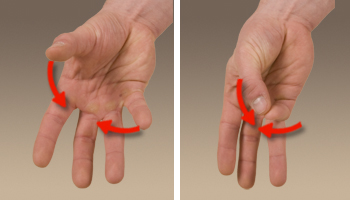
1.Prayer position stretching
- Start with your Place palms together in front of your chest, just below your chin, fingers straight, in a prayer position, elbows pointed out to your sides. Keeping your hands together, slowly lower your hands towards your waistline and raise your elbows so the angle at the wrist decreases. Keep your hands close to your stomach and your palms and fingers are together until you feel a stretch under your forearms. keep your palm together.
- Hold for at least 30-50 seconds
- Relax
- Repeat two to four times two times daily
2.Clenched fists
- Start with tell to the patient to take a sitting position and place your open hands on your thighs with the palms up.
- Close your hands slowly into fists but do not clench too tightly.
- With your forearms touching your legs, elevated your fists off of your legs and back toward your body, bending at the wrist.
- Lower your fists and after that slowly open your fingers wide.
- Relax and repeat it on another side.
- Repeat two to four times two times daily.
3.Hooked stretching exercise
- To start with, hook one elbow under another elbow and pull both arms towards the center of the torso and You should feel a stretch in your shoulders.
- Wrap one arm around the other arm so that both palms are touching.
- Hold for at least thirty seconds.
- Relax and repeat it on another side.
- Repeat two to four times two times daily.
4.Fist opener
- To start with Make a fist and hold it in front of you.
- Stretching your fingers until your hand is flat and open and with the fingers are together.
- Hold for at least thirty seconds.
- Relax and repeat it on another side.
- Repeat two to four times two times daily.
5.Wrist Extensor Stretch with extended arm
- Put your arm straight out in front of you with your elbow straight and Make the fist with your palm down like a patient is punching the air.
- Flex at your wrist, and bring your fist down towards the ground. You can use your other hand to add the pressure. Hold the stretch.
- Hold for at least thirty seconds.
- Relax and repeat it on another side.
- Repeat two to four times two times daily.
6.Wrist Flexor Stretching exercise
- First of all the physical therapist tells to the patient an Extended her arm in front of her with her palm up.
- Open the hands, as if a patient was pushing on the wall in front of himself or herself. take a right hand extend and pull the fingers back on a left hand, further until you feel a stretch in your forearm.
- Hold for at least thirty seconds.
- Relax and repeat it on another side.
- Repeat two to four times two times daily.
7.Wrist circle stretching Exercise
- To start with, the physical therapist tells a patient to take the sitting position with the hands on the table. Let the wrists hang off an edge. Make a circle with a wrist going clockwise and Then make the circle go anticlockwise.
- Hold for at least thirty seconds.
- Relax and repeat it on another side.
- Repeat two to four times two times daily.
8.Alternate finger stretch
- To do this stretch: Take a middle finger and ring finger together.
- Separate the pinky finger and index finger from them.
- Hold for at least thirty seconds.
- Relax and repeat it on another side.
- Repeat two to four times two times daily.
9.Wrist Stretching exercise using a table
- First of all the physiotherapist give you the command to the patient. Place your palm flat down on the surface of a table. keep your elbow straight. Gently pull your fingers backward to create a stretch on the under of your wrist and forearm and hold.
- Hold for at least thirty seconds.
- Relax and repeat it on another side.
- Repeat two to four times two times daily.
10.Reverse prayer stretching Exercise
- Relax the shoulders. take your arms behind your back and the palms are together with fingertips facing downward. press the elbow towards the ground without letting the backs of the hands come apart until you feel a stretch in your forearm.
- Hold for at least thirty seconds.
- Relax
- Repeat two to four times two times daily.
11.Backward facing wrist stretching Exercise
- Start with placing your hands out in front of you, rotating your wrists around so that your fingers are facing your knees.
- Start with your fingers close to your knees (this is easier than further away).
- Keep your palms flat on the ground, shift your body back toward your heels, and then forward toward your hands.
- Do five repetitions and hold for fifteen seconds and repeat for one more round.
12.Forward-facing wrist stretching Exercise
- Start with your hands flat on the floor in front of you with fingers facing ahead.
- Make sure your elbow pits are facing forward and pulse forward for five reps, holding for fifteen seconds
- Do one more round and hold at the end.
Active Assisted Range Of Motion Exercise
1.Active Assisted supination
- To start with, your physical therapist tell to the patient to take a comfortable position, such as sitting on the chair with the affected hand should be in full pronation position which means the front of the hand will be facing the floor. After that, place the folded towel under the affected hand. Next, a physical therapist takes to the opposite position of a patient. Then, a therapist gives a command to a patient that tries to rotate the wrist as well as when a patient can not do the movement, a physical therapist gives outside force to reach the complete range of supination and hold the thumb outwards with the therapist or another hand. do this movement ten repetitions per session. Do three sessions per day.
2.Active Assisted pronation
- To start with, your physical therapist tell to the patient to take a comfortable position, and sit on a chair with the affected hand should be in full supination, meaning the palm will be facing the ceiling. After that, place the rolled or folded towel under the affected hand. Next, a physical therapist takes to the opposite position of a patient. your physical therapist gives a command to the patient to try to rotate the wrist and when a patient is not able to reach the end range and stops at any point, a physical therapist helps the patient to perform the entire range. do this movement ten repetitions per session. Do three sessions in a day.
3.Active Assisted wrist flexion
- First of all, your physical therapist tells to the patient to take a comfortable position, such as sitting on a chair and affected hand relaxed on the edge of a table with full pronation. After that, place a rolled towel under the affected side of the hand. Next, a physical therapist takes to the opposite position of a patient. A physiotherapist gives commands to a patient to try to move the wrist down, when a patient is not able to move his/her hand during that time the physiotherapist provides help to a patient to reach the full range. Perform this movement ten repetitions per session. Do three sessions per day.
4.Active Assisted wrist extension
- To start with, your physical therapist tells to the patient to take a comfortable position, such as sitting on a chair, and the affected hand should be relaxed on the end of the table with full pronation. After that, place the rolled towel under the affected side of the hand. Next, a physical therapist takes his or her position opposite the patient. Then, a therapist gives a command to a patient to try to move the wrist upward, when a patient is not able to reach the end range during that time a physical therapist provides assistance to reach the end range. do this movement ten repetitions per session. Do three sessions per day.
5.Active Assisted wrist ulnar deviation
- First of all, your physical therapist tells to the patient to take a comfortable position, such as sitting on the chair, and the affected hand should be in mid-supination. After that, place the rolled towel under the affected side of the hand. Next, a physical therapist takes his or her position opposite a patient. Then, a physical therapist gives the command to a patient to try to move the wrist down, and when a patient is not able to reach the end range and stops at any point, a physical therapist helps the patient to perform the full range.do this movement ten repetitions per session. Do three sessions per day.
6.Active Assisted wrist radial deviation
- To start with, your physical therapist tells to the patient to take a comfortable position, namely sitting on the chair, and an affected hand should be in a mid-supination position. Next, place a rolled towel under the affected side of the hand. After that, a physical therapist takes the position opposite a patient. Then, a physical therapist gives a command to a patient to try to move the wrist up, as well as when a patient is not able to reach the end range and stops at any point, a physical therapist helps the patient to perform the full range. Do it ten repetitions per session. Do three sessions per day.
7.Active Assisted finger flexion
- First of all, place the hand with the affected finger flat surface on a table, with palm up. Then, a physical therapist gives the command to a patient to flex the fingers inward, but when the patient is not able to do full finger flexion due to pain or stiffness, the physical therapist helps the patient to perform the full range. Then, straighten the fingers. do repeat this ten repetitions per session. Do three sessions per day.
8.Active Assisted finger extension
- To start with, place the hand with the affected finger flat surface on a table, with the palm up. After that, a physical therapist will give a command to a patient to straighten the fingers, but when the patient can unable to do full finger extension due to pain. then a physical therapist assists the patient to complete the finger extension. Relaxed the fingers. Repeat it ten repetitions per session. Do three sessions per day.
9.Active Assisted finger abduction
- To start with, your physical therapist tells to the patient to take a comfortable position. place the hand flat surface on a table, with the palm up. using your opposite or unaffected hand, gently move your fingers apart by applying pressure near the ends of your fingers. Relaxed the fingers. Repeat it ten repetitions per session. Do three sessions per day.
10.Active Assisted thumb flexion
- To start with, the physical therapist asks the patient to take a relaxed or comfortable position, such as sitting on the chair and the hand should be in mid-pronation. Next, a rolled towel is placed under the affected hand. Then, a physical therapist gives the command to the patient to bend the thumb down so that feel the gentle stretch. The finger will cross the palm. Repeat it ten repetitions in a session. Do three sessions in one day.
11.Active Assisted thumb extension
- To start with, your physical therapist tells to the patient to take a relaxed or comfortable position, namely sitting on the chair and a hand should be in mid supination position. A rolled towel is placed under the affected hand. Then, your therapist gives a command to a patient to stretch the thumb outside meaning slightly posteriorly to a palm, but when a patient can not able to reach the end range, a physical therapist helps the assistance to do a full thumb extension. perform repeat it ten repetitions per session. Do three sessions in one day.
12.Active Assisted thumb abduction
- To start with, your physical therapist tells to the patient to take a relaxed position, namely sitting on the chair with a rolled towel under the affected hand, but a hand should be in a mid pronation position. After that, tell the patient to stretch the thumb out from the palm as if a patient is opening it up to hold the large jar, but remember that stretch at a big thumb knuckle, is not at the tip. Repeat it ten repetitions in one session. Do three sessions in one day.
13.Active Assisted thumb opposition
- First of all, your physical therapist tells a patient to take a comfortable position, such as sitting on a chair. Next, touch a thumb to the tip of every finger. When a patient can do this exercise effortlessly, then touch further down on each finger till a patient can touch the base of each finger. Repeat it ten repetitions per session. Do three sessions per day.
Active Range Of Motion Exercises
These exercises help to improve joint function. Movements help to keep your joints flexible, reduce or decreased pain, and improve balance and strength.
1.Active finger flexion range of motion exercise
2.Active finger extension range of motion exercise
3.Active finger abduction and adduction range of motion exercise
- To start with, a physical therapist should give a command to a patient to take a comfortable position with the forearm supported on a table on a rolled-up towel Open your hand and stretch the fingers as far as possible. Bring your fingers together again. Do it ten repetitions in a session. Do three sessions per day.
4.Active thumb flexion range of motion exercise
- First of all, your physical therapist gives a command to the patient to take a comfortable or relaxed position with the forearm supported on the table on a rolled-up towel for padding or on the knee. A thumb is positioned outward. Move a thumb across the palm as well as back to the starting position. Do it ten repetitions in a session. Do three sessions per day.
5.Active thumb extension range of motion exercise
- To start with, a physical therapist should give a command to a patient to take a comfortable position with the forearm supported on a table on a rolled-up towel for padding or on the knees. The thumb is positioned outward direction. After moving a thumb across a palm then come back to the starting position as well as move slightly backward but not in abduction. Do ten repetitions in a session. Do three sessions in one day.
6.Active thumb abduction range of motion exercise
7.Active thumb adduction range of motion exercise
8.Active thumb opposition range of motion exercise
- To start with, a physical therapist should give a command to a patient to take a comfortable position with the forearm supported on a table on a rolled towel for padding or on the knees. One at a time, touch each or every fingertip to the pad of your thumb. Do ten repetitions in a session. Do three sessions in one day.
9.Active wrist extension range of motion exercise
- To start with, your physical therapist tells to you place your forearm on a table on a rolled towel for padding with the hand hanging off the end of a stable surface, such as the table with your palm down. A physical therapist should give a command to move the hand upward until a patient feel the gentle stretch. Next, return to the starting position. Do it ten repetitions per session. Do three sessions in one day.
10.Active wrist flexion range of motion exercise
- First of all, tell a patient to place a forearm on the table on a rolled-up towel for padding with the hand hanging off to the end of a stable surface, such as the table with the wrist, is in pronation position. After that, a physical therapist should give a command to move the hand downward until a patient feel a mild stretch. Next, return to the starting position. Do it ten times in a session. Do three sessions per day.
11.Active radial deviation range of motion exercise
- To start with, a physical therapist gives a command to a patient to take a comfortable position with the forearm supported on a table on the rolled-up towel for padding or on the knee and the thumb upward in position. After that, move the wrist up through the entire range of motion. Do exercise ten in a session. Do three sessions in a day.
12.Active wrist ulnar deviation range of motion exercise
- To begin with, it is the responsibility of a therapist to give a command to a patient to take a comfortable position with the support of the forearm on a table on the rolled-up towel for padding or on the knee, along with a thumb upward in position. Move the wrist down through a full range of motion. Do it ten times per session. Do three sessions in a day.
13.Wrist circles to increase range of motion exercise
- To begin with, a clinician should give a command to a patient to take a comfortable position, such as sitting on a chair. After that, bring the hands up with the elbows close to the body, making fists. Next, rotate the wrists in a circular motion. Then, try to keep the palms facing down to maximize the range of motion. Do 15 circles in each direction per session. Do it in opposite direction also (anticlockwise). Do three sessions in a day.
14.Wrist shakes range of motion exercise
- To start with, tell a patient to take a namaste position of a hand. Next, simply shake the wrists out ten times in a session. Do three sessions in a day.
15.Active supination range of motion exercise
- Tell a patient to take a comfortable position means to stand or even sit with an arm at the side with the elbow bent to 90 degrees, with the hand in a mid-range over the edge of a table. Tell a patient to move their hand upward facing the roof without holding it at the endpoint. Do it ten times per session. Do three sessions in a day.
16.Active pronation range of motion exercise
- A physical therapist should give a command to a patient to take a comfortable position means to stand or even sit with the arm at the side with the elbow flexed to 90 degrees, with a hand in the mid pronation over the edge of a table. Tell a patient to move their hand downward facing the ground without holding it at the endpoint. Do it ten times per session. Do three sessions per day.
17.Active elbow flexion range of motion exercise
18.Active elbow extension range of motion exercise
19.Active shoulder flexion range of motion exercise
20.Active shoulder extension range of motion exercise
21.Active shoulder adduction range of motion exercise
22.Active shoulder abduction range of motion exercise
23.Active shoulder lateral rotation range of motion exercise
24.Active shoulder medial rotation range of motion exercise
Strengthening Exercise
Strengthening exercise training can also protect your joints from injury.
1.Grip Strengthening Exercise
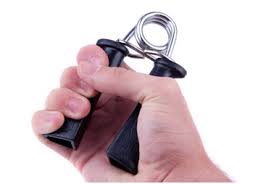
- Grippers come in many types of tensions. When a low weight becomes easy, improve the gripper tension. Grippers range start from light to ones requiring 365 pounds of pressure to close(move).
- Tell to the patient to sit comfortably with an arm bent at 90 degrees, with palm facing in, holding the gripper in one hand. Next, squeeze slowly, as well as release it without holding at the endpoint. Repeat 10 to 20 times in a session, and do three sessions in a day. Only a hand should be moving, not the whole arm or upper limb. Switch the hand as well as repeat. When a patient can comfortably do three to four sets, try the gripper with more tension.
2.Ball squeeze Exercise

- To start with, your physical therapist tells to the patient to Grasp and squeeze the ball in the affected hand. Place the sponge ball in between your thumb and index finger. Squeeze the ball by bringing your thumb in towards your index finger and after that relax. do repeat 10 repetitions per session. do three sessions in one day. After six to seven days increase 10 to 20 repetitions according to a patient’s ability.
3.Rubber band strengthening Exercise
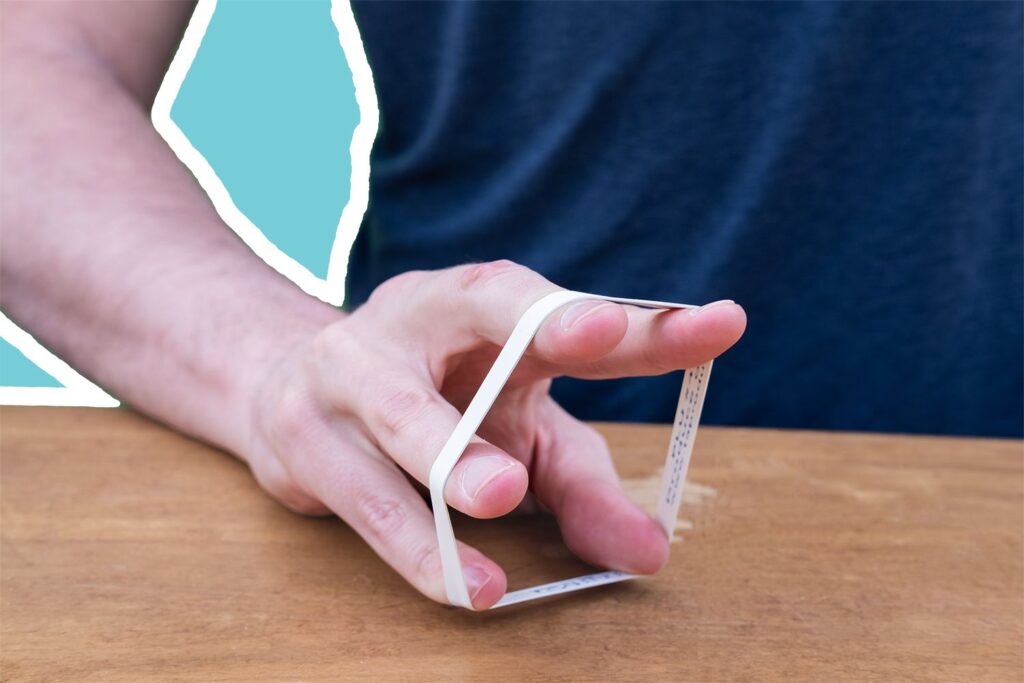
- The rubber band strengthening exercise is simple, but, it works the smaller hand muscles. It is also one a patient can do sitting at the desk or even anywhere else. Tell a patient to take an ordinary rubber band available at home and stretch it around the tops of the fingers and the thumb. Slowly open the hand to stretch against a rubber band, and after that close the hand. Keep the motion-controlled. Repeat 10 repetitions in a session. Do three sessions per day.
4.Fist to jazz hand
- To start with, your physical therapist tell to the patient to rest one arm on a table like a patient is about to arm-wrestle someone. after that make the fist. Next, slowly open a fist and stretch the fingers out as far as a patient can comfortably go (do a jazz hand). Repeat 10 repetitions per session. Do three sessions per day.
5.Rotation
- First of all, Sit with the arms bent to 90 degrees and forearms out in front of a patient with palms facing down. Hold the light resistance band or even dumbbells, or go weight-free as well as pretend a patient is holding something. After that, slowly rotate his or her hands so the palms are facing up. Next, slowly rotate the palms back to the starting position. Repeat it ten repetitions per session. Do around two sessions in a day.
6.Dumbbell Windshield Wipers
- To start with, place the forearm on a stable as well as a flat surface like a table or even a chair. After that, hold one end of the lightweight dumbbell (around two to five pounds) in the affected hand. Rotating your wrist from right to left, lift and lower the dumbbell in the windshield wiper motion. Do continuously for ten repetitions per session. Do three sessions in a day.
7.Wrist extensors strengthening with the dumbbell in pronation
- To start with, these wrist strengthening exercises, sit in a chair with your forearm resting on a table. Hang your wrist and hand over the end of the table.
- Hold two to a three-pound dumbbell in your hand. Then, with your palm facing down, slowly elevate your hand, so the back of your hand moves towards the ceiling. a patient’s forearm must remain flat surface of the table.Once your wrist is fully extended, hold the position for some seconds, then slowly lower your hand down. Repeat this motion 10 to 15 times. Perform two to three sets.
8.Wrist flexors strengthening with the dumbbell in pronation
- To start with, the physical therapist tells to the patient to sit on the chair with the forearm resting position on the table. Next, hang the wrist and hand over the end of the table. Hold the two or three-pound dumbbell in the affected hand. After that, with the palm facing down, slowly flex a wrist down so that the palm moves down the ground. Without holding at the endpoint tell a patient to perform ten repetitions per session and then release. Do three sessions in a day. After 5 days, a physical therapist must give a command to a patient to hold for ten seconds in one repetition, for strengthening the muscles.
9.Wrist extensors strengthening with the dumbbell in supination
- To start with, this wrist strengthening exercise in full supination, tells to the patient to take the sitting position on the chair with a forearm resting on the table. Next, hang the wrist and hand over the end of a table. Hold the 2 to 3-pound dumbbell in the affected hand. Then, with a palm facing up, slowly move a hand down, so the back of the hand moves towards the floor. a patient’s forearm must remain flat surface of the table. Then, a clinician should give a command to move their hand in the downward direction as far as he/she can and then come back to the normal or starting position. Do it ten repetitions per session. Do three sessions in one day. After 5 days, a physical therapist must give the command to a patient to hold at the endpoint for ten seconds in a repetition. Do two sessions per day.
10.Wrist flexors strengthening with the dumbbell in supination
- To start with, your physical therapist tell to the patient to sit on the chair with the forearm resting or comfortable on a table. Next, hang the wrist and hand over the end of the table. Hold the 2 to 3-pound dumbbell in the affected hand. After that, with a palm facing up, slowly lift a hand, so the back of the hand moves towards the floor. a patient’s forearm must remain flat surface of the table. Then, a clinician should give a command to move their hand in the upward direction as far as he/she can and then come back to the normal position. Do it ten repetitions in a session. Do three sessions per day. After 5 to 6 days, a physiotherapist must give a command to a patient to hold at the endpoint for ten seconds per repetition.
11.Wrist supination with dumbbell
- To perform this strengthening exercise, sit on the chair with your forearm resting on a table. Make sure your wrist and hand are over the end of the table.
- Hold the end of a small one to a three-pound dumbbell in your hand, like you would hold a hammer.
- Slowly allow your hand and wrist to rotate over so your palm is facing up towards the ceiling.
- Hold the end position for some seconds, then slowly rotate your hand back up, so the dumbbell is straight up once again.
- You can then allow your hand and wrist to slowly rotate over, so your palm is facing down (this is a position called pronation). Hold this position for a few seconds. Then, slowly rotate your hand behind, so the weight is pointing to the ceiling.
- Repeat this exercise 10 to 15 repetitions. Do two to three sets in one day.
12.Wrist pronation with dumbbell
- To strengthen your wrist pronators, to start with, sit on a chair with your forearm supported on a table and your wrist and hand over the end.
- Hold one end of the dumbbell with the weight pointing up near the ceiling.
- Slowly rotate your hand, so your wrist and palm are facing downwards the ground. Hold this position for some seconds, then slowly turn your hand back to the normal position with the weight pointing up towards the ceiling.
- Allow your wrist slowly rotate so your palm is facing up.
- Once your palm is facing up, hold the end position for some seconds, then slowly return your wrist to the starting position.
- Perform this exercise in two to three sets of 10 to 15epetitions.
13.Wrist ulnar deviators strengthening with the dumbbell
- To start this wrist strengthening exercise, the physical therapist tells a patient to sit in the chair with the forearm resting on a table. Next, give the command to a patient to put the hand in mid-range of supination as well as pronation over the edge of a table. Hold the 2 to 3-pound dumbbell in the affected hand. Next, with the palm facing a side, slowly move the hand down. A patient’s forearm must remain flat surface of the table. Then, a clinician should give a command to move a hand in the downward direction as far as he/she can and then come back to the starting position. Do it ten repetitions in a session. Do three sessions in one day. After 5 to 6 days, a therapist must give a command to a patient to hold at the endpoint for ten seconds in every repetition.
14.Wrist curl
- To start with, your physical therapist tell to the patient to take the sitting position as well as hold the arm at 90 degrees, with a palm facing up. The arm may rest on the leg, a bench, or the table. Curl a wrist up. wrist return back to the starting position. Repeat ten repetitions in a session.
15.Wrist extensors strengthening with the use of theraband in supinated hand
- First of all, your physical therapist asks a patient to take a comfortable or resting position, such as sitting on a stable surface of a chair or table with the hand hanging on a rolled towel at the end of the table, a palm should be facing the ceiling. After that, wrap one end of the band on a patient’s hand, and the second end on a physical therapist’s hand. Tell a patient to move their hand in the downward direction against a theraband. Do it ten repetitions in one session. Nearly three sessions would be done by a patient in one day.
16.Wrist extensors strengthening with the use of theraband in pronated hand
- To start with, your therapist tell to the patient to take a resting position, which means sitting on a stable surface(chair) with the hand hanging on a rolled pillow at the edge of the table, the palm should be facing the ground. After that, wrap one end of the theraband on a patient’s hand, whereas the second end is on a clinician’s strong hand. therapist gives a command to a patient to move their hand in the upward direction against the band. Next, do ten repetitions per session. Around three sessions would be done by a patient per day.
17.Wrist flexors strengthening with the use of theraband in pronated hand
- To begin with, the physical therapist gives a command to a patient to take a comfortable position, namely sitting on a stable surface of a chair or table with the hand hanging on a rolled towel at the end of a table, and the palm should be facing the ground. Wrap the one end of the theraband in a patient’s hand, while the second end is in a physical therapist’s strong hand. Tell a patient to move their hand in the downward direction against a theraband. Next, do this strengthening exercise ten times per session. Nearly three sessions should be done by a patient per day.
18.Supinators strengthen with the use of the band
- To begin with, give a command to a patient to take a comfortable position, such as sitting on a stable surface(chair) with the hand neutral on a rolled towel at the edge of the table. After that, wrap the one end of a theraband in a patient’s hand, whilst the second end in a physical therapist’s strong hand. Give a command to a patient to rotate their hand against the theraband, a palm will face the ceiling. Then, do this strengthening exercise ten times per session. Around three sessions must be done by a patient per day.
19.Pronators strengthen with the use of the band
- To embark with, the therapist tells a patient to take a comfortable position, namely sitting on the stable surface(chair) with the hand in the normal position as well as should be on a rolled towel at the edge of the table. Next, wrap the one end of the band in a patient’s hand, whereas the second end is in a clinician’s strong hand. Give a command to a patient to rotate their hand against the band, so the hand must be facing the floor. Do this strengthening exercise ten repetitions in one session. Around three sessions would be done by a patient in a day.
20.Wrist radial deviators strengthening with the theraband
- To start with, tell a patient to take a comfortable position, such as sitting on a chair with the hand in a mid-supination position at the edge of the table as well as the hand should be placed over the rolled towel. Next, wrap one end of the band on a patient’s hand, and the second end on a physical therapist’s hand. Ask a patient to move their hand in the upward direction against a theraband. Do it ten times in a session. Around two sessions would be done by a patient per day. After 5 to 6 days hold the position at the endpoint for ten seconds per repetition. Slowly back to the starting position.
21.Wrist ulnar deviators strengthening with the theraband
- To embark with, telling a patient to take a relaxed position means sitting on a chair with the hand in mid-pronation position at an edge of the table as well as hand should be put over a rolled or folded towel. After that, wrap one end of the theraband in the patient’s hand, as well as the second end in the clinician’s hand. Ask a patient to move their hand in the downward direction against a theraband. Do it ten times in one session. Around three sessions should be done by a patient in one day. After 5 days held at the end position for ten seconds in one repetition. Slowly return to the neutral position. When the patient is adapted to the light-weighted band after upgrading the color of the band for strengthening.
22.Finger spread apart with theraband
- To start with, wrap the theraband around each of the fingers. After that, push against the resistance from a band, and then spread fingers as far apart as possible. Hold for ten seconds, after that release it. Continuously do ten repetitions, then switch a theraband to the other hand as well as repeat. Do it ten times in a session. Do three sessions in a day.
Home Advice
- Activities that lead to the aggravation of the symptoms must be avoided.
How to prevent compartment syndrome in the forearm?
Acute compartment syndrome
- You can not prevent acute compartment syndrome lead to an accident or injury. But you can seek early diagnosis and treatment to avoid complications.
- If you have a splint or tight bandage that feels too tight, tell your healthcare provider. give particular attention if you have taken pain medication and that part of your body still hurts or swells. The cast or splint should get adjusted to avoid compartment syndrome.
Chronic compartment syndrome
You can avoid exertional compartment syndrome by:
- Building exercises endurance gradually, instead of doing too much too soon.
- Change your body positions when you exercise (for example, mixing up your gait when you run).
- Improve flexibility.
- Not overdo your muscles.
- Wearing proper clothes.
DISCLAIMER:
This article is intended or purposeful for your general informational purposes only and does not address particular circumstances. it is not a substitute for professional advice(or guidance) or help( or assistance) and should not be relied on to make decisions of any kind. A few or any actions you take upon the information presented in this article are strictly at your own risk and responsibility.


2 Comments